Of all the genres and subjects we have in the photography world, portraiture can combine the three major technical elements of lighting, camera and personal communication. For many people starting out, taking photos of other people can be quite daunting. In this article we are looking specifically at how I set up my camera in the hope that it might trigger some ideas about how you might be able to tweak your camera settings.
Why shoot low DOF images?
Creating images with a soft foreground and background really lets your subject ‘pop’. It’s a great way to have your subject be in context with their surroundings, yet not have the location be an over-dominating element in the image. Creatively using aperture and depth of field is rewarding and adds to your storytelling ability.
Split your image into three areas. Your foreground, your subject or area of focus, and your background. Making sure you engineer these areas will let you blend an image together. The image below had the footstool placed to provide a foreground.

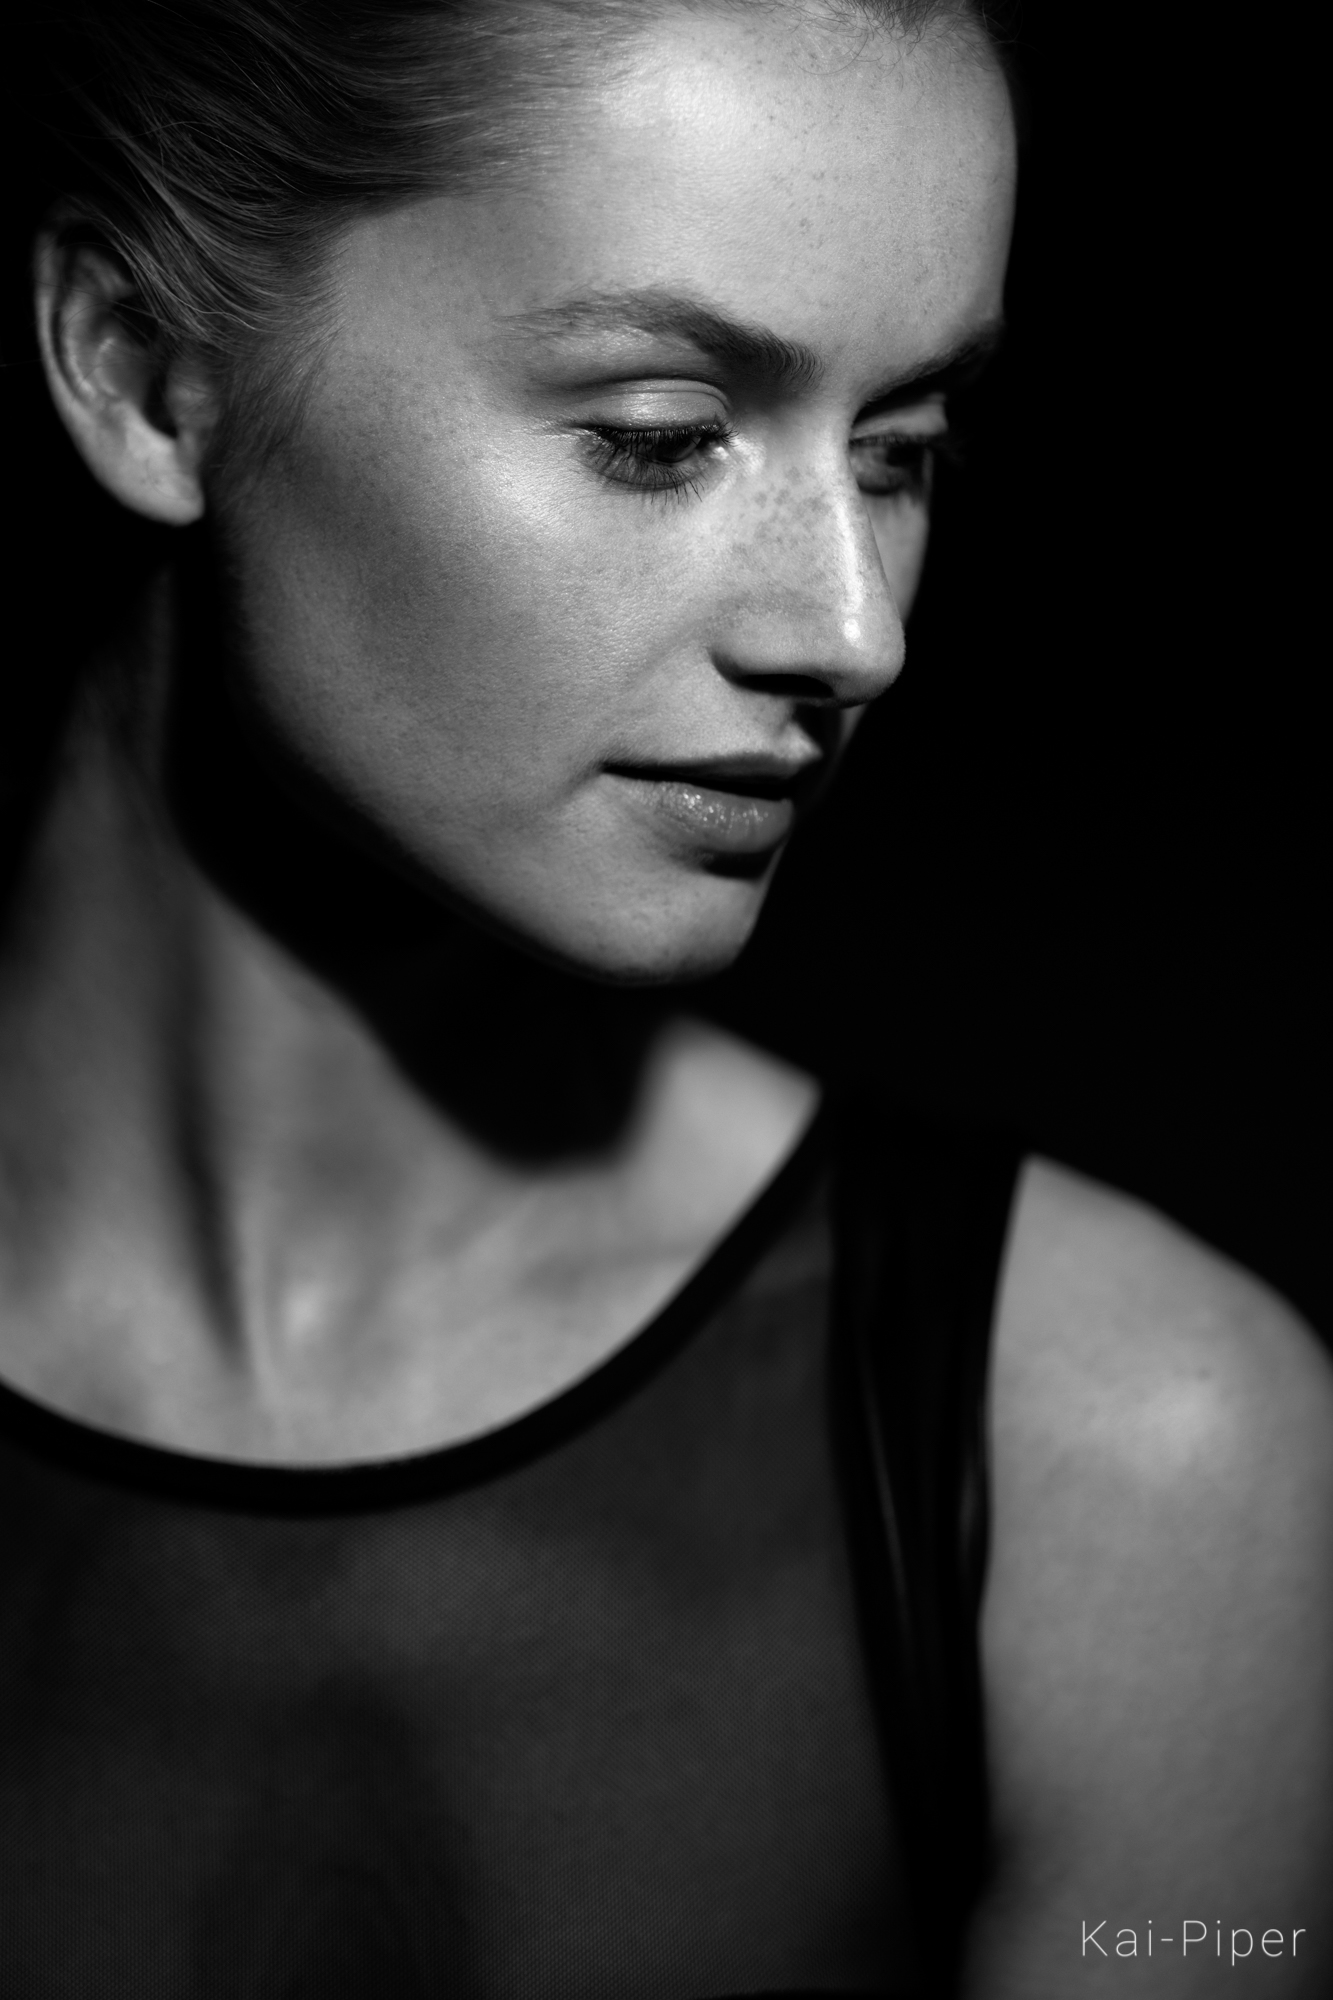
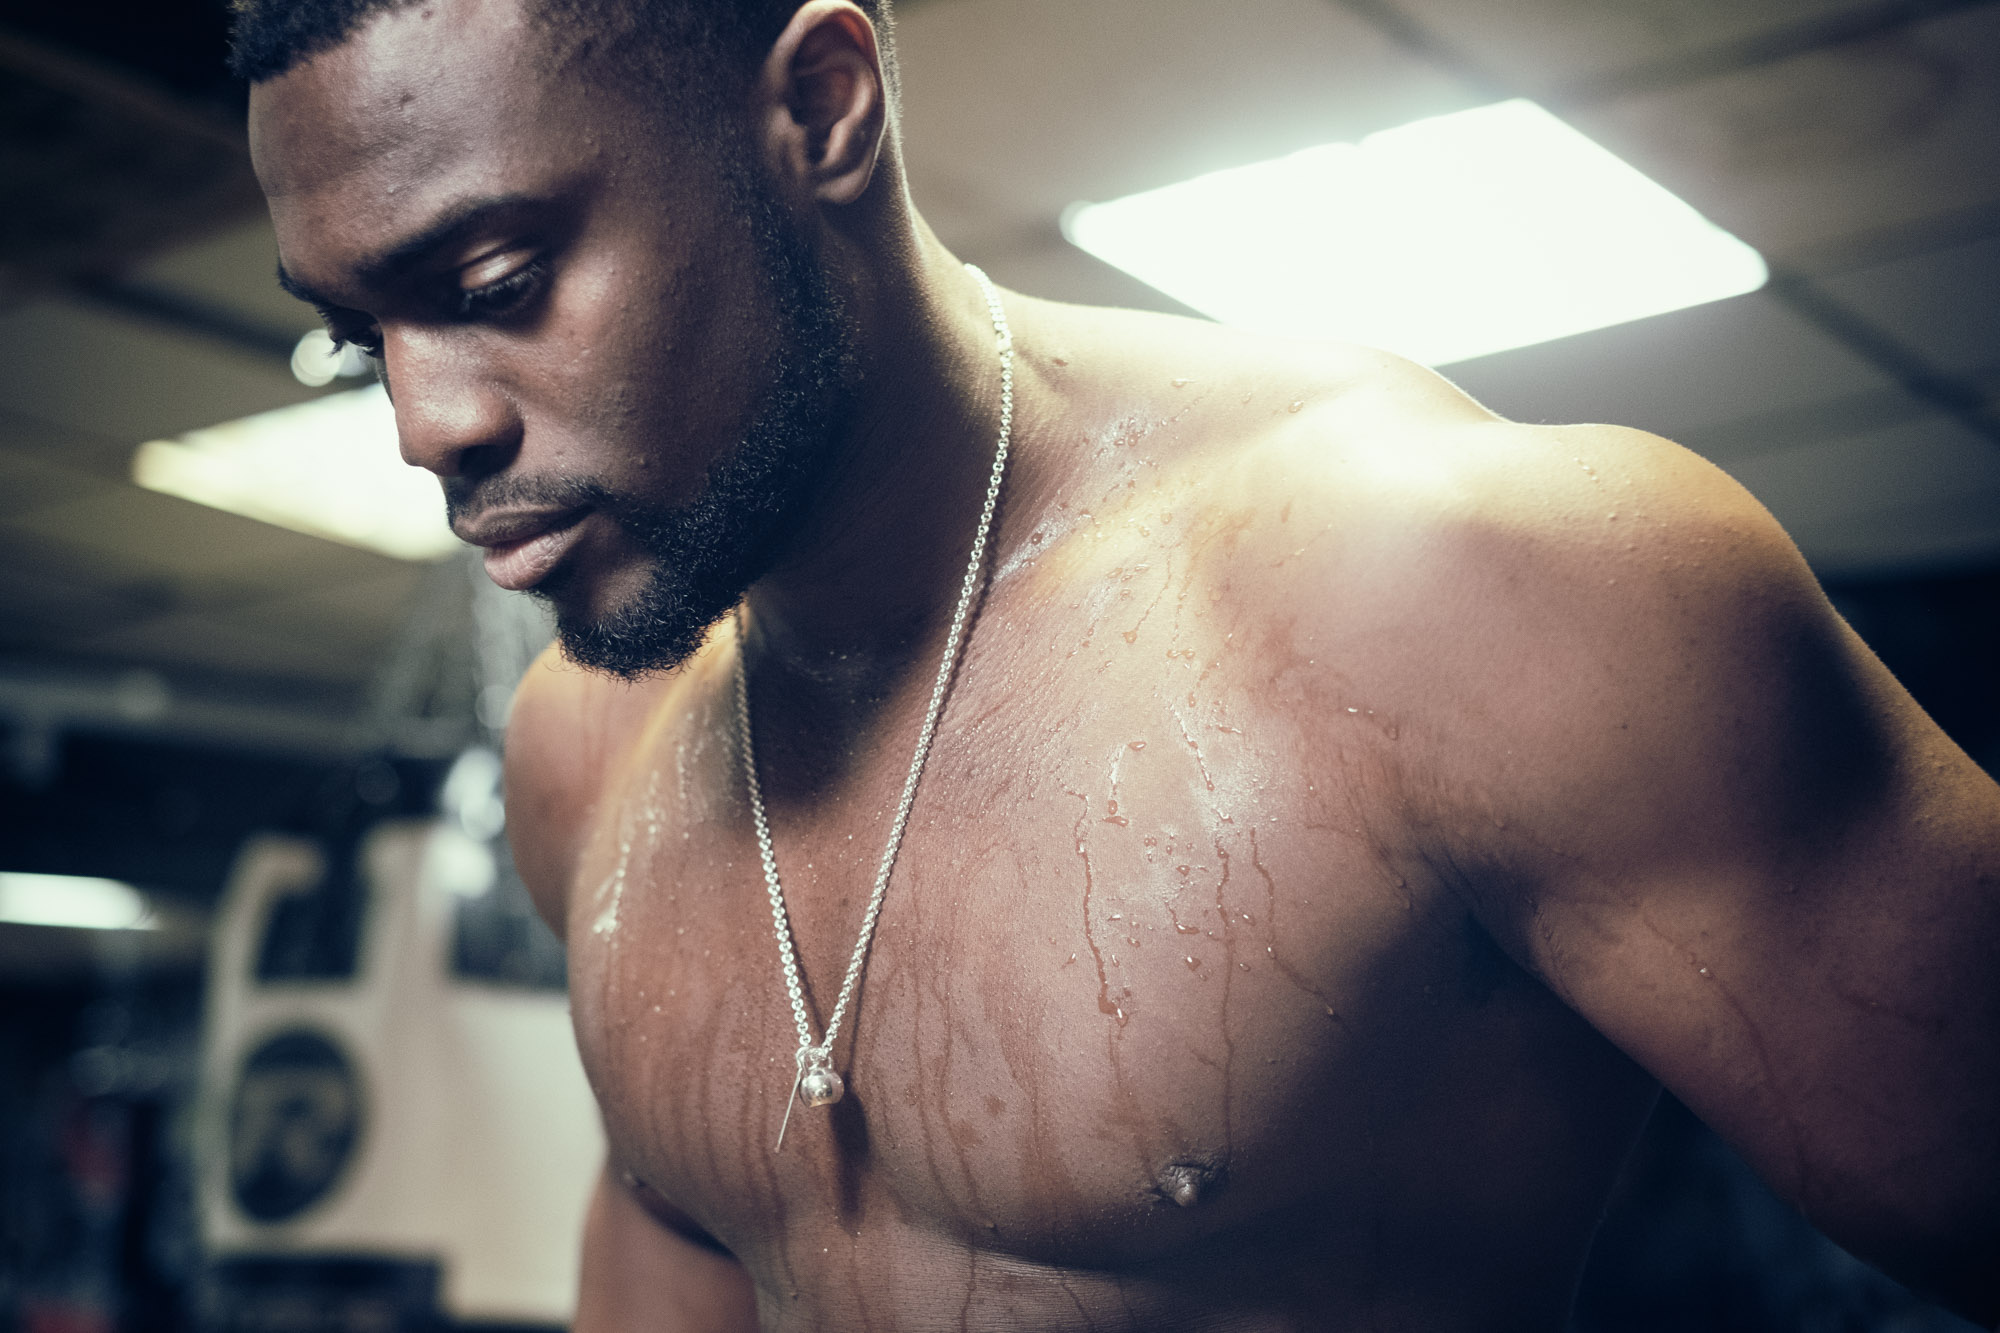
Image of George Morton. GFX 50S + GF110mmF2 at f/2, 1/100th

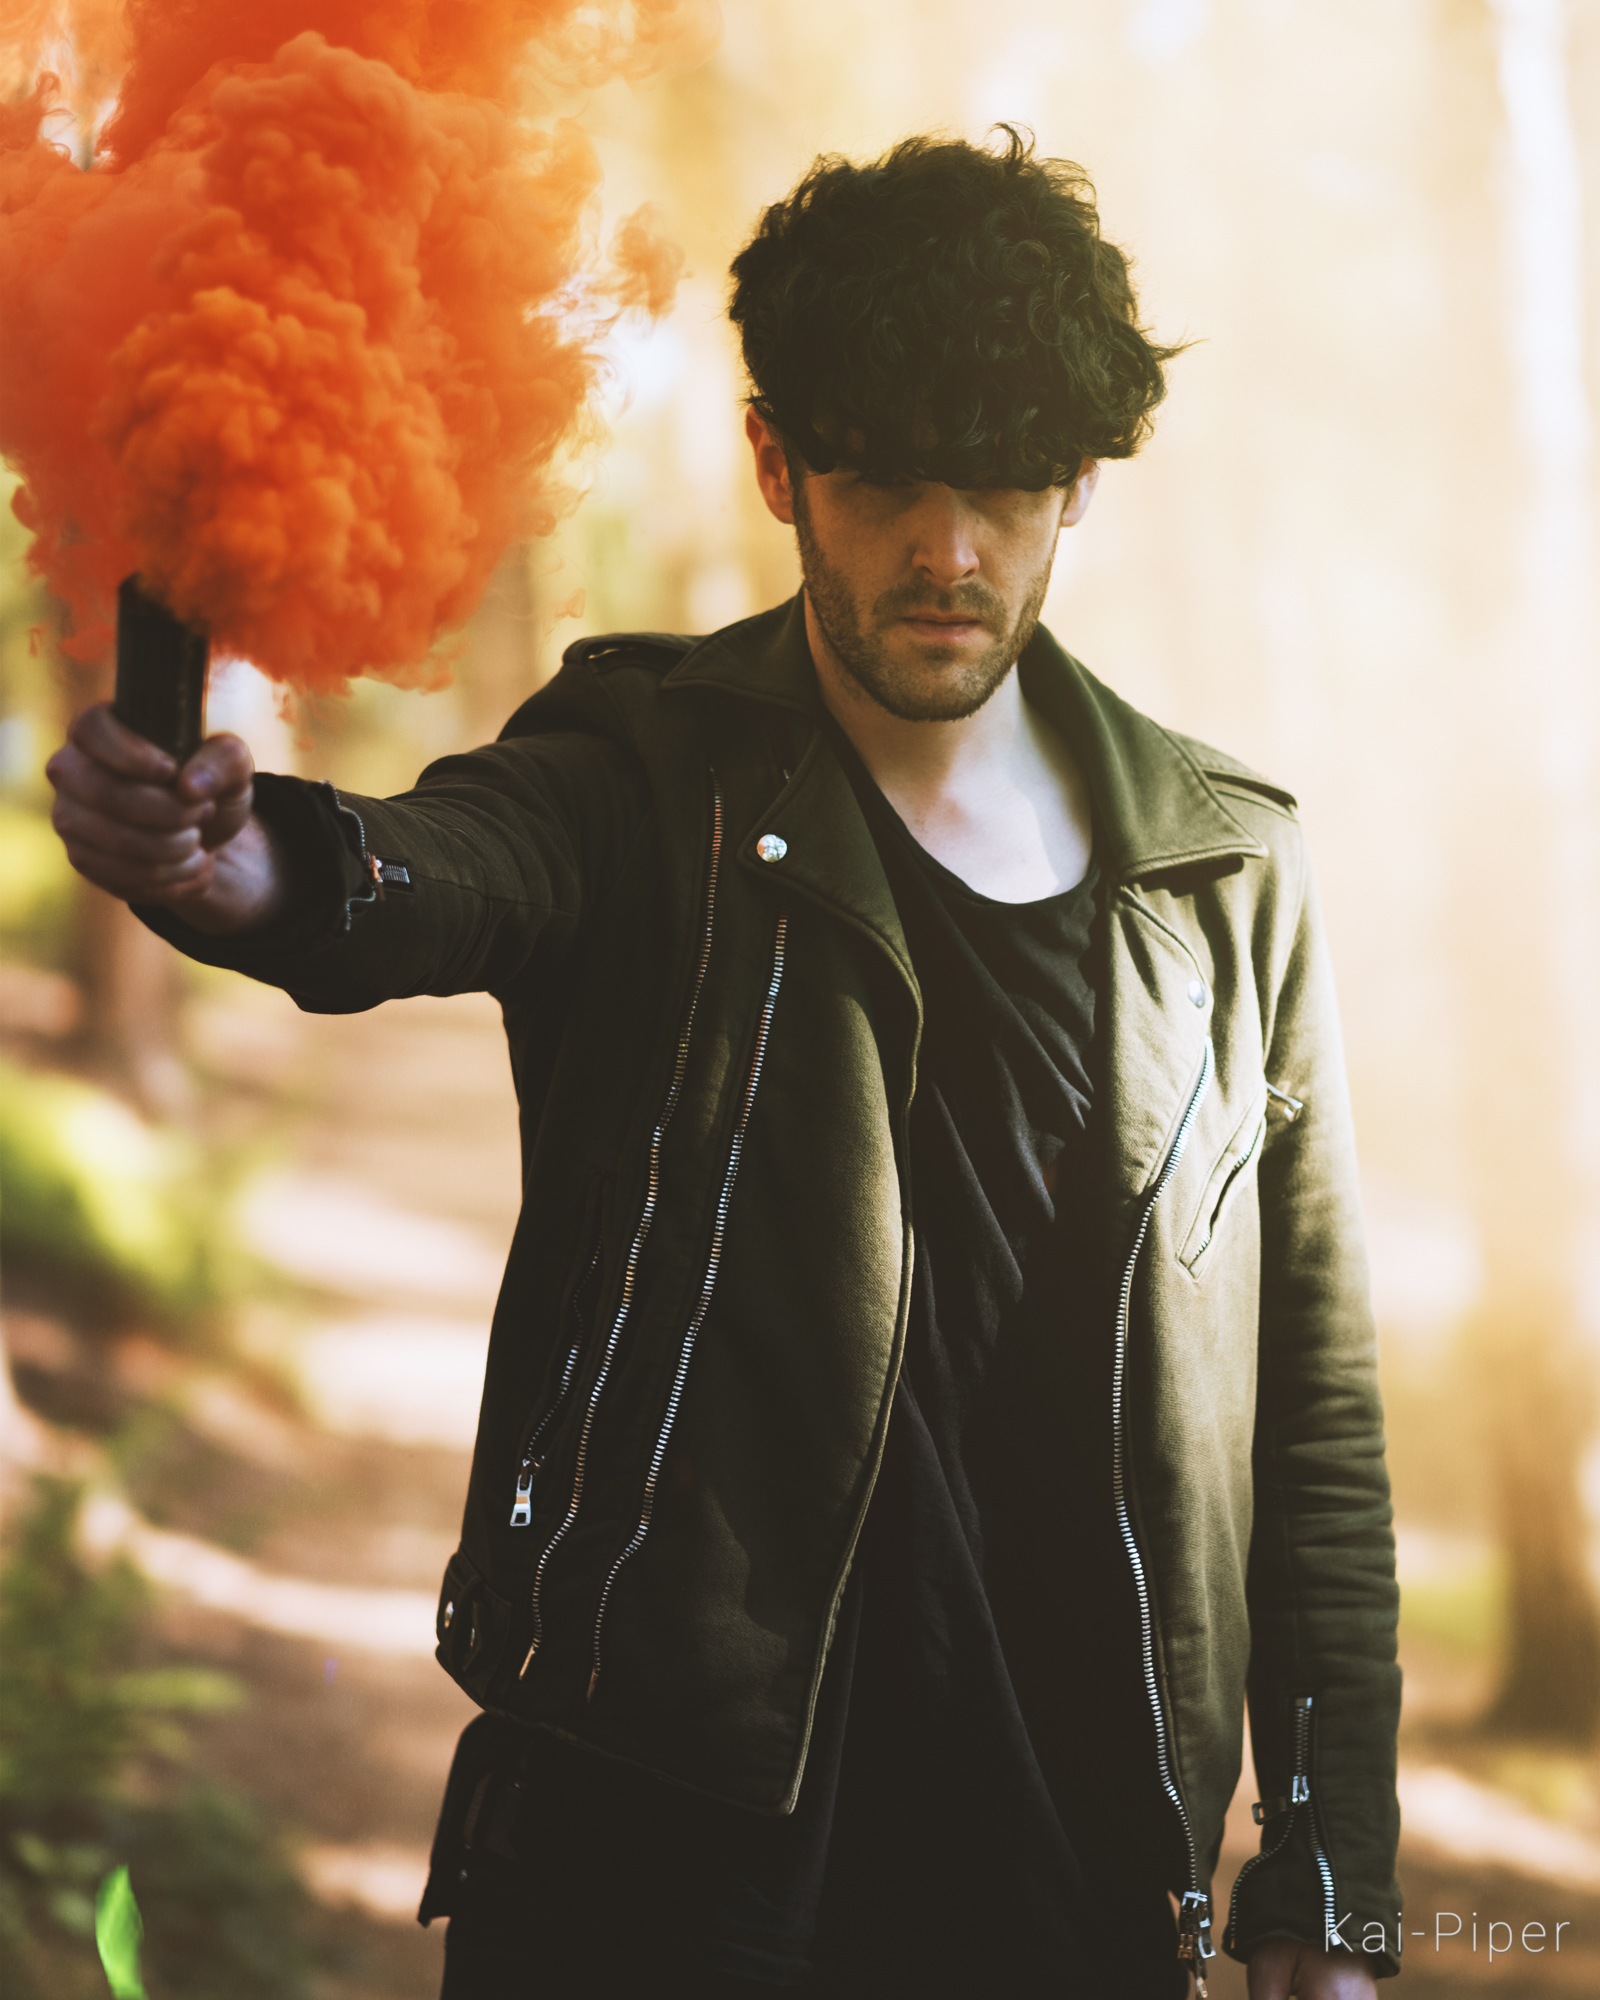
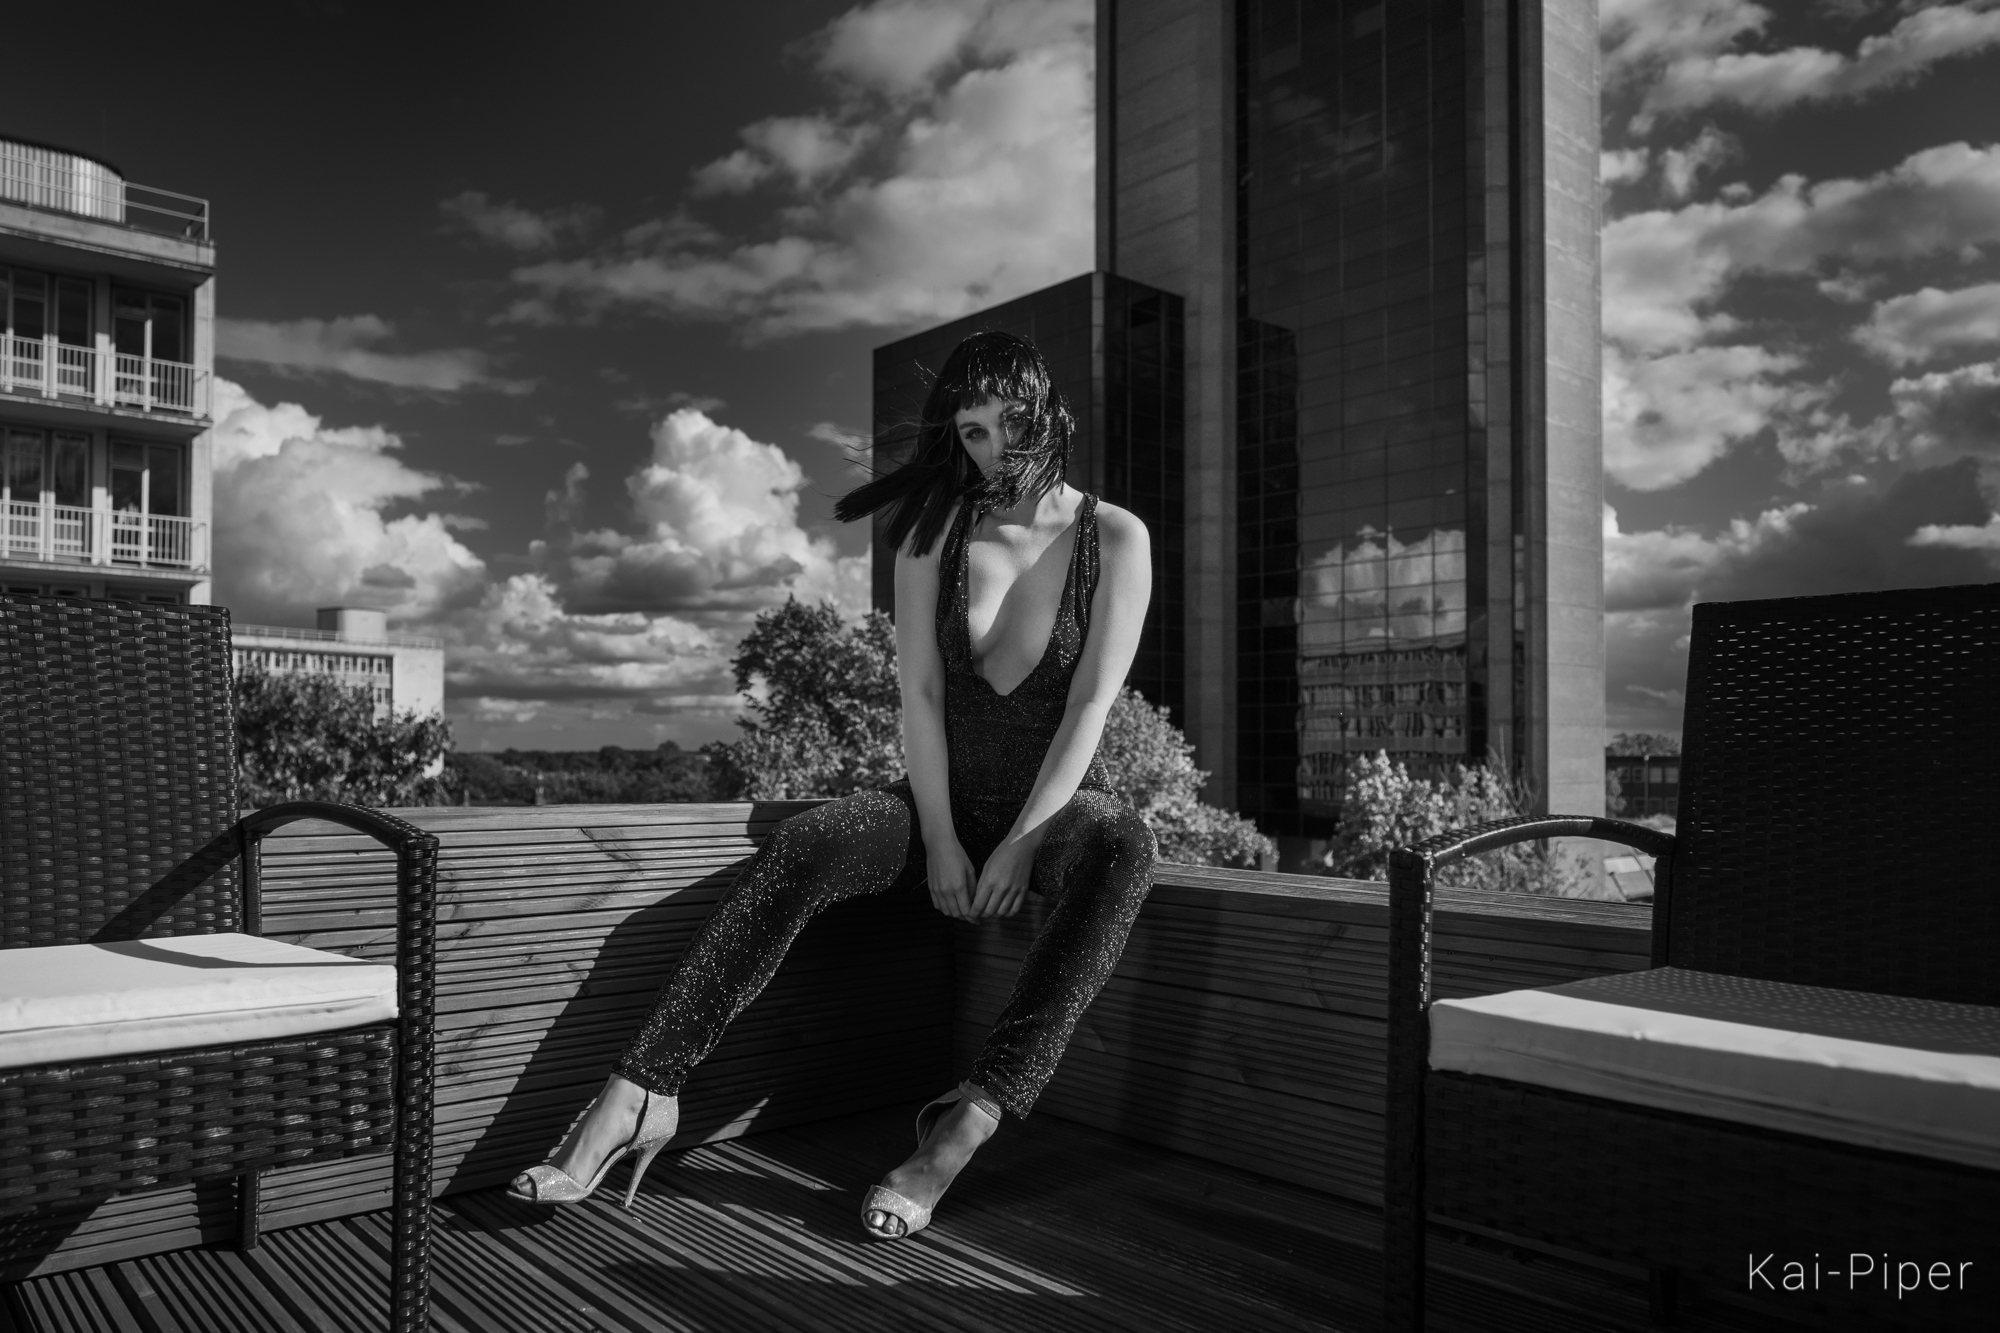
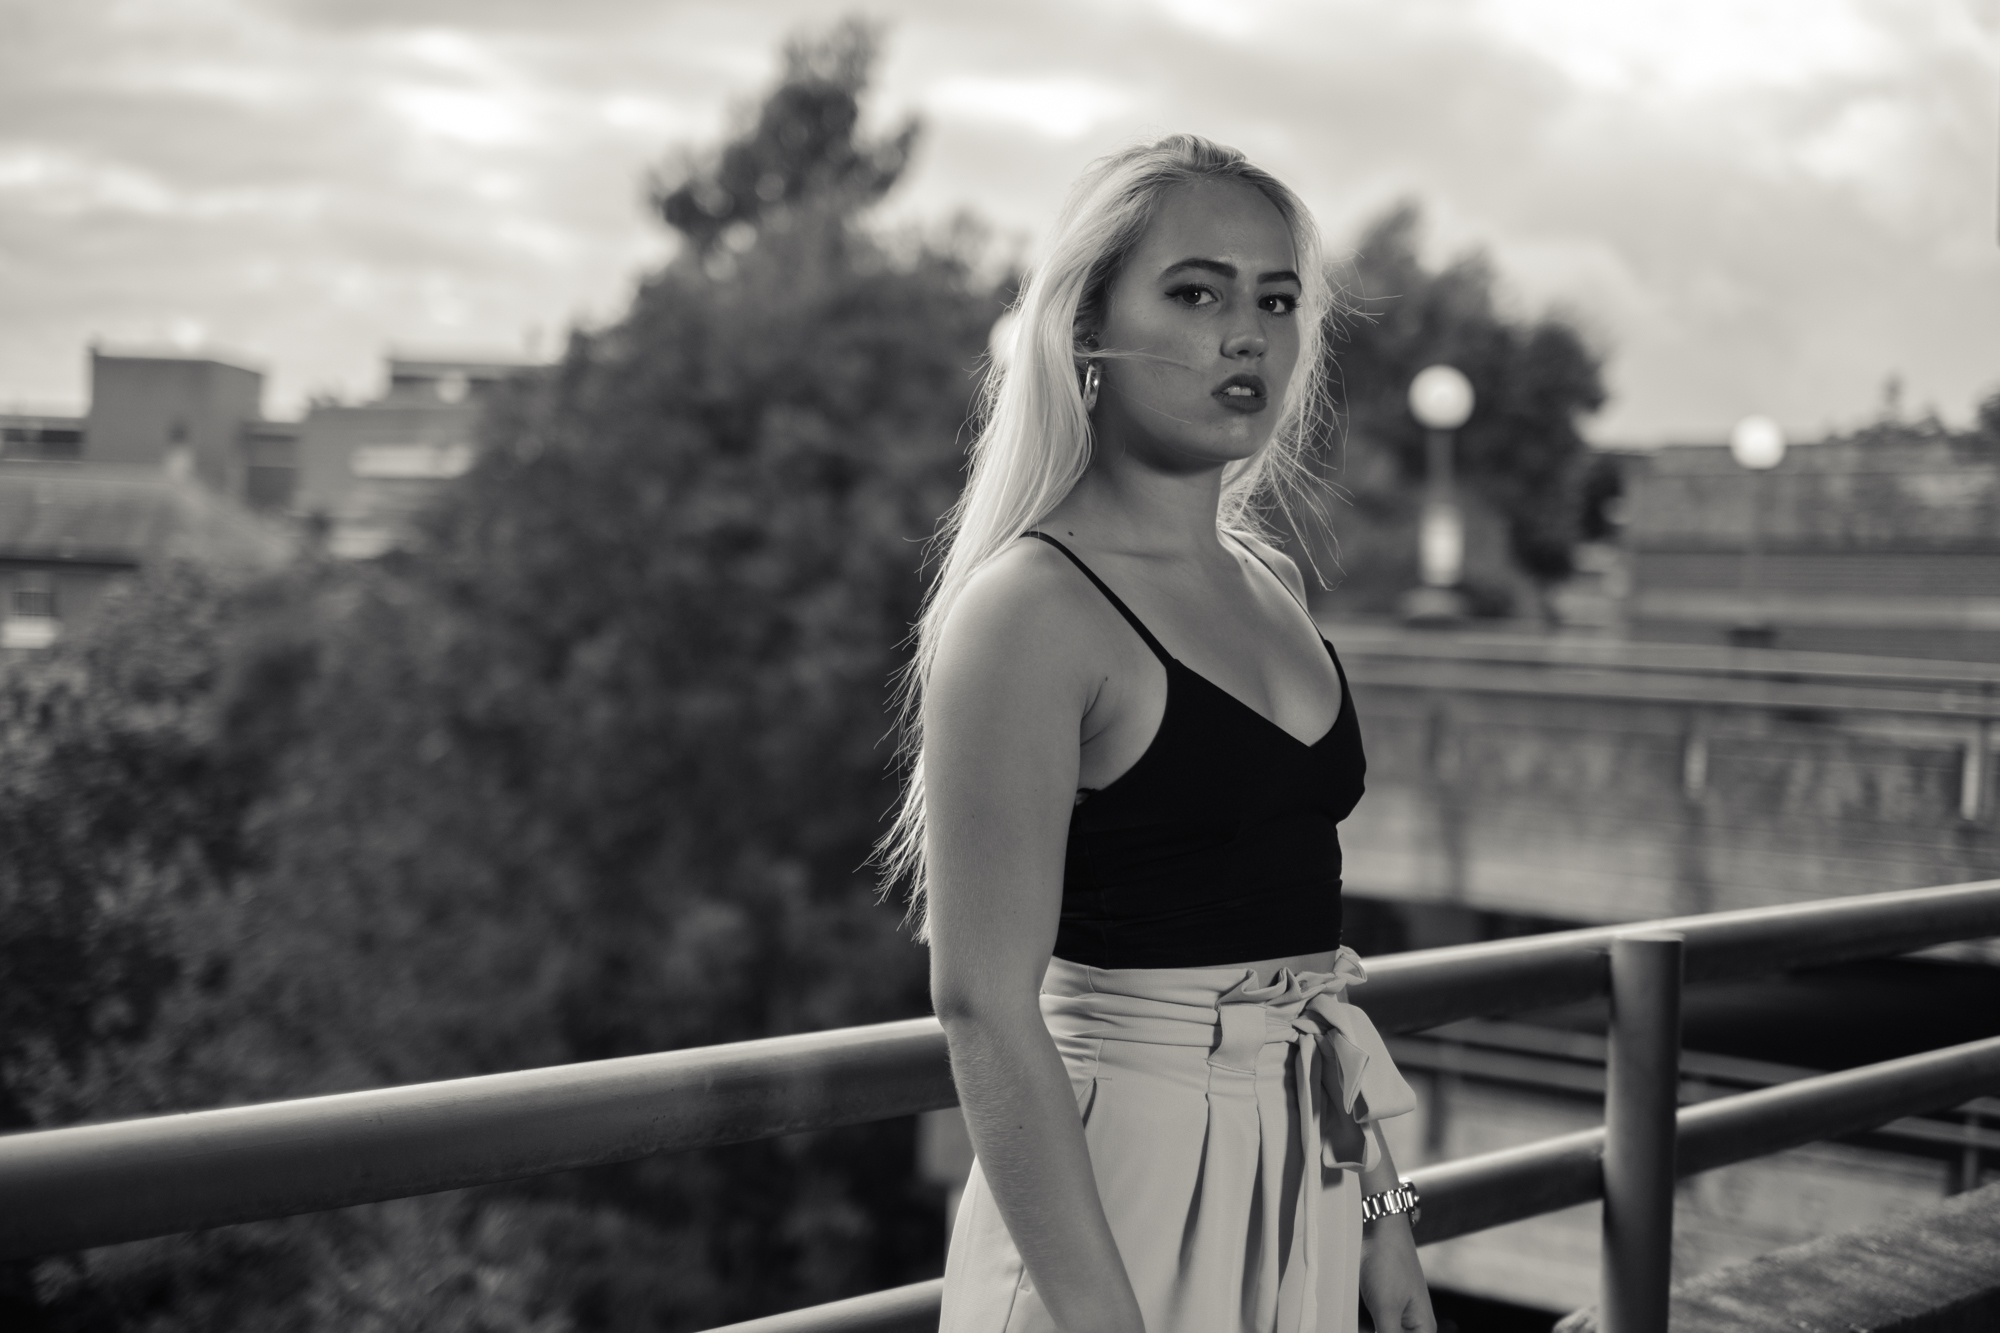
Image of Dave Pearson. X-Pro2 + XF56mmF1.2 at f/1.4, 1/250th
Focus settings
Using the back-button focus method has been working successfully for my style of photography for years. The EVF system lends itself to this hybrid auto/manual focusing system of focusing the camera. Using the focus peaking lets me visually check that my image is focused in the way I expect. You can turn these settings on via the second screen of the AF/MF settings page. Personally, I find that the Red Highlight setting works very well, overlaying a monochrome preview of the image.
My style of shooting is slow and calculated, meaning that a manual focus style works perfectly. If you are looking to learn more about autofocus modes, tracking modes and capturing faster moving subjects, try this basic introduction to focus modes.


Image quality settings
Setting the camera up to work as expected is something you might do each time you reset the camera or after an update. These settings are the same across all genres of photography, not just portrait work. I use the 3:2 aspect ratio so that I have a similar crop to a full page magazine or an 8×10 print when composing the image in the viewfinder. Using the Acros film simulation mode helps me ‘see the light’ in the image in a clear way; sometimes colour images present themselves in a more complex way. All settings are off unless listed.
Image size, image quality and RAW settings: Uncompressed RAW, Large 3:2 JPEG.
Film Simulation mode: Acros – no filter (STD is the default setting as shown below)
White Balance: Auto
Highlight tone: +1
Shadow Tone: +1
Lens Modulation: On
Colour Space: Adobe RGB

Photometry settings
The answer to the question “Should you be using spot, multi, or average mode to give your exposure guide?” is going to be based on the way you shoot and the style of images you are looking to create in terms of contrast. Images like the one below are created by metering for the highlights using spot metering.
You can use the camera to help work out your settings. Try moving the metering point around the image while having the camera set to display the preview exposure setting set to ‘on’. Changing the size of the metering point will let you get a wider or tighter measurement (using the X-Pro2, depress the rear joystick to select the positioning options for the focusing screen, and use the print command dial to change the size/weight of the area that the photometry and focus calculations are worked out from). Set the shutter speed to ‘auto’, while preselecting your ISO and aperture settings based on your shooting style and needs. As you move the metering point around the screen, while keeping your composition constant, you will see the shutter speed change and the preview result in the screen.
In short, I use spot metering as it feels like it gives me the most accurate view of the expected dynamic range of the image.
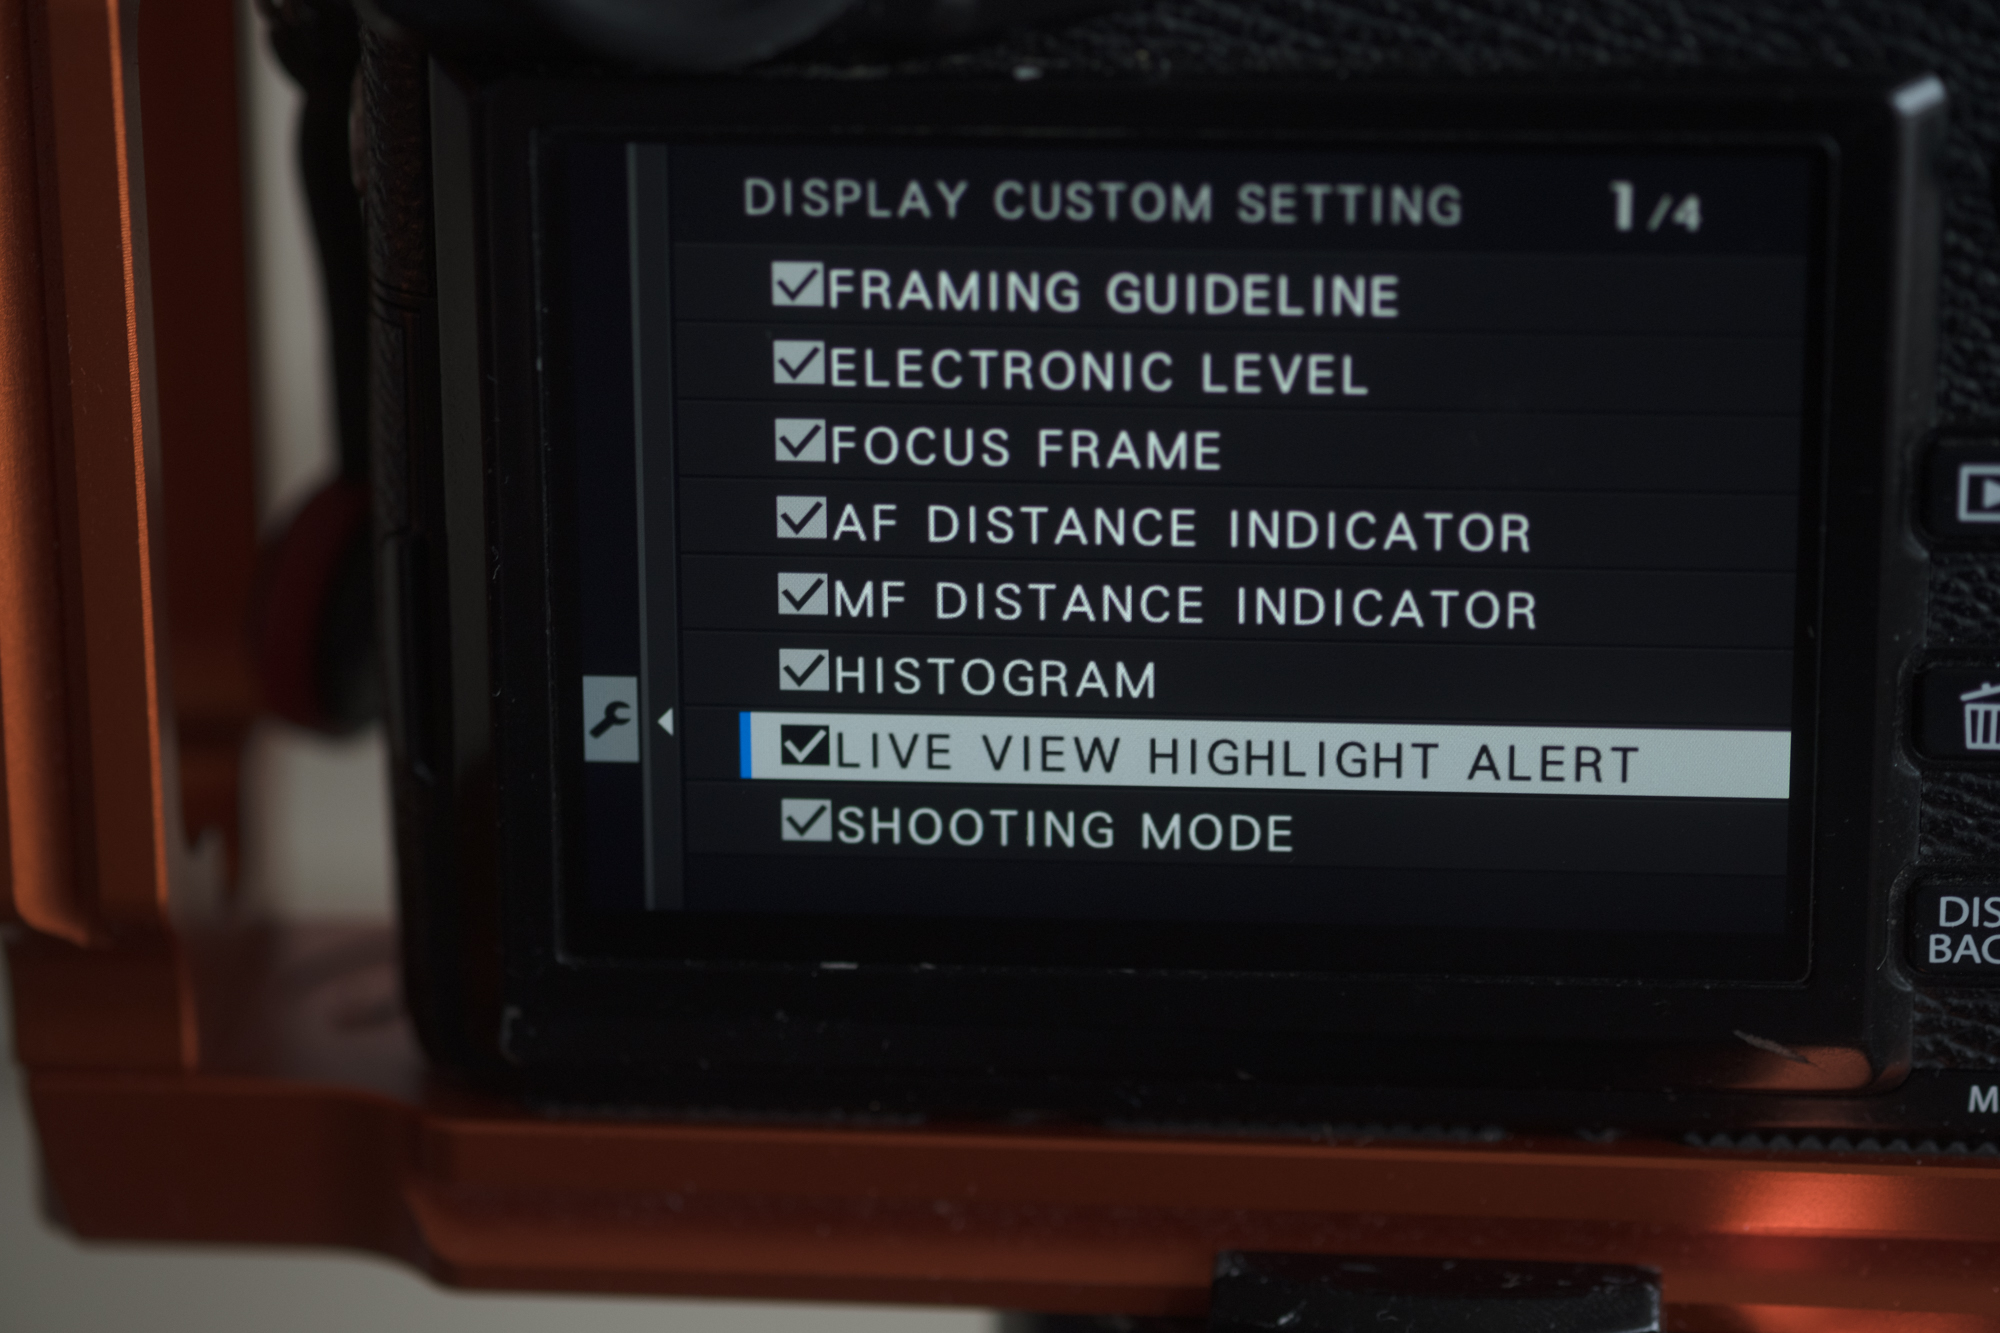
Display settings
The display settings are broken up in the camera into the rear LCD and EVF settings. On the camera, you can find these settings in Setup > Screen Set-up menu.
Aside from bumping my EVF brightness up on the X-Pro2 by +1, everything else is left at 0. Image display is turned off as I find that it’s distracting. If I have correctly planned my exposures and flash settings, I know that all I have to worry about is my composition. I prefer to take a series of images and then check back to have a look.
Preview exposure and white balance gets turned on or off depending on if I am using flash or not.
EVF Autorotate Display: On
Preview Exp./WB in Manual Mode: Depends on the image
Framing Guideline: Grid 9
There are many settings in the ‘Display Custom Settings for EVF/LCD’ menu. In here you can turn on many different settings, many of which I have turned on. I would recommend that you experiment with how these settings can help. The level indicators are particularly useful and the ‘Live Highlight Preview’ is very useful also.
Flash settings
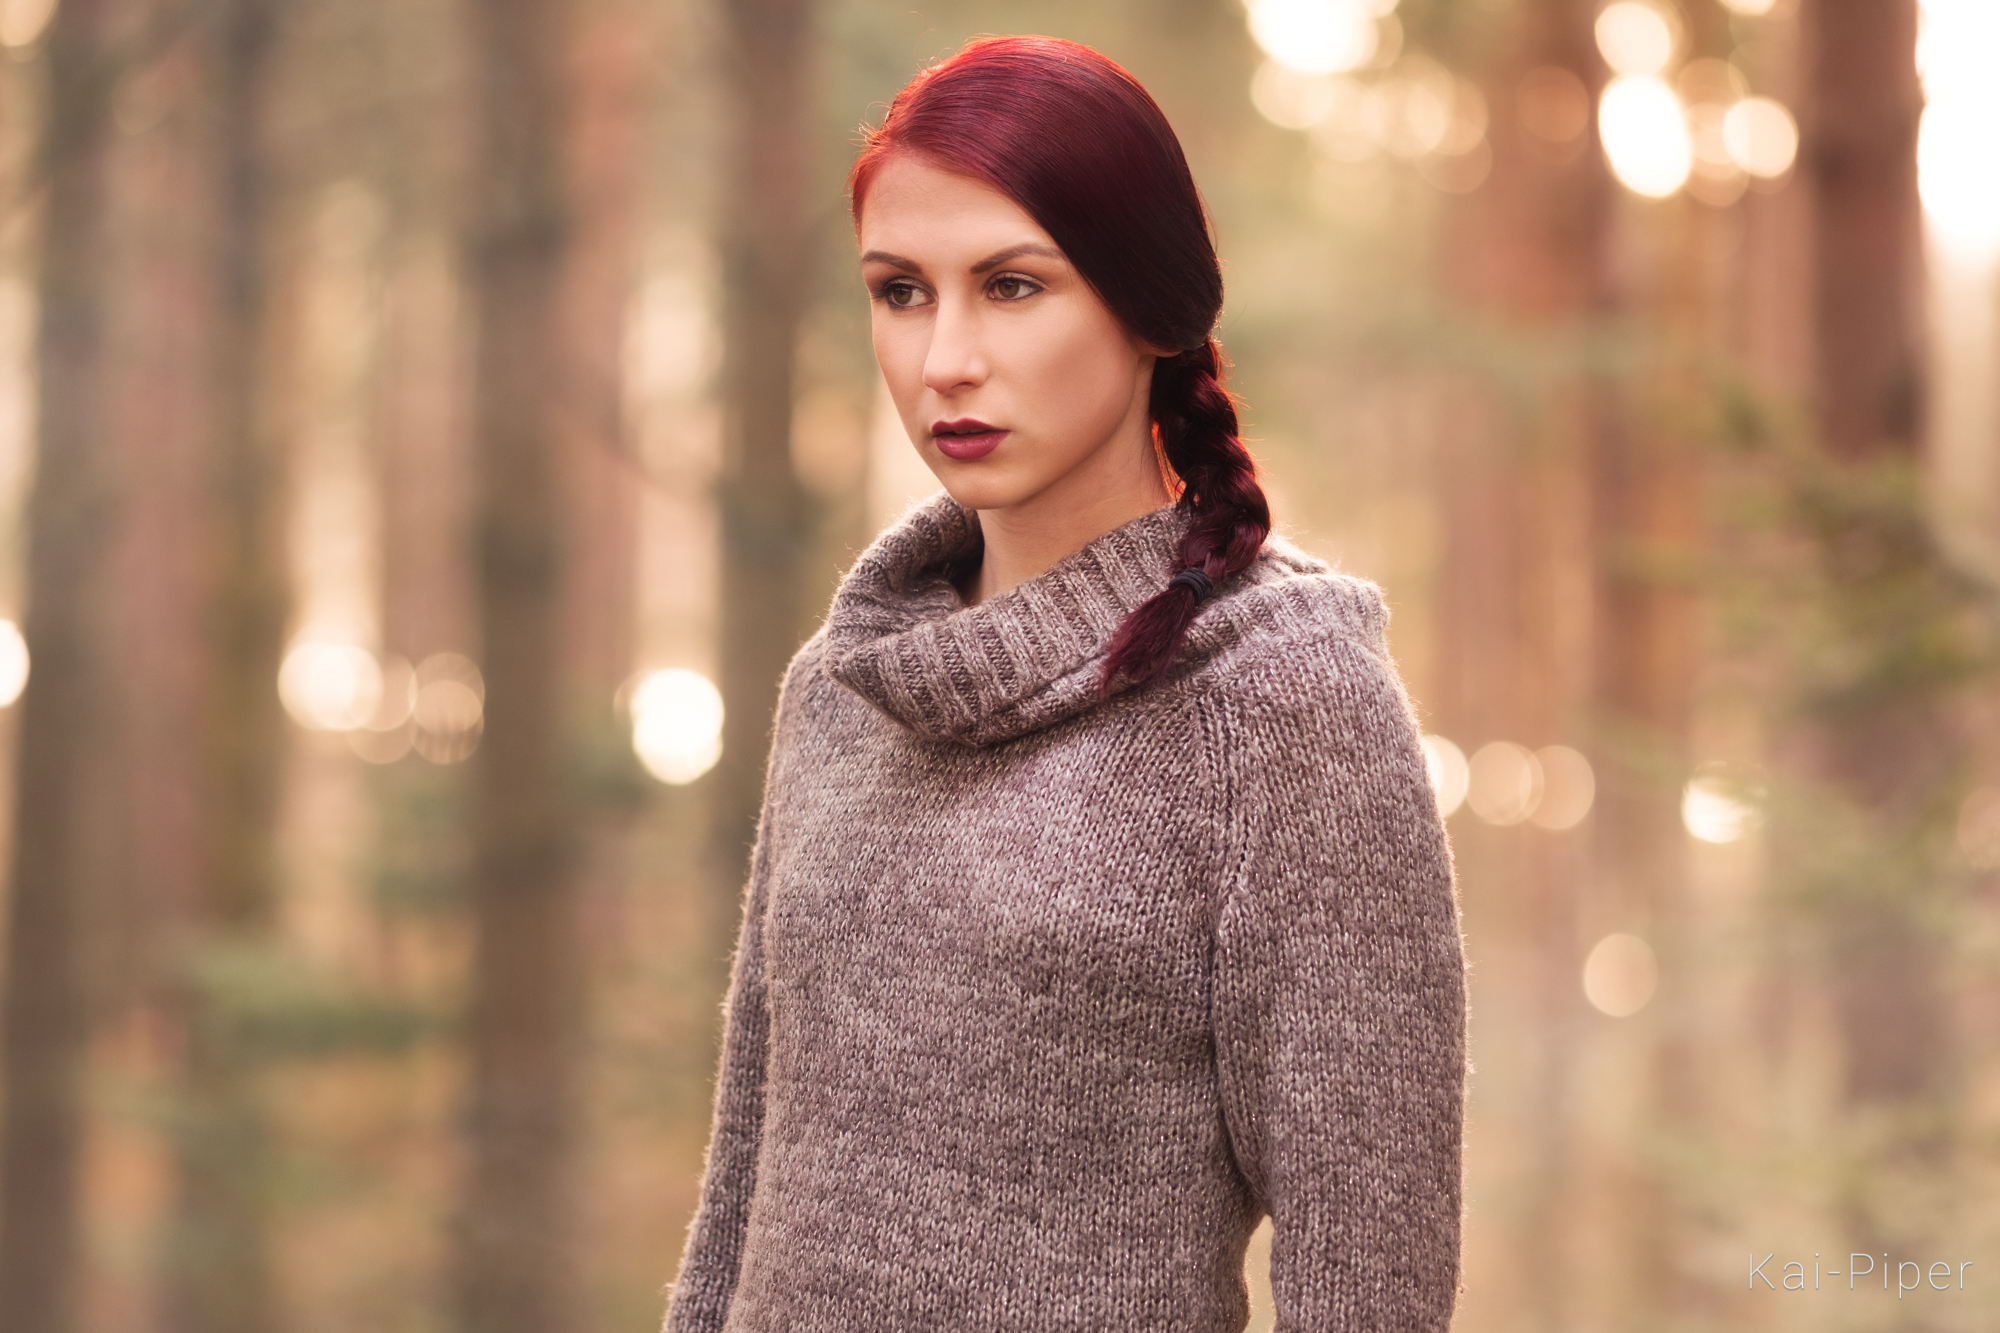
My style of photography normally involves off-camera flash using the Cactus system but I have used many other lighting setups too. Using HSS (High Speed Sync) lets us really experiment with all the camera’s abilities and allows us use of the full range of the camera’s settings, meaning that we can combine flash with low apertures. Images like the one below are photographed at f/1.4 at 1/8000th of a second.

The process for creating an image like the one above is to set up the camera with an exposure to be as bright as possible without overexposing the lightest area in the image. Both of the images below are photographed at f/1.4 at 1/4000th of a second. Image B has fill flash using the Cactus system, using HSS to enable the camera to capture light past the normal sync speed of 1/250th/sec on the X-Pro2. Image A shows the exposure level before adding the flash.
Model: Elle B
Image A – Above – Setting up the image
Image B- Below – Adding fill flash
In terms of camera settings, I make sure the camera is set up to have the hot shoe on TTL mode or manual mode. All flash power and control is provided by the flash trigger.
If the camera is set to silent mode or the electronic shutter, the camera will not activate the hot shoe. In order to use HSS, the flash must be set to FP in the sync setting.
Red eye removal is turned off, TTL lock mode is set to ‘Last Flash’ mode. If you are using a Fujifilm flash, you will have access to master control settings for the power output and LED light settings.
Shooting settings
Self-Timer settings: Off
Photometry: Spot or Average
Shutter Type: MS
IS Mode: Depends on the lens being used
I am not normally using any bracketing functions but if you are, the settings for these options are in the shooting settings menu.
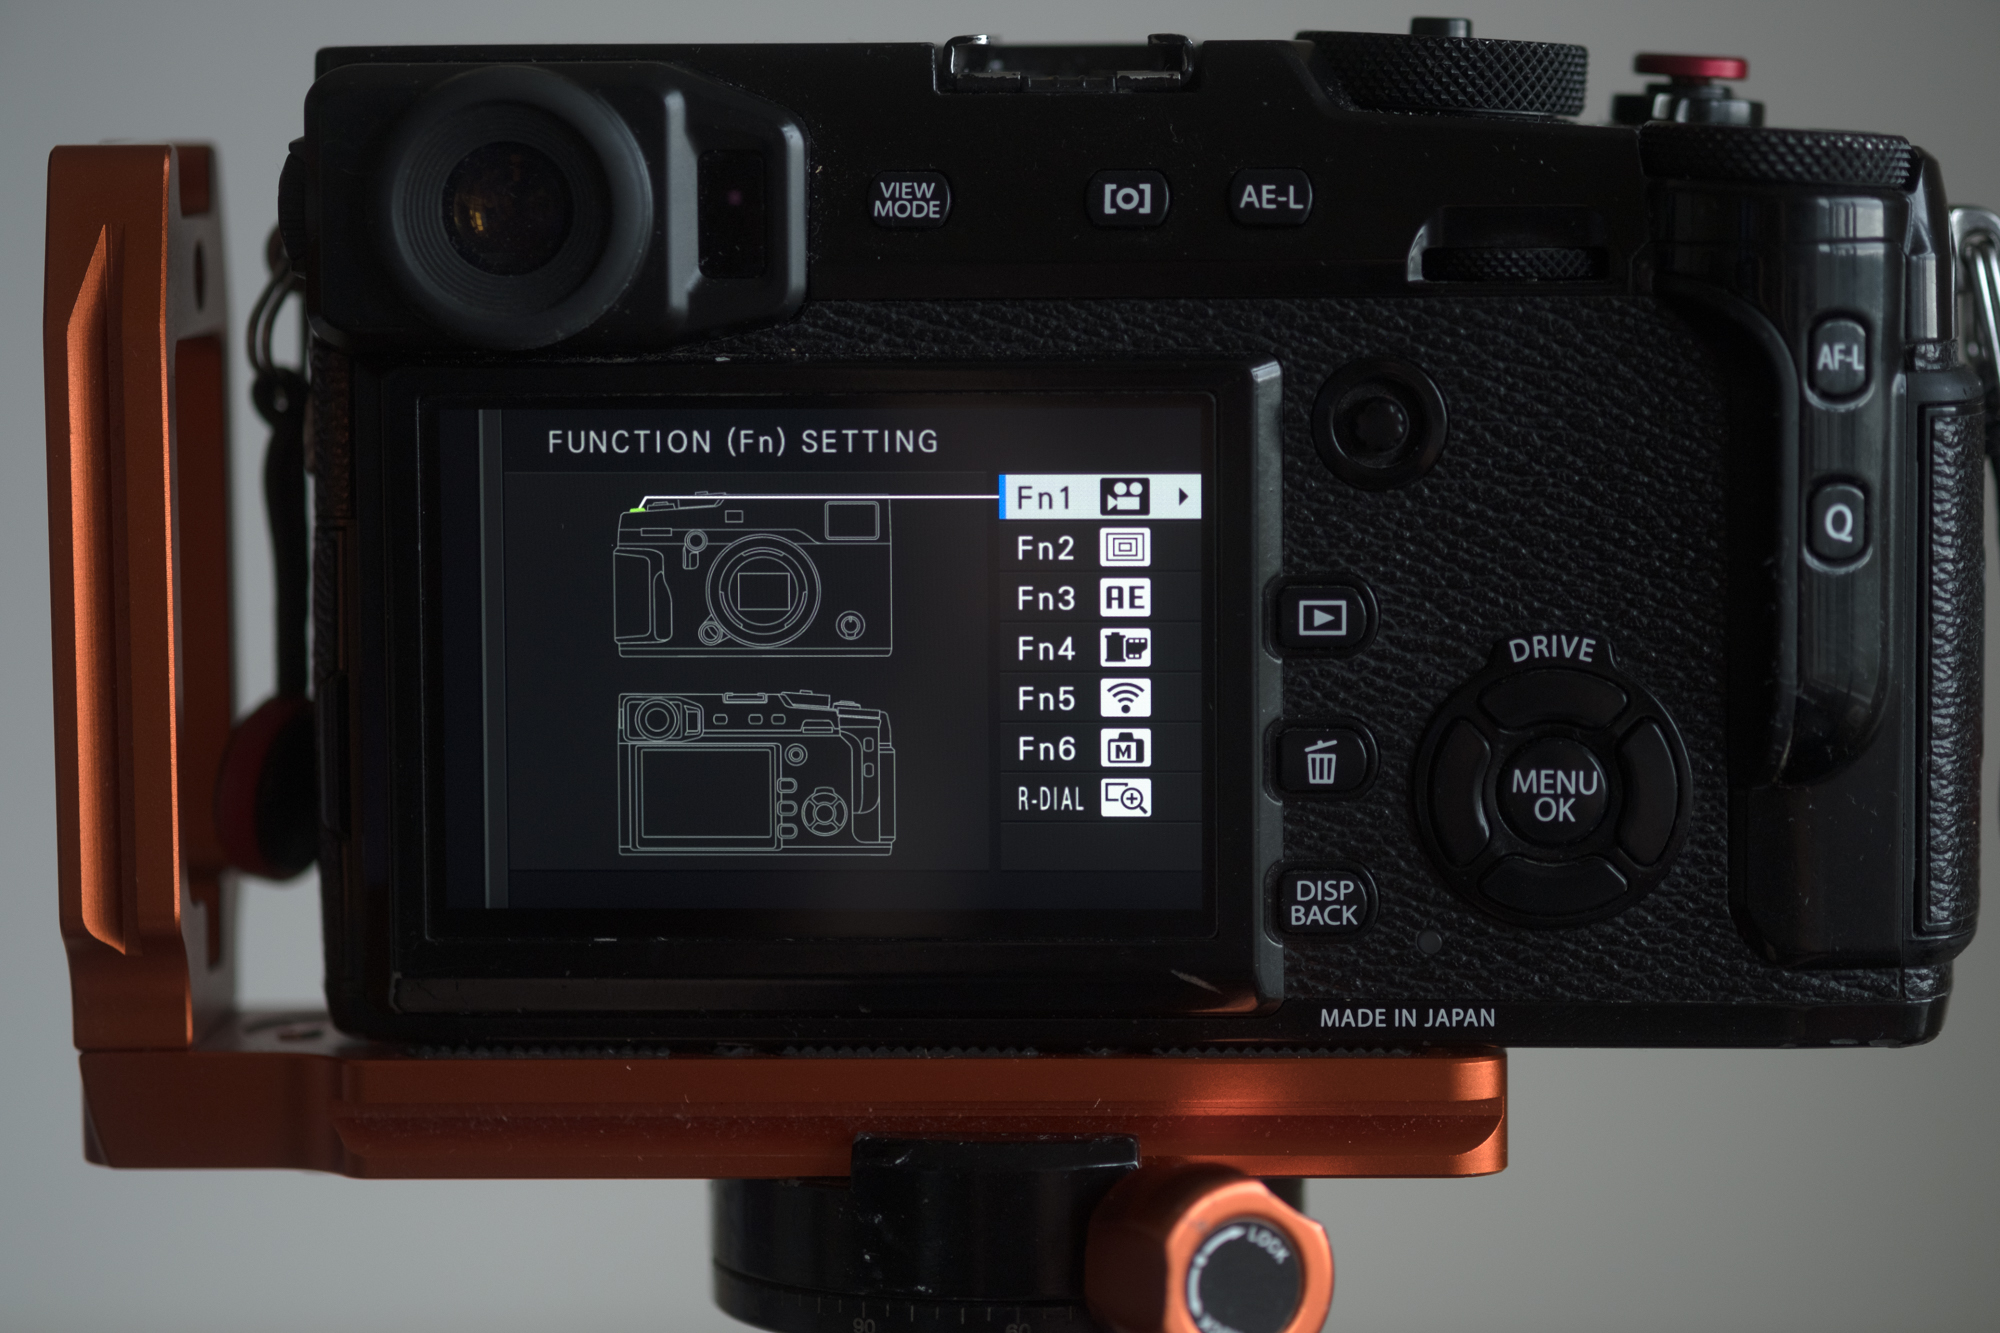
Custom buttons
There are a few functions that I want quick access to. I have set functions such as changing film simulation modes and activating the wireless communication mode to Fn6 and Fn5. The most-used function is turning the EVF exposure preview on and off. I have set this function to Fn4.
You can set this up by pressing and holding the DISP/Back button. A menu will pop up letting you assign functions to buttons in a way that is preferred to you. Resetting the camera will return these to defaults. A quick way to set these functions is to press and hold the button you wish to switch.
More examples of low DOF images