There are few things you can do to make your images really pop. Some are complex and some are simple. Keeping your verticals vertical has to be one of the fastest, easiest ways to really make a big difference. This blog is about ensuring your images are correctly controlling perspective.
What’s the problem & what causes it?
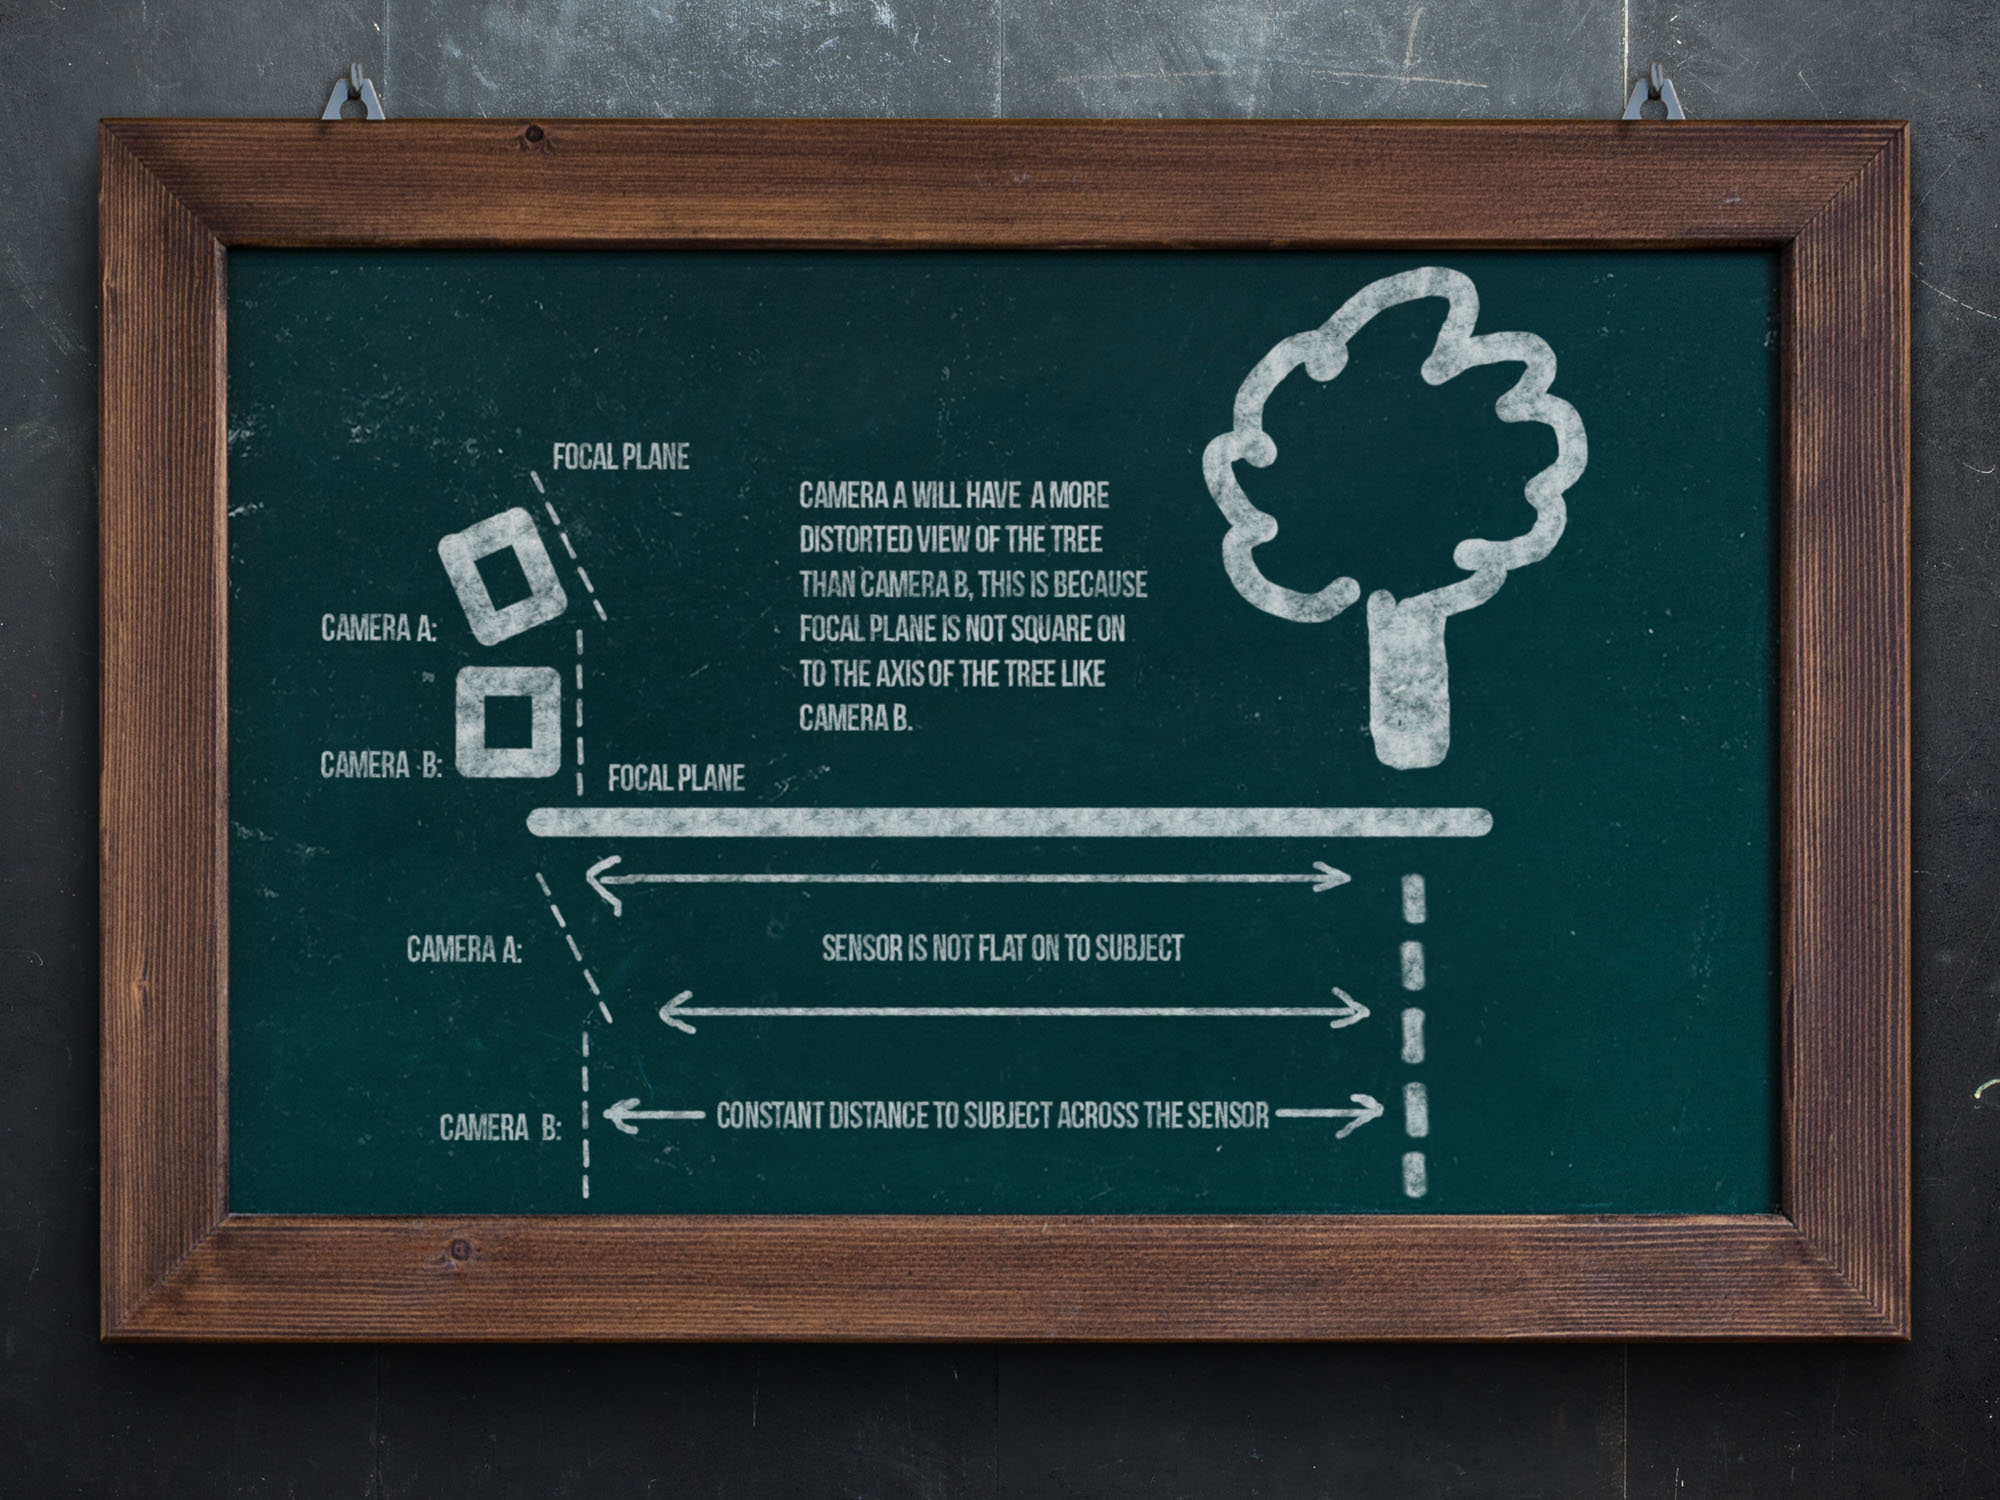
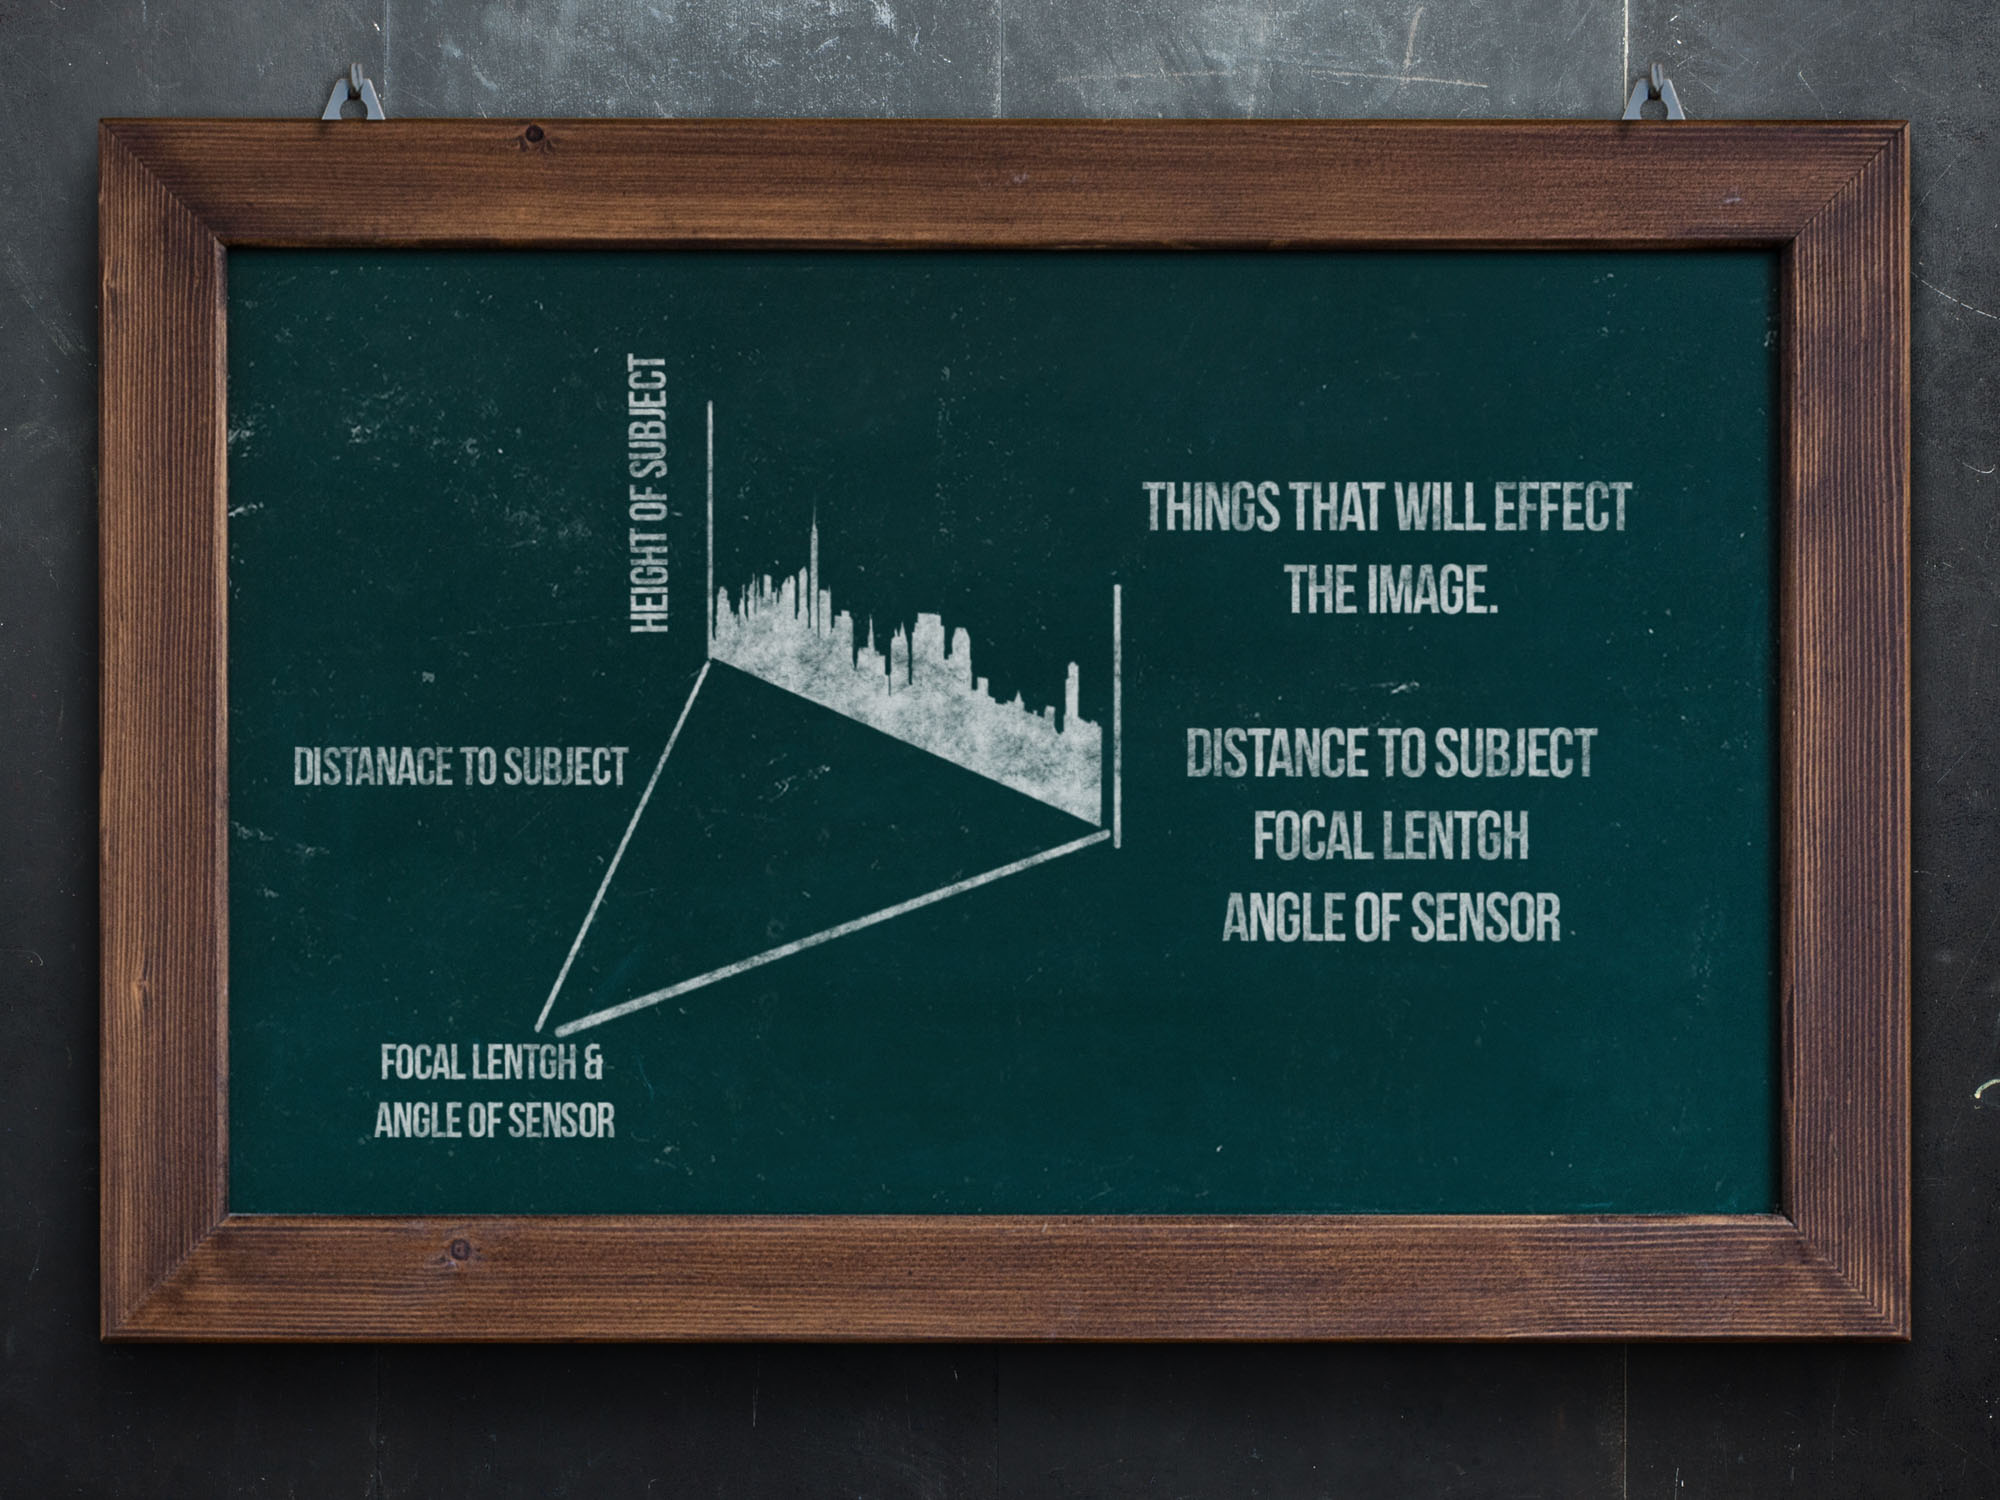
Distortion is the problem. The vertical lines of the building are leaning away, creating a distorted view. This is an effect of the way the lenses have to shape the light coming into a lens. The longer the focal length, the less the light has to be shaped and the less distortion we get. This is one reason why we like to use mid-length focal ranges for portraits and why we get more distortion the wider our focal length is.
How do we correct this?
There are a few ways to do this, firstly, by using a tilt/shift lens, but since we don’t currently have on in the Fujifilm XF or GF line up, we are left to correct this in post-processing.
The first thing to remember is that we cannot ‘change’ the perspective in post-production, but we can change how it is shown in a photograph, how it is emphasized (wide-angle lens) or de-emphasized (telephoto lens) when compared to our vision.

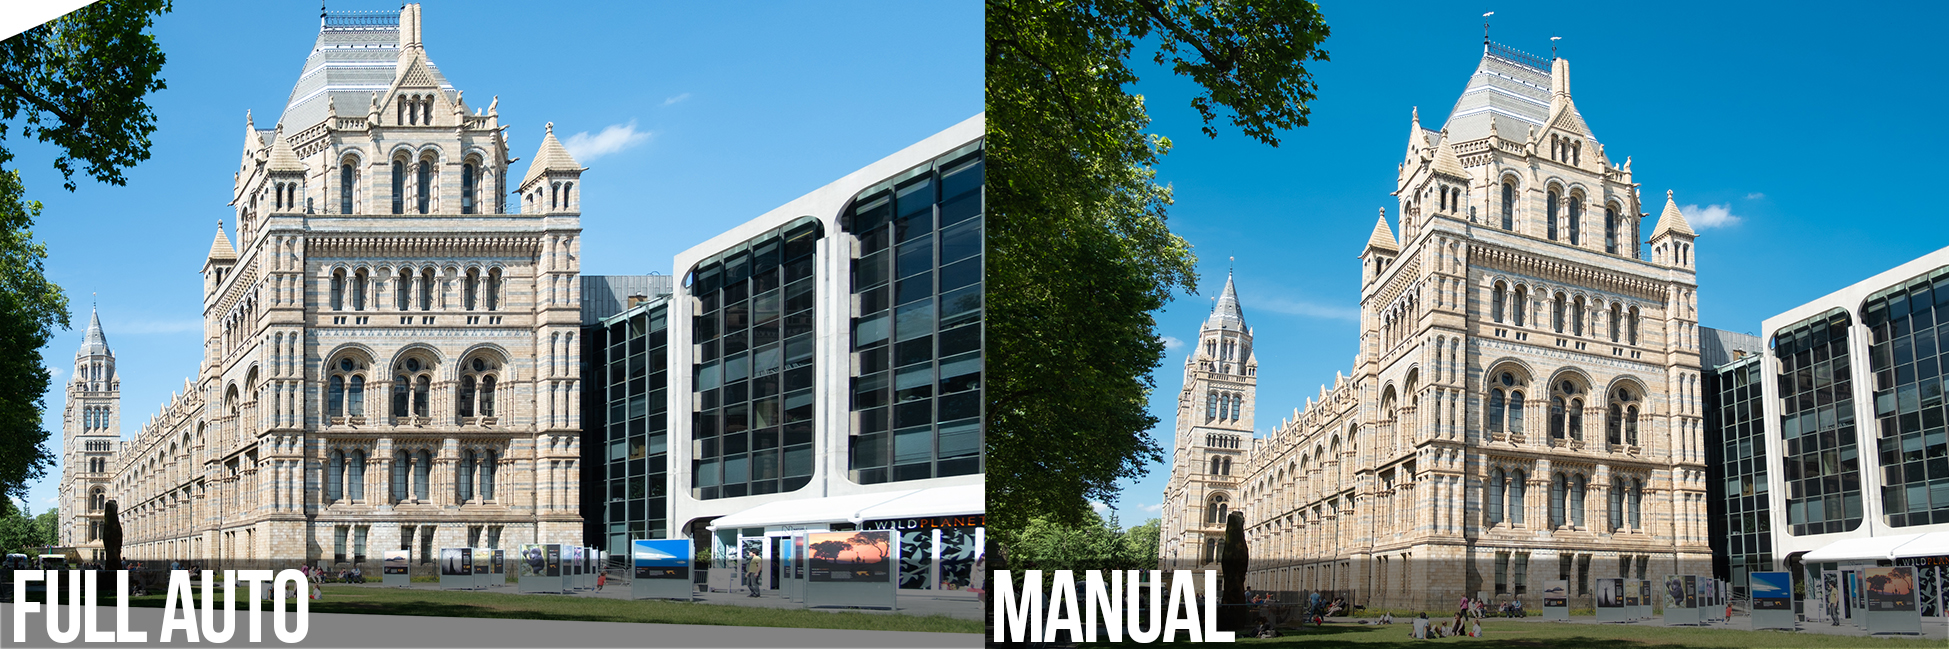
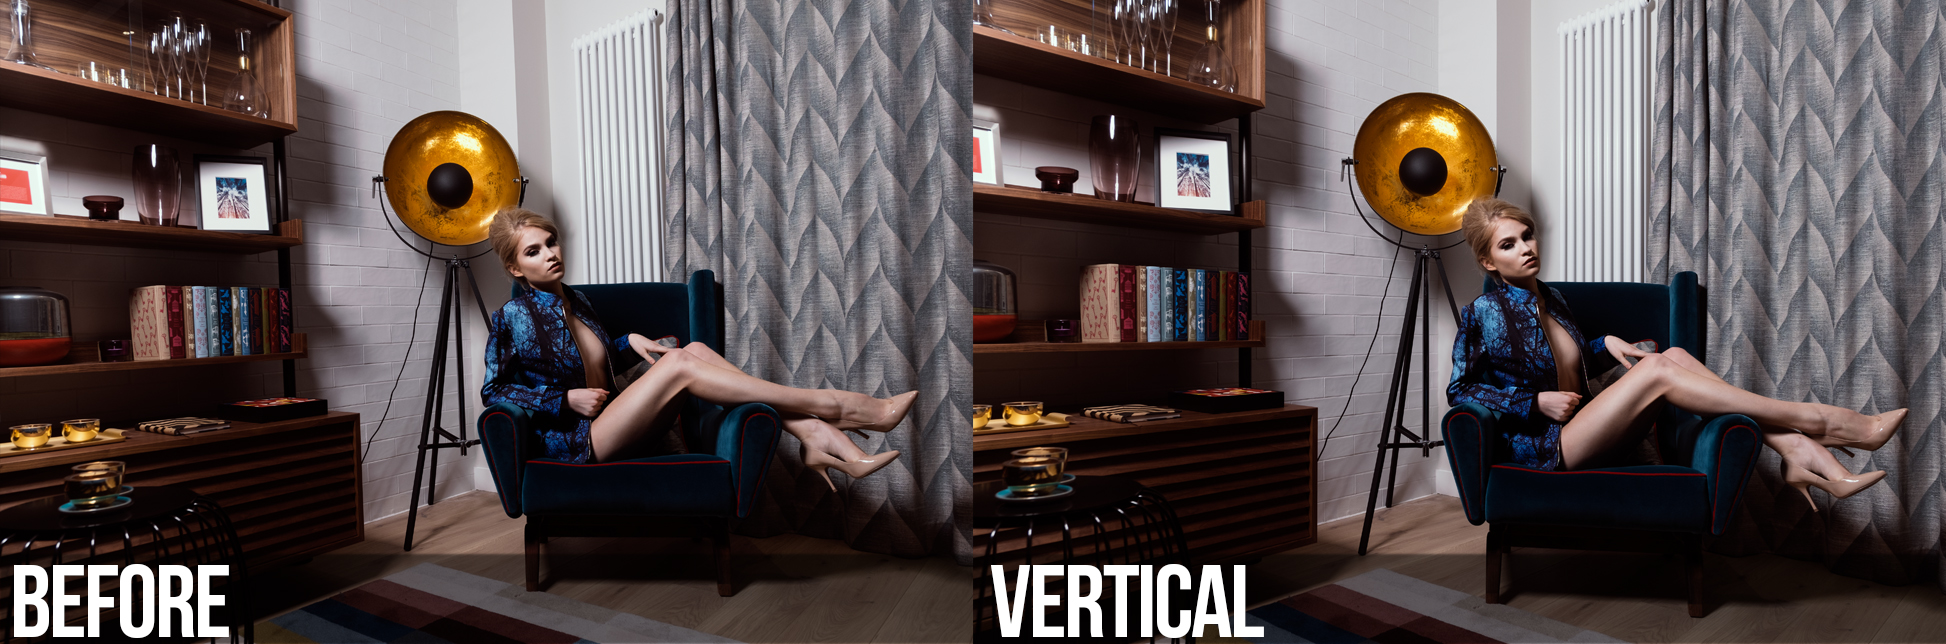
Below are two images. The left image is using the full auto tools using Lightroom, while the image on the right is my manual edit using the transform tools, showing what a corrected/edited image the building could look like using the full auto and the manual corrections. As always, there is a balance & creative license to be used.
Over-cropping at the capture stage & shooting tips
Firstly, at the shooting stage, make sure you over-crop your images. As you can see from the image below, when we stretch out the image, we lose parts off the edge. Look at the window of the hut in the image below and you will see how much of the image was lost. Making sure you have room to crop is going to give you best final image after you have fixed the distortion.

Over-cropping should be something we do all the time, in my mind. When we are framing up, just take a tiny moment to nudge back, zoom out or loosen up the frame. This will be apparent if you’re printing images and need to crop to a 10×8 print after tightly cropping using an APS-C frame. Over-cropping in camera gives you extra flexibility to ensure your images are usable for different needs or to correct distortion.
Things to think about when shooting:
- Get central to your subject.
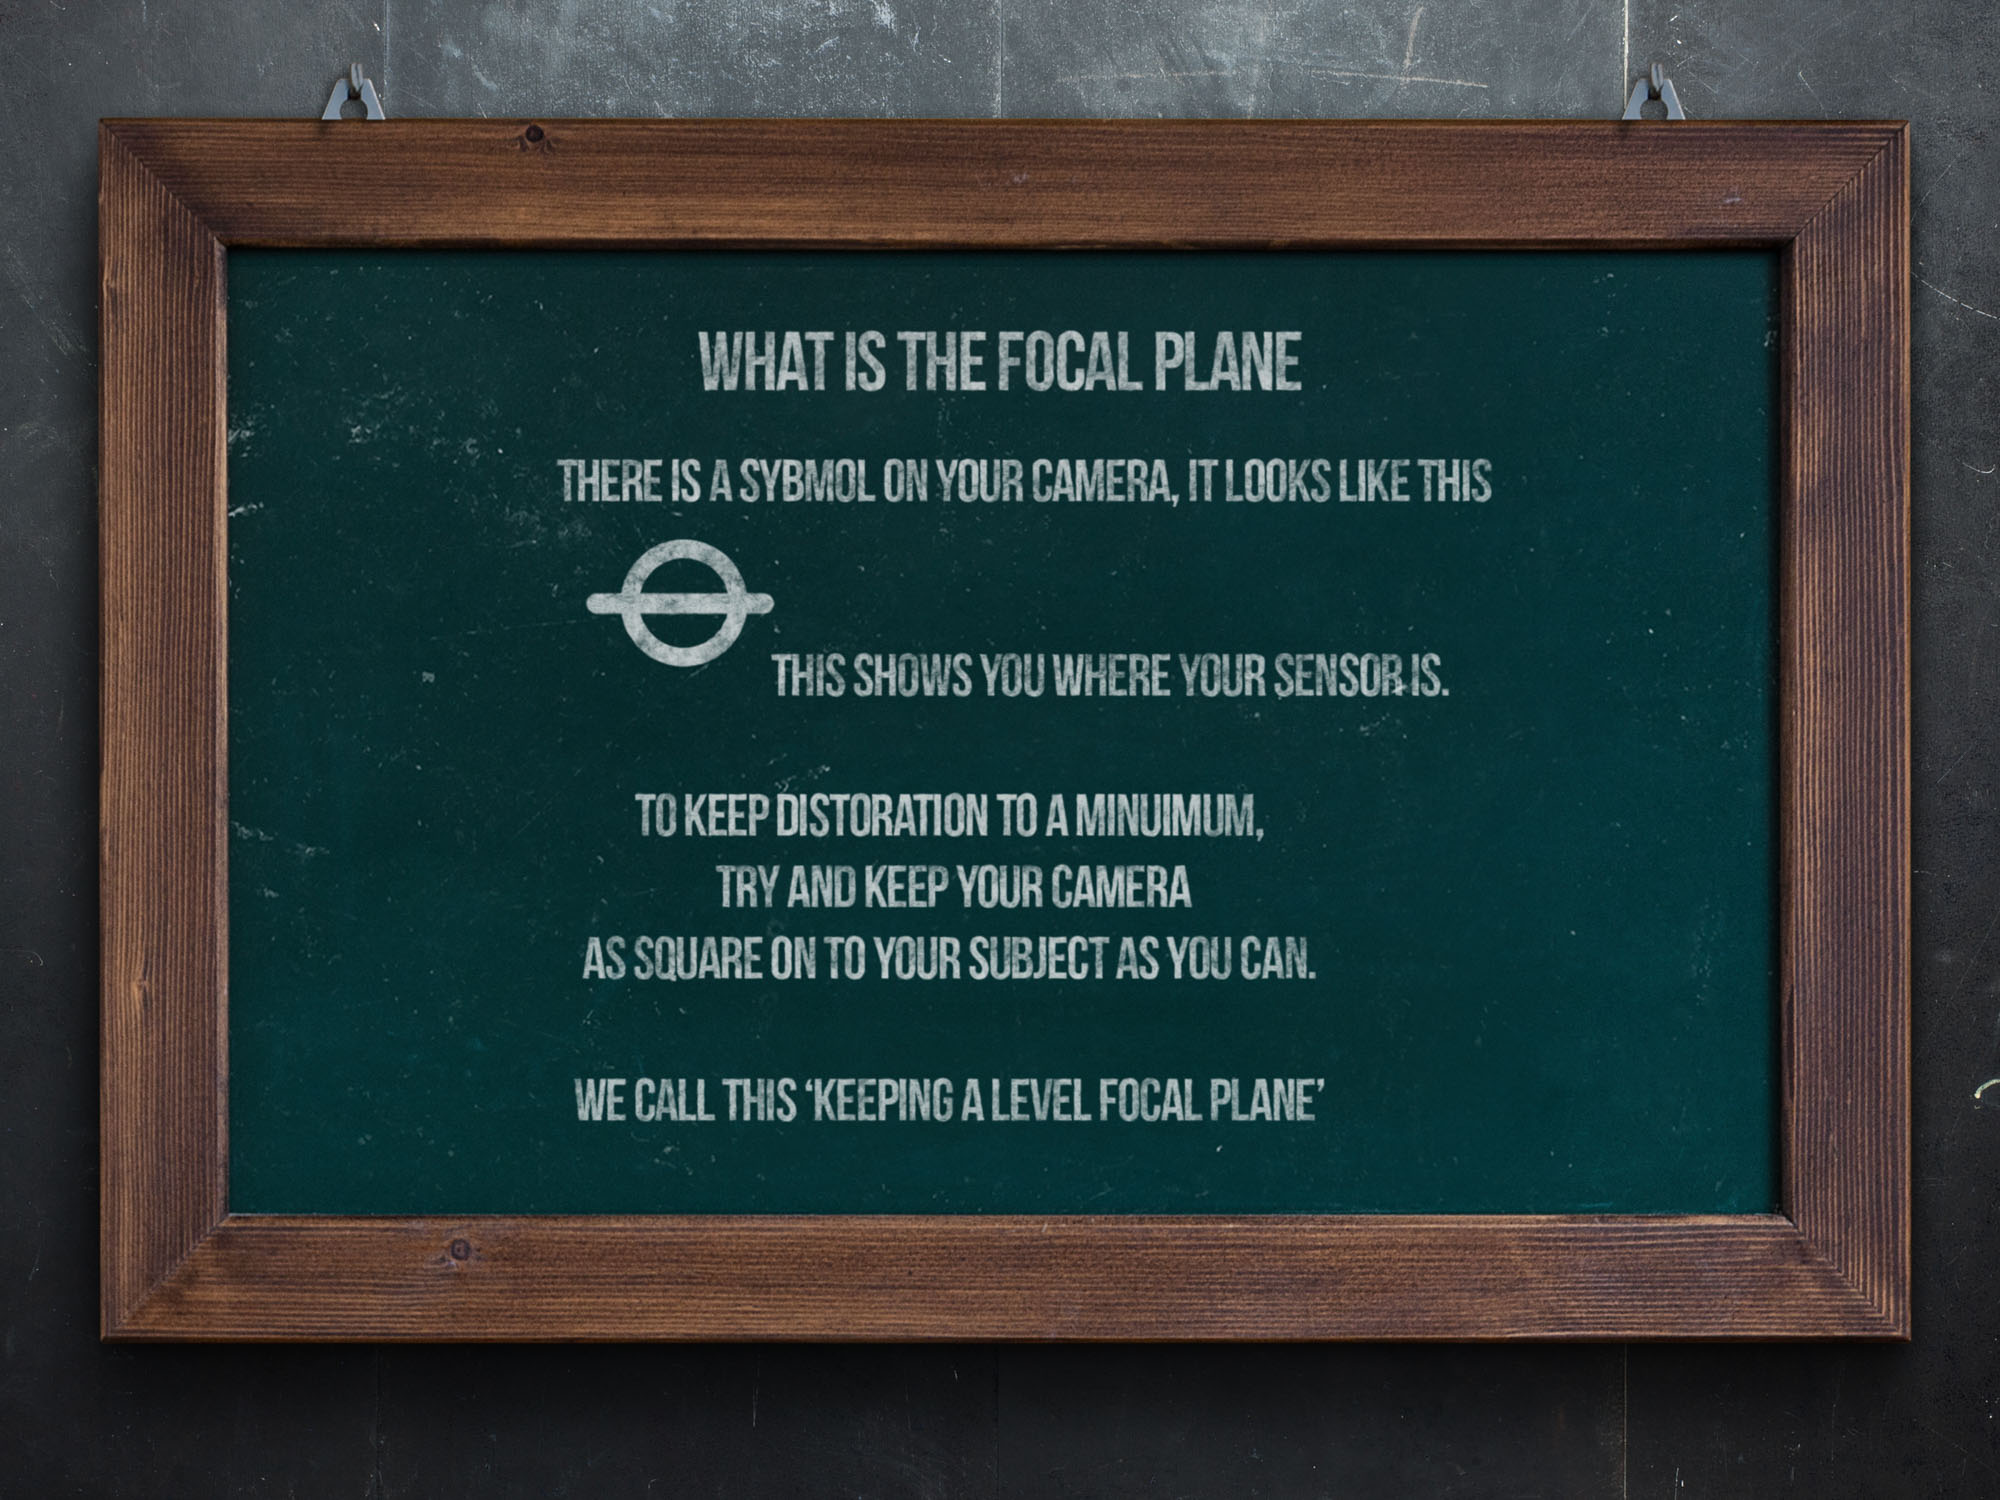
- Use the inbuilt level to keep your camera flat.
- Keep a good distance from your subject.
- Overcrop your image.
- Avoid shooting a steep angle up to your subject
These two images (below) were taken as we walked through an old Spanish town using the X-Pro 2. Both have been corrected to have good vertical lines.


How much should you correct?
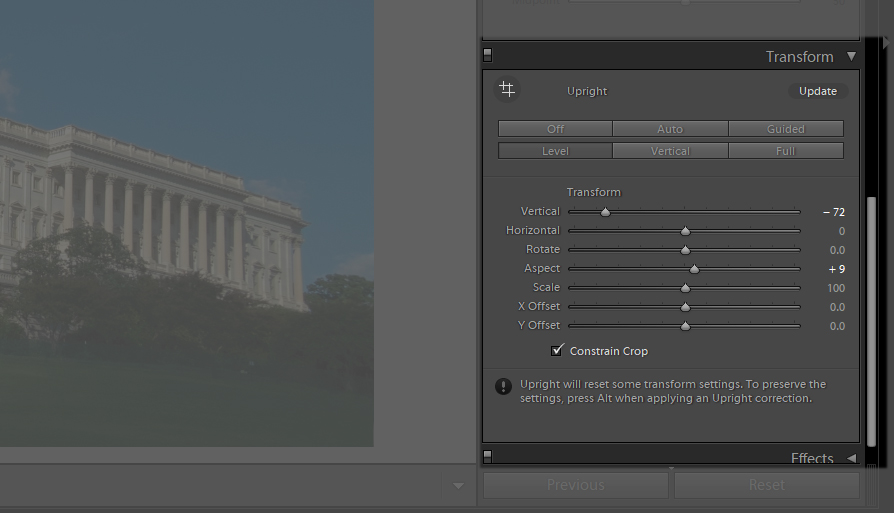
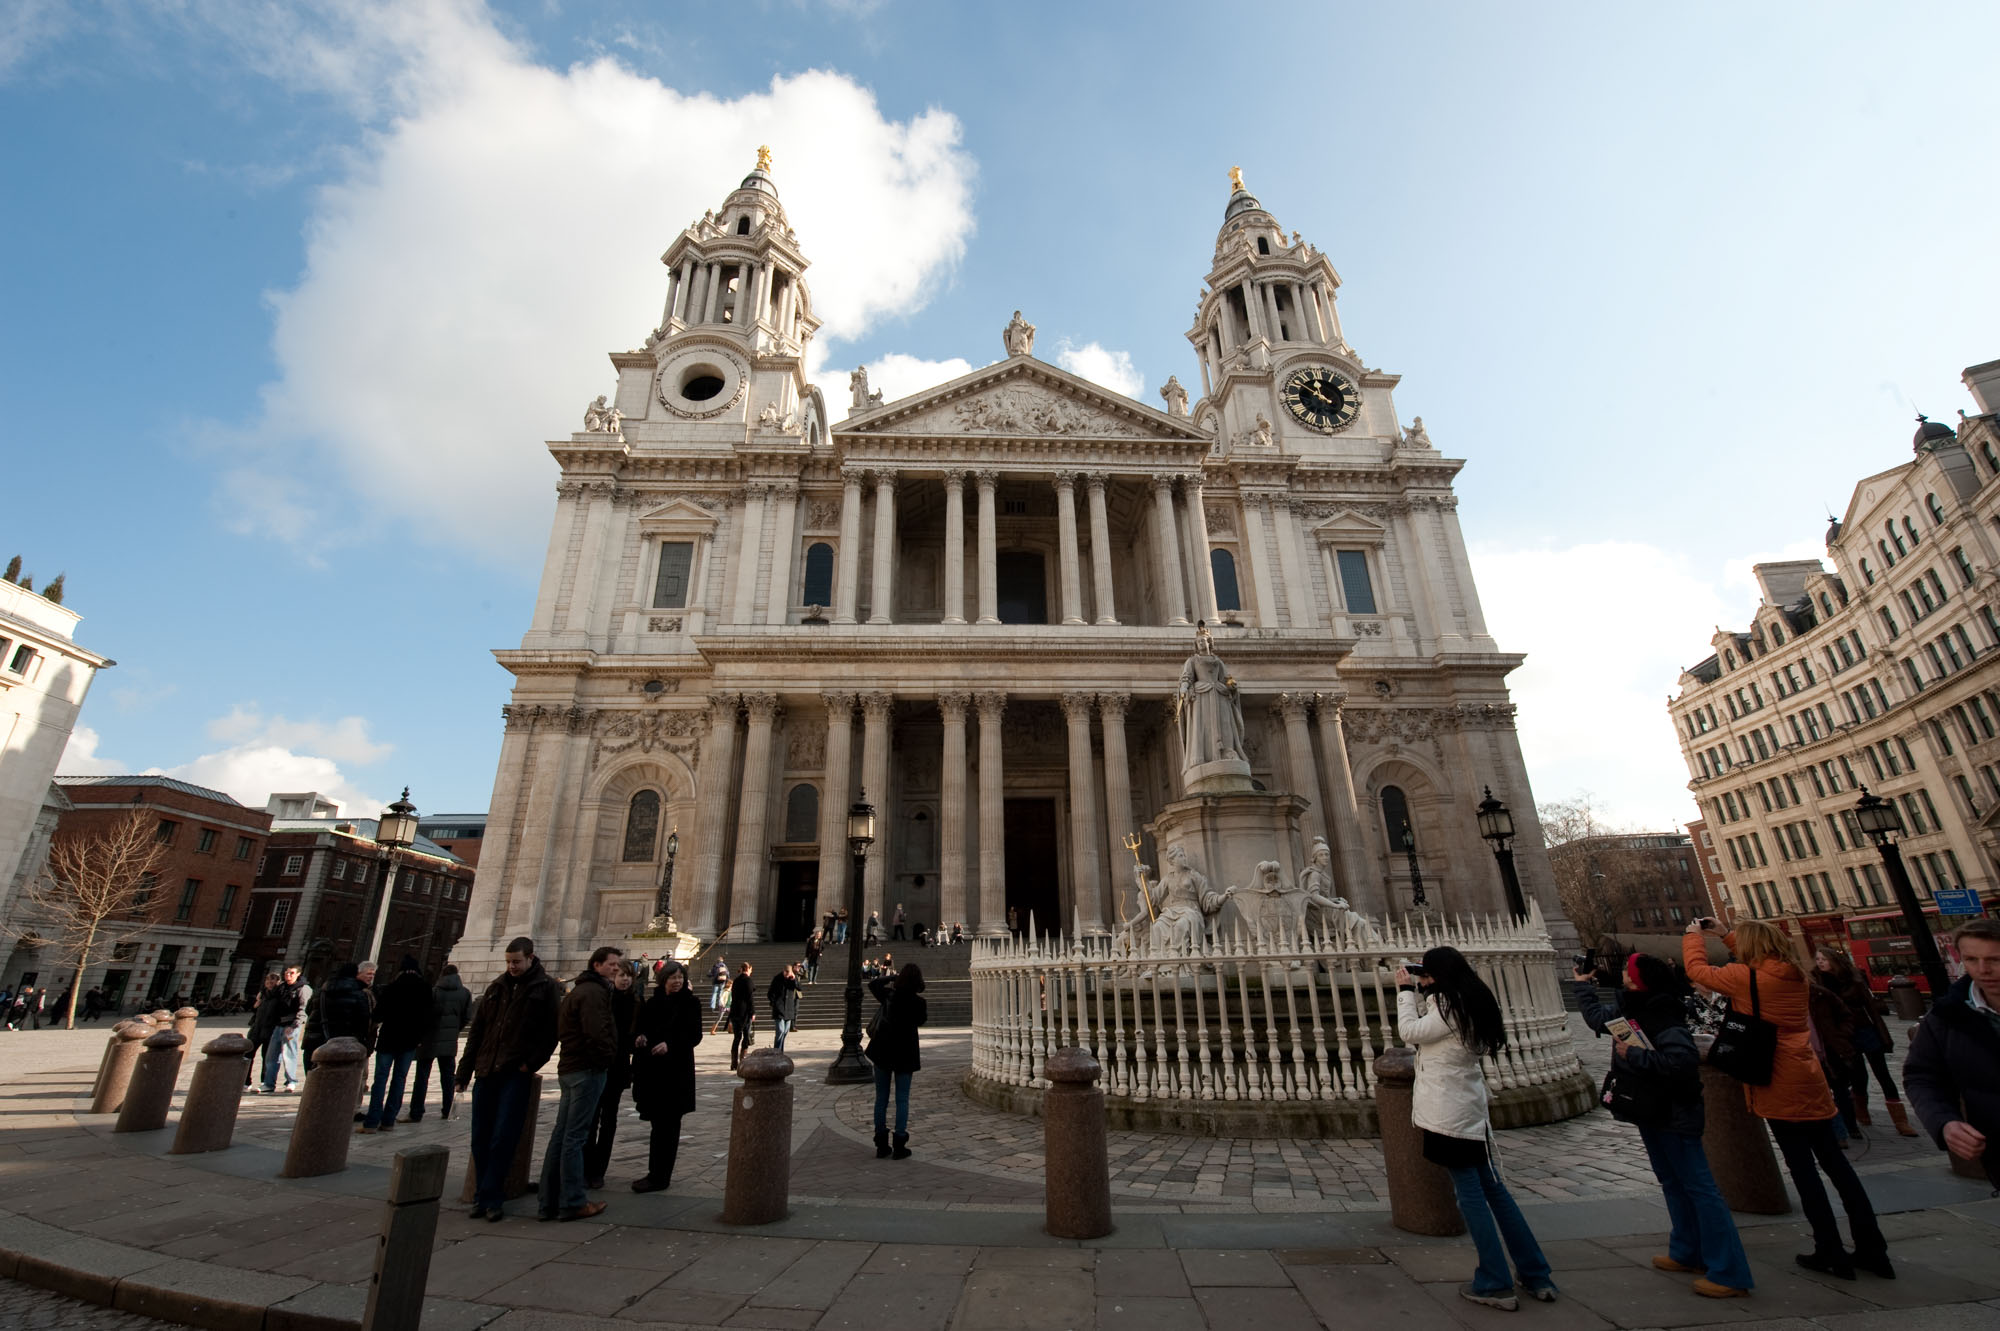
As mentioned at the start of the post, the amount you wish to alter or correct the image is totally up to you. As the image creator, it’s totally your call. Below is an image of the White House with very little correction. I used the Transform Tools to guide shape the horizontal and verticals on the building to ensure they were perfectly straight. The difference is marginal but if you’re printing large, the effects of the distortion will also be enlarged. I find it is good practice to make sure all of my images are corrected, no matter how small the adjustment is.

Lightroom has the answer
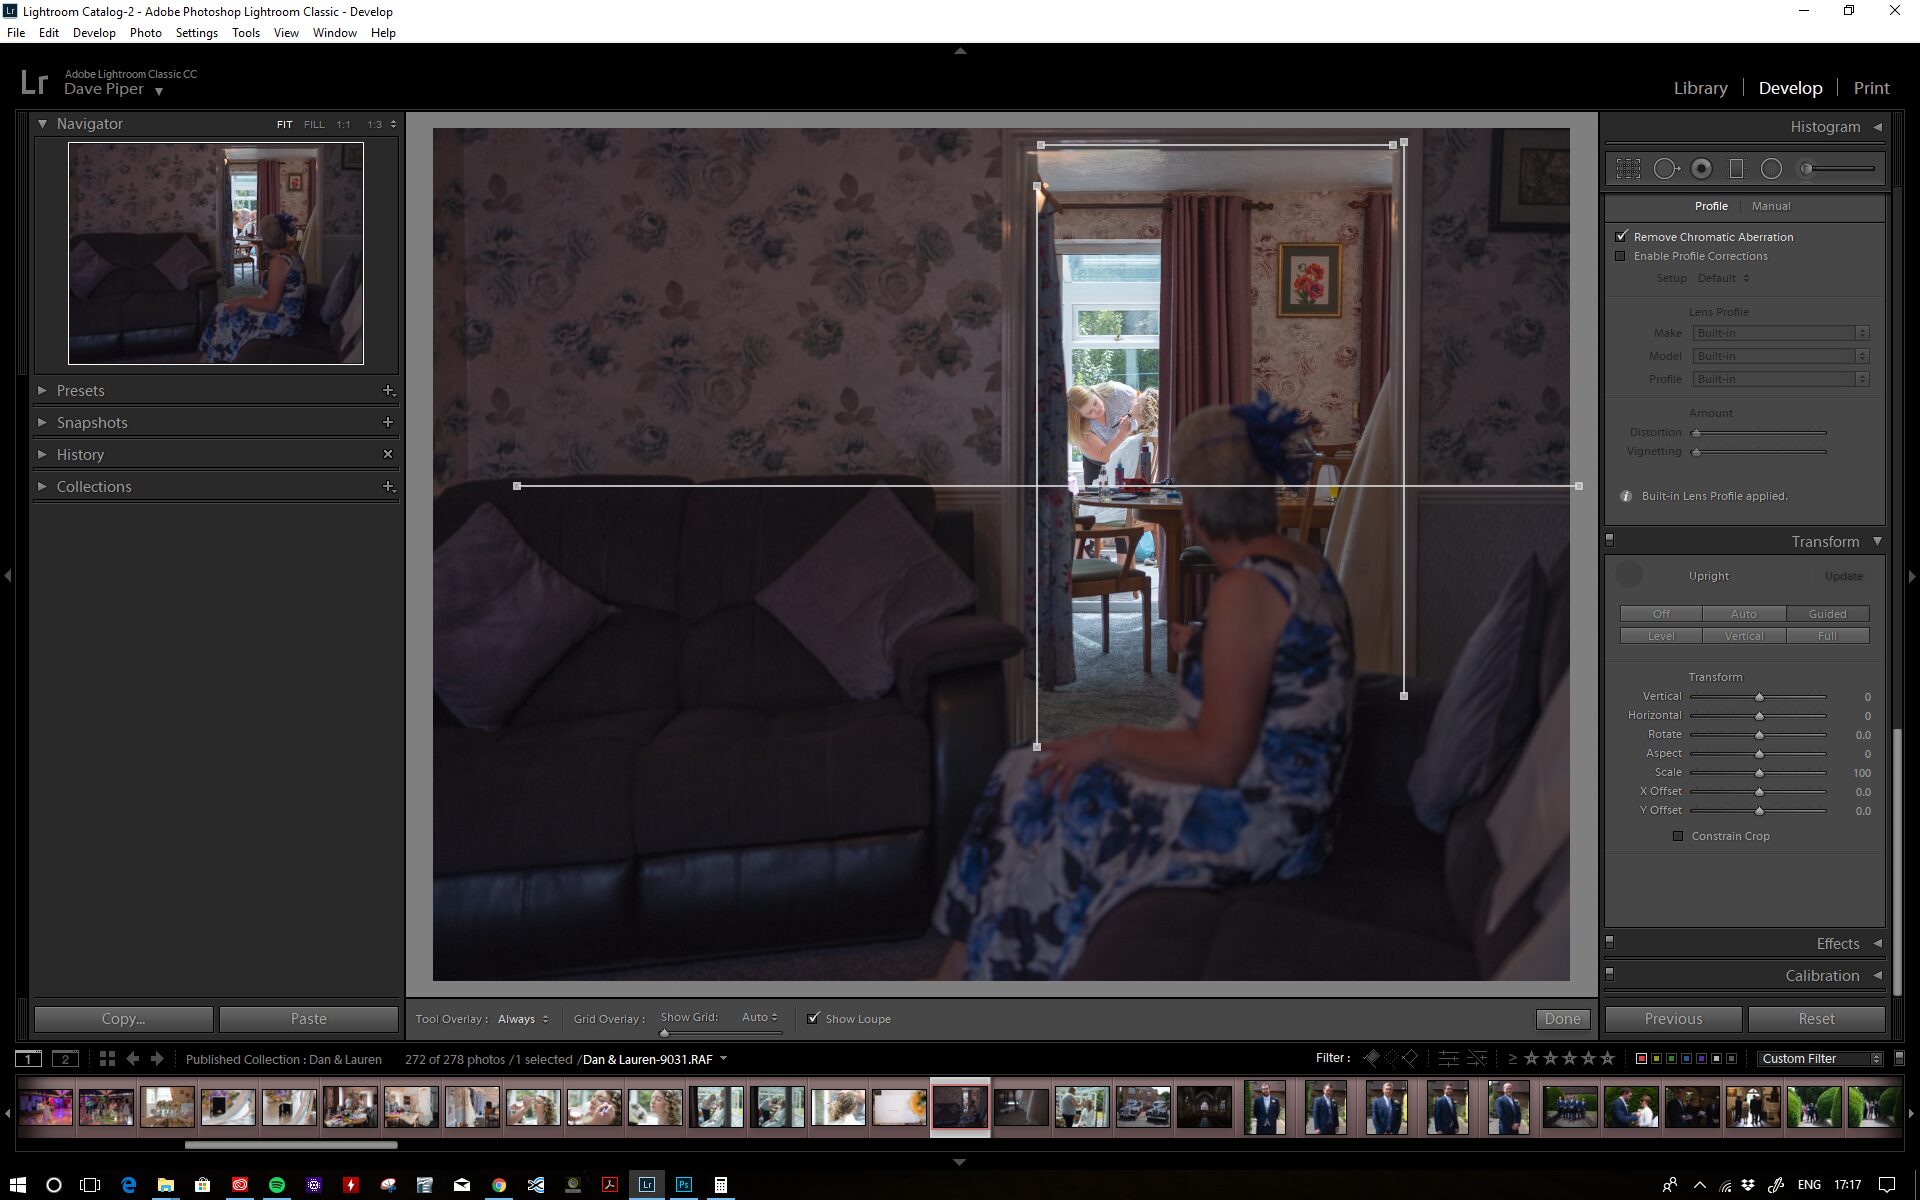
Lightroom has some of the best tools & the most ways to correct your lines. Once in the Develop mode, scroll down the options & tools and open up the TRANSFORM panel in the DEVELOP module. These are the tools that will let you correct any distortion in your images. It should be noted that any images with a large amount of distortion could end up heavily cropped during the process. These tools are not a ‘get out of jail’ card for bad photography practice, but there to aid you in the process of finishing your images.
In all of the above modes, we can select to constrain the crop of the image (normally left turned on using the checkbox under the tool options.
Auto Mode:
This adjusts balance levels, aspect ratio, and perspective corrections.
Full Auto mode on Lightroom is pretty hardcore at times and sometimes requires tight crops. Other times, like in the example below, it will do a great job in correcting an image. Sometimes the Auto Mode does get it wrong; if that happens, try the guided options.

Guided:
Manually draw up two or more lines to customize perspective corrections.
The enhance auto/ manual mode as I think of it is the most commonly used tools, in my workflow anyway. They give me all the control and power I need to pretty much sort anything except barrel distortion in an image. This tool is very simple to use.
Simply select the tool and mark out the lines that you wish to correct and by magic, Lightroom does the rest for you. Ensure the crop button is ticked to avoid any unwanted white areas when Lightroom re-shapes the image. Below you can see where I placed my lines and the finished image beneath that.

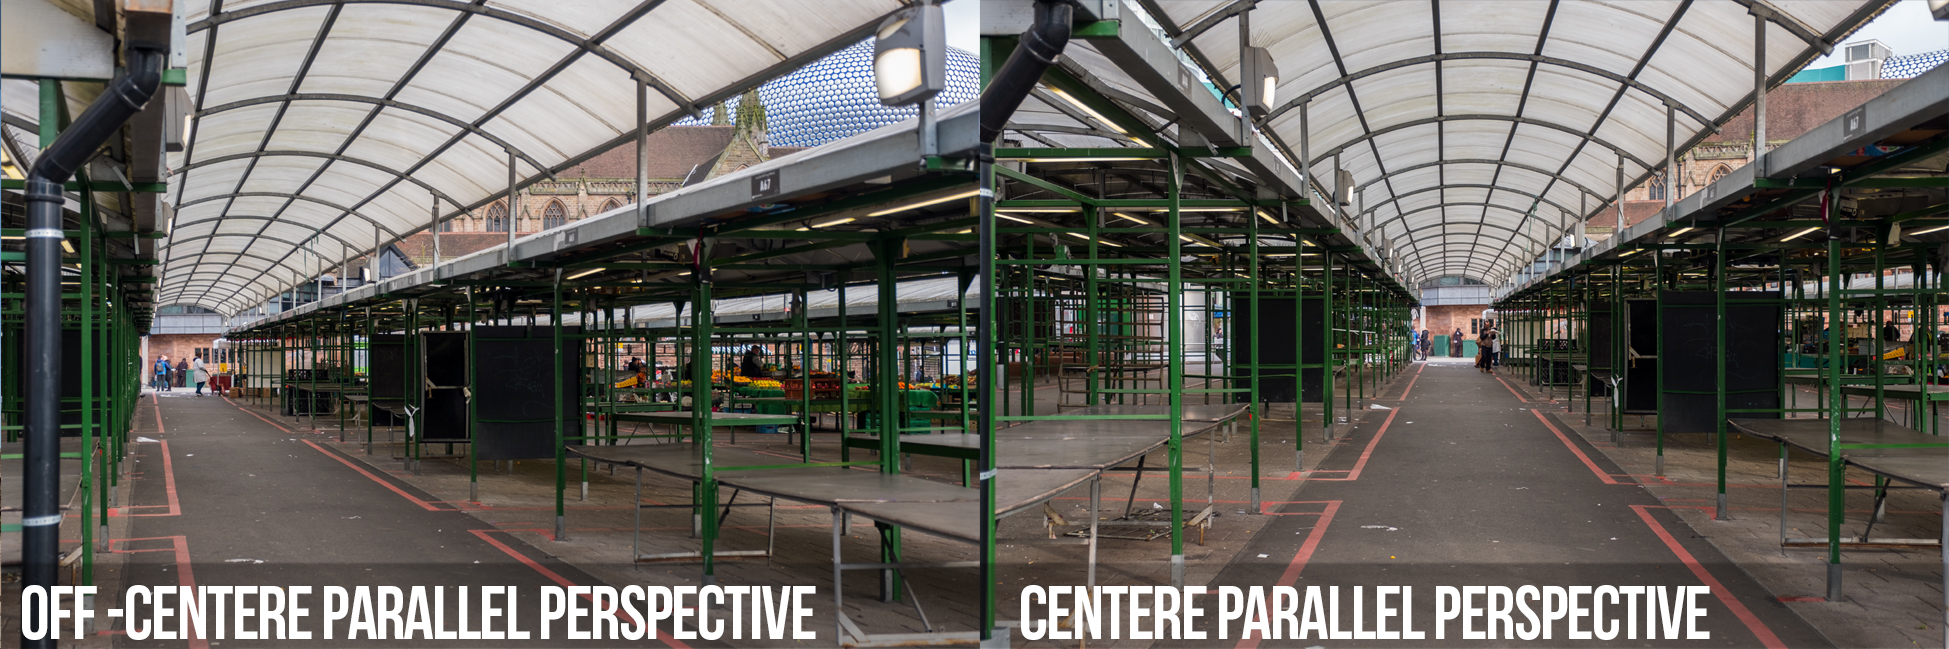
Below: Another example using the Guide tool. This time using the beams that support the roof and signs that hang down as a guide to straighten up the image. The image also had a slight crop to enhance the placement of the vanishing point using the rule of thirds concepts.

Level:
Enable level corrections only & Vertical: Enable level & vertical corrections
These two options pretty much say what they are right up front. If you’re looking to just correct the level or the verticals – these two simple options are good to go for. Normally I would never go for the level only corrections as I would do this using the crop tool anyway, but the vertical correction is super effective pretty much all the time – so effective that I would love to see these sorts of settings in camera applied to RAW files in the EXIF.
If you have images with people in, the Level & Vertical are pretty good auto options to go for, as they are not going to really distort any people in the image.

FULL AUTO:
Enable full control over horizontal, vertical and perspective corrections including aspect ratio.
This is the full auto mode that you can use to correct some of the more complex problems. Be warned though: results may vary on the nature of the images. As you can see from the image directly below, there are no horizontal lines to straighten out (most commonly found in double point perspectives or infinite-point perspectives), so the program makes the best guess as to what should be level. In this case there would be nothing, which has resulted in a heavy crop and a badly distorted image. To properly correct this image, I would have either used the guided or vertical only tools if using Lightroom.

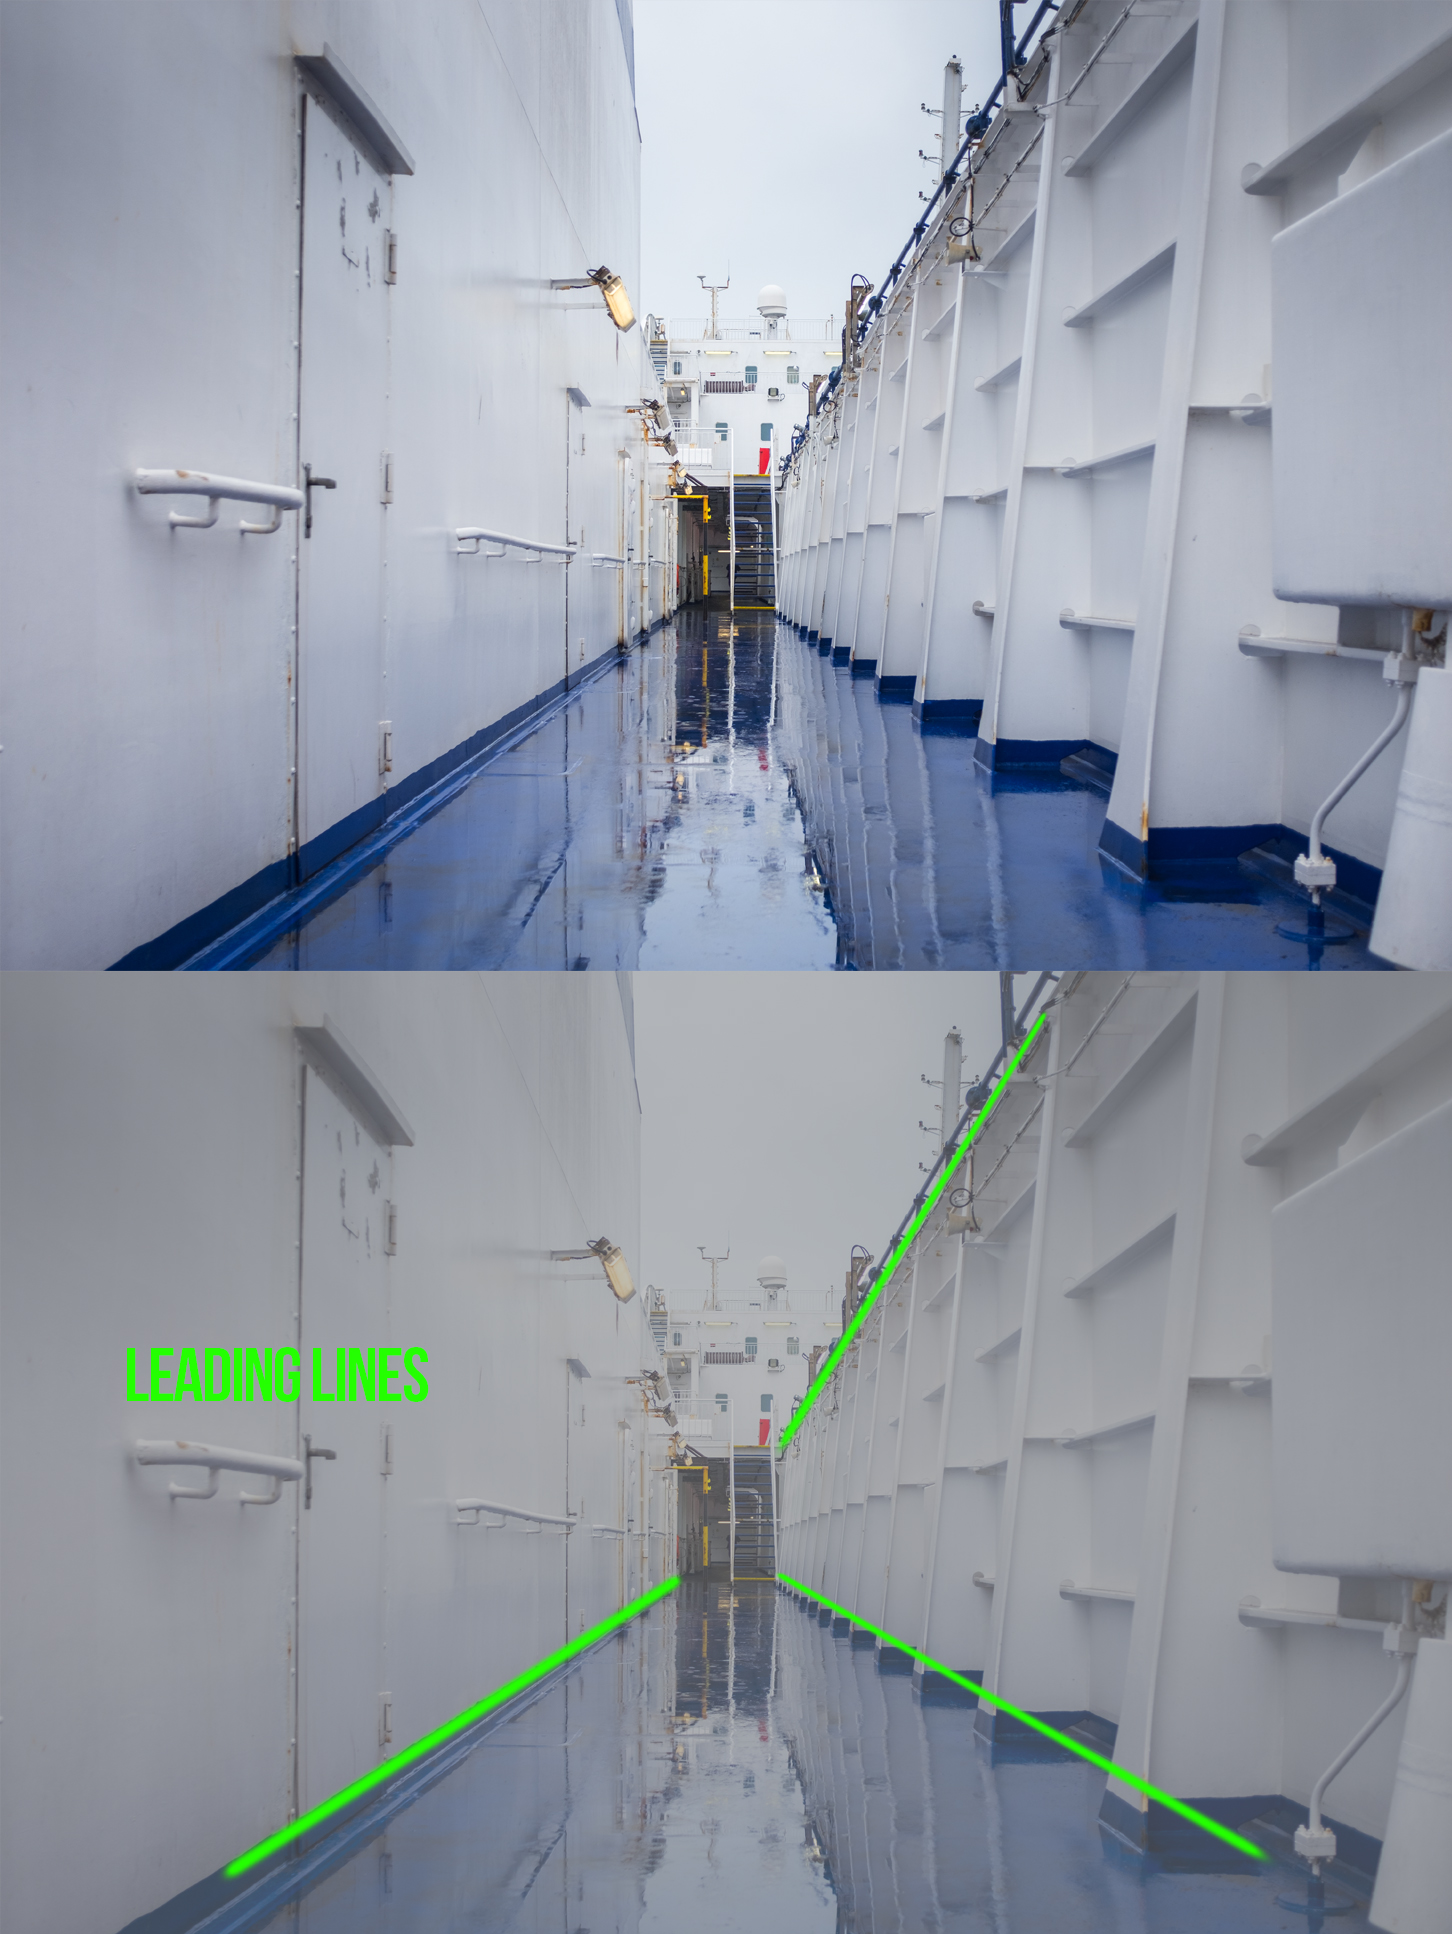
Sometimes the AUTO mode is awesome and really can help an image along. Best results normally come when an image has leading lines and clear lines which can be shaped into vertical and horizontal lines.


Rectilinear vs Curvilinear Lenses:
Currently, there are no curvilinear lenses in the XF or GF lens range. Most people would recognize a Curvilinear lens as a ‘fish eye’ lens and produce an exaggerated distortion of object and lines. Check out this link for more about ‘fish eye’ or curvilinear lenses.
Vanishing Points:
For more reading – have a look into vanishing points. Understanding how they work and how you effectively control them can be a great step forward in creating exciting compositions.
The most commonly-used one in photography would be the single point perspective projection (as shown below) & the four-point perspective, also called infinite-point perspective. It should be also worth remembering that many photographs have no vanishing points at all, in portraits for example.

Try making an image with
- no vanishing points
- 1 vanishing point
- 2 vanishing points
- infinite-point perspective
Some interesting terms if you want to get really technical:
- A vanishing point located beneath our feet is known as ‘the nadir’.
- A vanishing point located above our feet is known as ‘the zenith’.
- Any vanishing point lines that converge inside the frame of the image would be known as Lines of Convergence.
Super Corrected Images:
Some images, normally taken with wide-angle lenses at a closer-than-ideal distance to the subject will have massive amounts of distortion. Some people like this look, which is fine, but be aware that it will require a big crop to try and fix, and will not always look good afterwards. The example below shows how this looks using the Auto Correction. Notice how much has to be warped to get the building near, but not totally corrected. The one aspect that might of helped is if I had taken the image square-on to the building, but giving more distance would have been the best way to get this image looking better.

If you really liked this article and want to know more, check out Piet Van den Eynde’s Academy video on a similar topic.