

Flash photography need not be as complex and technical as many make it. Great results can be obtained with some simple techniques and a bit of practice. In today’s article, we’re going to use a simple one-light setup and a few minutes of post production to make a dramatic image.
For those of you who are interested, this technique is covered in my eBook “Flash & Fujifilm” which is available right here on Fujilove. In Case Study 9 in the book, we go over this technique with a couple of additional images. For now, though, let’s jump in and set the scene for ourselves here.
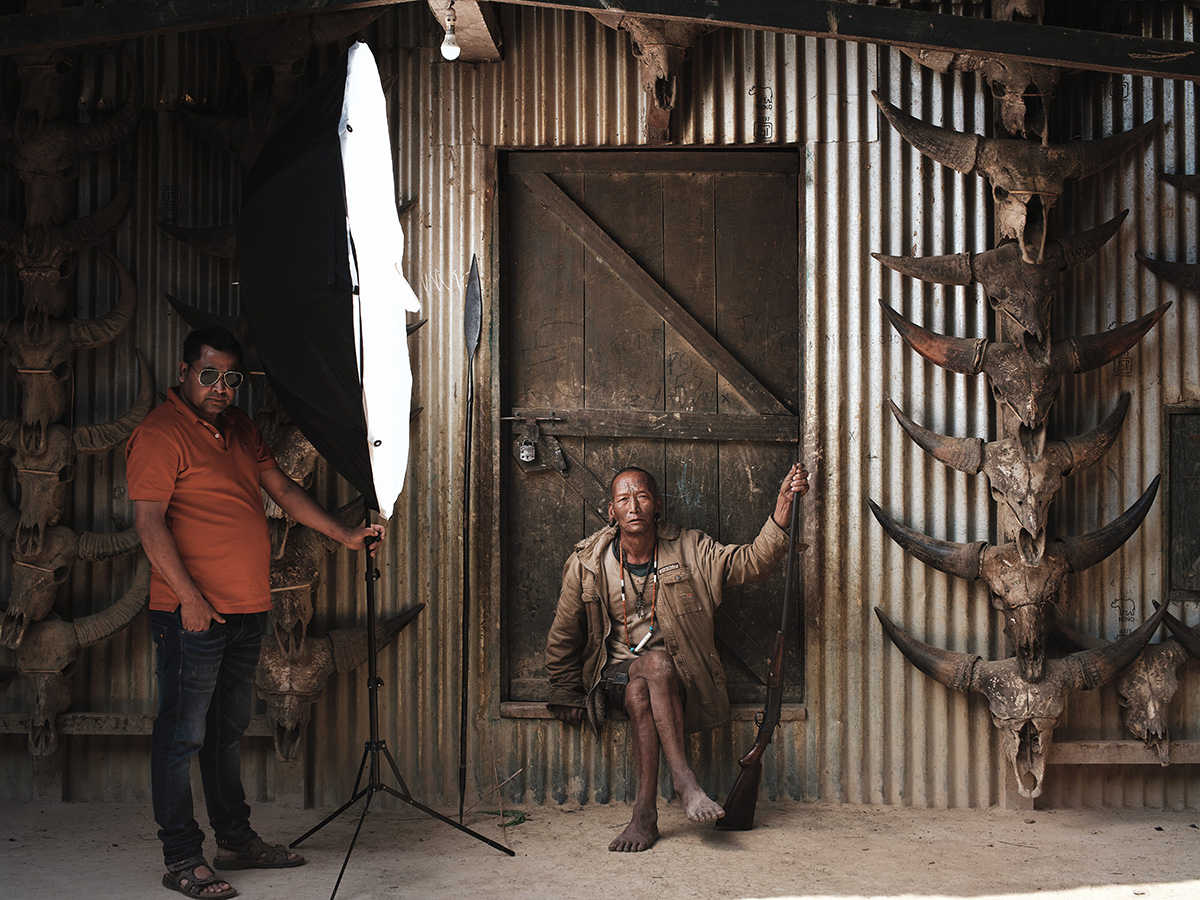
This portrait is of a Wancho hunter from Arunachal Pradesh in India. It was made on one of my journeys for my Tattoos of Asia project. With this journey, as with many of them, I was traveling to very remote areas and had to limit my equipment. Often, this means I have to make compromises when lighting and be creative with my techniques. This is one such example of that.
The scene you see here is quite wide. In order to have my flash illuminating just the man and keep it out of my composition, I would have needed a very high power flash (as we know, flashes become effectively less bright as we move them further away) and a softbox with a grid (to keep the light directed exactly where I wanted it).
These, however, would have presented their own problems. Powerful lights are large and heavy (I was traveling with one backpack). On top of that, moving a light further away changes the quality of light hitting the subject. So, I chose to keep the flash in my composition and remove it later in post production. So, let’s go through the process of making this as easy as possible.
Composition
The first step with an image like this is to set up a composition. As we’ll see soon, we don’t want the camera to move at all between frames, so this was done on a tripod. I locked my GFX 50R and Mitakon 65mm f/1.4 into the composition I wanted and focused the lens on my subject.
If you’re using an autofocus lens, it’s important here to switch into manual mode. If the lens focuses slightly differently between shots, there is a chance your composition will change due to focus breathing or that your background and foreground may change because of depth of field. So, make sure you flick the focus selector to M and use either manual focus or your AF-L button to set focus on the subject.
Setting up the Ambient Exposure
My next step was to set up the Ambient Exposure. That is, I set the camera up for the existing light in the scene (in this case, the blazing midday sun). In this case, my exposure was 1/125 and f/8 at ISO 100. Note that everything on the camera is set manually here. Nothing is left to chance because I need the two images I’ll make to match up as perfectly as possible.
The sync speed of the GFX is 1/125 and since I wasn’t worried about shallow depth of field, I didn’t need to use high-speed sync. My choice of aperture was simply to darken the image slightly below a “correct” exposure for the ambient light so that I could add flash to the image. It’s important when you’re working with Godox flashes to set your Fujifilm camera to REAR or FRONT sync in the FLASH FUNCTION menu when you’re not using HIGH-SPEED SYNC. This keeps the flashes firing at their normal speed (Godox flashes drop into a slow recycle mode after a certain number of HSS triggers).
Setting up the Flash
My flash in this case is a Godox Witstro AD200 and it is being pushed through a Photek Softlighter II 63”. I brought the flash in as close as I could to get a nice soft light on my subject and get the most power from my flash. Since I was working in full daylight, the flash would already need to be at 1/2 or 1/1 power, and I wouldn’t be able to push it any further. So, as you can see, the flash ended up well inside my composition.
Making the Images
Now that everything was set up and on full manual mode, I could begin working with my subject. I started this process by making approximately 10 different frames of him. As my ambient exposure, flash exposure, and focus were all set manually, there were no changes to the images between frames here except my subject’s expression.
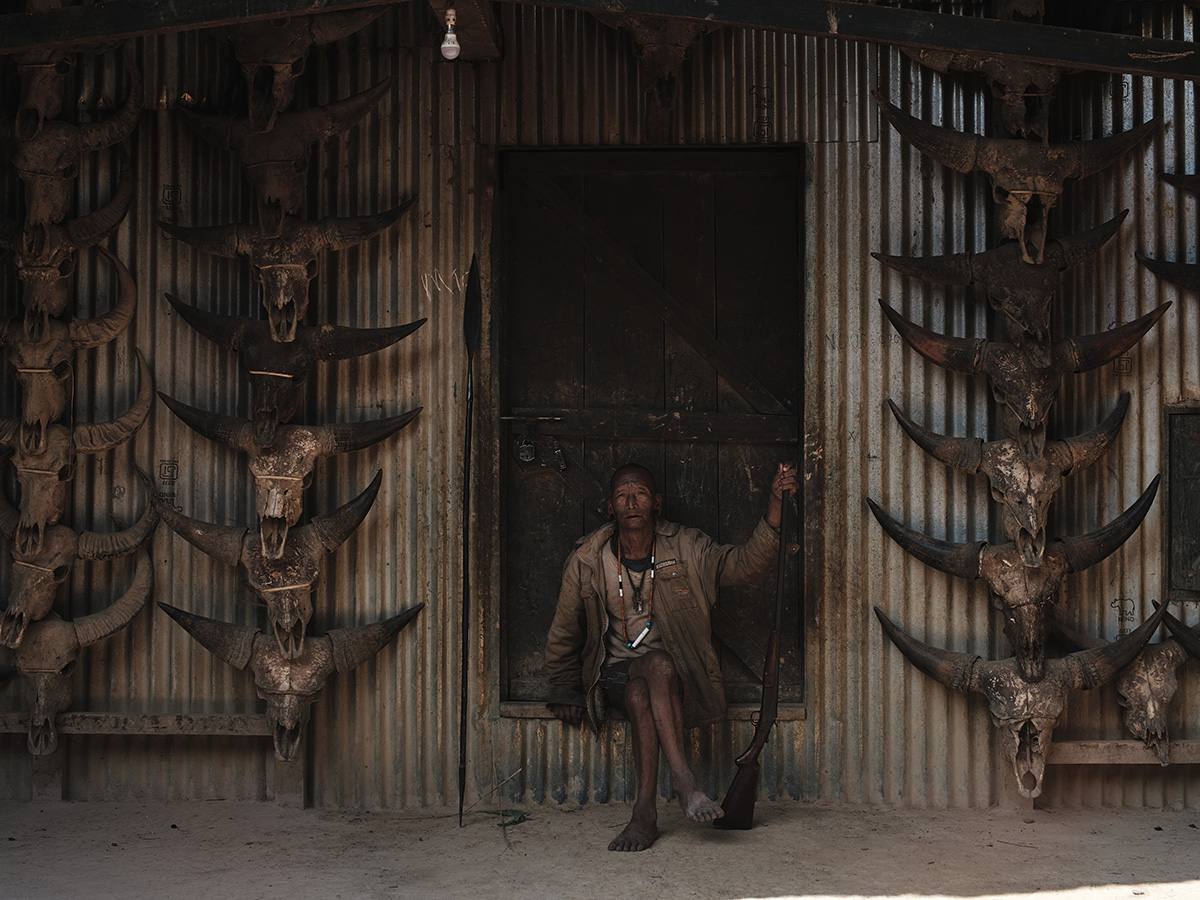
Once I was happy with the image I had made, I asked my assistant to step out of the composition and turned off my flash. Now I could make my plate. A plate is a photograph of the background without any equipment in it. As you can see, the area where my flash was has a lot of detail in it. There is no way I could have used the clone tool to remove my flash in this case. Since this plate is just made with the ambient light and my camera was in full manual mode, I could use this plate to erase the flash very easily. You can see that process in the video below.
I hope this has been helpful for you! As I mentioned above, this technique, as well as many others, are covered in Flash & Fujifilm. Until next time, happy shooting!


