When Fujifilm recently announced a kaizen (改善 continuous improvement) firmware update for the entire GFX line-up, the only new feature I was interested in was the addition of Classic Neg film simulation. Since the release of the X-Pro3 back in the fall of 2019, Classic Neg has replaced Classic Chrome as my favourite profile.
I currently have the GFX 50S with the GF 45-100mm f/4 R LM OIS WR for review, so the timing of this update couldn’t have been better. I immediately installed the new firmware in the GFX 50S (version 4.0) and made sure Classic Neg was properly loaded into the camera. I already had images sitting in the camera so I wondered if I could still apply the new film profile to the older images, or if I could only apply it to new images.
I swiftly jumped into in-camera RAW conversion and, lo and behold, there was Classic Neg as a film profile option! I gleefully began applying Classic Neg in-camera to my older images to see how they would look. Not every image worked out since Classic Neg acts similar to real film -it’s pretty finicky- but I was still thrilled to be able to apply this new film simulation to my older images.
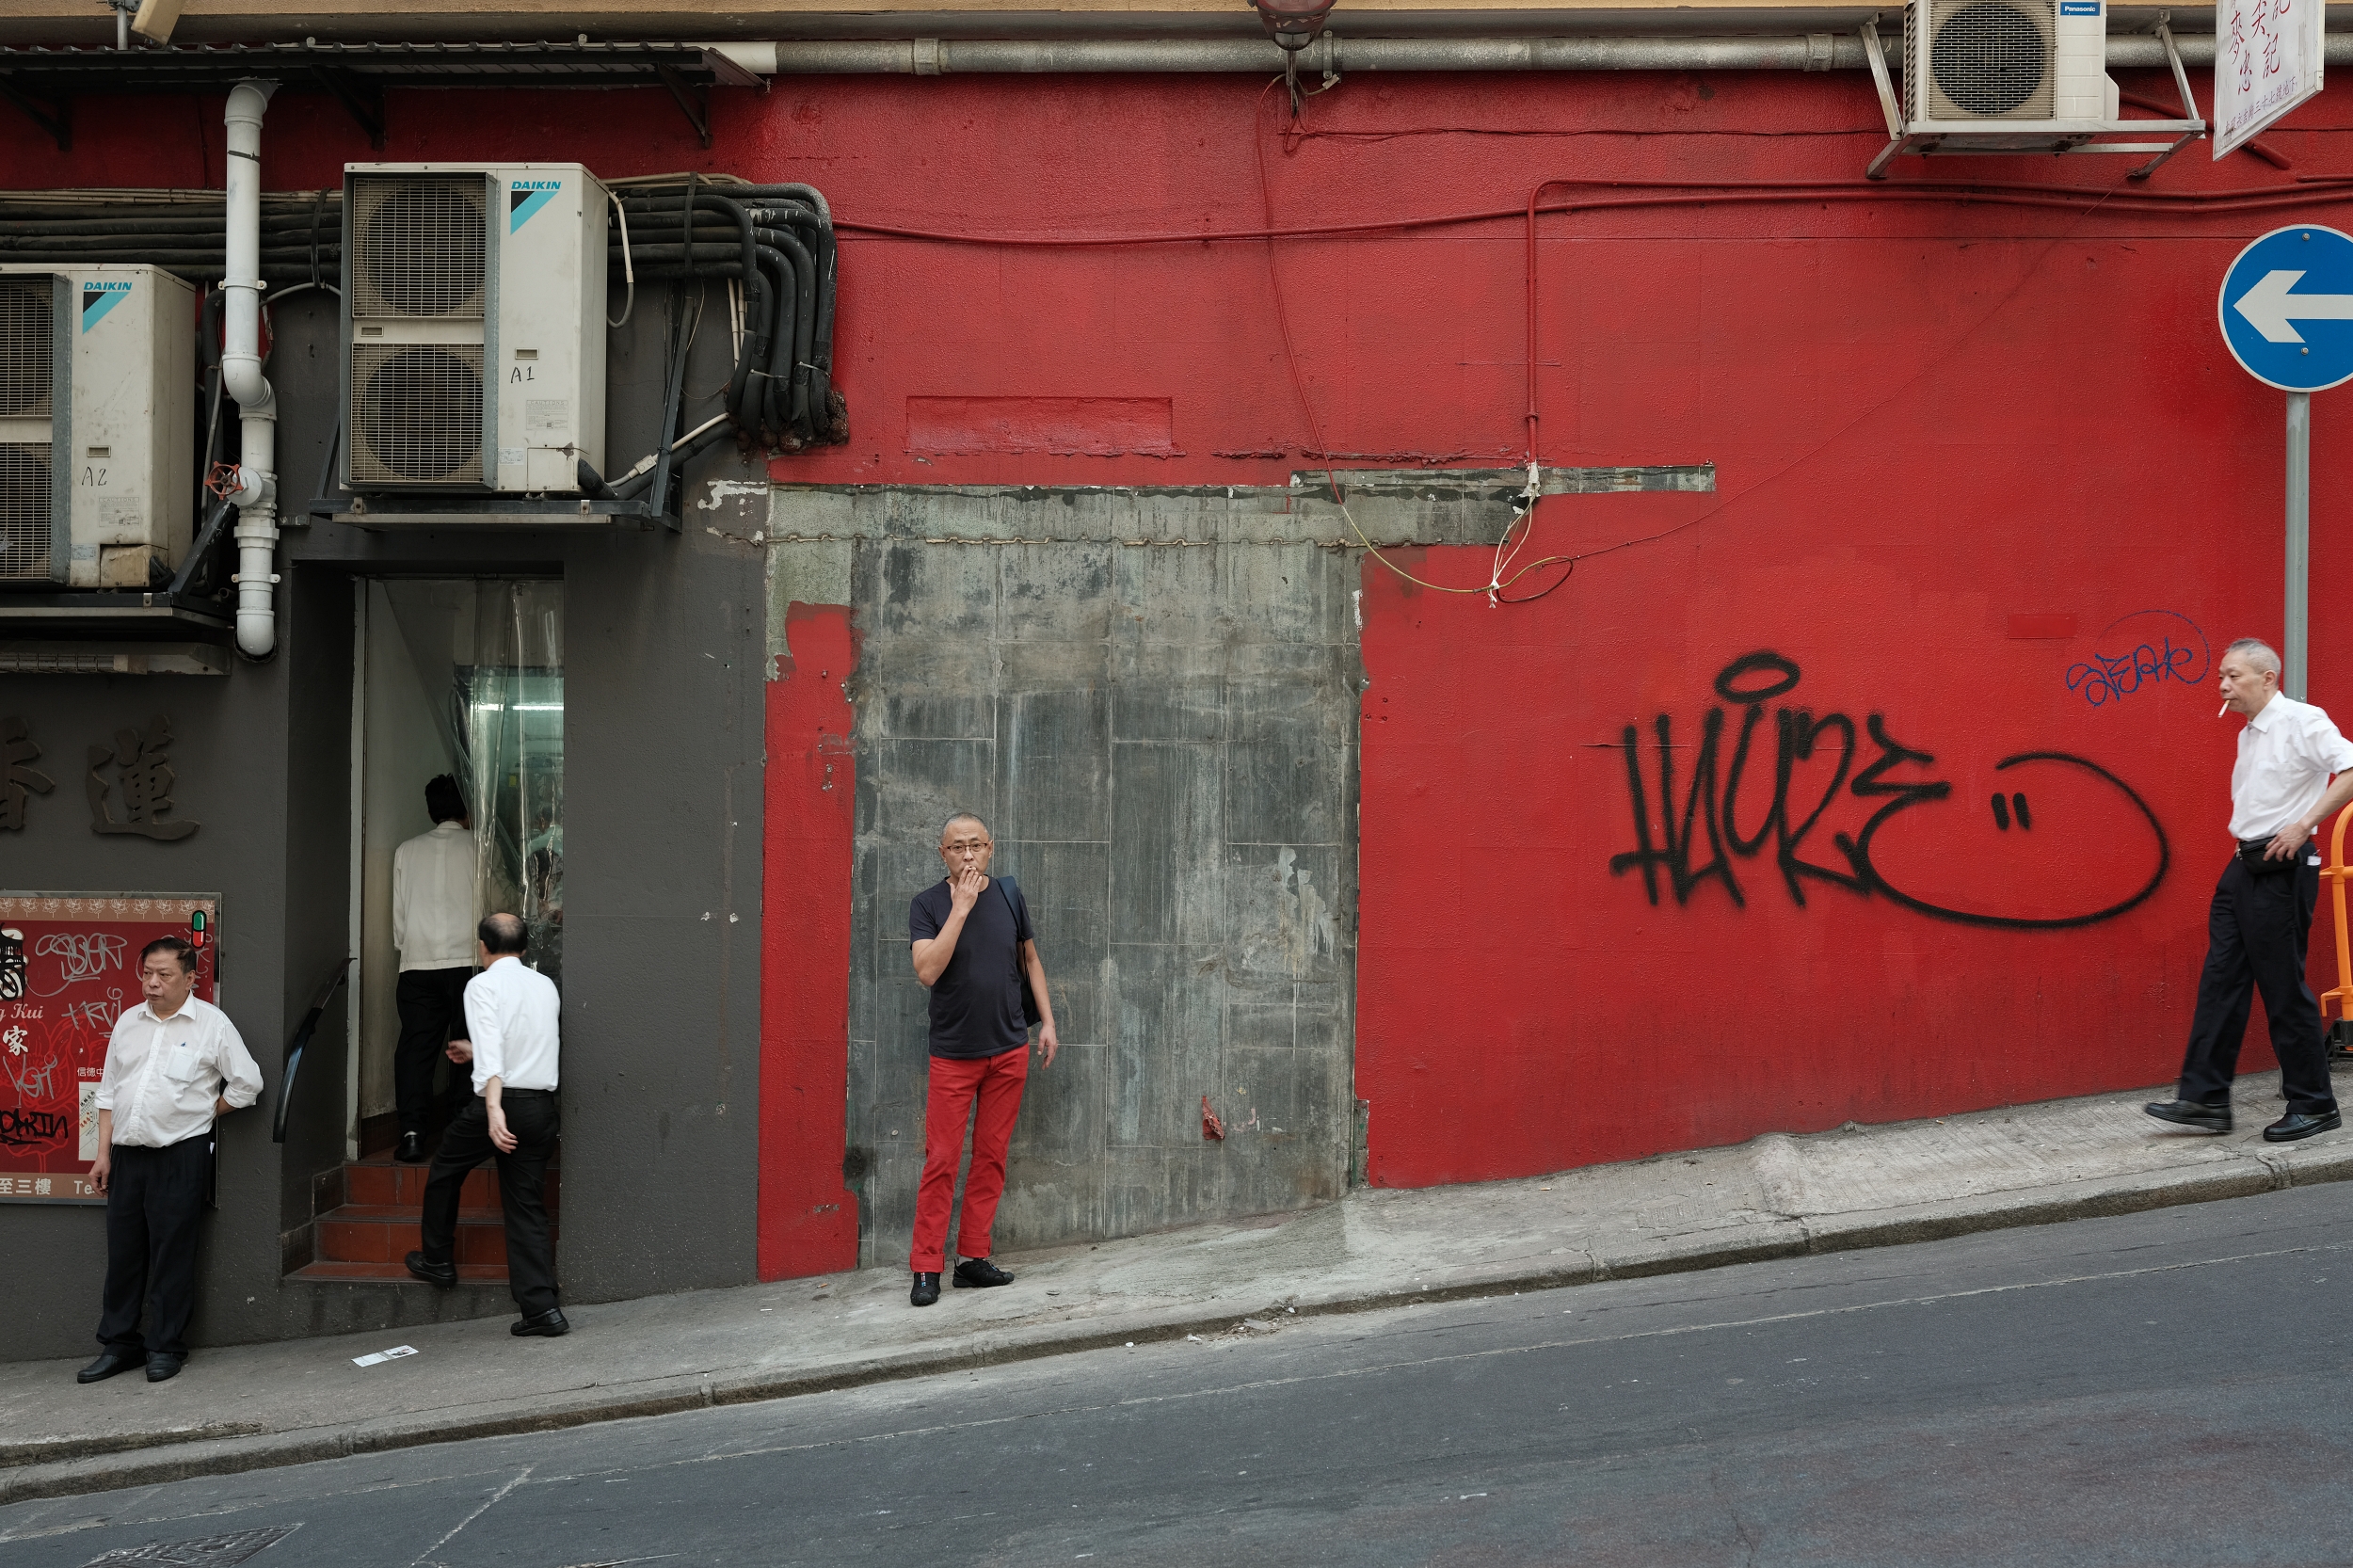
Classic Neg. Film Profile applied from an image captured with the GFX 50S + GF 32-64mm f/4 from February 2017
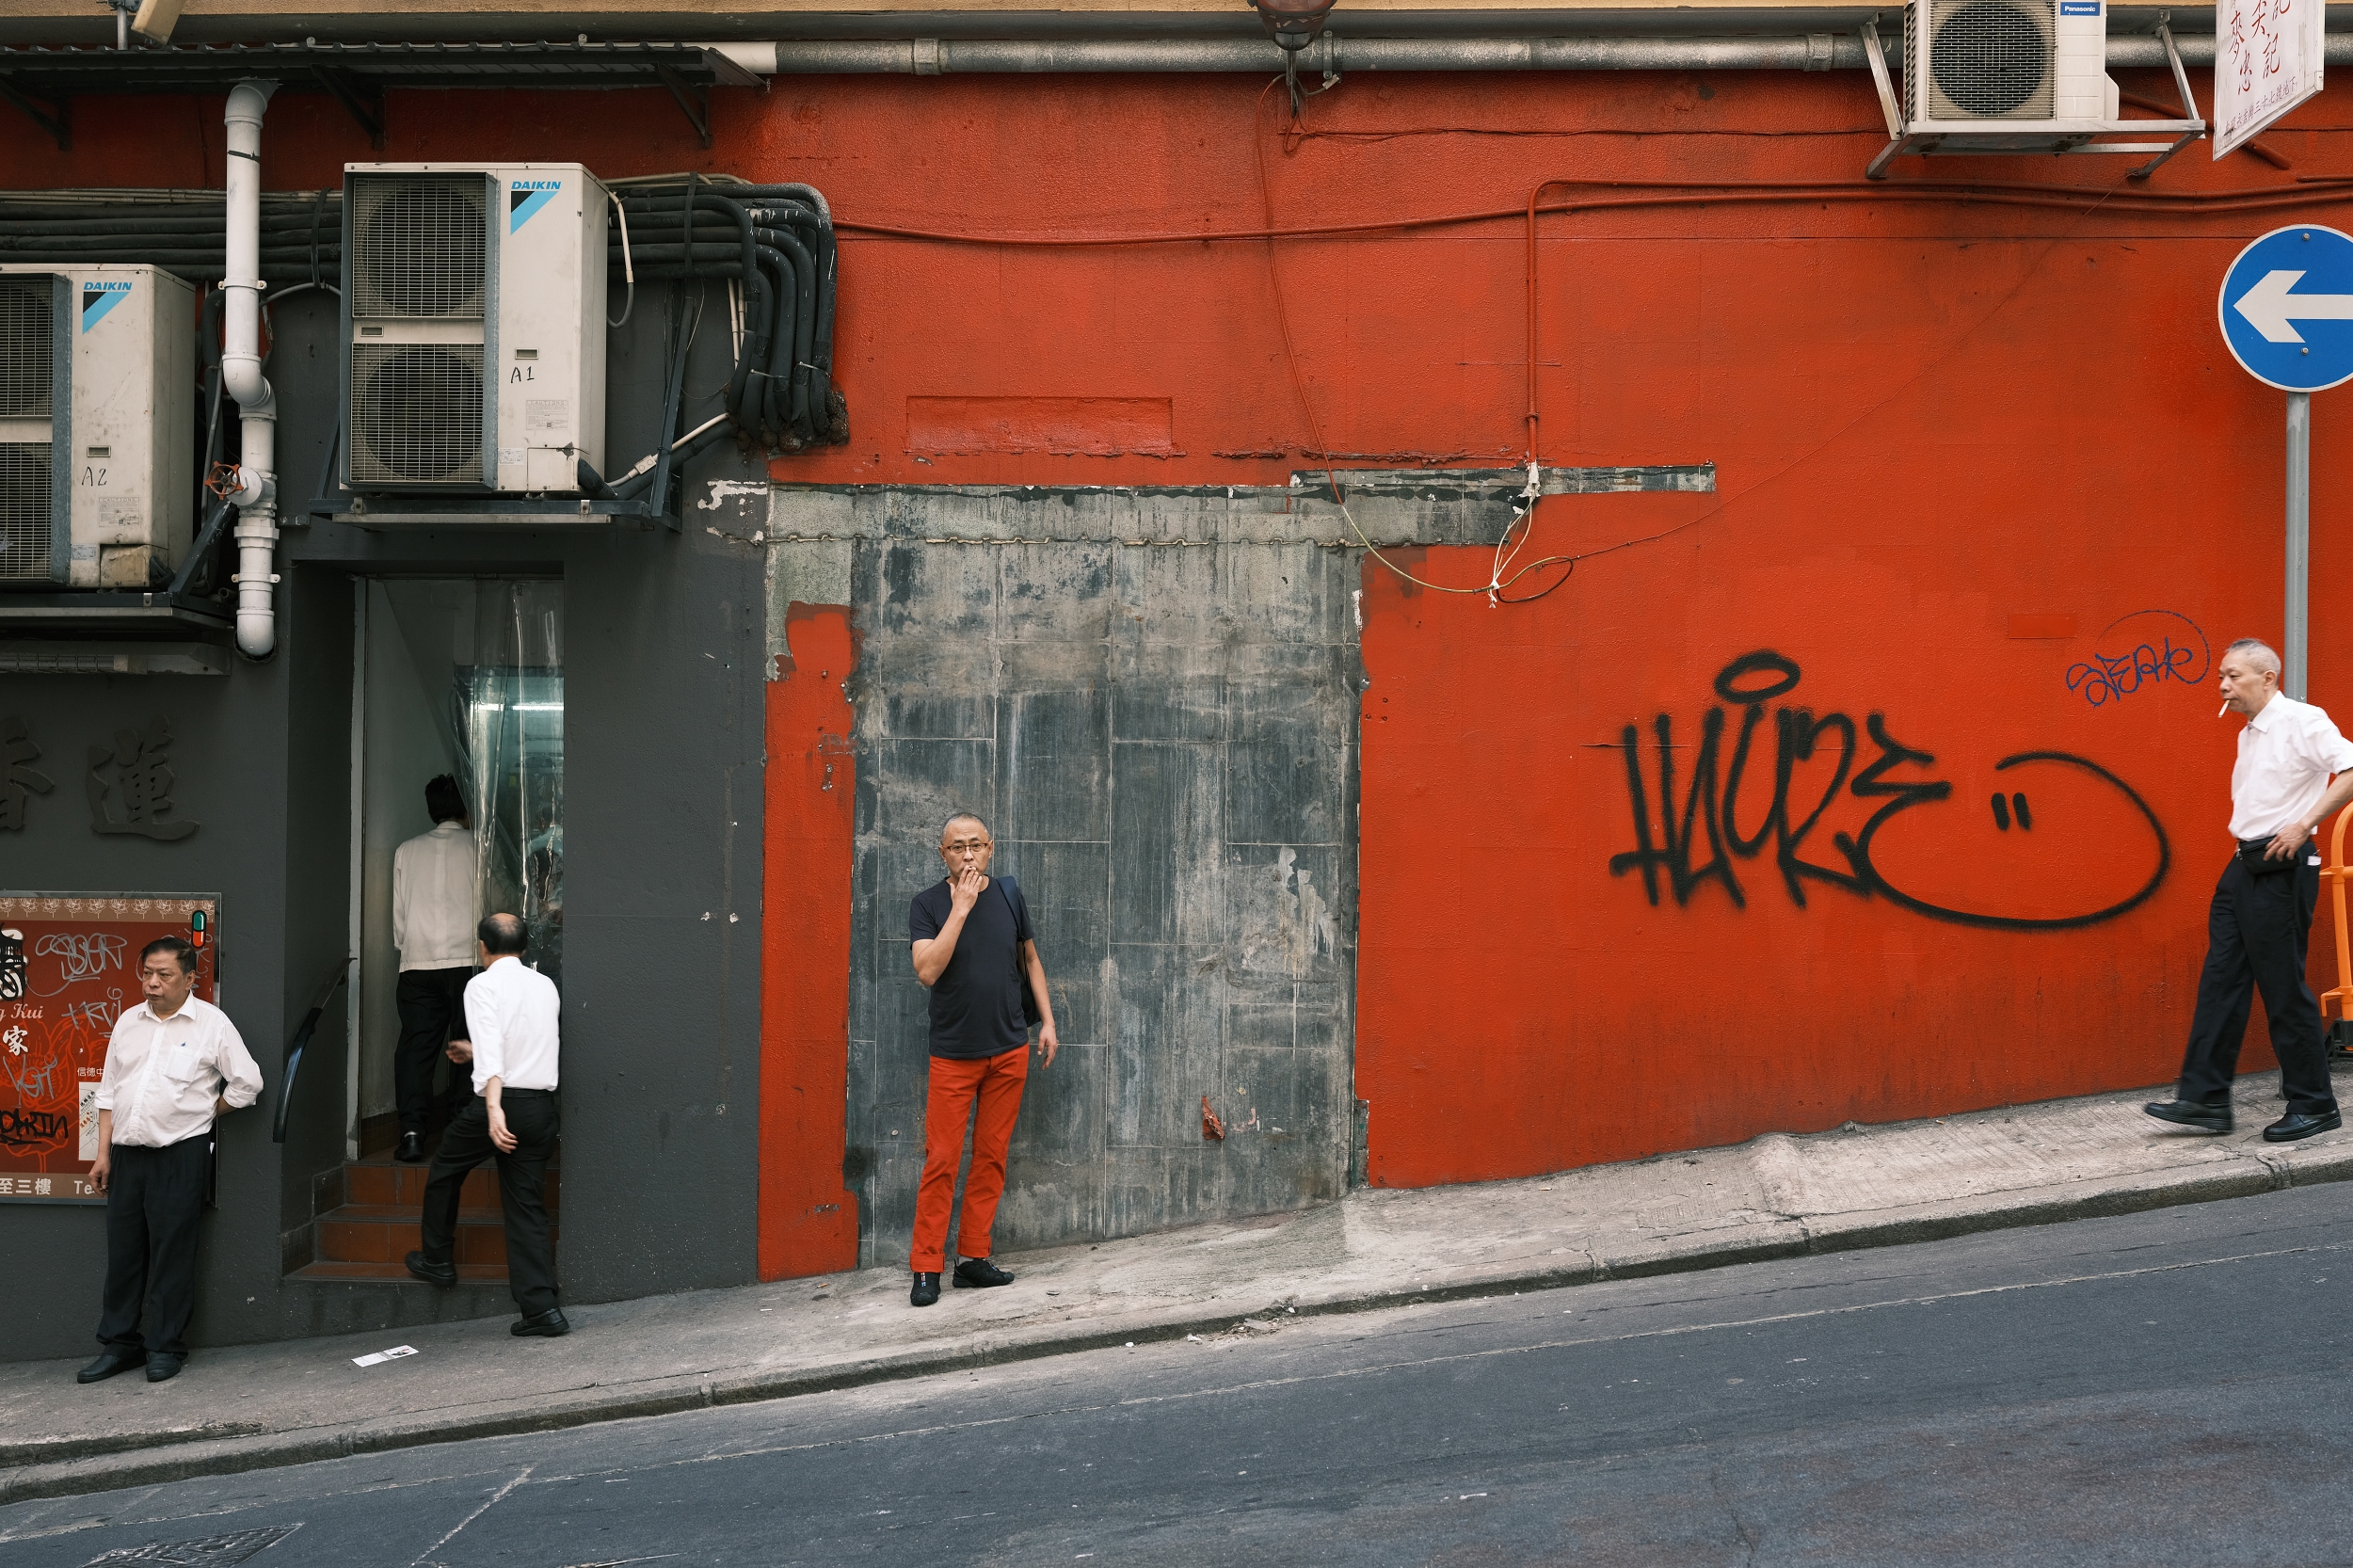
Classic Chrome Film Profile as I originally intended back in February 21st, 2017
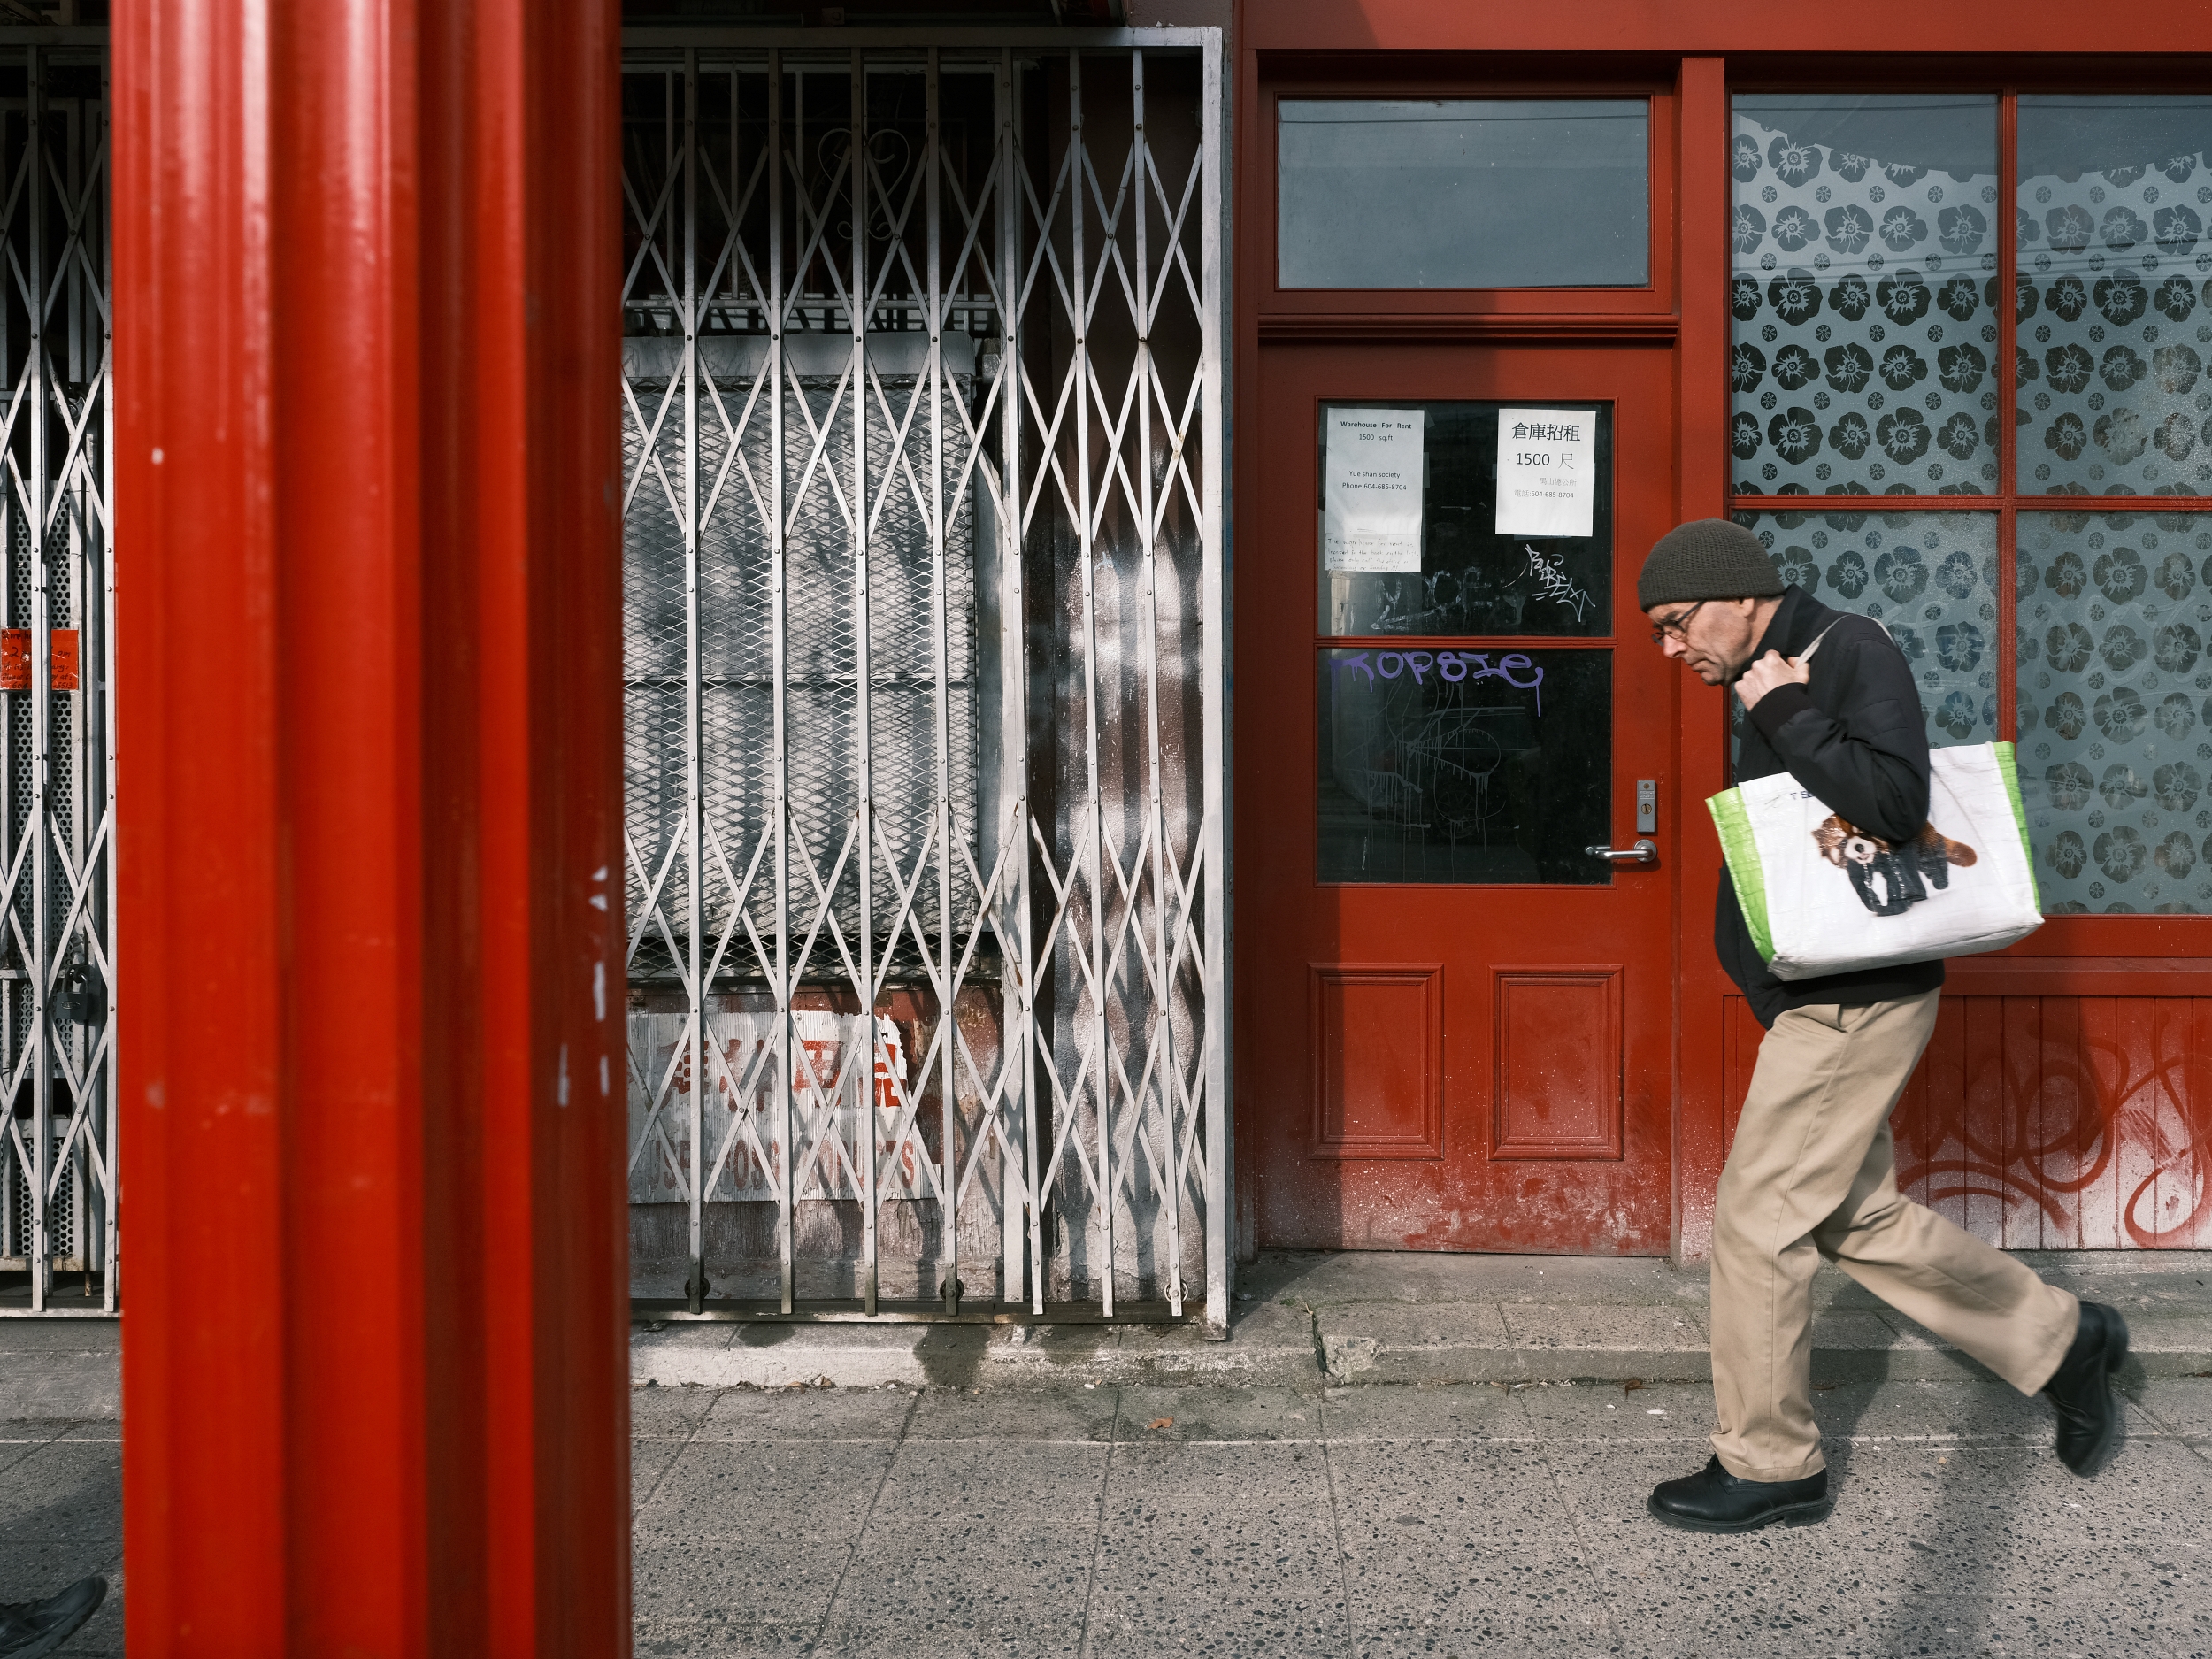
Then I wondered if I could go as far back as my original RAW files when I first tested the GFX 50S in February of 2017. Could I grab those original files, re-upload to my SD card and create Classic Neg images via in-camera RAW conversion? As you can see from this article’s feature image, the answer is again yes. The feature image was captured on Feb 21, 2017 2:23:26pm using the GFX 50S + GF 32-64mm f/4 R WR originally with Classic Chrome, but I applied Classic Neg film profile to this three year old RAW file. How cool is that? Knowing this new film profile was backwards compatible, I spent time going through my back catalogue of GFX 50S images and hand picked the ones I thought would work with Classic Neg.

Classic Neg Profile. Captured on Feb 20th, 2017 with the GFX 50S + GF 32-64mm f/4.

Classic Chrome Profile as originally captured on Feb 20th, 2017
Another option: Did Fujifilm already update X RAW STUDIO to take advantage of this new firmware update? Yes they did! For those of you who shoot Fujifilm RAW and have yet to download this app, I highly recommend you give it a try. This is a very powerful tool. Basically this software uses your camera’s X Processor to process the RAW images on your desktop computer by connecting it to your camera via USB. Once the software recognizes the camera and the RAW images are from the same camera model, you can process the RAW files on your desktop with the same processing power and options as the in-camera RAW conversion feature on your camera. I spent 4-5 hours in the software with the GFX 50S attached, and the battery dropped from 100% to 60%. Not bad.
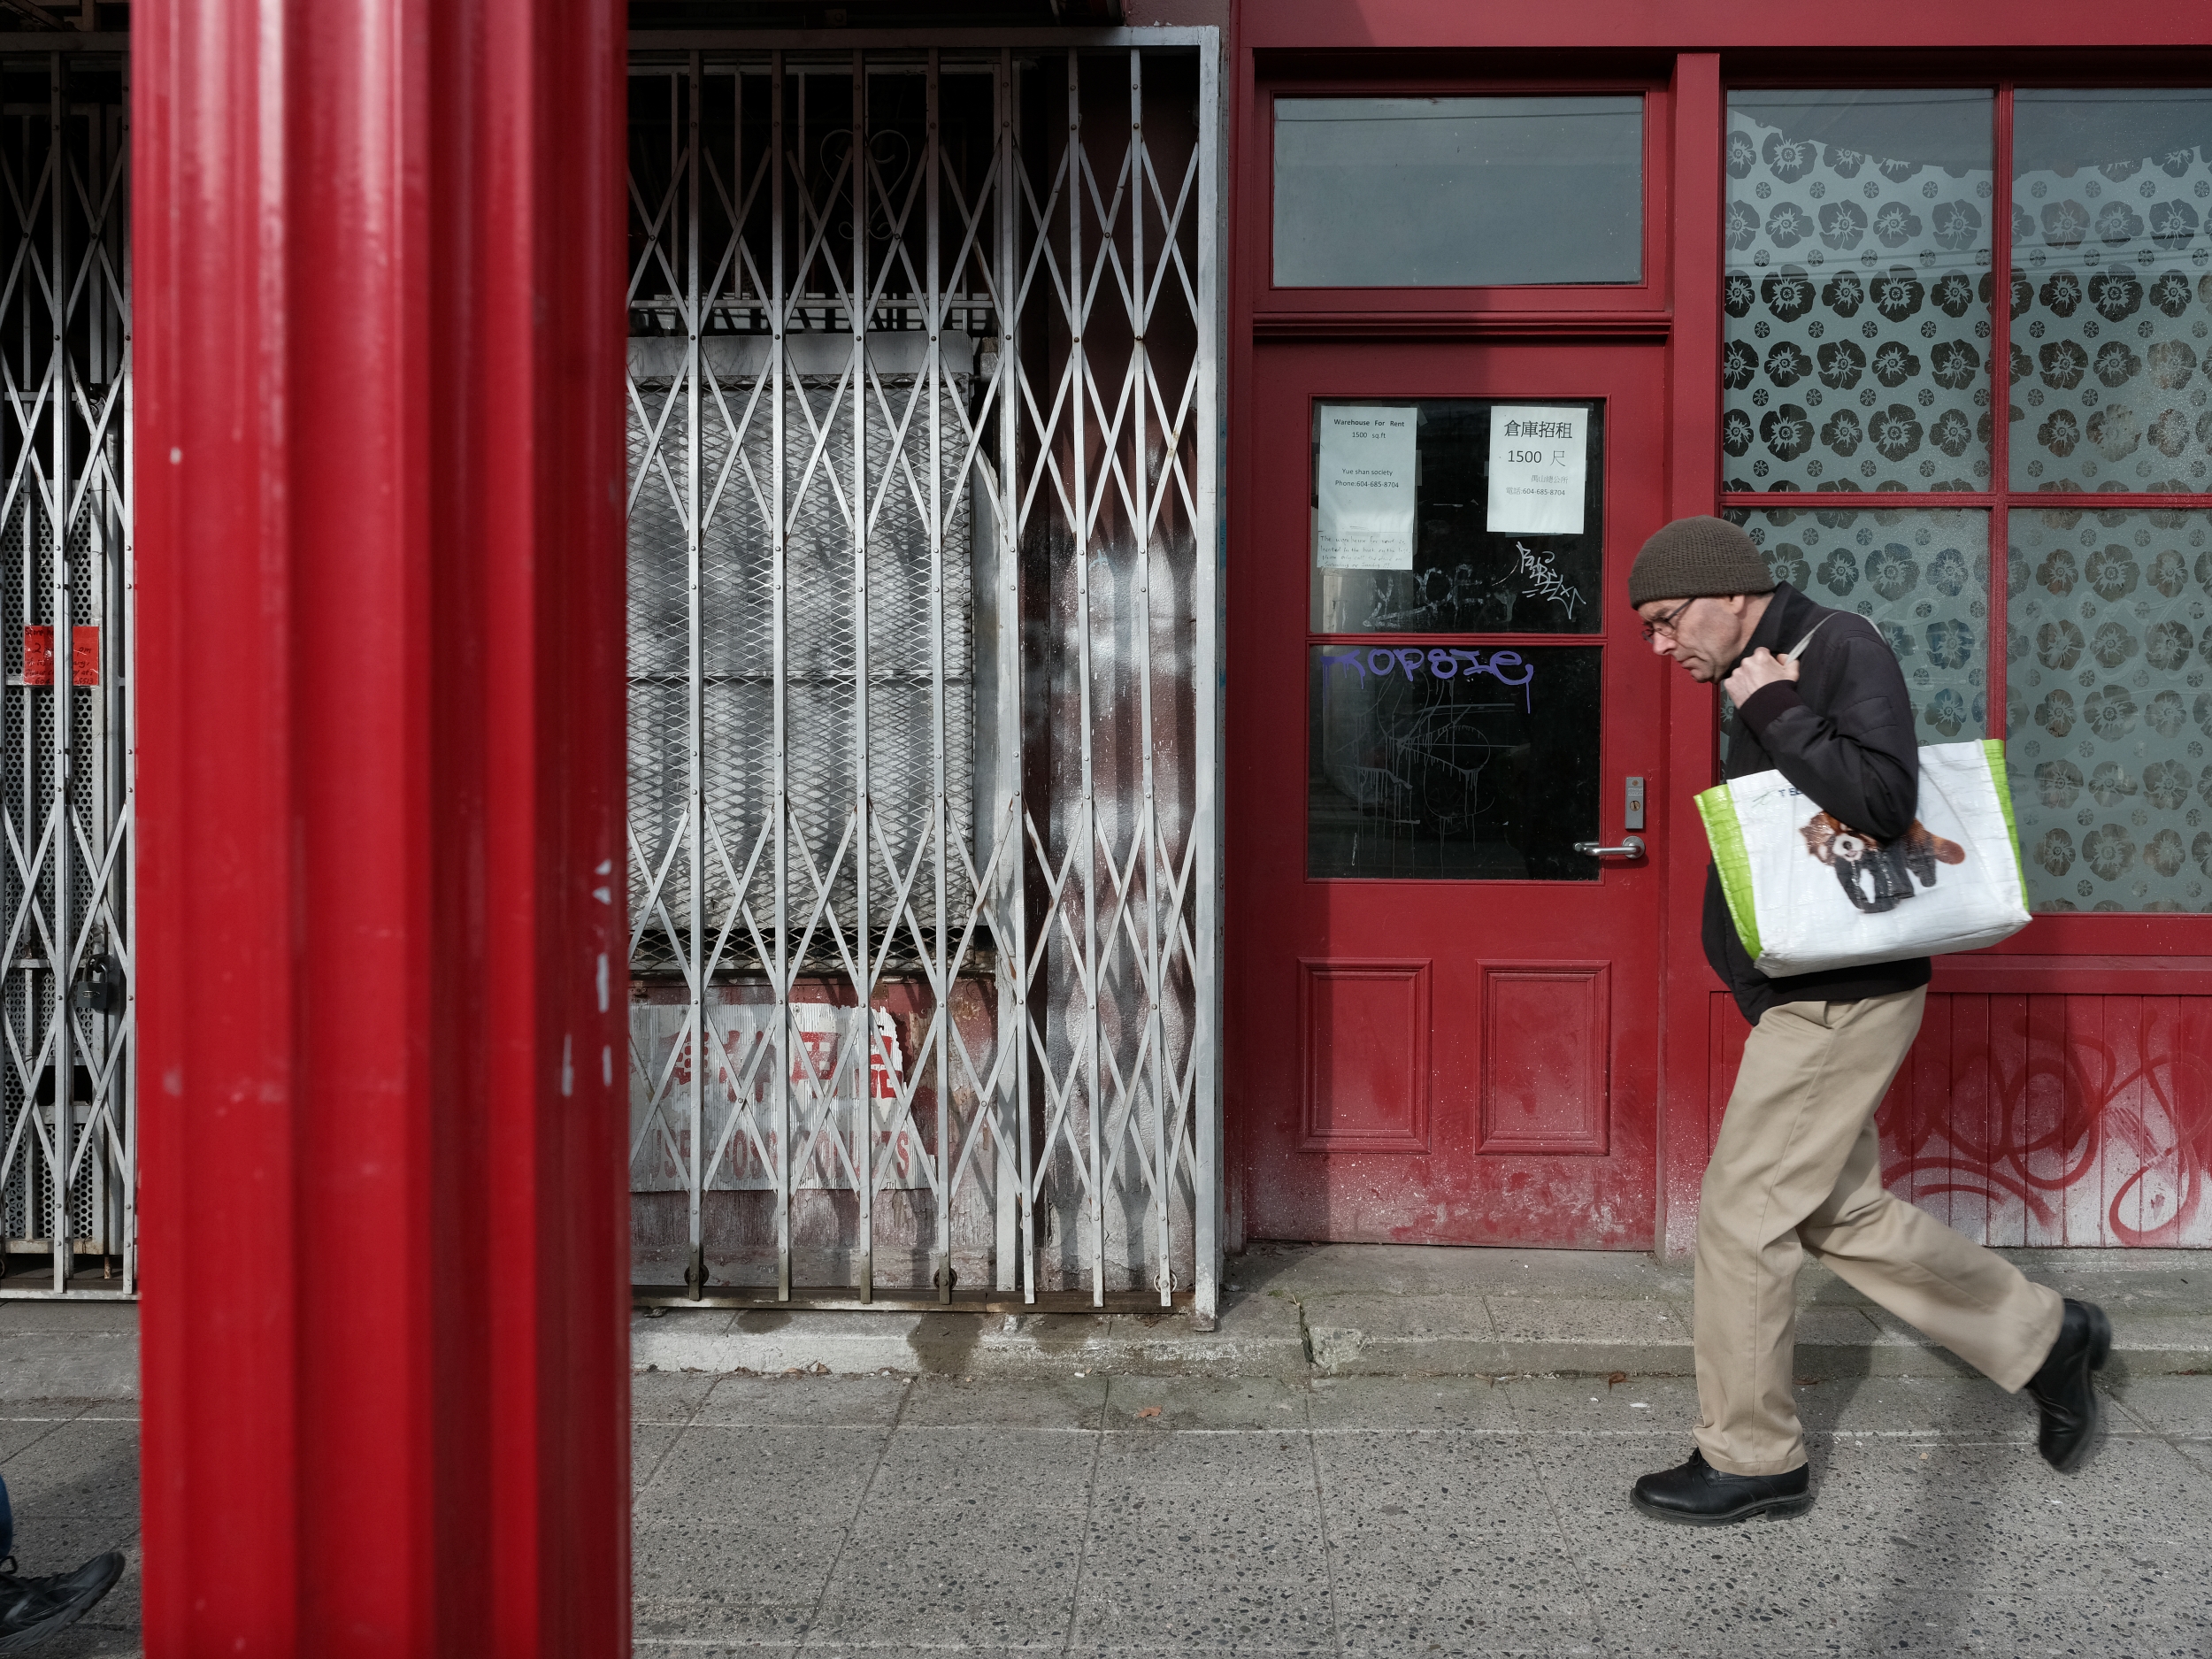
Fujifilm X RAW STUDIO Desktop Software. I attempted to process a RAW file from the GFX 100 and GFX 50R using X RAW STUDIO and the GFX 50S attached. It doesn’t work.
There are a few things to note about this unique software. The RAW files you are processing are from your computer, not from the camera. This is a good thing. There’s no need to upload old RAW files onto an SD card and re-insert it into your camera. Second, the Fujifilm X RAW STUDIO knows via EXIF data and the X-Processor to only process the images that were captured on the same camera model that’s attached to your computer. I attempted to process RAW files captured with the GFX 100 and GFX 50R, but the software wouldn’t allow it. However every GFX 50S RAW image I captured, from the original pre-production copy I had from 2017 to the most recent one I have now, all processed flawlessly in X RAW STUDIO on my MacBook. This is another reason to always shoot in both JPEG and RAW, even when you have a pre-production copy and can’t initially process the RAW files in LR or PS. You can bring new life to old images by applying new film profiles, as long as you keep the RAW files.

After making your adjustments to your RAW file, you can copy the profile and paste it to another image, or save it under ‘User Profile’ using a unique profile name.
Although the X RAW STUDIO is pretty basic and won’t replace Lightroom or Photoshop, it will create the most accurate film simulation. Why? Because it’s coming directly from your camera’s processor. For example, if you have a favourite SOOC JPEG and want to replicate it with the matching RAW file, you should either create it using in-camera RAW conversion or use X RAW STUDIO for the most accurate recreation of the JPEG. Although you can’t do much more in X RAW STUDIO than the in-camera RAW converter, you can copy all your settings called the ‘Conversion Profile’ and paste it to the next RAW image, or save it under User Profile. This makes processing a batch of images with the same adjustments quicker, versus in-camera where you have to re-input every setting for every image.
In addition, unlike in-camera conversion, X RAW STUDIO shows real-time changes to your image as you adjust your settings. There’s no need to constantly hit the Q-button to see the changes, then hit the Display-Back button to continue adjusting your photo. After you finish processing the image, the X RAW STUDIO software creates a data file that shows all the adjustments you’ve made to create your new JPEG, useful for future reference.
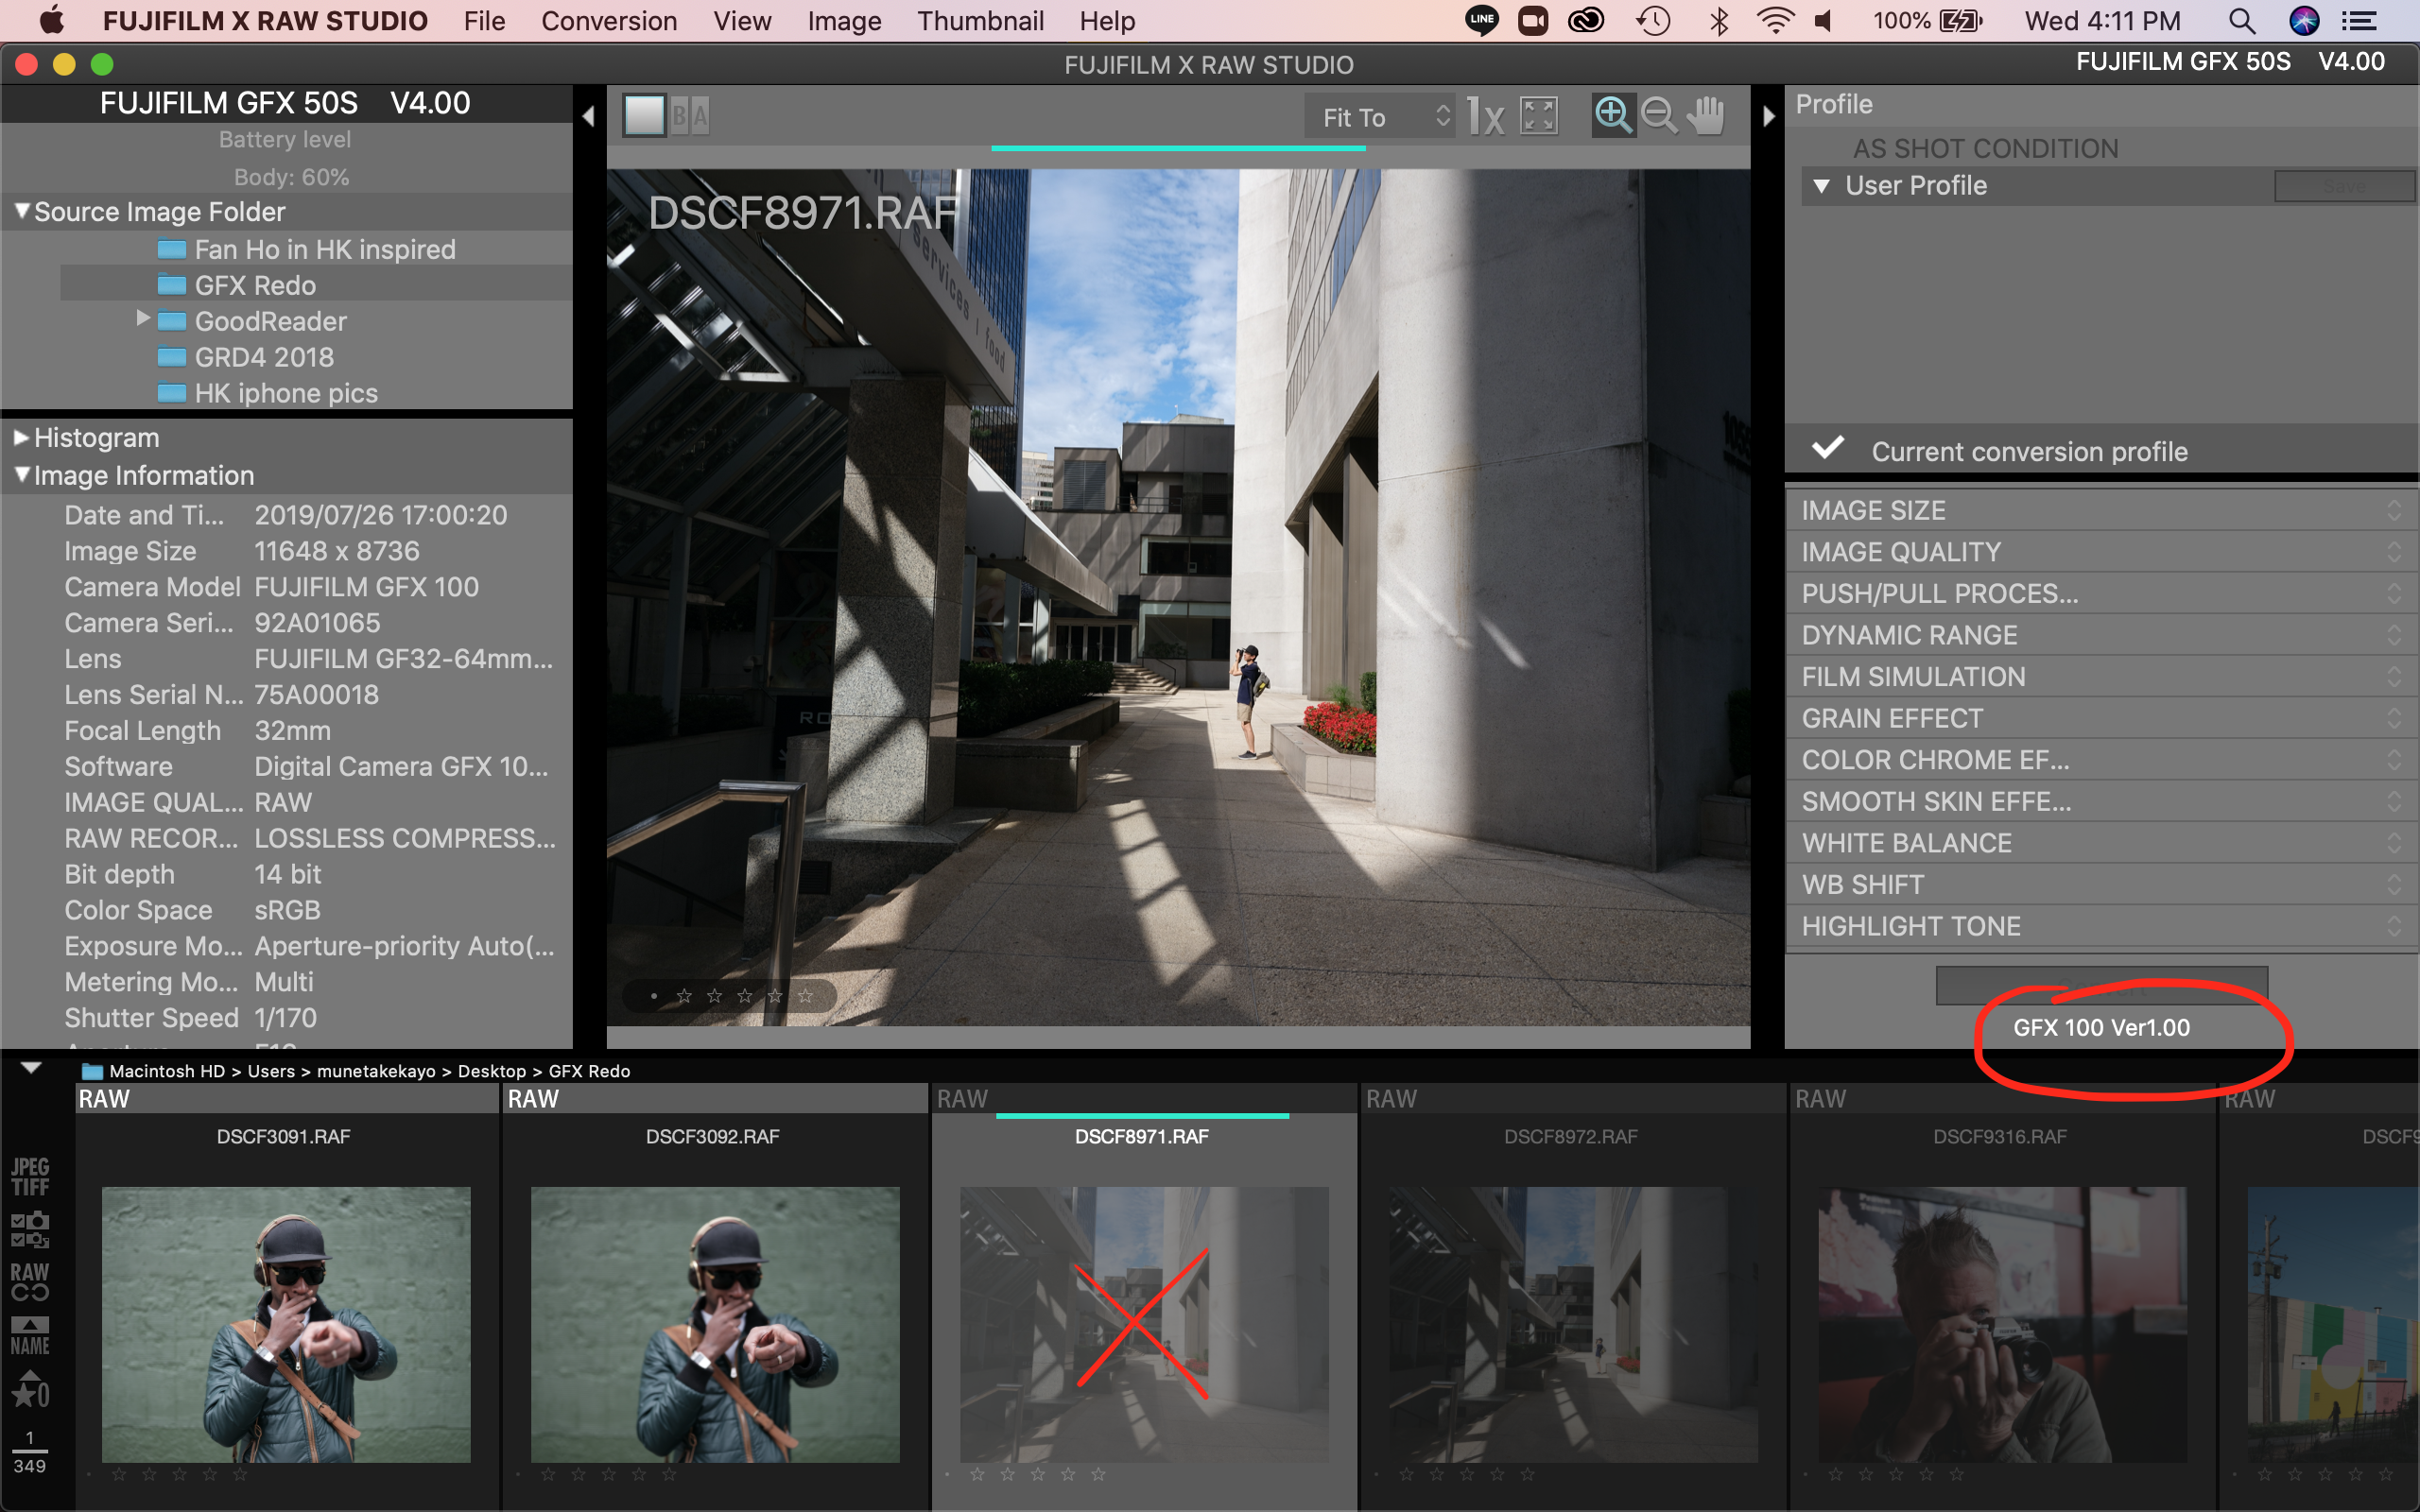
A new adjustment setting has been added to the RAW conversion called ‘Smooth Skin Effect’. It can be set to Off, Weak, or Strong. It’s not a particularly useful feature for many, so I recommend turning it off. However, there are times where you might need to touch up a model’s face quickly while you’re in the field. In that situation, I recommend using it in the ‘Weak’ setting. I’ve attached close-up examples in X RAW STUDIO for your viewing pleasure.

Smooth Skin Effect: OFF
Smooth Skin Effect: STRONG
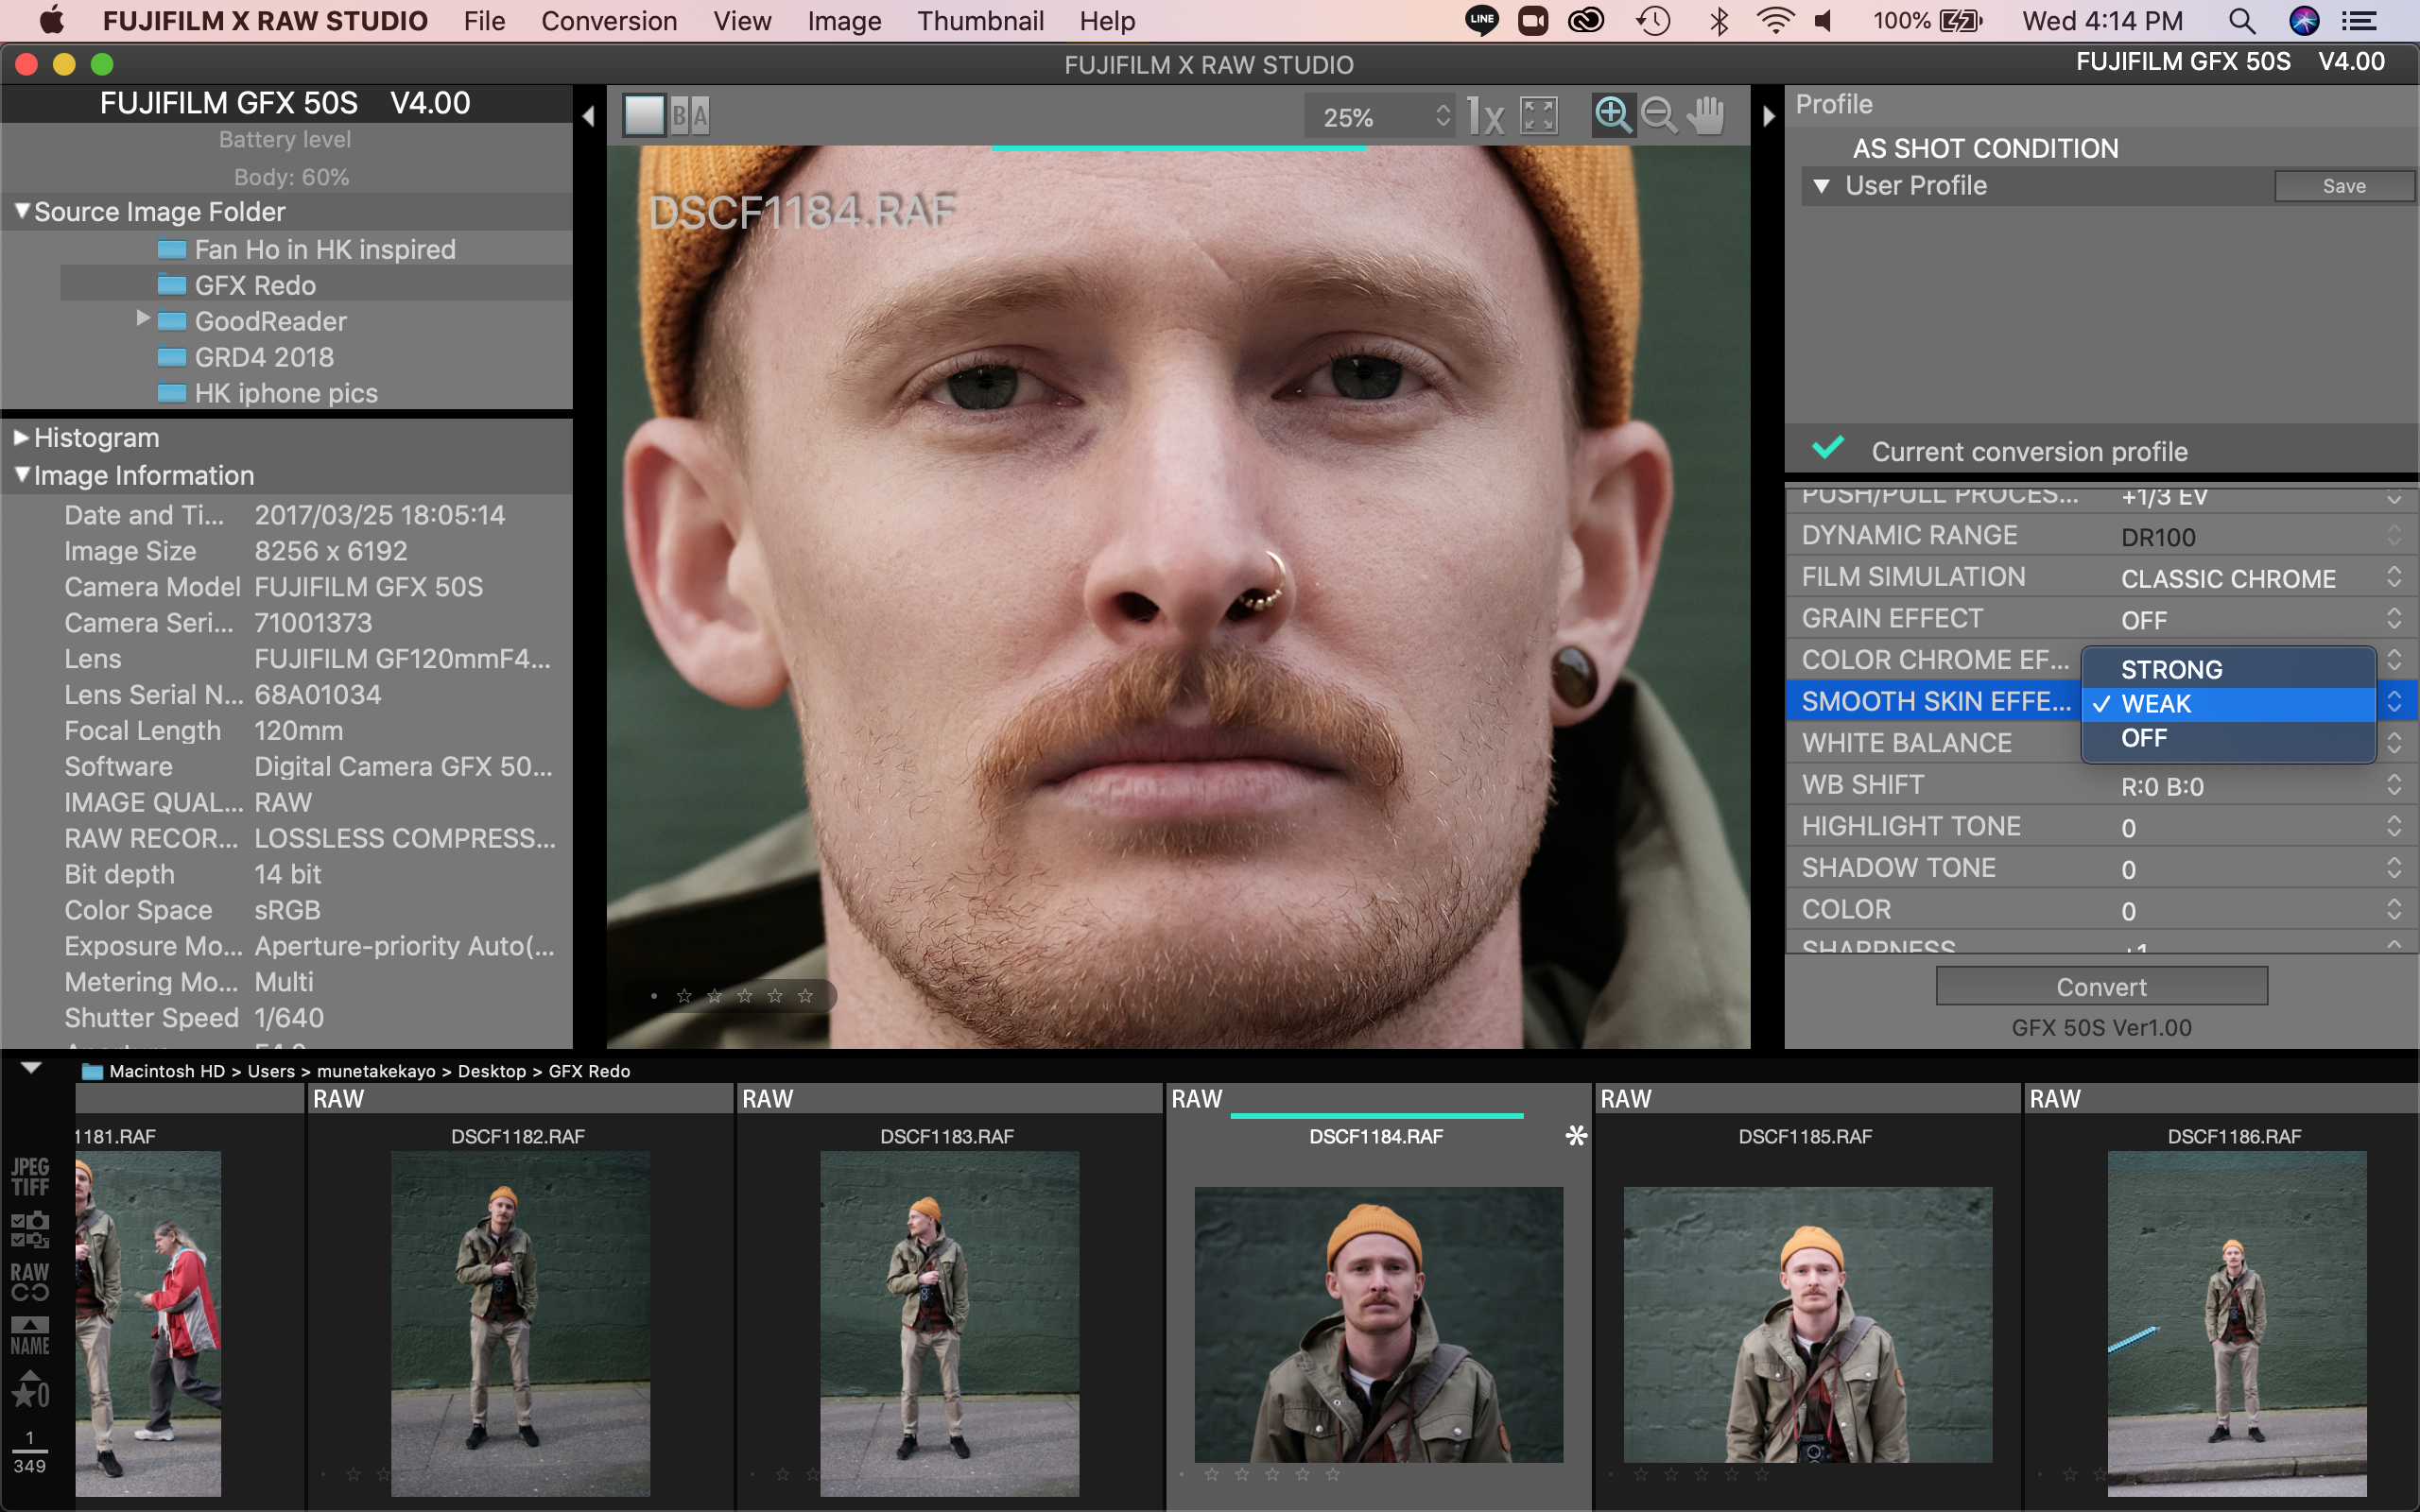
Smooth Skin Effect: WEAK
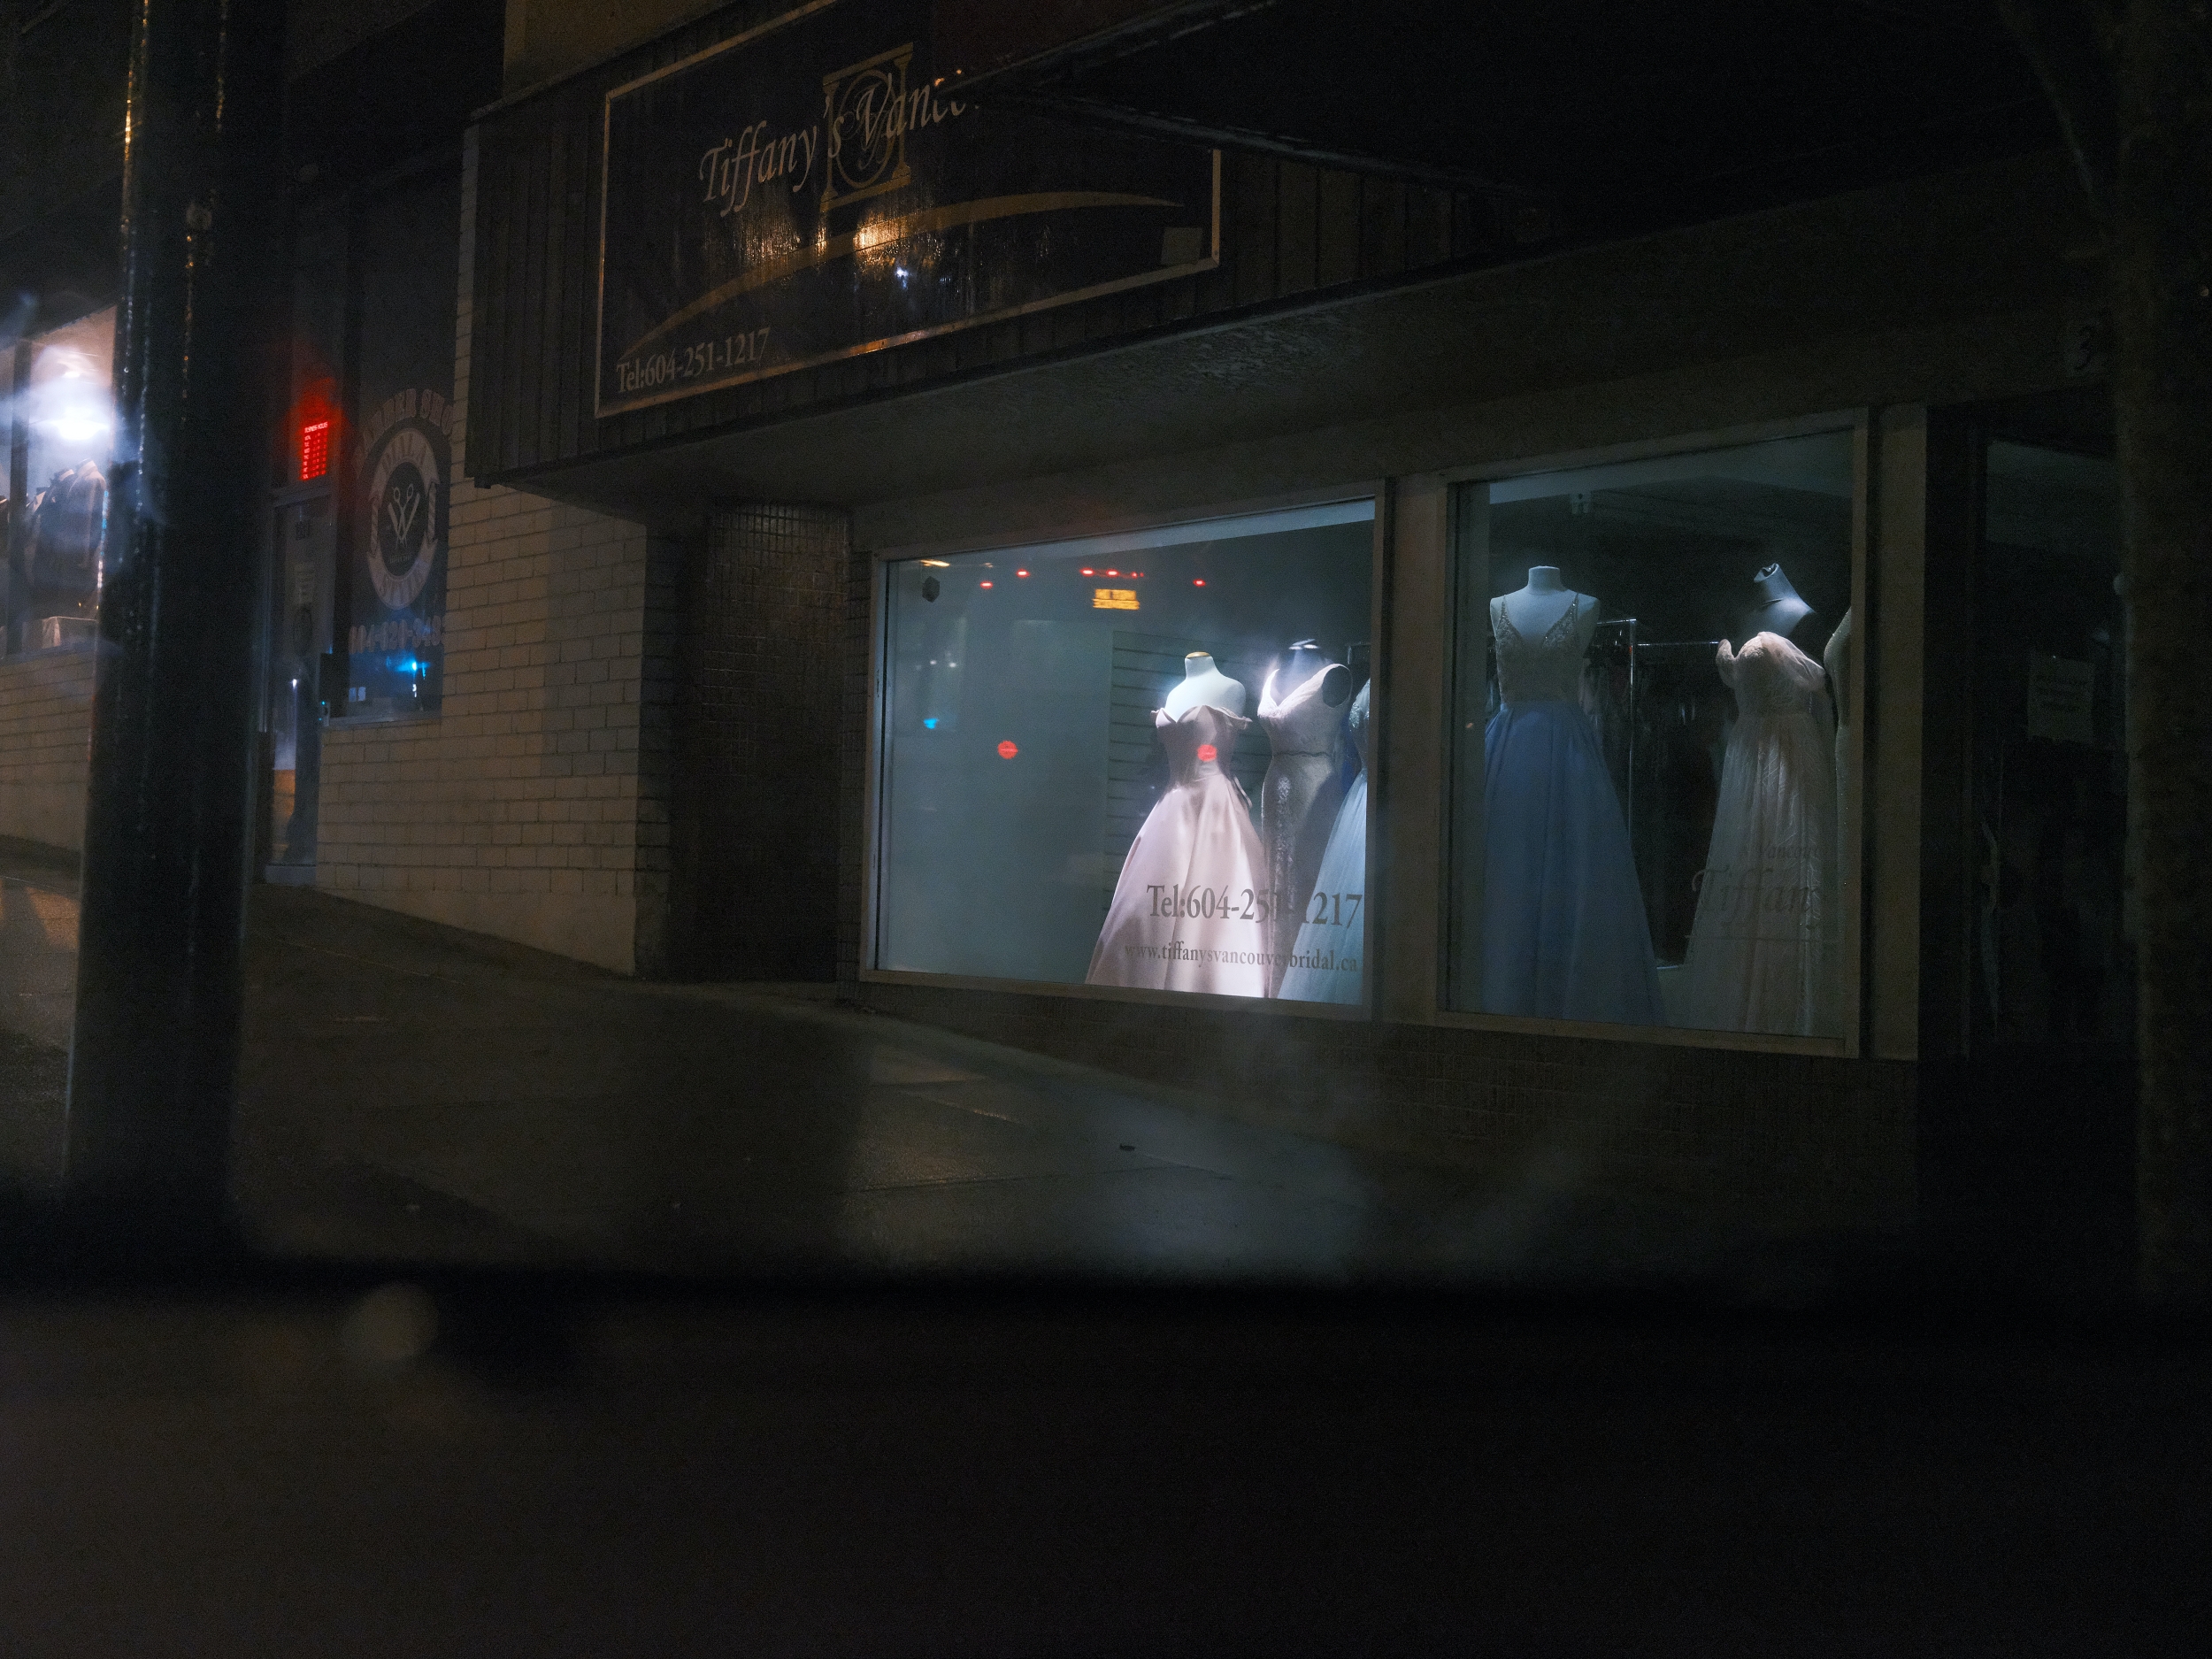
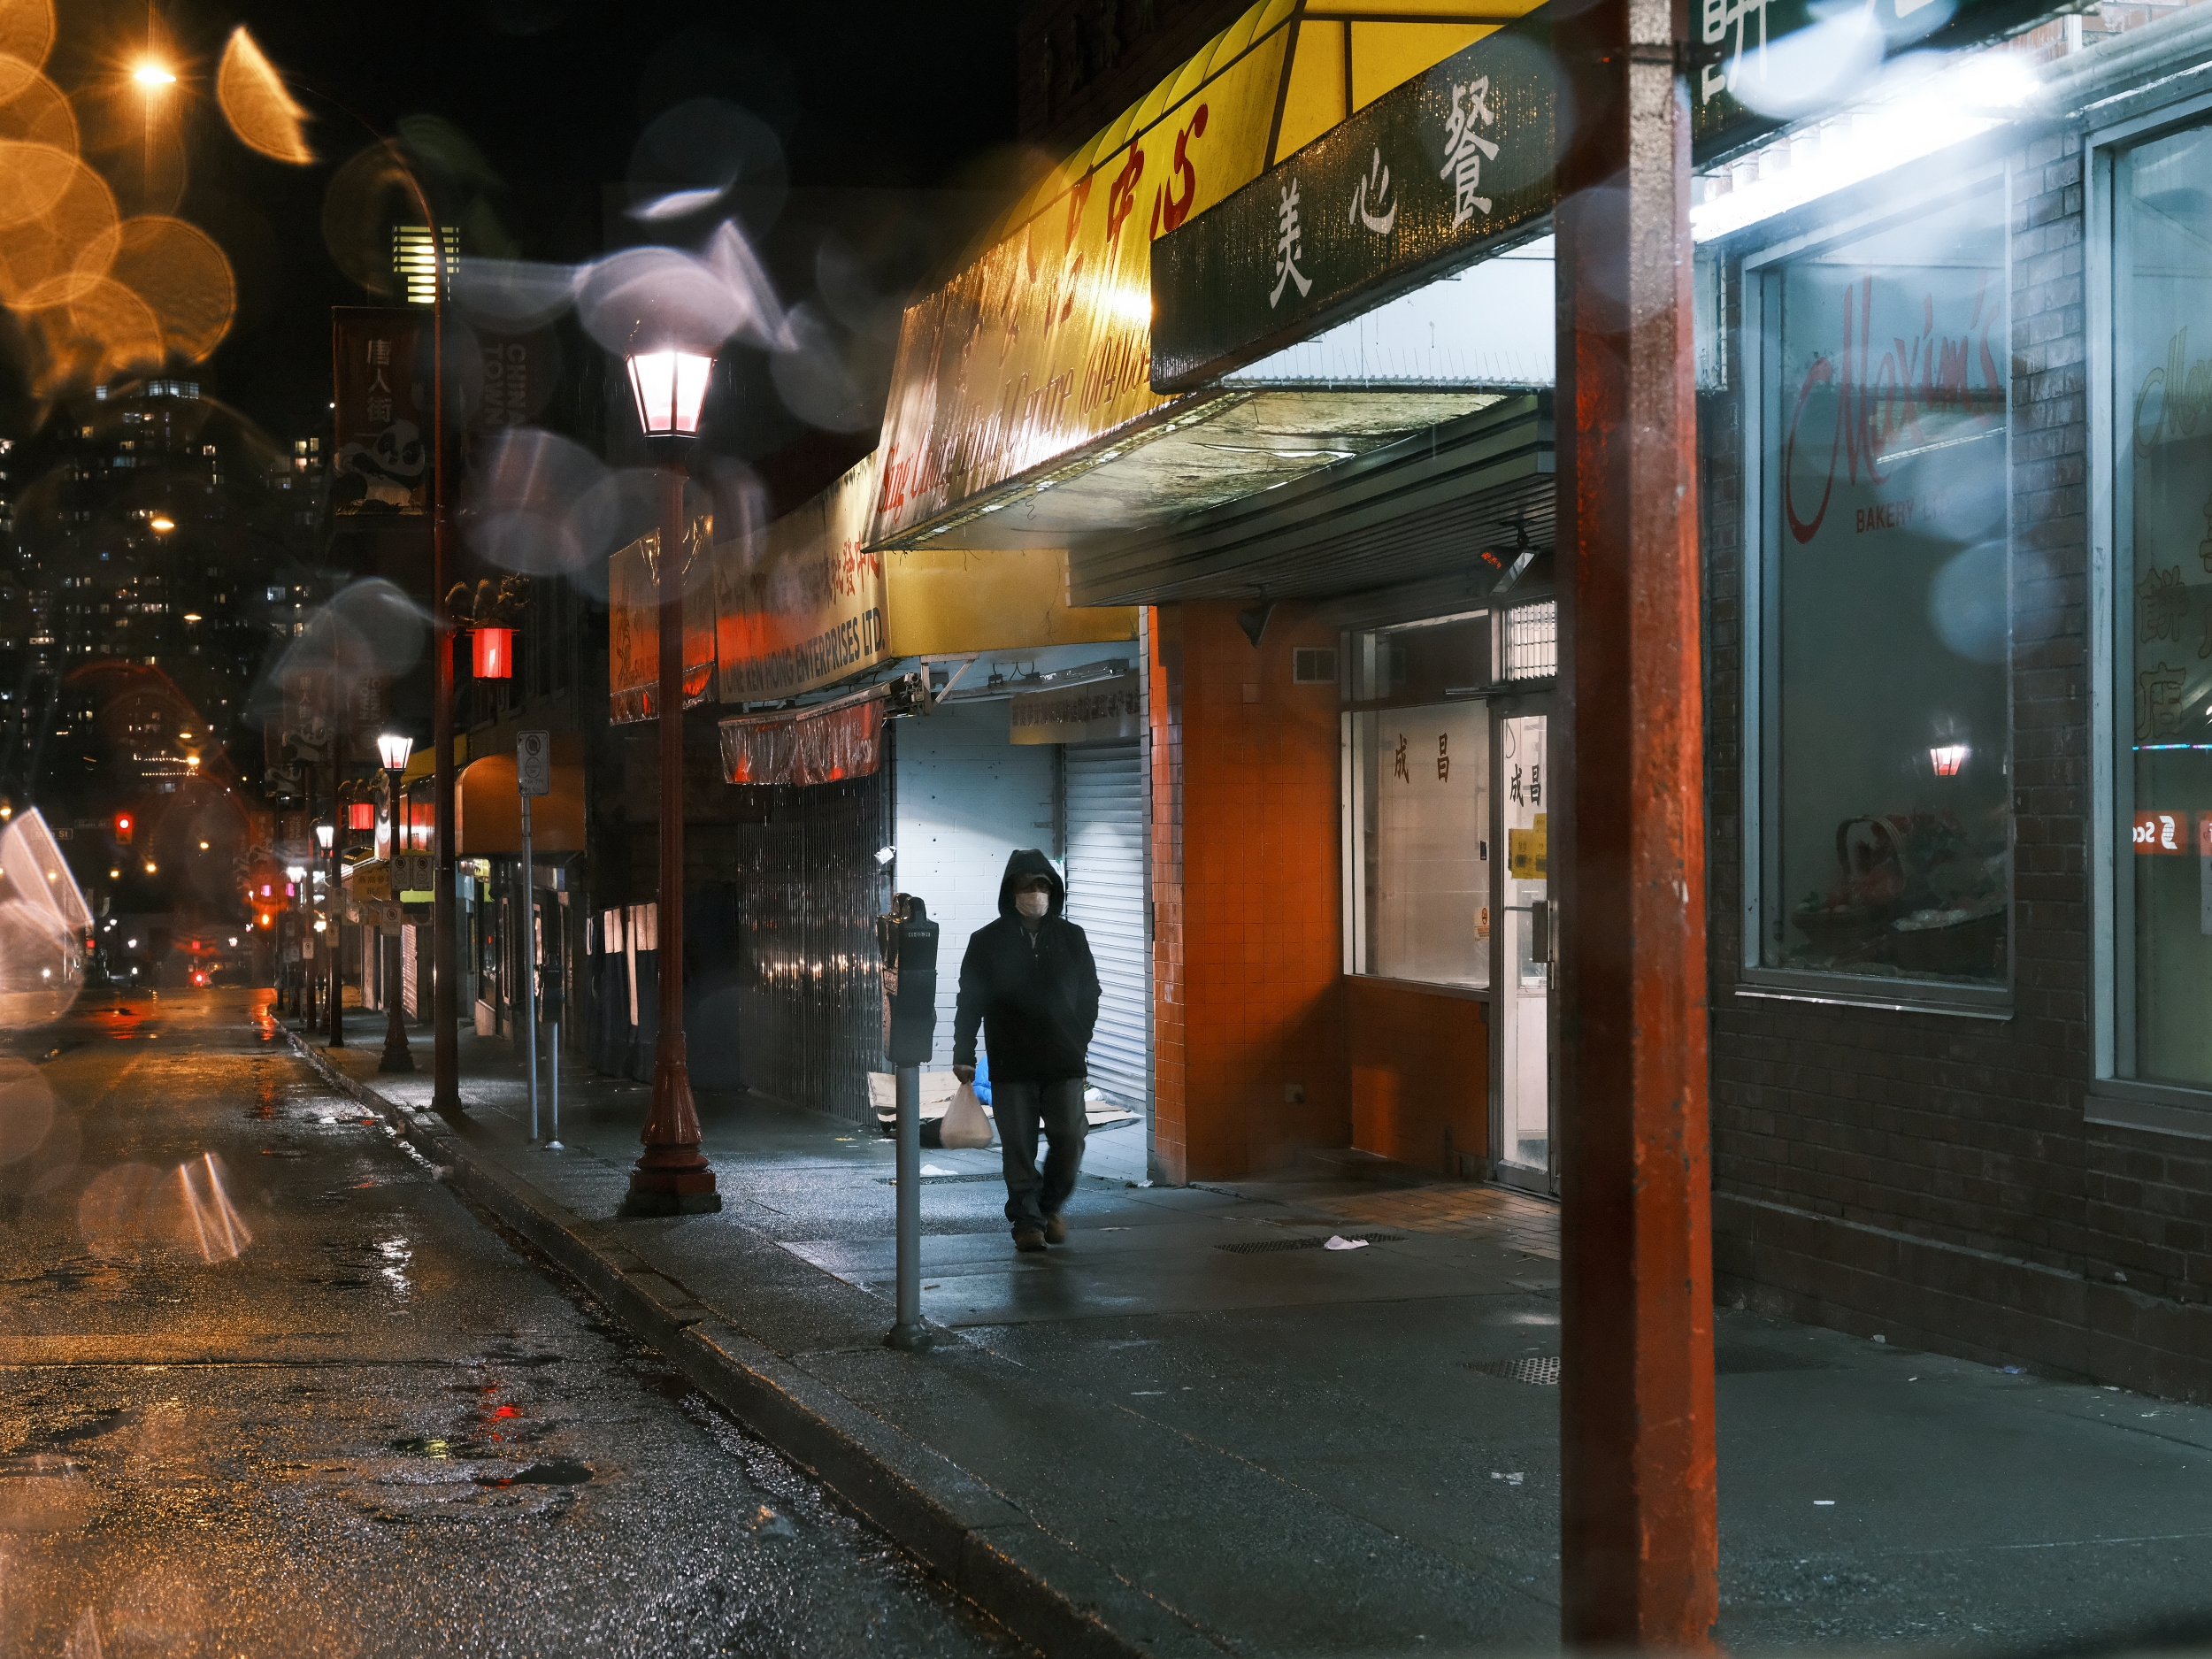
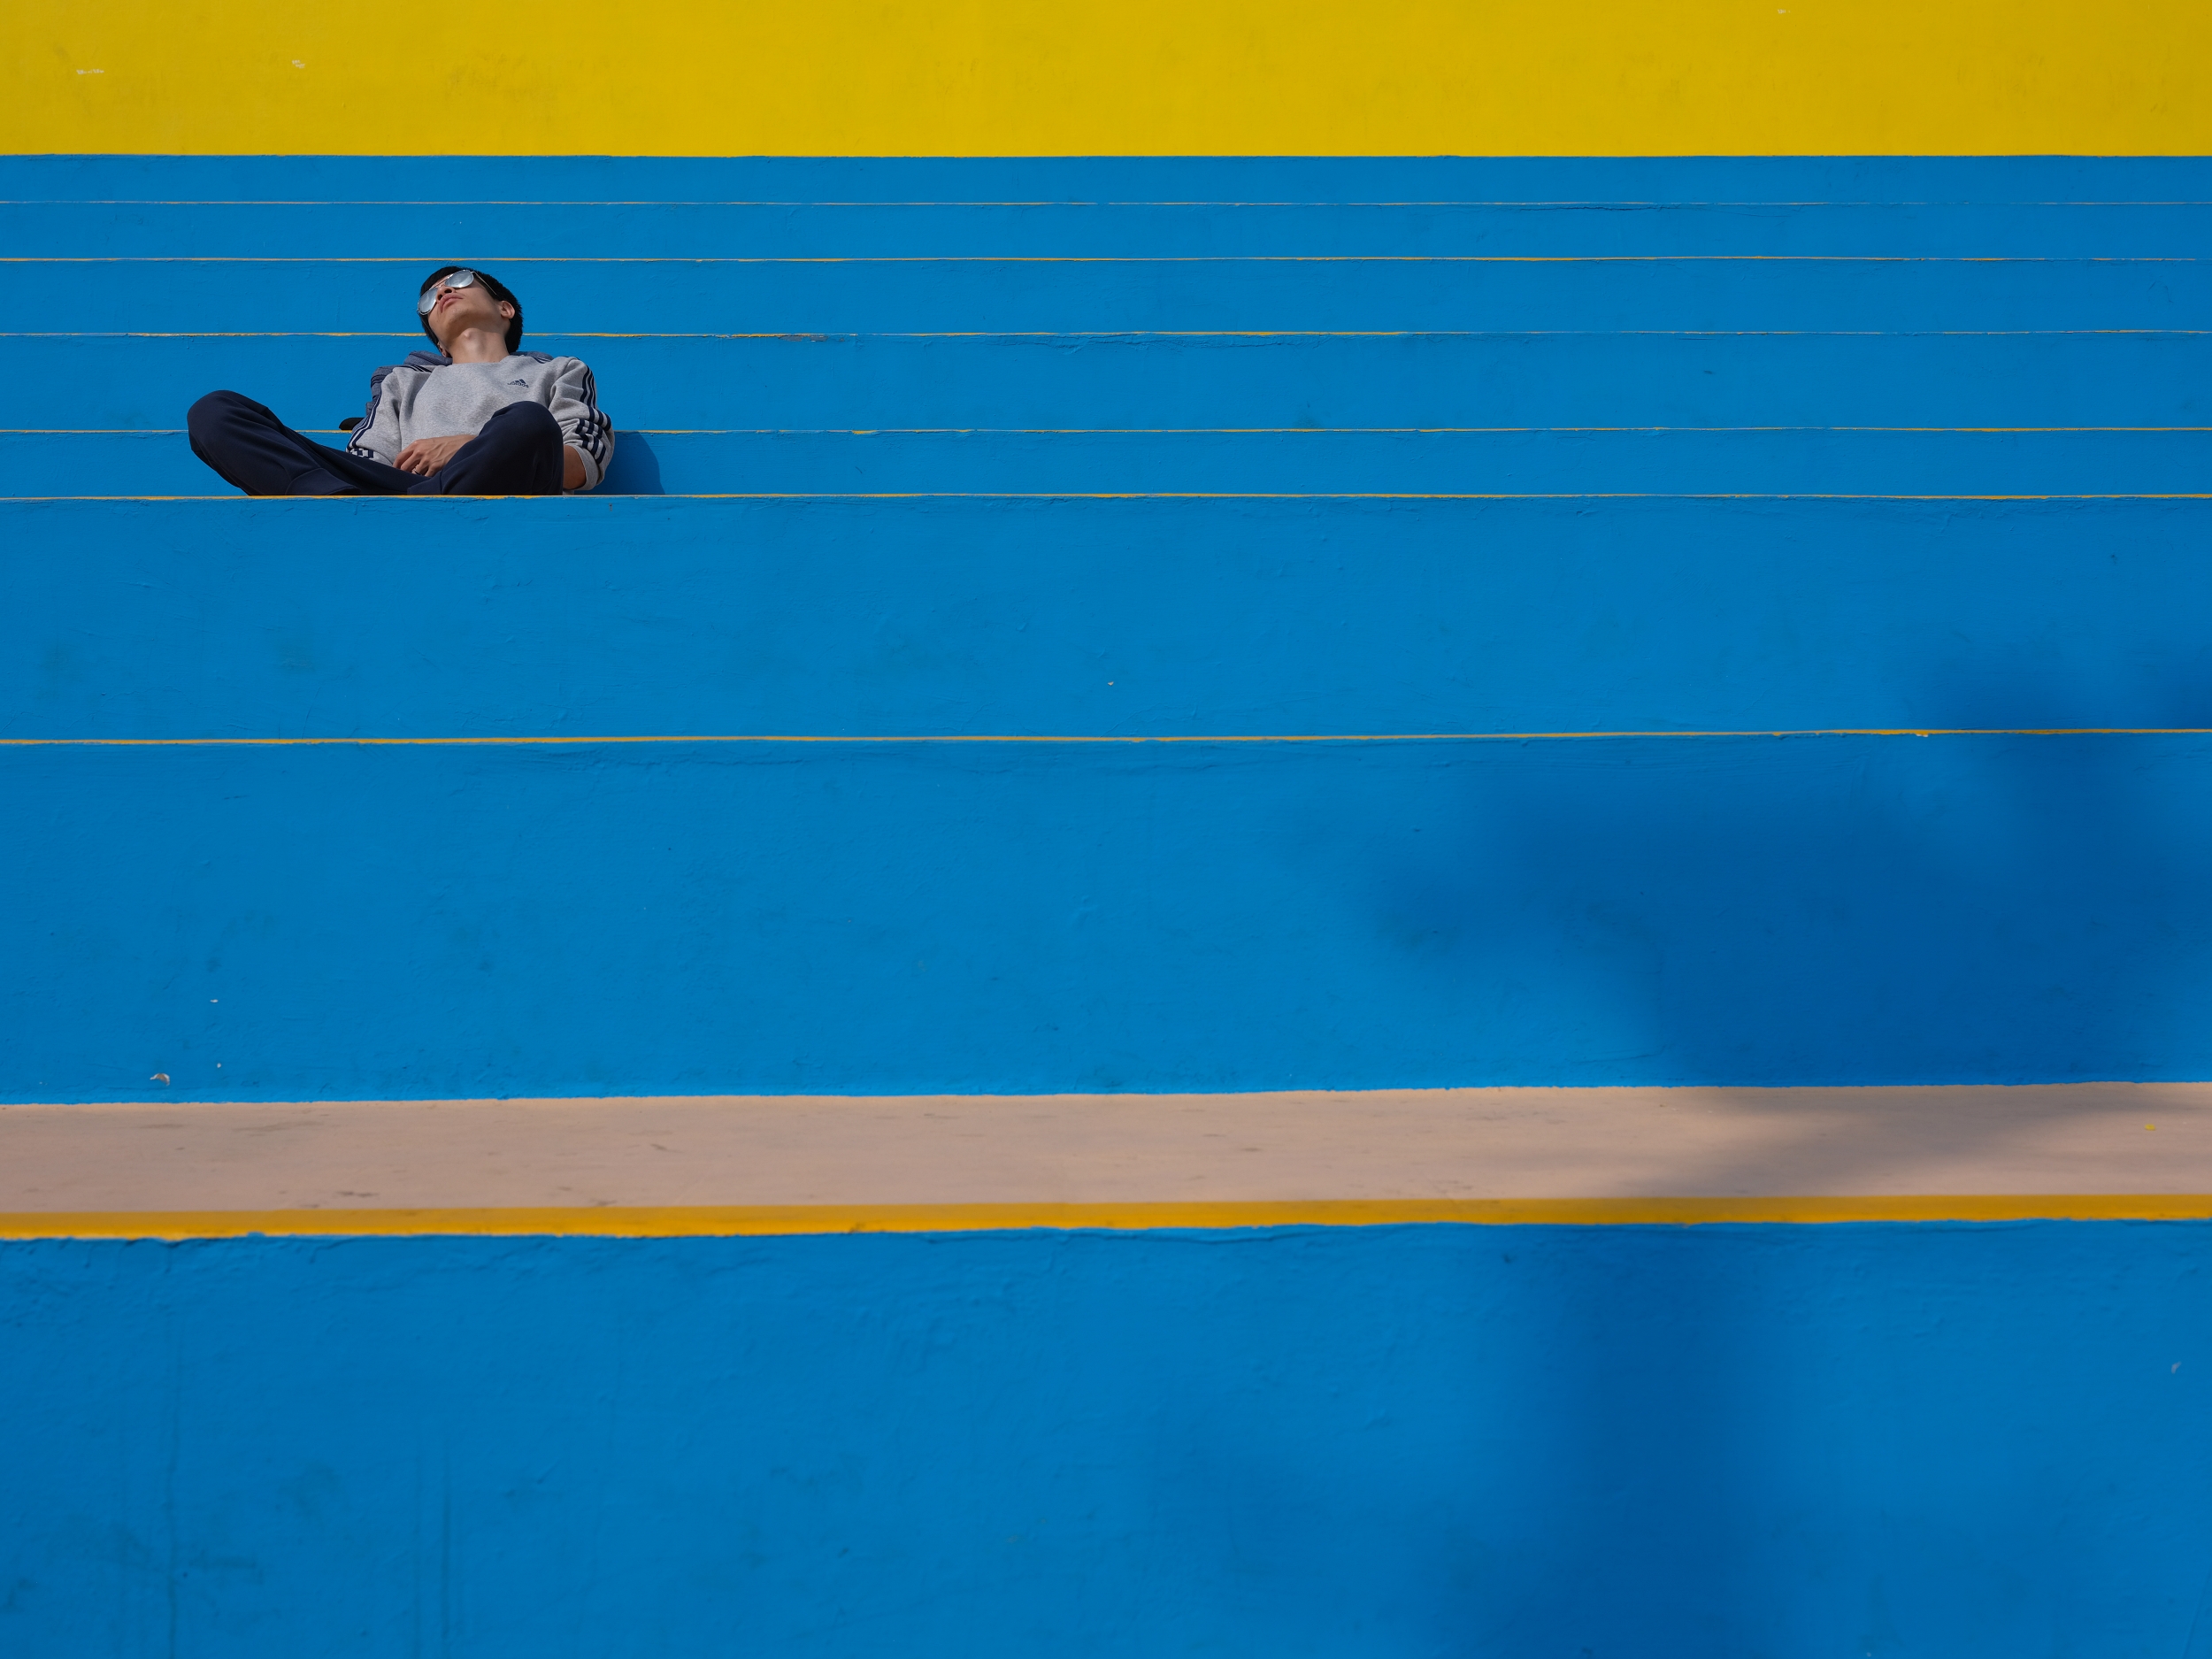
As I mentioned earlier, although Classic Neg film simulation is my favourite profile because it has such a film-like feel, it’s not optimized for every lighting condition. Unlike Classic Chrome which seems to work in almost every situation except for night photography (I prefer Provia or Pro Neg Std), you have to be selective when using Classic Neg. I find it works best during the day, and it works well when there’s punchy red or orange colours. It seems less effective with green and blue. Classic Neg also works well when the exposure is even, especially in the shade or on a cloudy day. Like real film images, Classic Neg can be finicky when lighting is complicated. In general I like -2 RED in White Balance Shift, or minus magenta in LR or PS, especially when it comes to skin tones. I also prefer -1 shadows as it tends to crush the shadows more so than Classic Chrome.
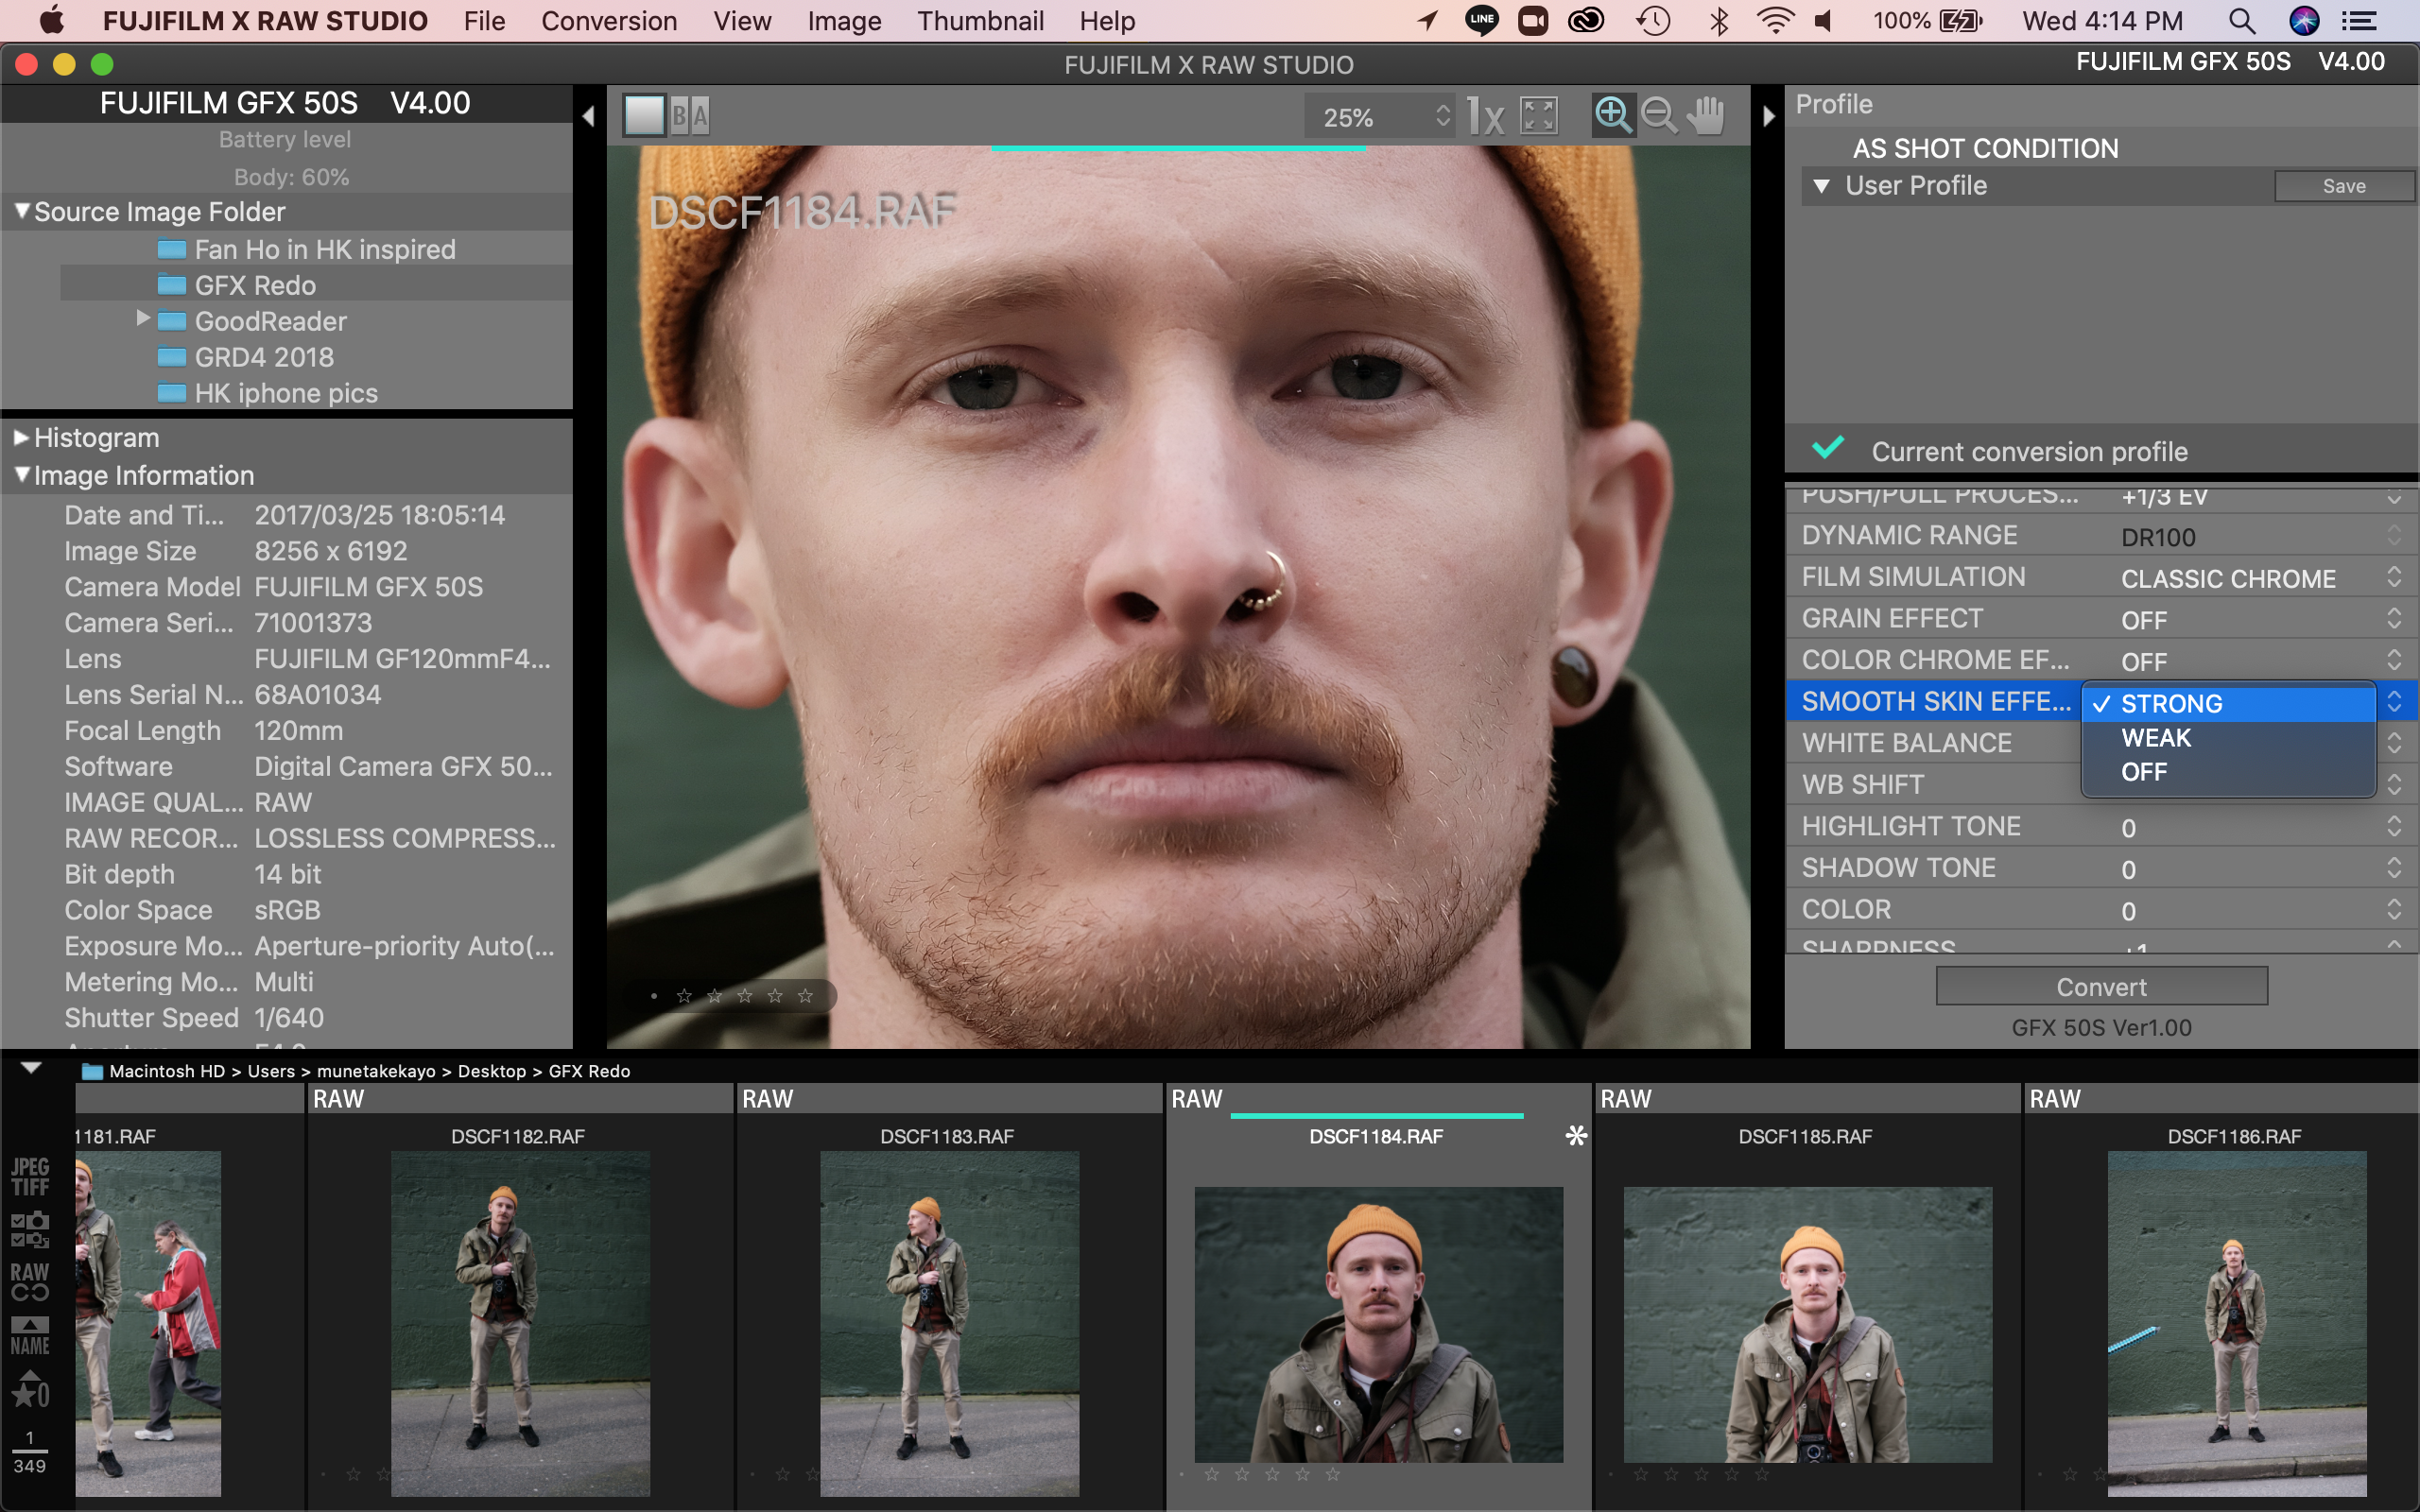
Classic Neg Film Profile. Captured with the GFX 50S + GF 45mm f/2.8 in Hong Kong December 5th, 2017.
Classic Chrome Film Profile
I decided to do a test by applying three different film simulations to the same image. For the below image that I captured in Hong Kong in December of 2017, I processed it using Provia, Classic Chrome and Classic Neg. Can you tell which is which? For this specific photo I feel Provia looks best with its punchy and bright colours, especially in the yellows. Neither Classic Chrome nor Classic Neg handles yellows or blues very well, so for this specific image Provia works best.
Provia Film Profile. GFX 50S + GF 45mm f/2.8. Captured in Hong Kong Dec 6th, 2017

Classic Chrome Film Profile. Muted yellows and blues.

Classic Neg. Film Profile. Muted and muddy yellows and blues. I would need to play in LR or PS to really clean up the unusual colour cast
Here is another image captured in Hong Kong in 2017 that I processed with Classic Chrome, Provia and Classic Neg. Because this photo has no strong single colour theme and is evenly lit, each film profile gives this image unique characteristics. For this photo I prefer the Classic Neg. image. However, Provia gives a nice even colour vibrancy, while Classic Chrome gives the most neutral look. Which of the three do you prefer?
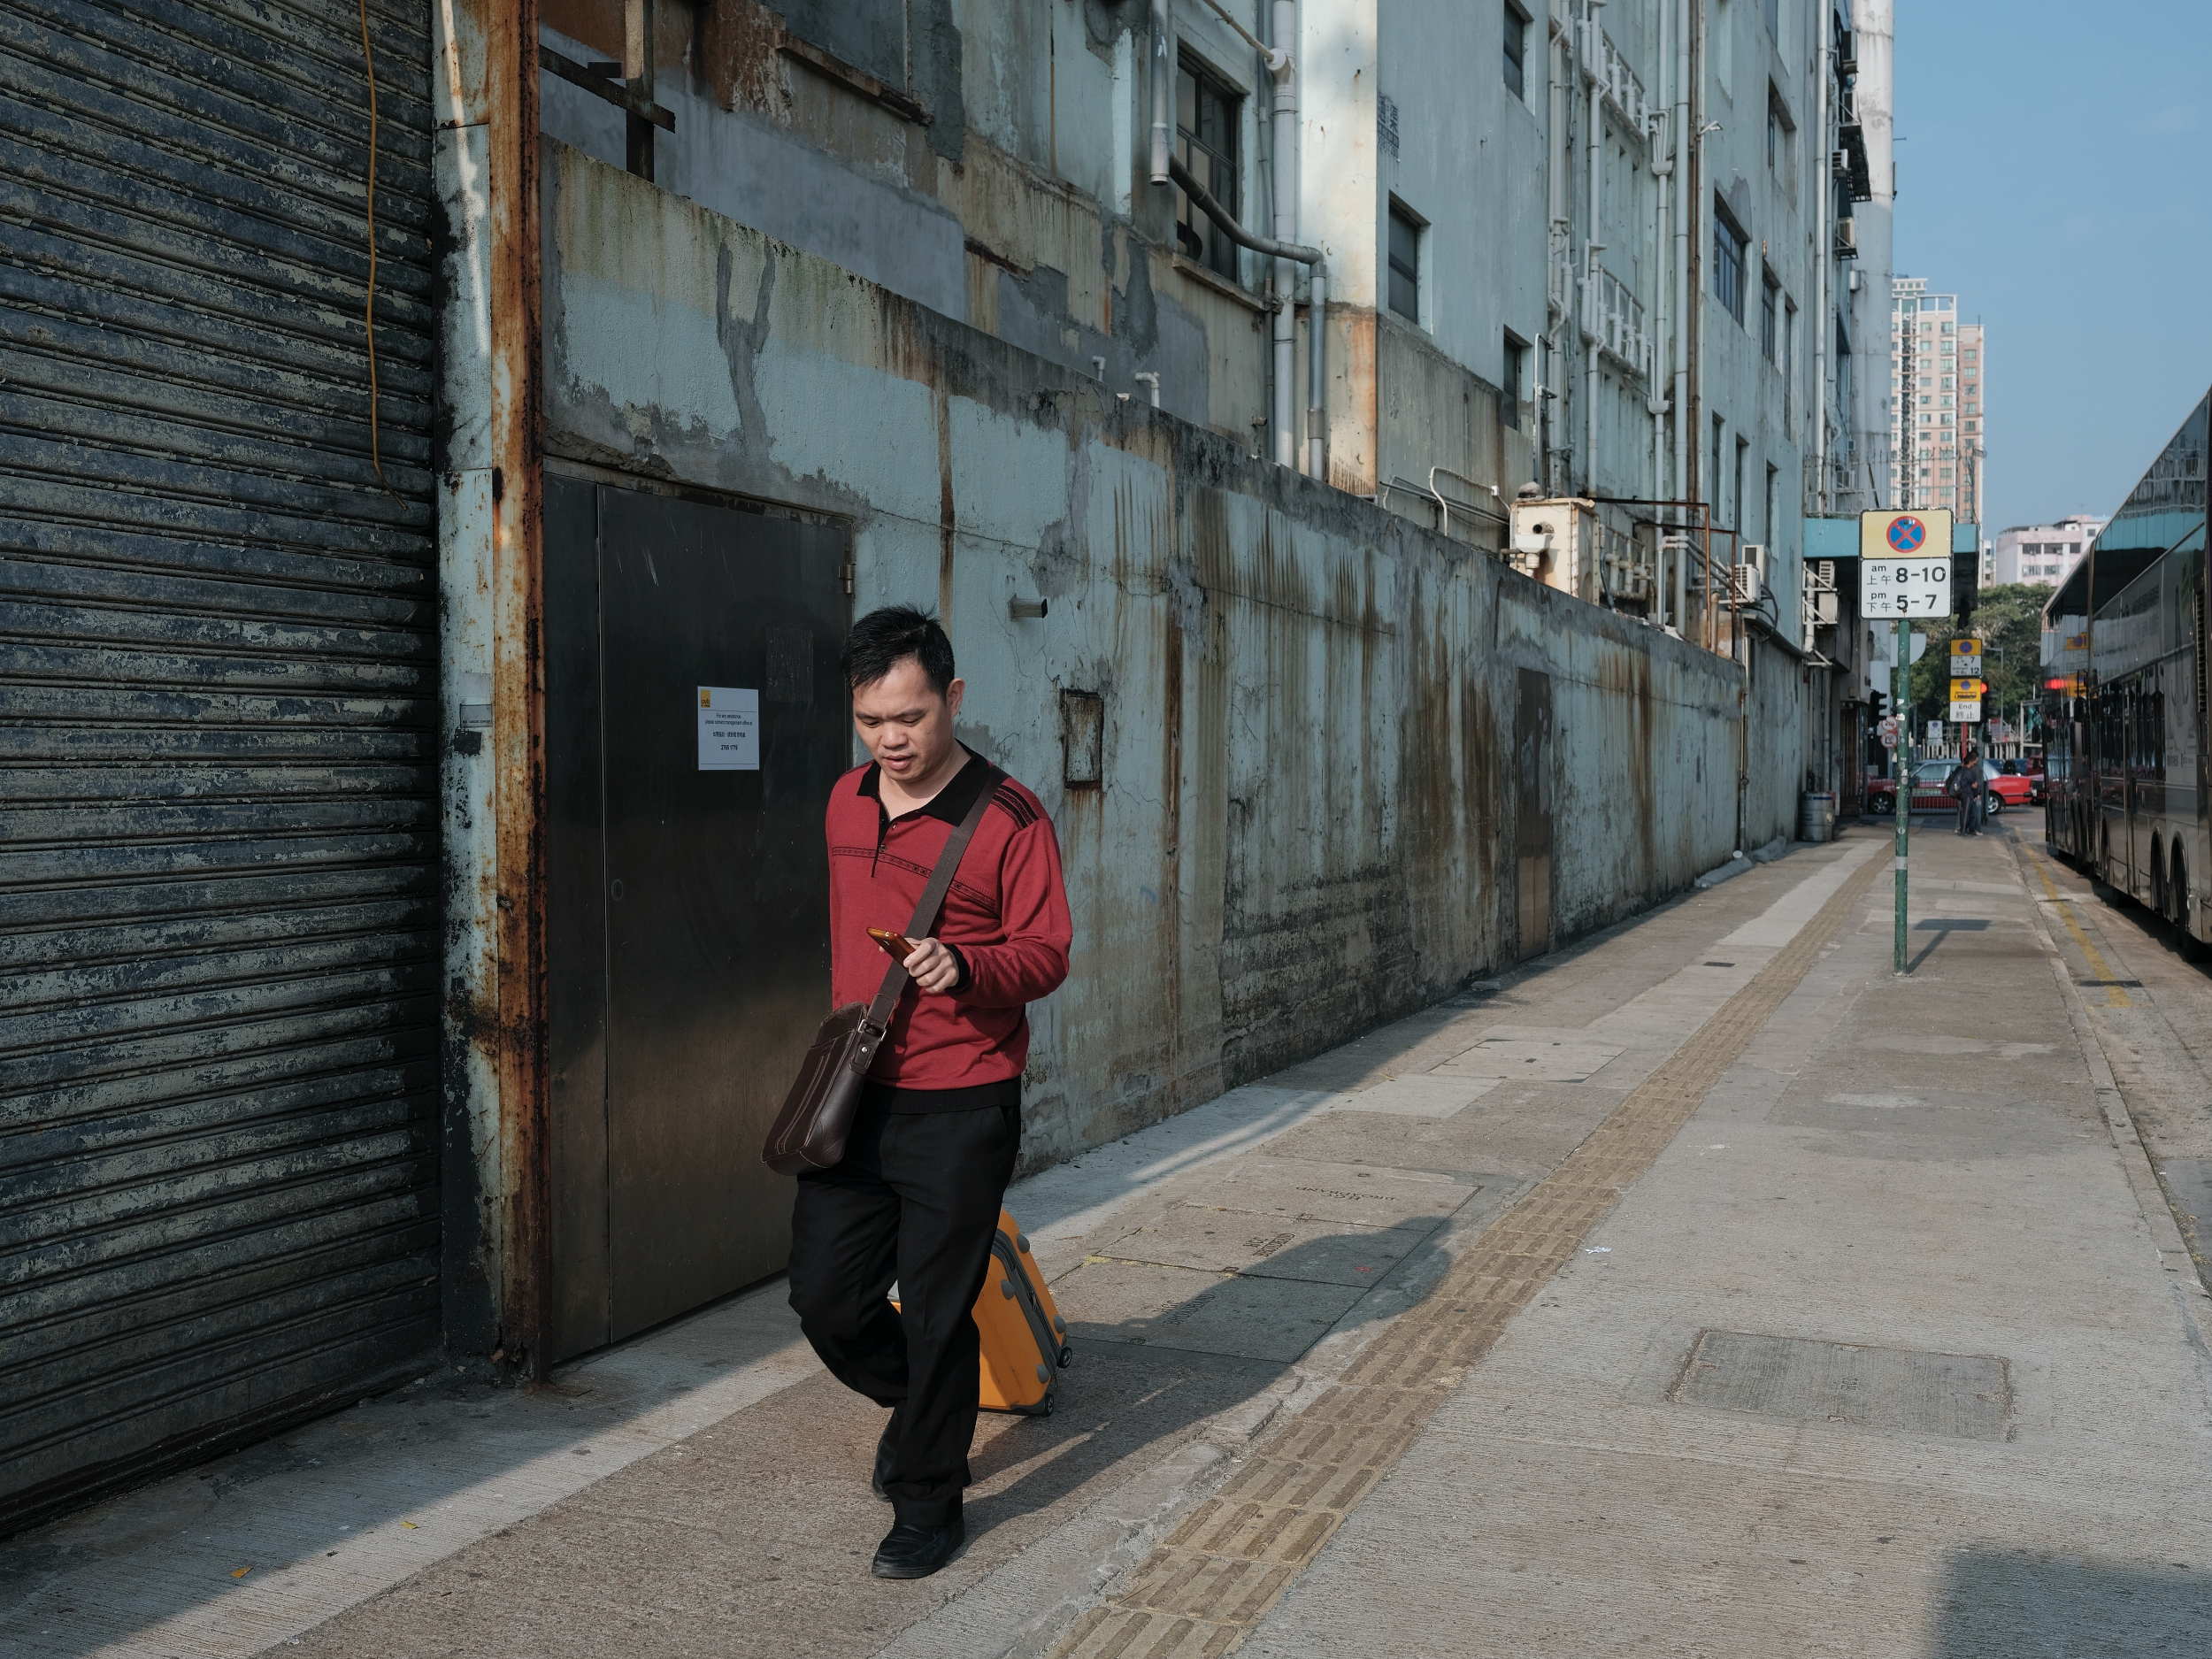
Classic Chrome Film Profile. Captured wit the GFX 50S + GF 45mm f/2.8 in Hong Kong December 7th, 2017

Provia Film Profile. Vibrant colours, nicely highlighting the rust on the metal building.
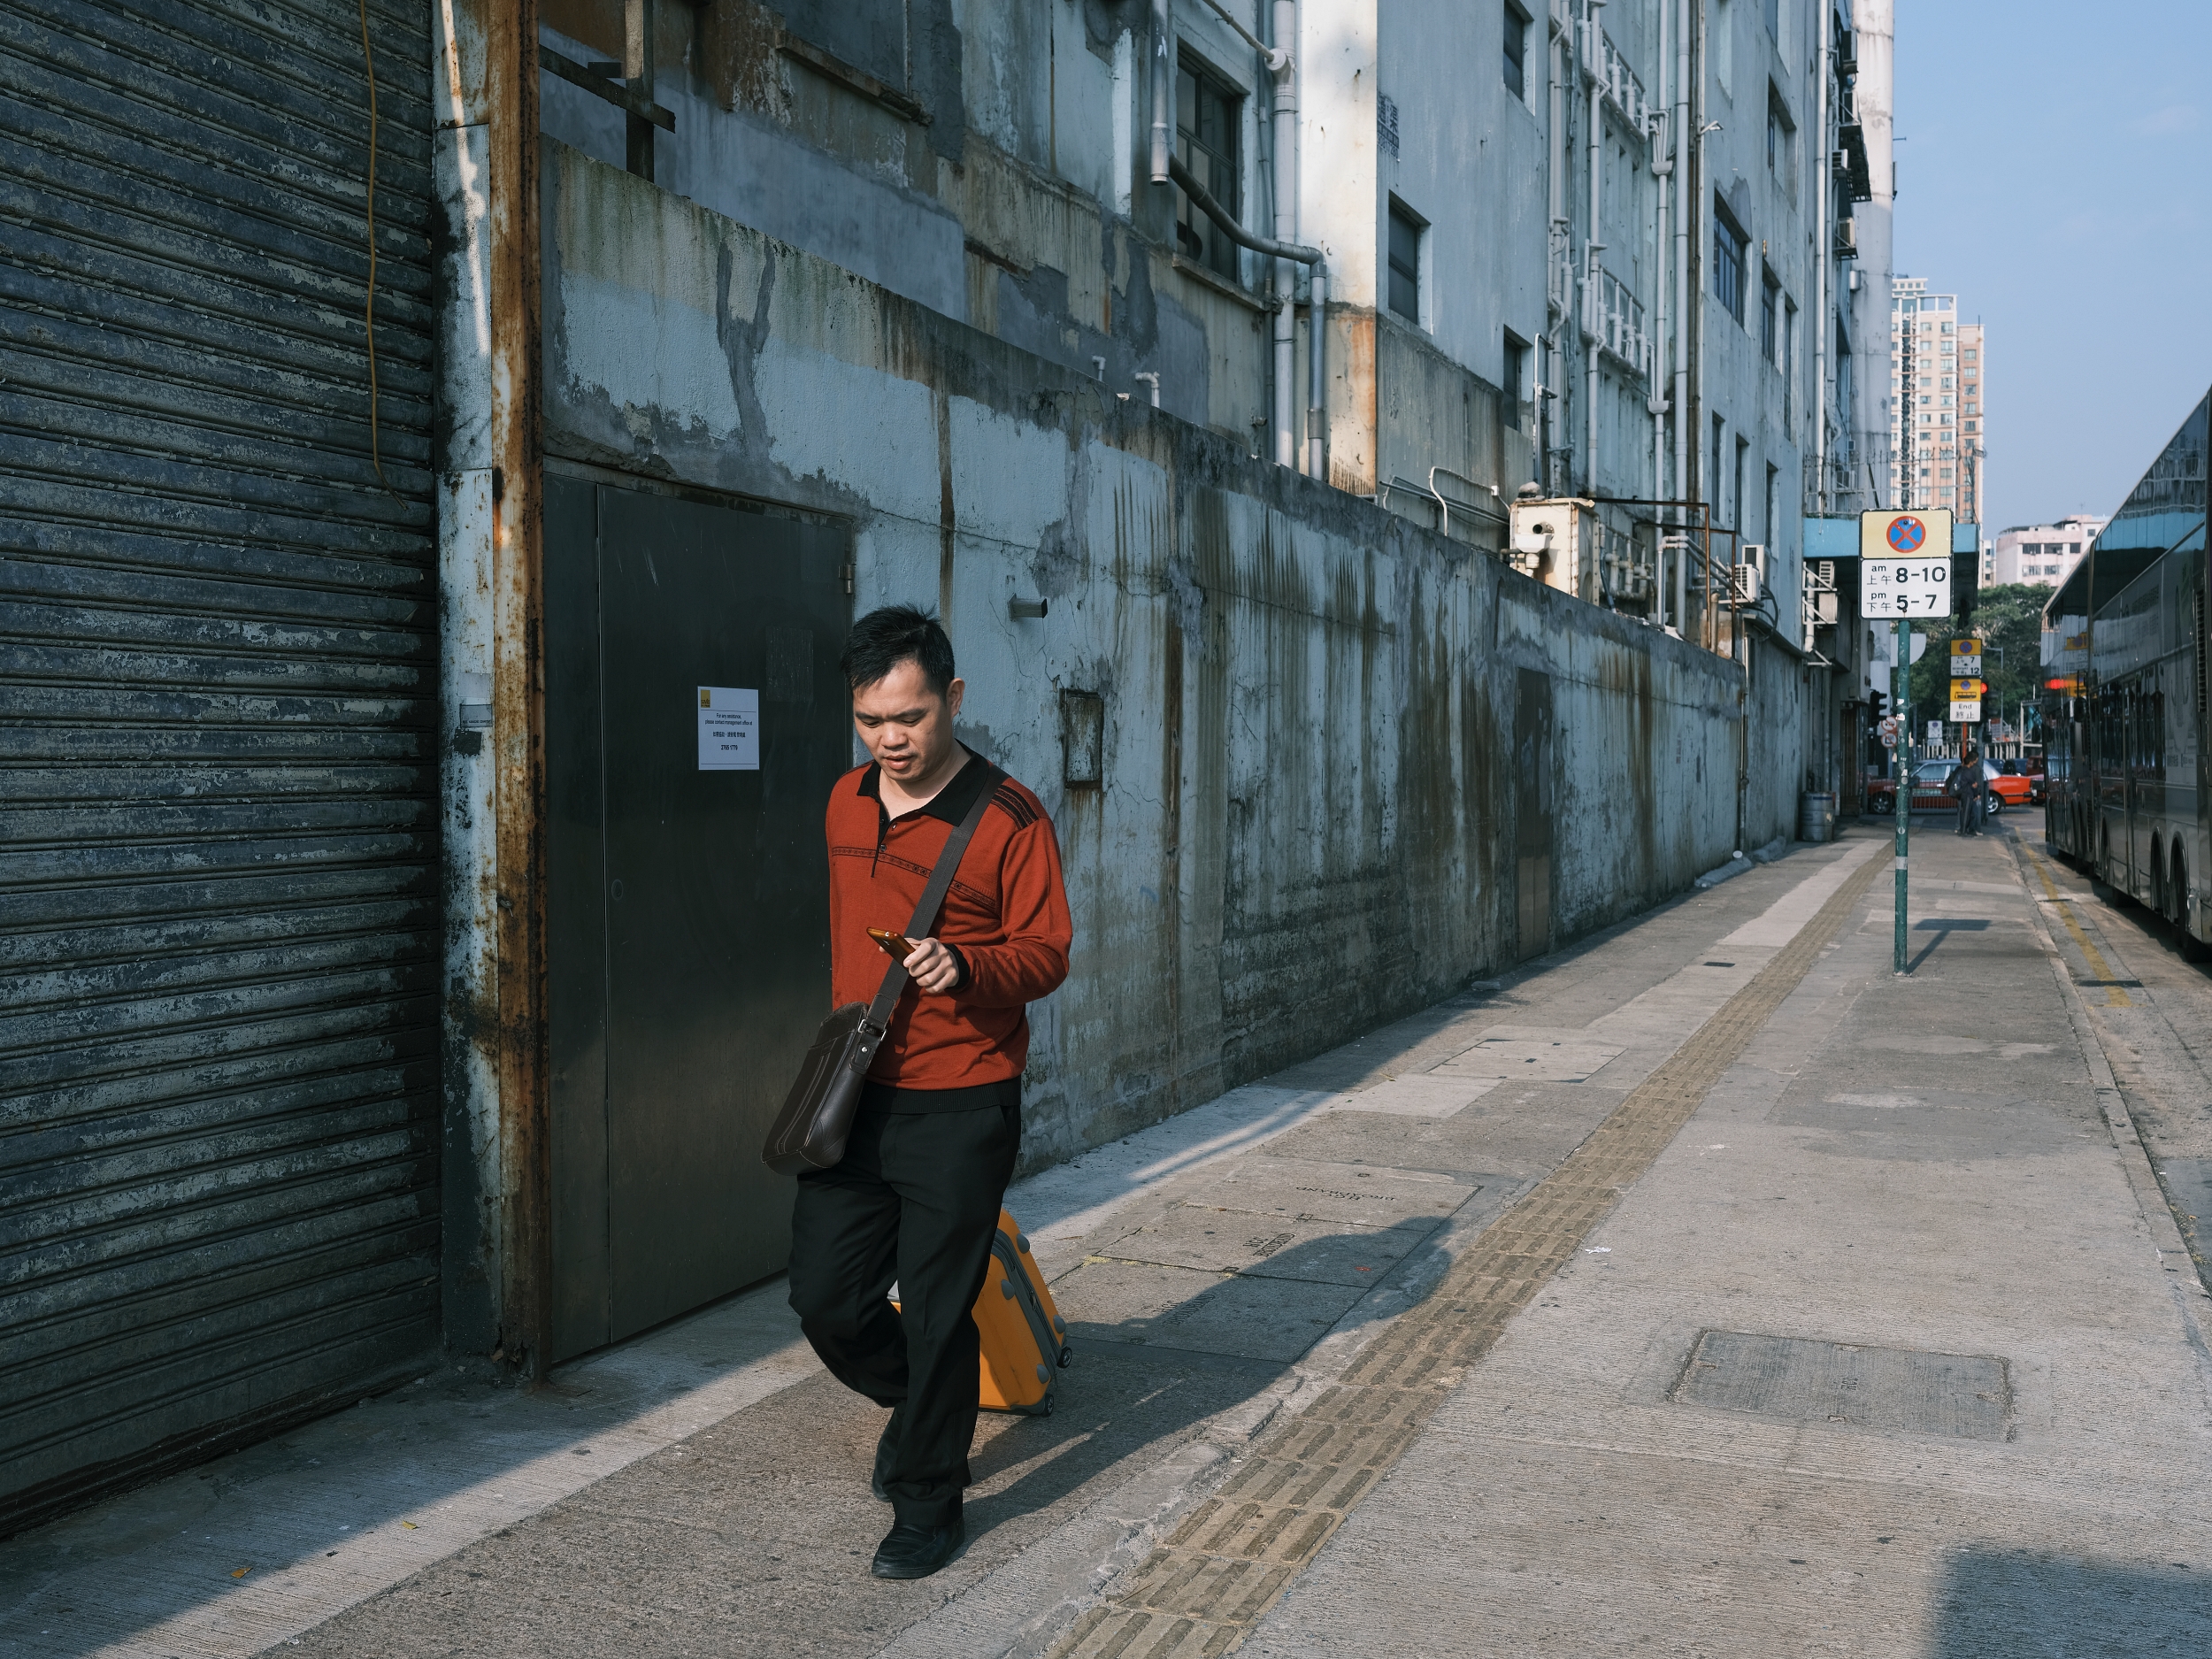
Classic Neg Film Profile. Darker shadows, lighter highlights, most film-like colour profile.
As a side note, Fujifilm also added Eterna-Cinema film profile to the GFX 50S and 50R, but I don’t find this simulation as useful for stills photographers. It’s a nice flat profile for videography for post production colour grading and exposure adjustment, but for stills it looks flat and dull. If you need to use a neutral film profile for stills, I recommend using Pro Neg. Std with minus 2 shadows and minus 2 highlights.
At this point, you might be thinking: ‘I don’t own a GFX camera, why should I care about the latest firmware update?’ One thing it shows is that Fujifilm is able and willing to go back to a three year old camera and add new film profiles, as well as tweak things like autofocus, face detect, folder structure, tethering control and other useful features. The GFX 50S and 50R still use the older X-Processor Pro, which is the same processor found in the X-H1, X-T2, X-Pro2, X-T20, X-E3 and X100F. Although I don’t foresee a big firmware update coming to the X-T20 or X-E3, we know there’s one coming to the X-T3 and perhaps they’ll include the X-H1. I for one would love to see a similar firmware update on the X-H1, considering it’s newer than the GFX 50S. And this experiment I did by applying the Classic Neg film profile to older GFX 50S RAW files shows this process is possible with any older camera with new film profiles added via firmware.

Classic Neg Film Profile. GFX 50S + GF 63mm f/2.8. 1/160th sec f/2.8 @ ISO 3200. Captured March 25th, 2017
Thank you Fujifilm for the latest kaizen firmware update to the GFX line-up, especially to the 3 year old GFX 50S. In a previous article I mentioned that I would consider buying a second hand GFX 50S if they updated the firmware to squeeze more features, functions and power from the aging but still capable X-Processor Pro. Of the three GFX cameras, I prefer the overall ergonomics and features of the GFX 50S over the 50R or GFX 100. Until there’s a full upgrade to the GFX 50S with IBIS and the latest X-Processor 4, this latest firmware update breaths fresh life to the OG digital medium format camera from Fujifilm. And if you’re like me and you keep all of your RAW files, this latest firmware update allows you to revisit older images and re-imagine them with the latest film profiles. Now let’s all anxiously await the big firmware update to the X-T3, and perhaps Fujifilm will throw us a bone by updating the X-H1 and X-T30 as well. Thanks for reading and happy shooting everyone!