Hello all, my name is Michael Gillman. I’m a photographer in Raleigh, North Carolina, USA, and I shoot exclusively with the Fujifilm system. I primarily shoot portraits and landscapes but also enjoy shooting concerts and the occasional wedding. My love of photography started nearly 10 years ago when I decided to purchase a point-and-shoot camera. I then decided to go with a friend to a local photography meetup, where I quickly realized this was something I was going to be doing the rest of my life. While I spend my weekdays teaching doctors and nurses better workflows for their patients through software, rarely a weekend goes by where I’m not on a photo-related assignment or two, or traveling for my own personal photo projects. I clocked in at just over 30,000 miles traveled in 2017.
Alien Skin Software asked me to write about my favorite tools in Exposure that I use during my editing process, which I’m happy to share with the FujiLove readers. This is by no means a full product review.
I was introduced to Alien Skin’s RAW editing software Exposure a couple of years ago by a friend of mine. At the time, I was mostly using Lightroom exclusively for all of my Nikon photo editing. I downloaded the trial version of Exposure X2 and was very impressed. I loved the great film presets that were at my disposal, the intuitive layout, the way the photo filing system works, and the nice overlays. At this point, I started using a combination of Lightroom and Exposure for various edits.
I also really liked the fact that there was no extra catalogue of my photos created, like in Lightroom. Exposure uses my current photo file structure. I open Exposure up and use the directory in the upper left hand corner to drill down to my photos. Piece of cake!
Fast forward to today, and Exposure X3 has become an even more important part of my workflow. I’ve recently switched from Nikon to the Fujifilm camera system. My initial thoughts on editing my Fujifilm RAF files in Lightroom weren’t overly great. While Lightroom was a great tool for my Nikon files, I found that it didn’t handle my Fujifilm files quite as nicely in some areas, especially when it came to sharpening. I noticed some artifacts when applying sharpening to the files in Lightroom that I didn’t get in Exposure. Also, I prefer the grain in Exposure and the overall control I get with it as opposed to Lightroom. With that, I’m learning to use Exposure X3 as more of a standalone RAW photo editor as opposed to using it alongside Lightroom. While currently in the process of learning more about Exposure X3 in that regard, here are some things that I liked right from the get go:
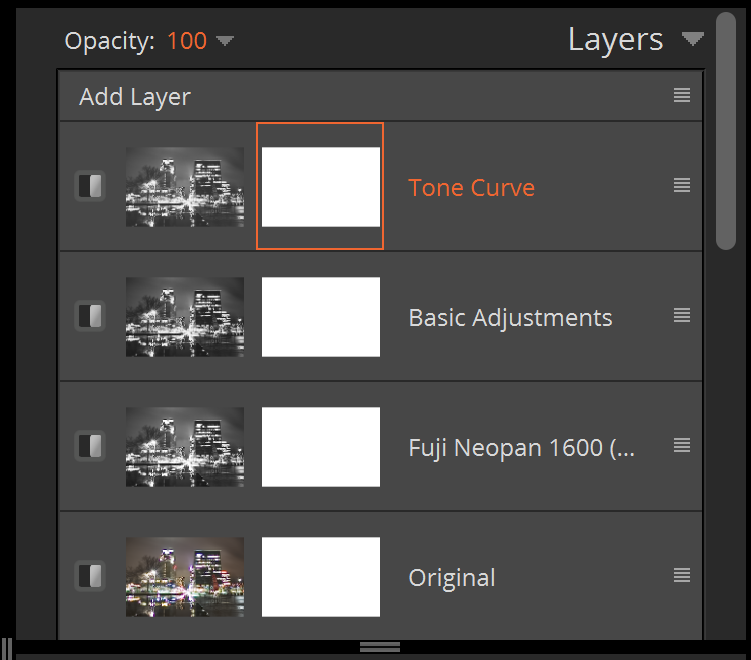
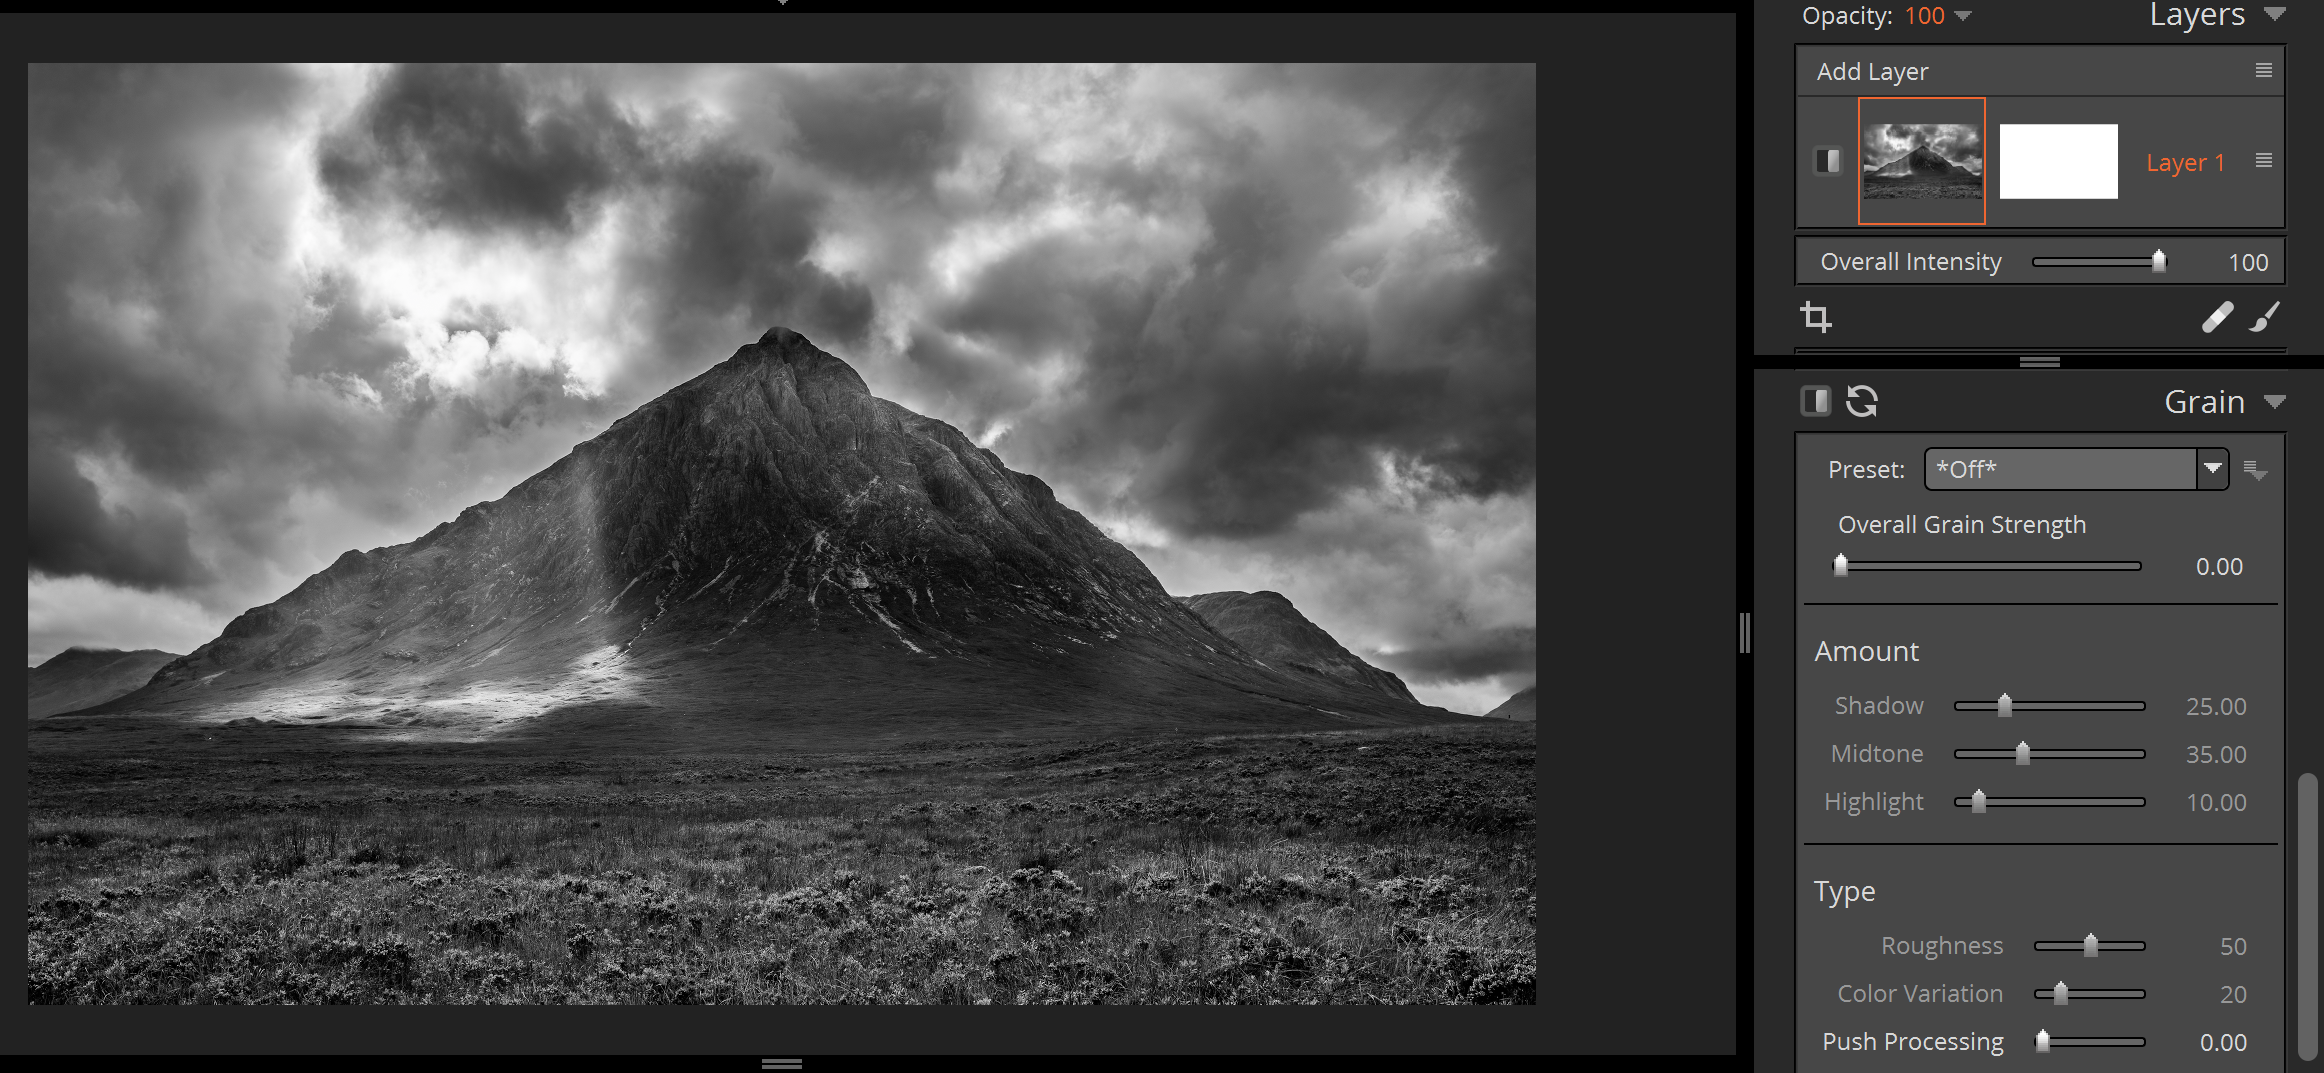
Layers
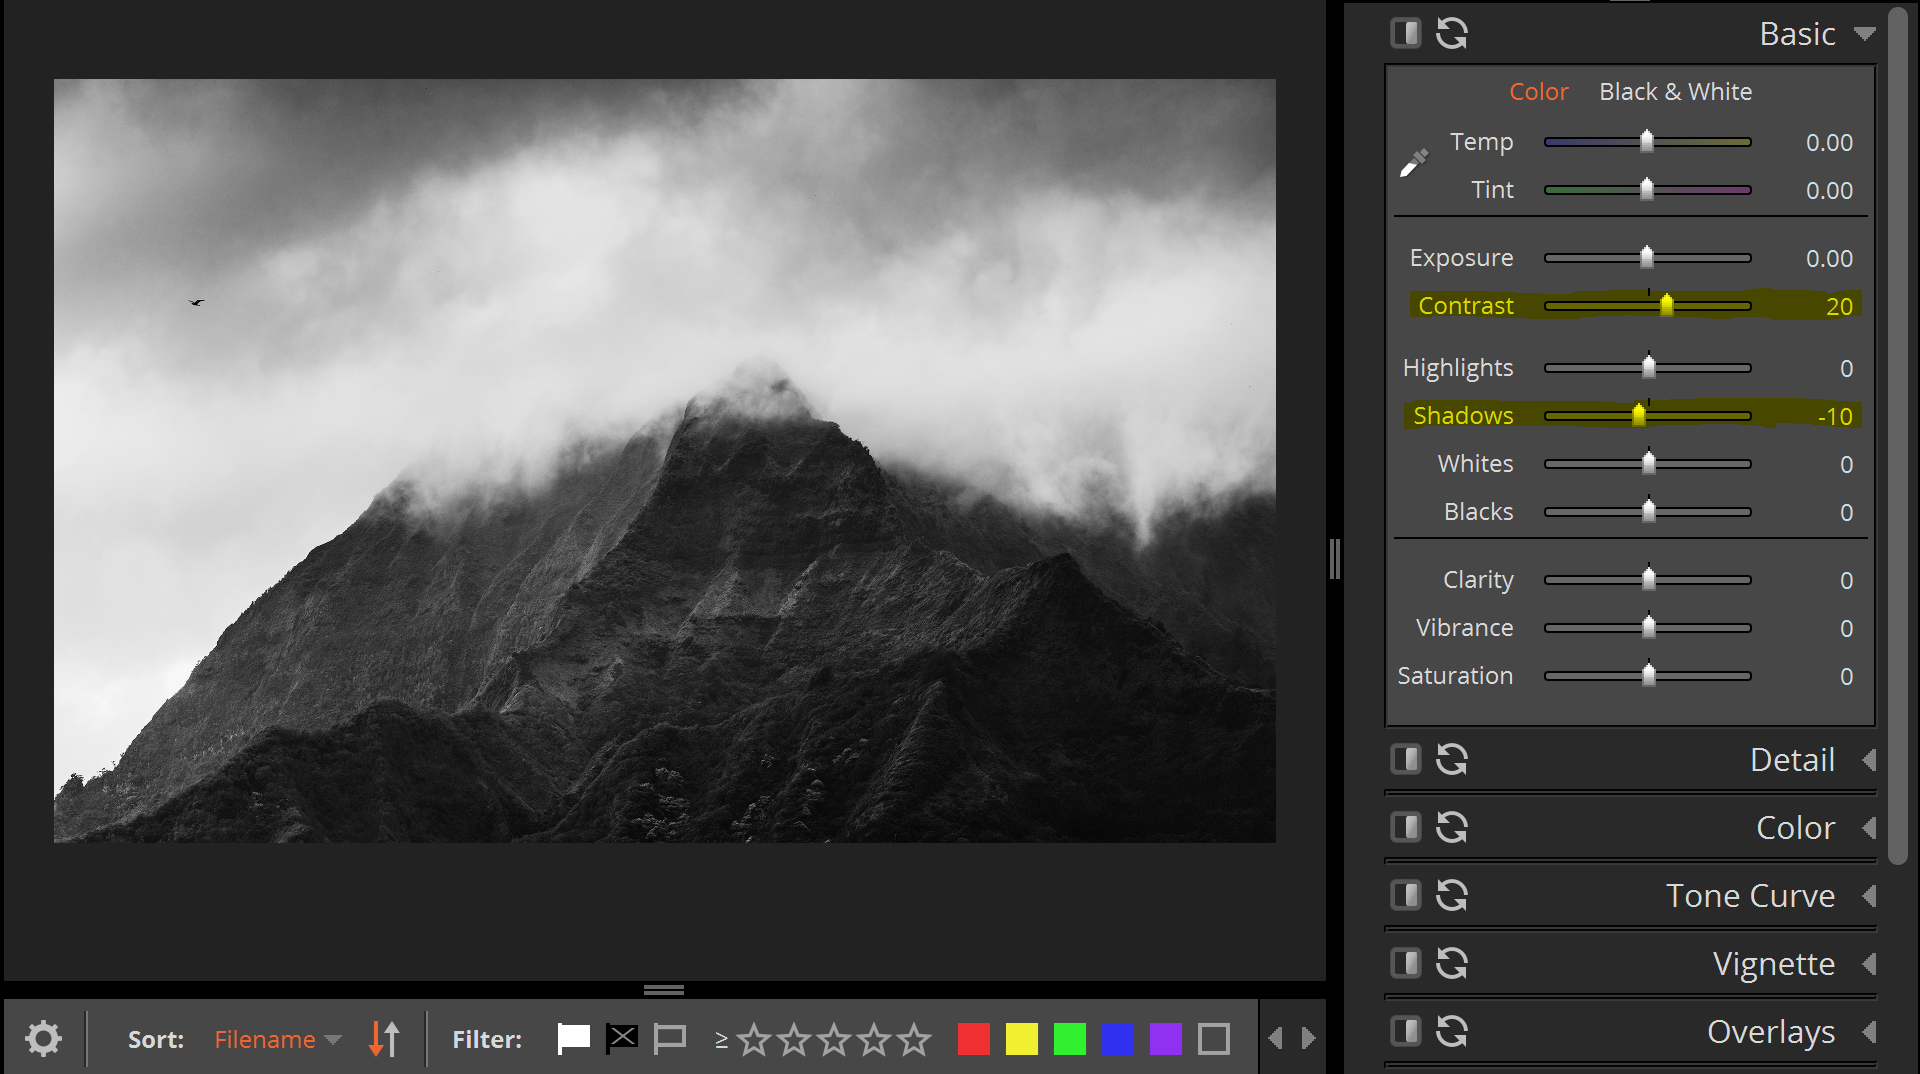
One of my favorite things about Exposure X3 is being able to progressively build upon my image, layer after layer, as I edit. Once I’m done editing an image, I can dissect exactly what I’ve done by looking at each layer, and turn a layer on or off to see exactly how that particular layer has affected my image. What’s especially helpful is being able to name my layers as they pertain to that particular layer’s edits. For example, I added a Fuji Neopan 1600 preset to one of the layers below, then added an additional layer to add a little contrast to the image along with some other basic adjustments. I then added a third layer to adjust my tone curve.
Film Presets
One of the many things that turned me onto Fujifilm was their great film presets for JPEGS. While I mostly shoot RAW, the presets were a lot of fun to shoot with and often produced great results right out of the camera. Exposure X3 has a wealth of great-looking film presets as well, and Alien Skin keeps building on them. My current favorites are the Kodak Gold simulations as well as the Fuji Pro set of simulations.
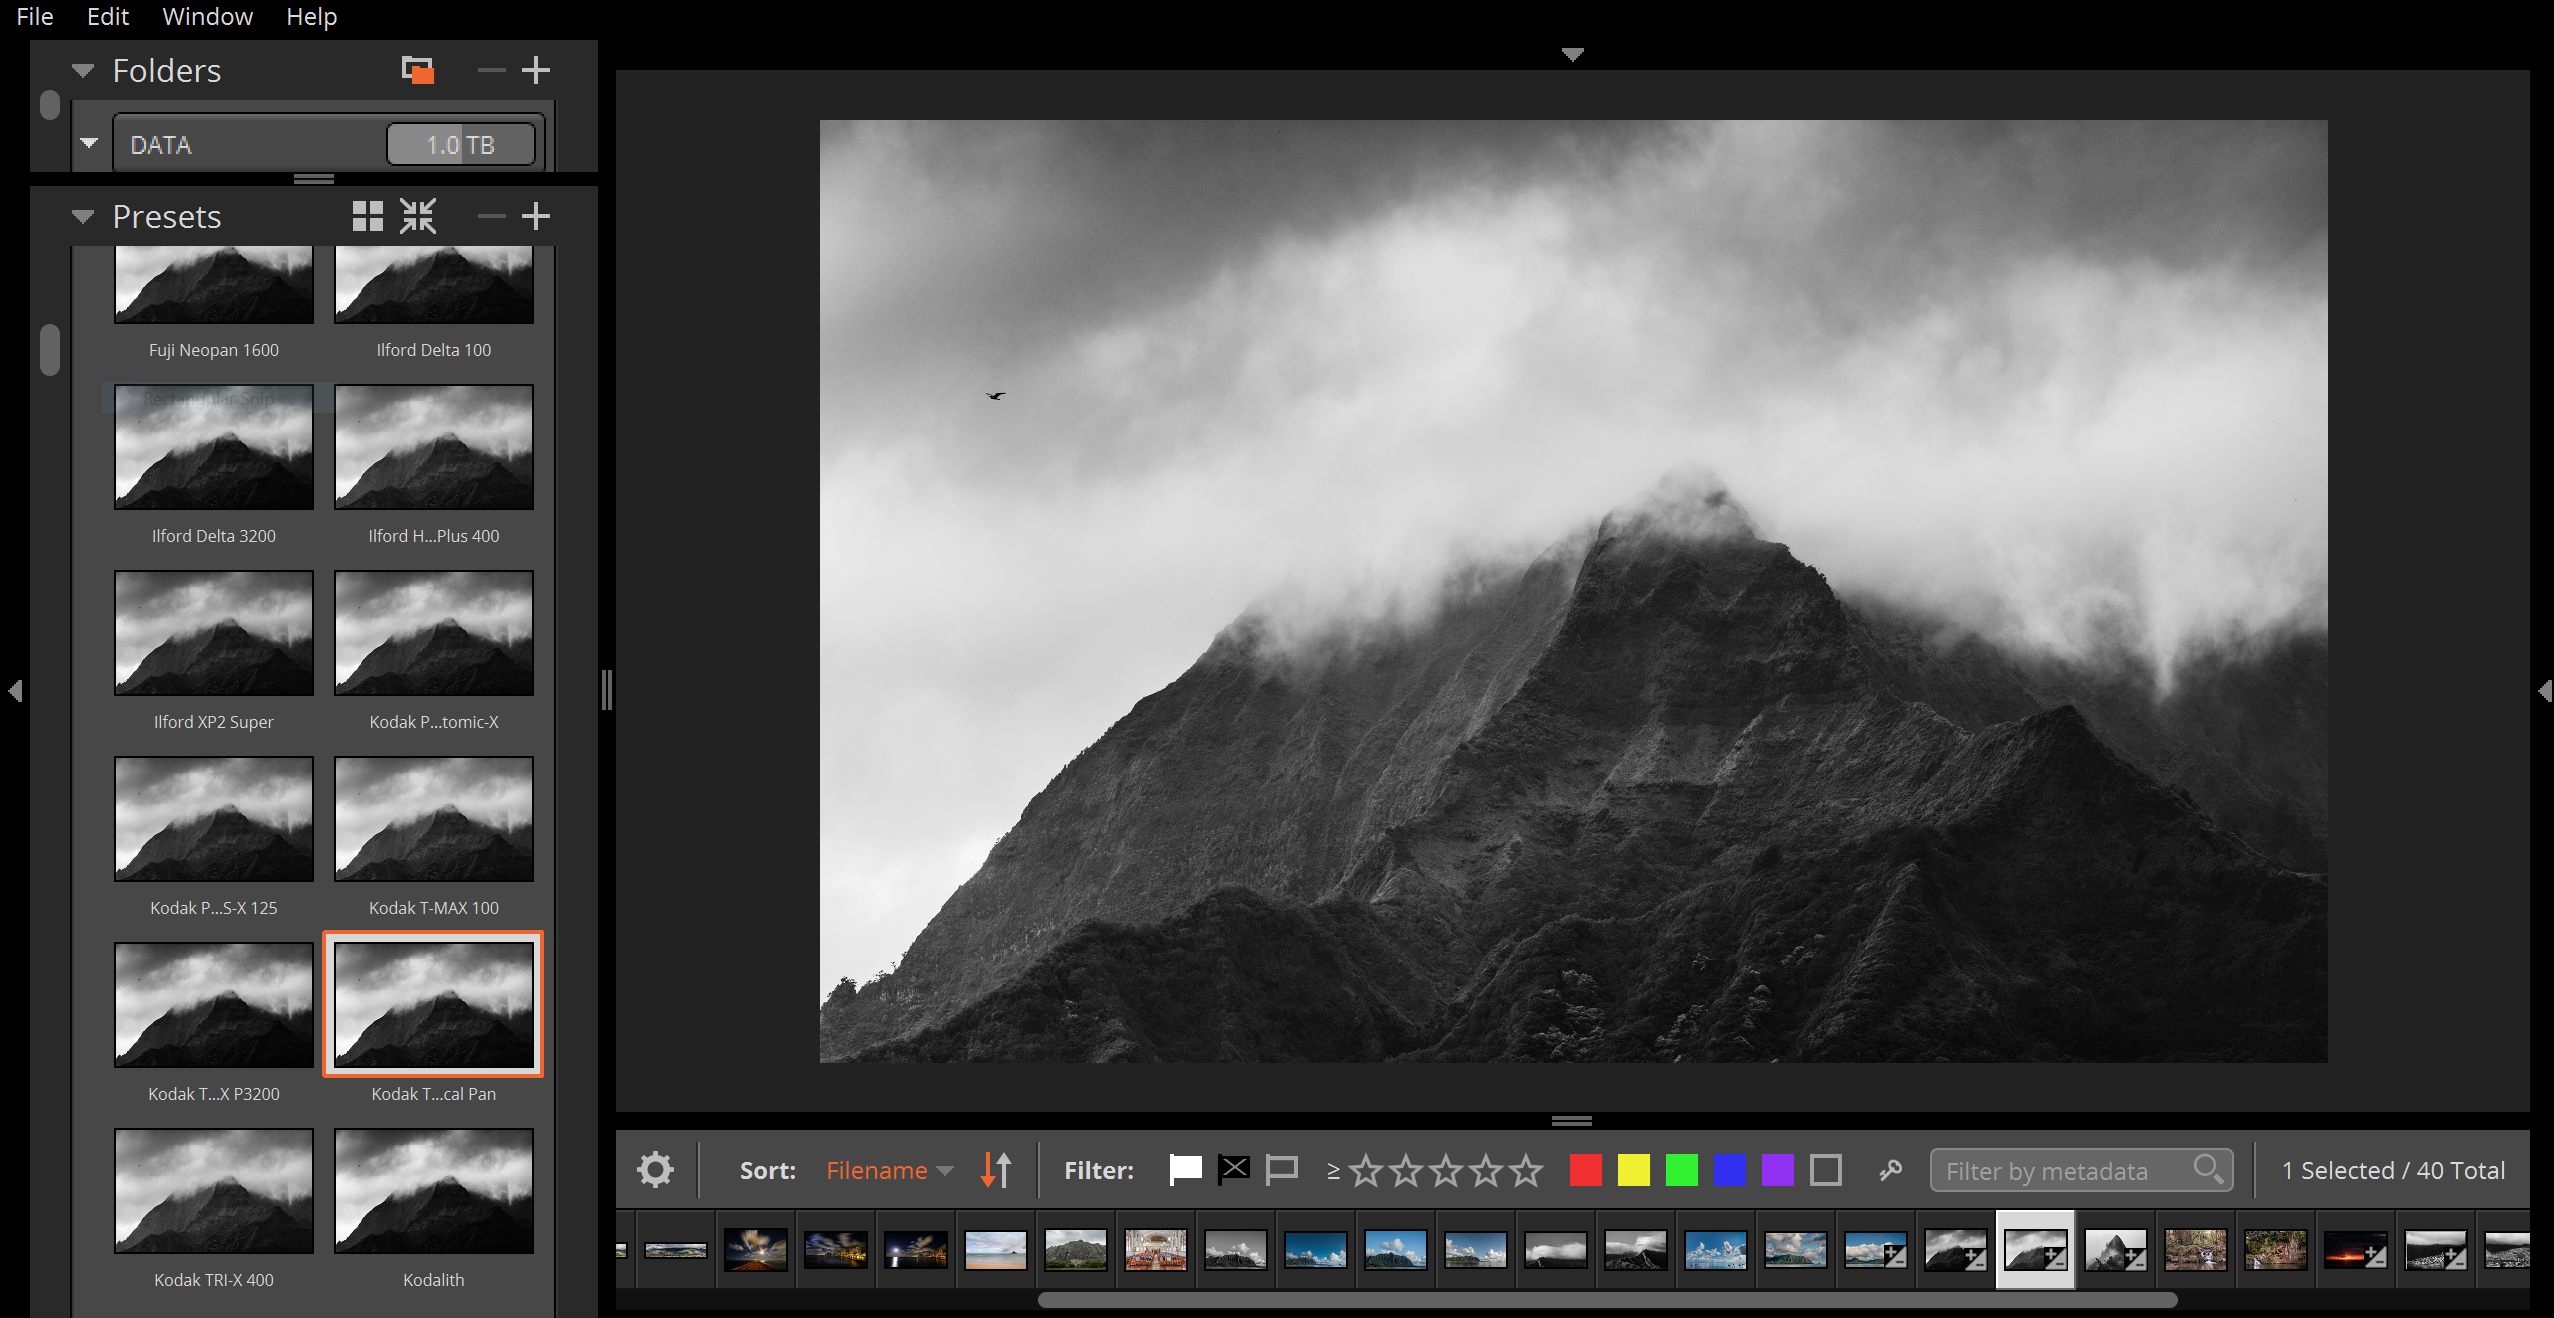
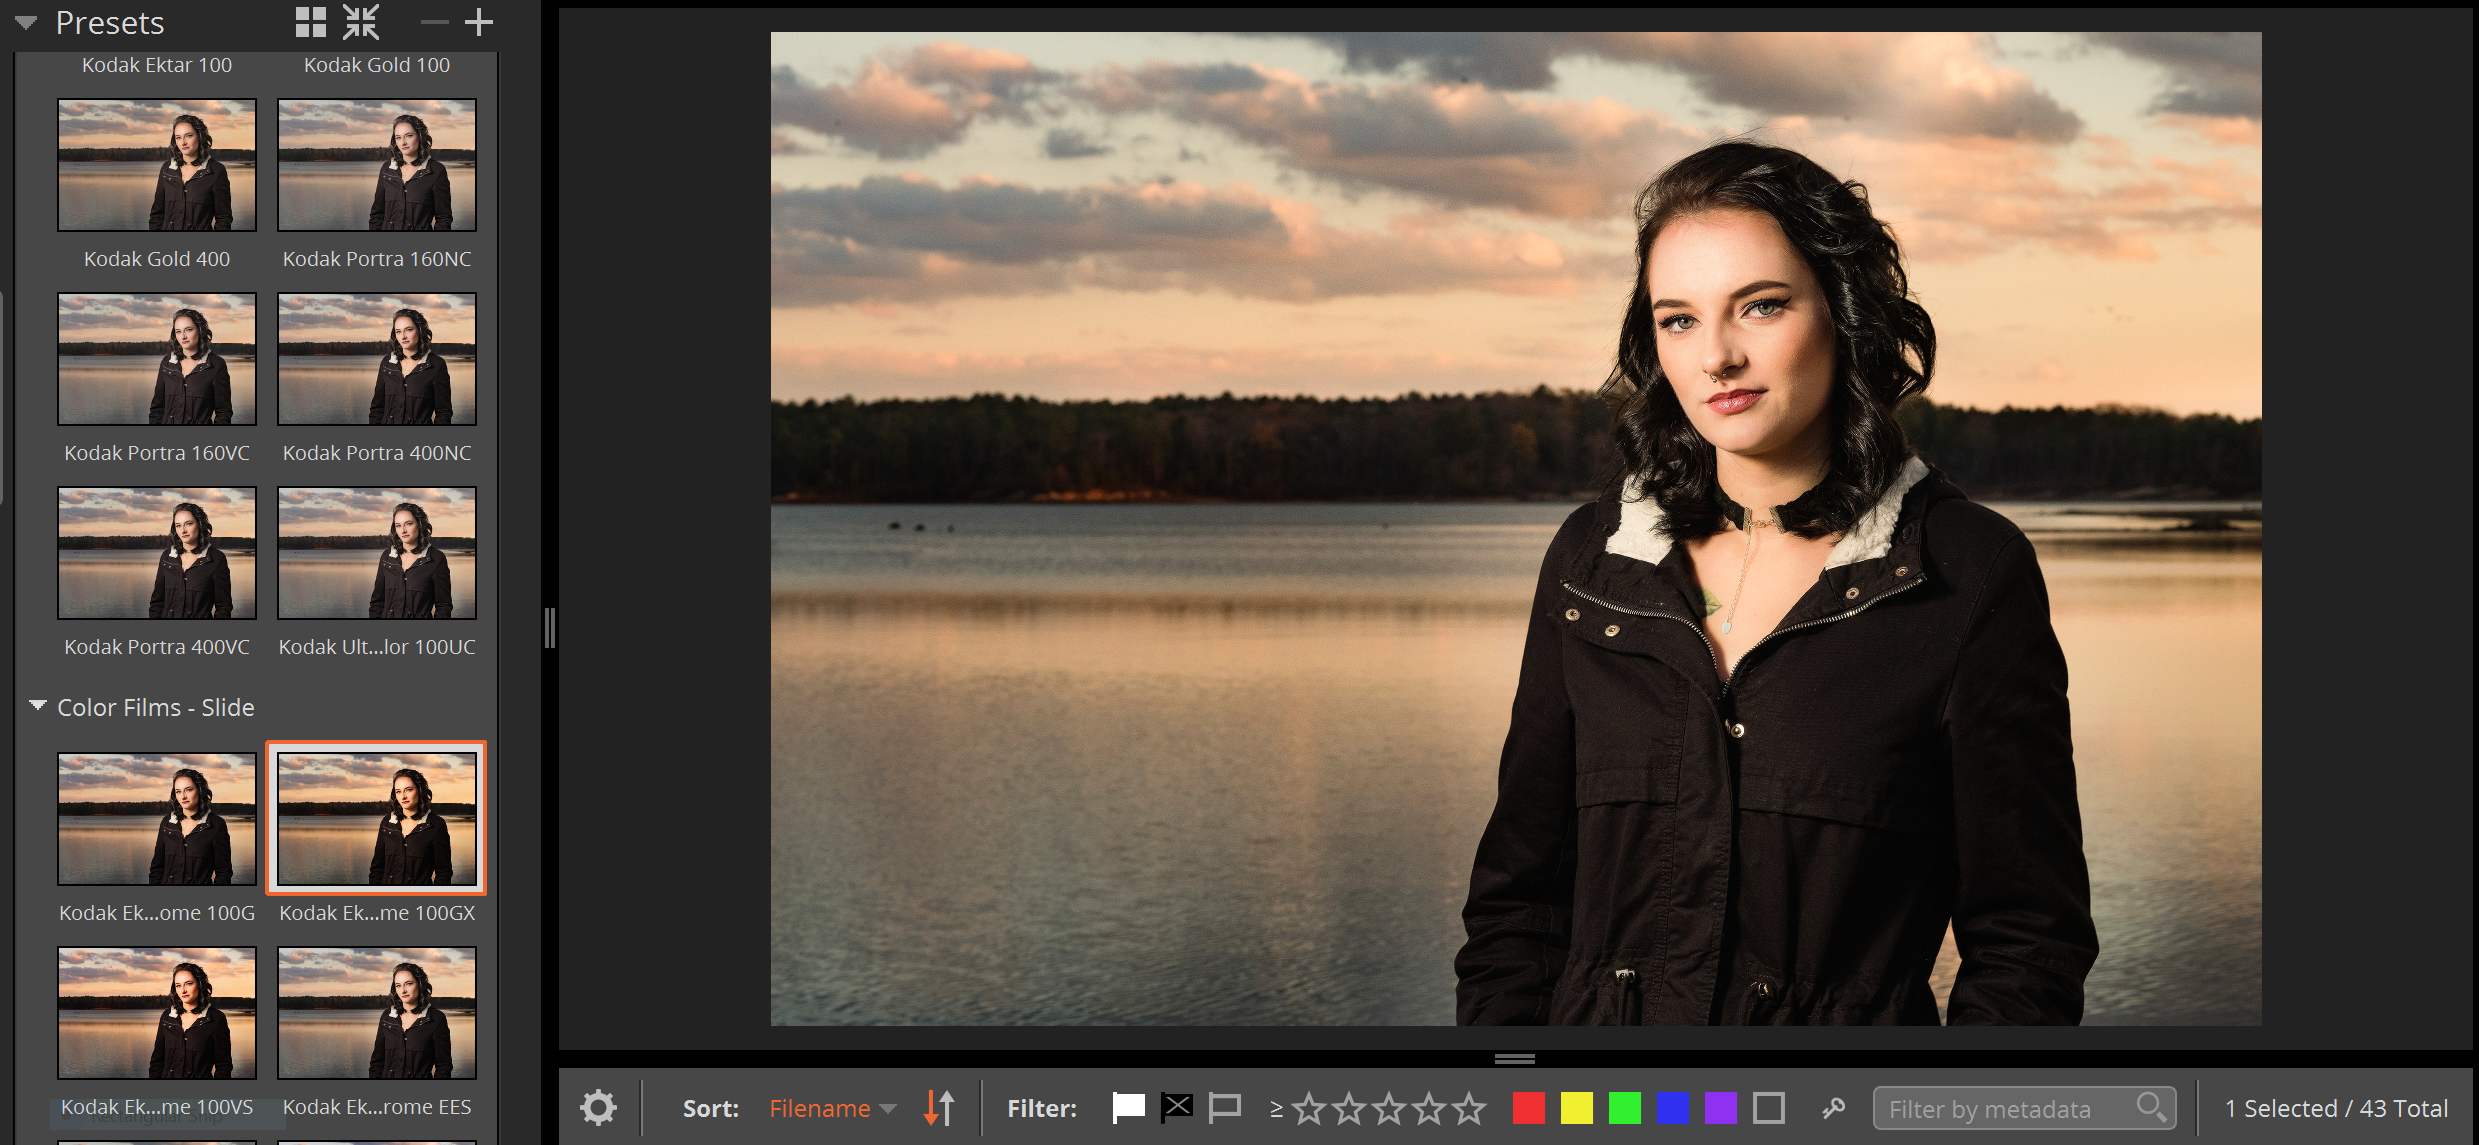
Exposure features over 500 presets, so I assign a star to my favorites, which helps me easily find them.
Here is an unedited image and a group of black and white presets to the left. If I hover over each preset with my cursor, Exposure shows me a preview of what effect the preset will have on the image. In Lightroom, the only preset preview I have available to me is the much smaller box on the upper left hand corner of the panel. With Exposure, you can also enlarge the Preset Preview panel to see several rows of three preset previews at a time, which is very helpful.
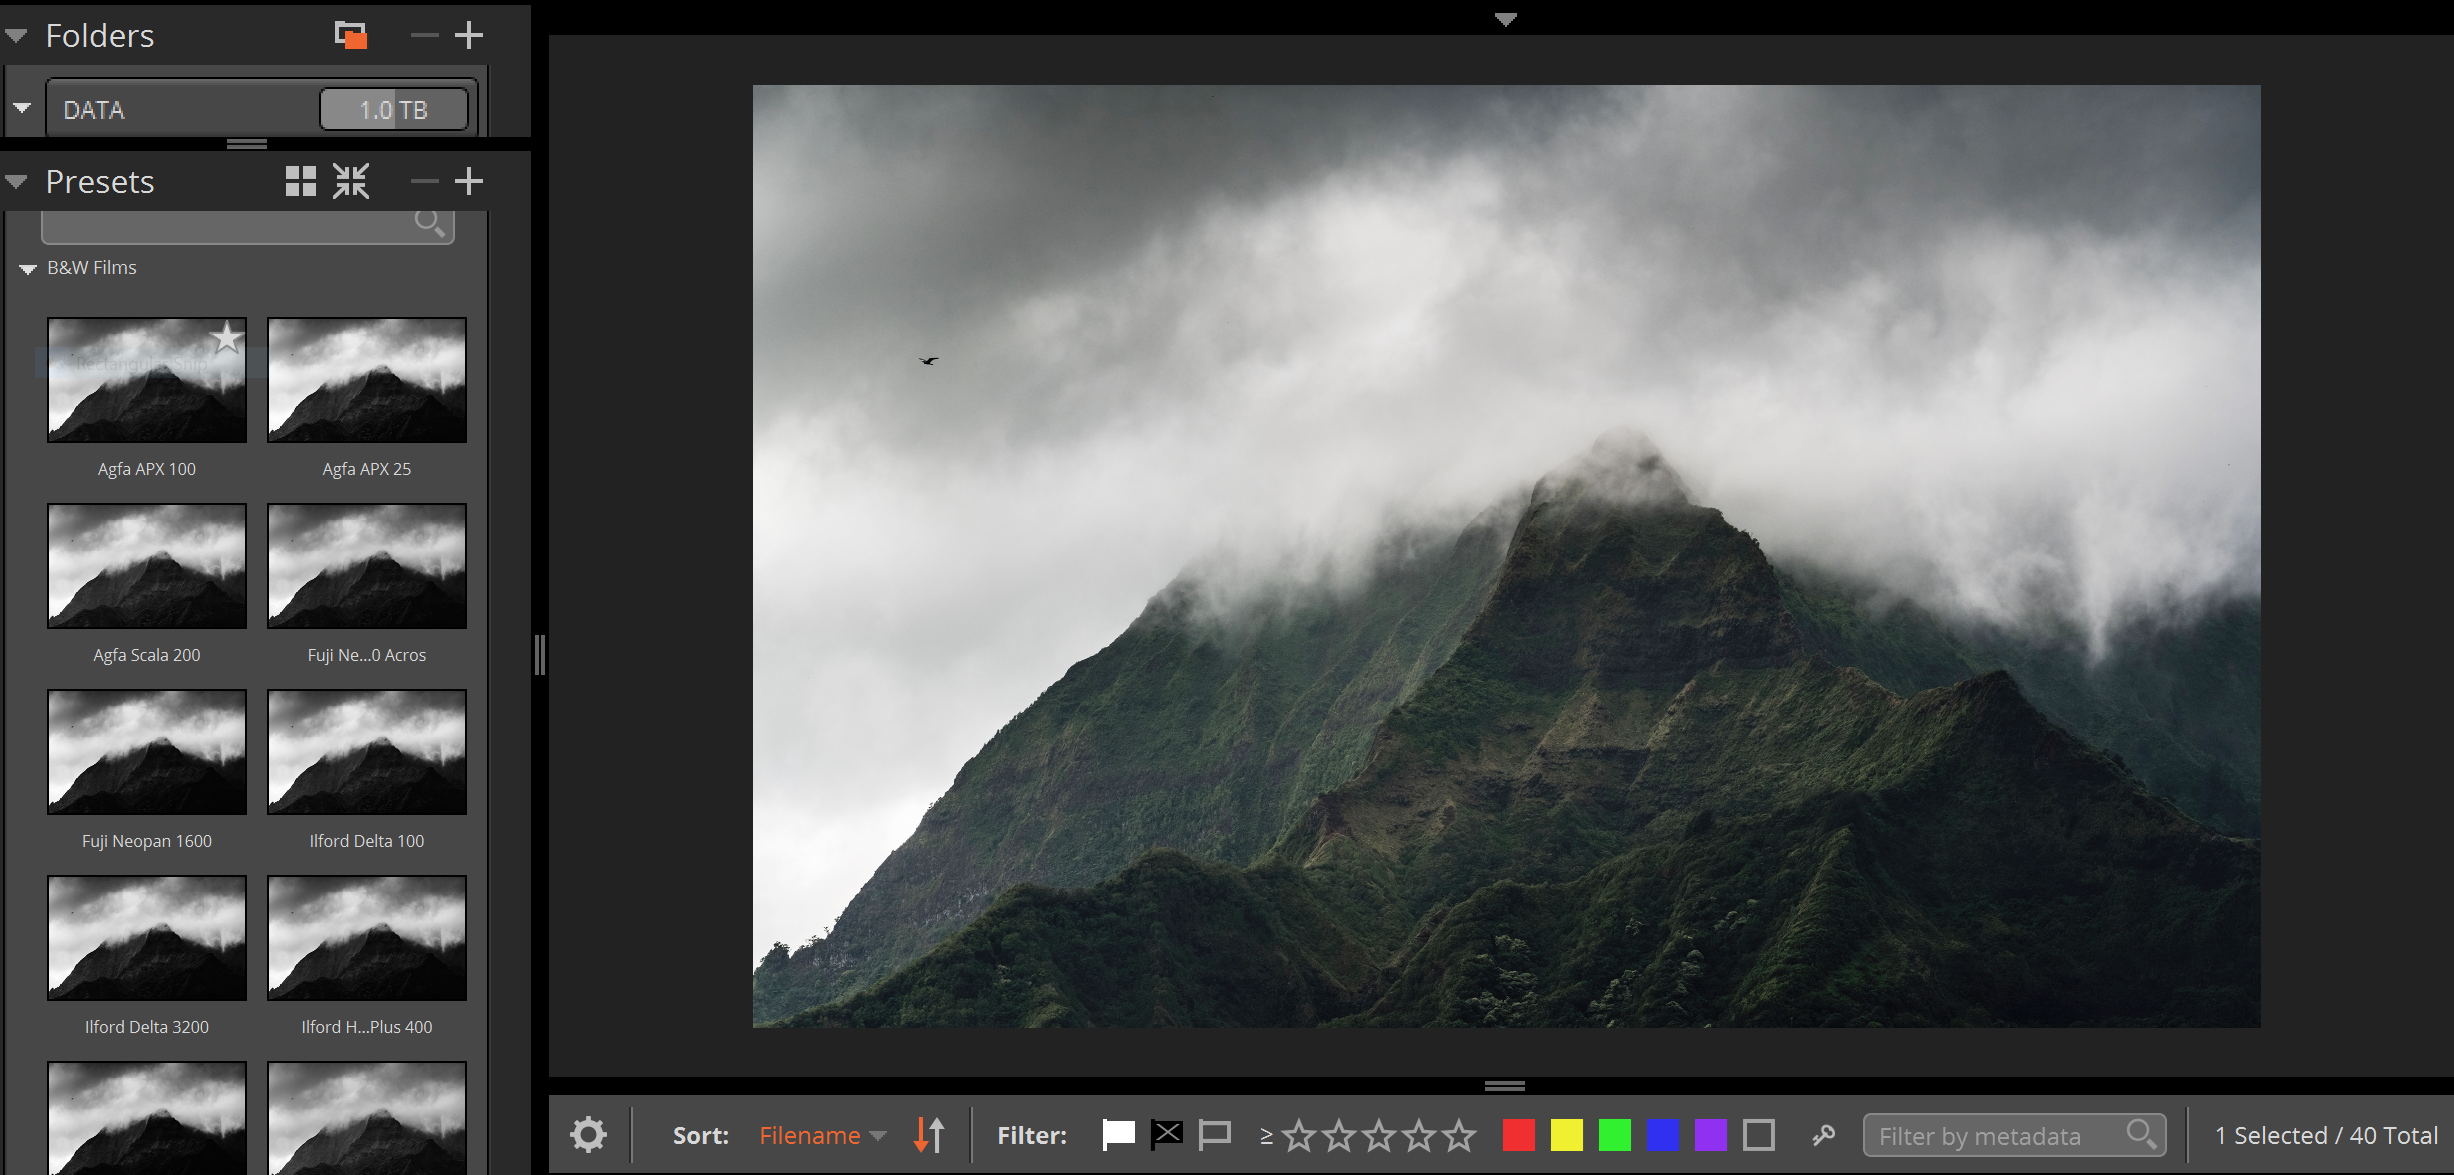
Original image. Click to enlarge.
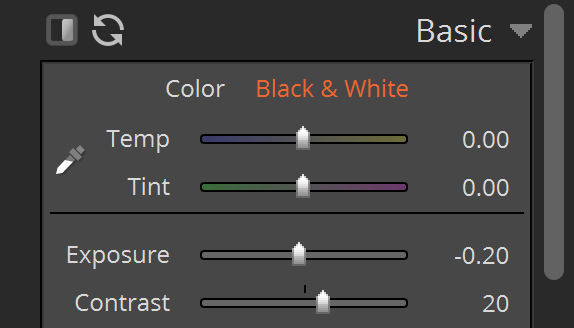
I’ve chosen a Kodak black and white preset here, called Kodak Technical Pan. I think that this is a great preset that adds a little grain to the shadows and midtones.
Kodak Technical Pan. Click to enlarge.
While I think the preset looks great, Exposure enables me to also use a preset as a foundation, or a base edit for a more fine-tuned edit via the Basic panel. If you like total control over your images like I do, once the desired preset is applied, head over to the editing panels on the right and fine tune your image from there.
Once edited, I can save it as a custom preset to easily apply it to future images.
I’ve also found that if I’m on the fence about a particular photo, and not sure which direction I want to go with it, quickly running through some presets may give me an idea of what can be done with the image.
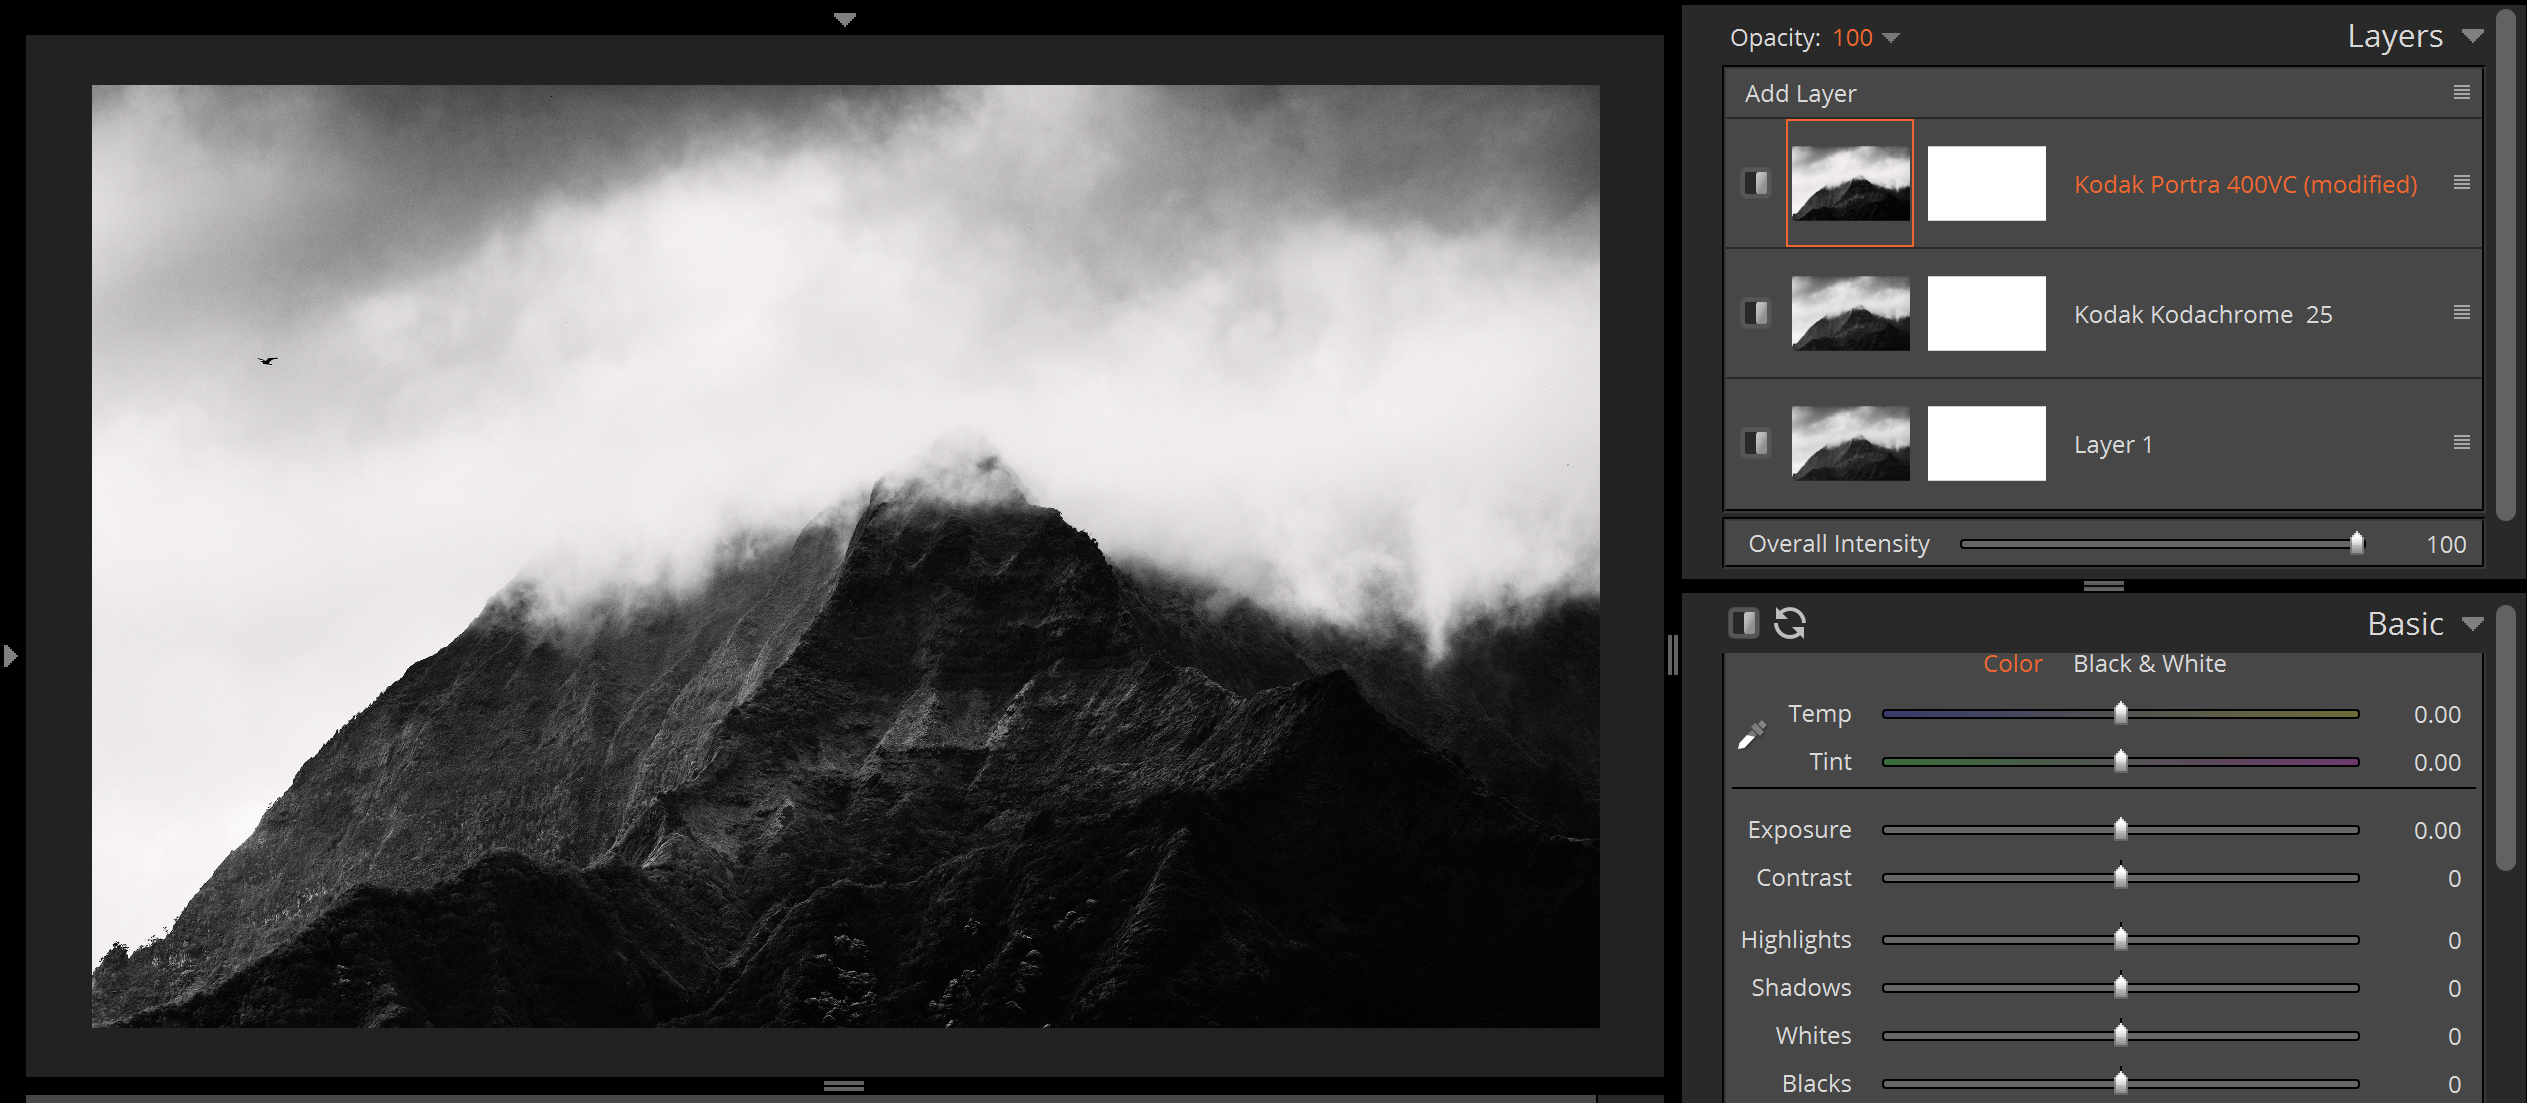
I can also drag and drop multiple presets on top of my image, building layers of my preset selections as I add them. I’ve done that in the screenshot below.
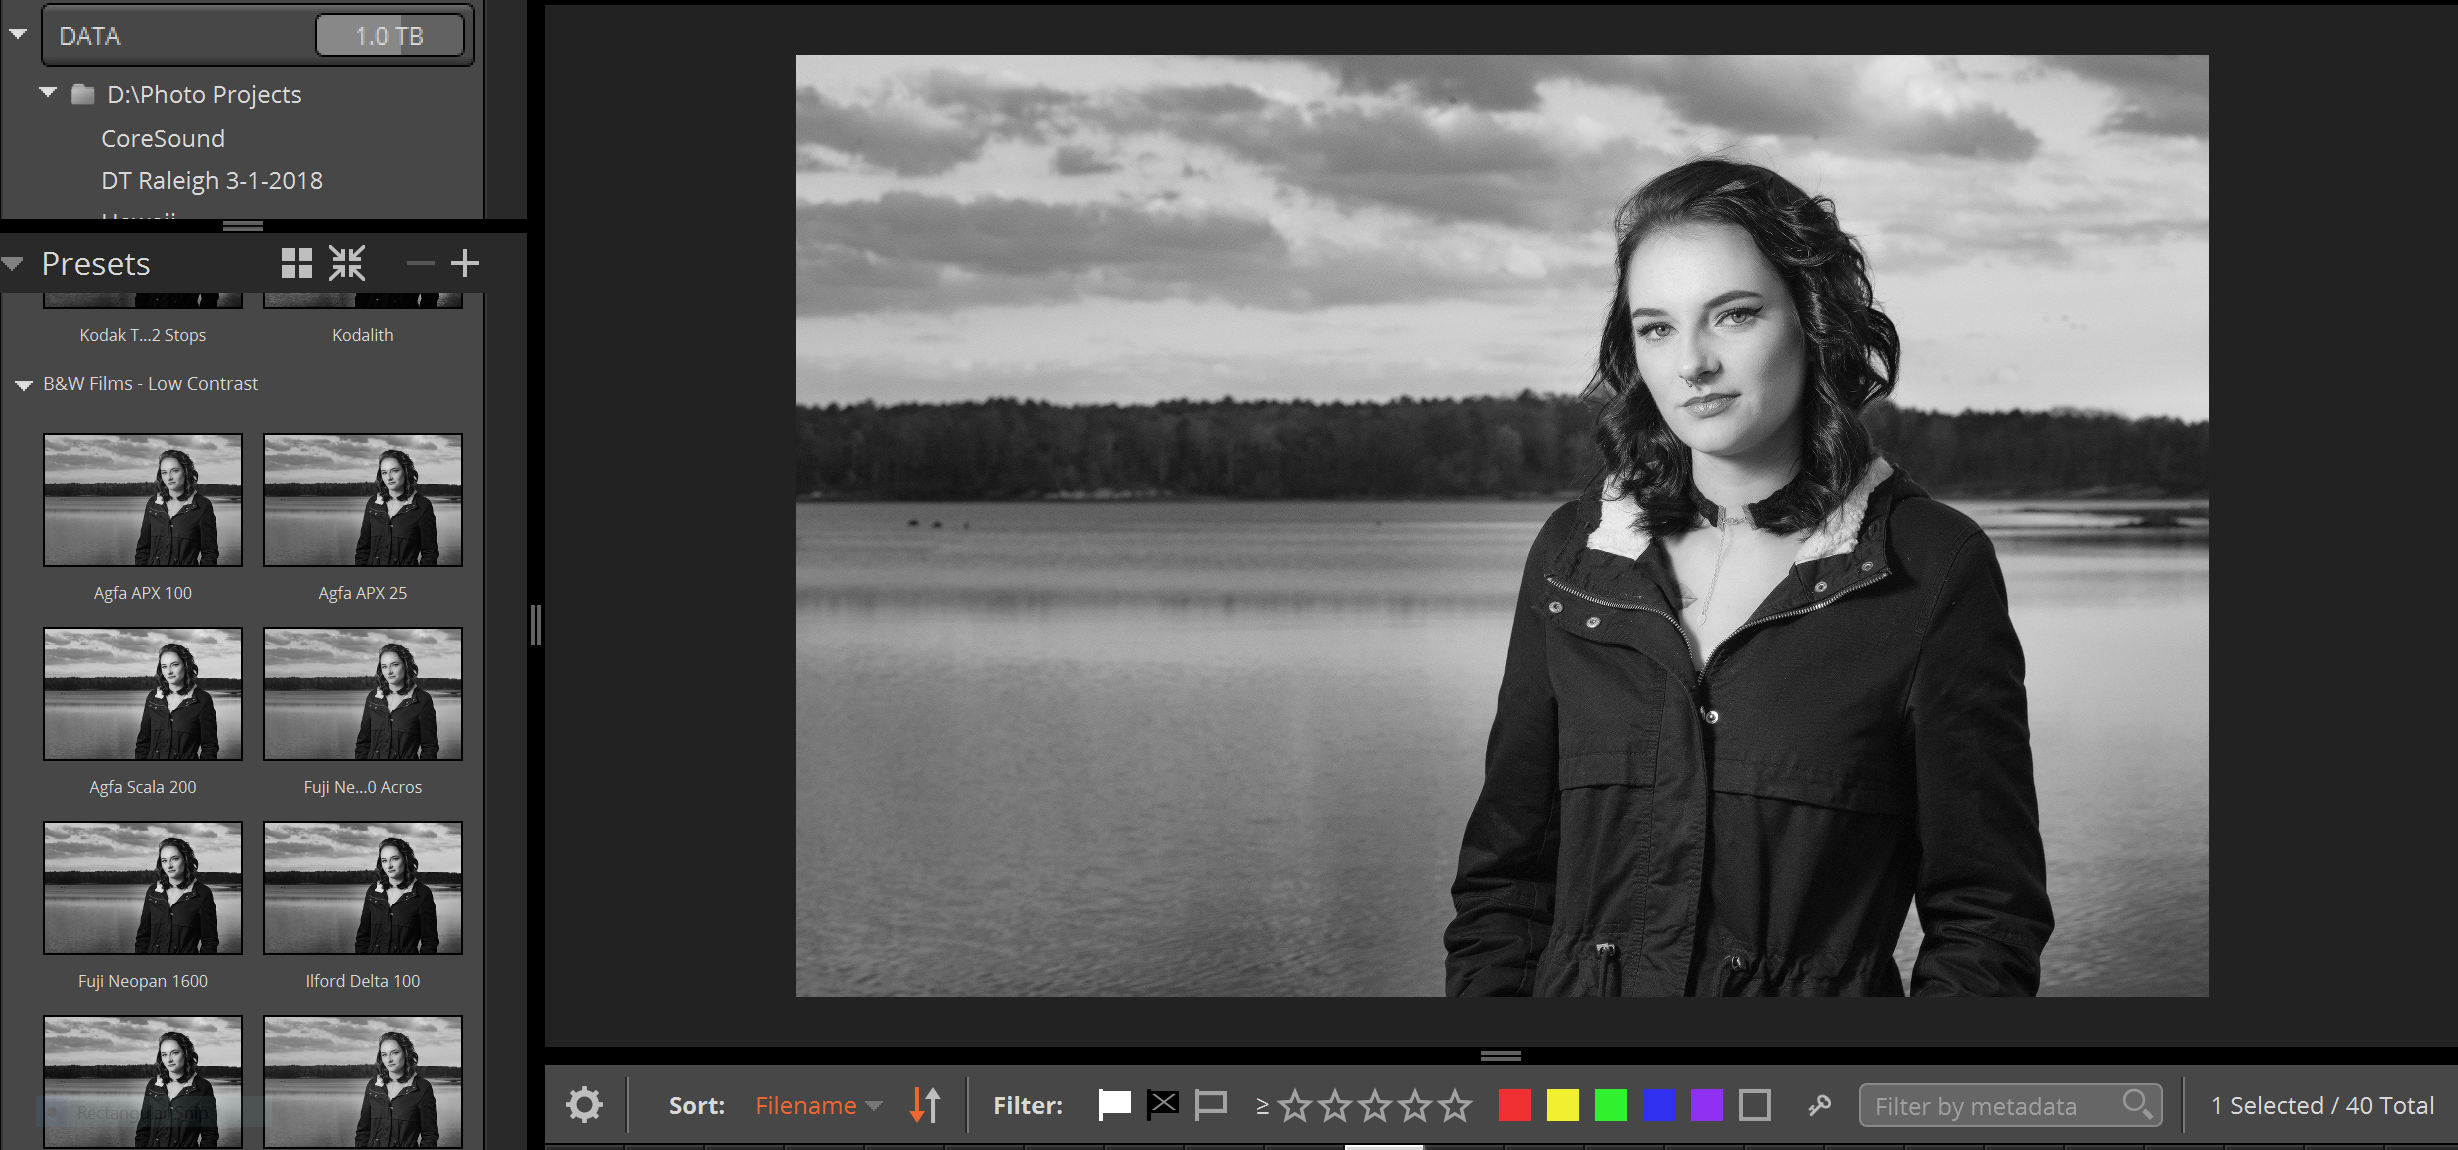
Let’s take a look at some presets I like to use for portraits. When shooting at nearby beaches or lakes, I generally like some nice, warm tones. In this photo, I want to apply a preset that adds a warm tone with a bit more pop.
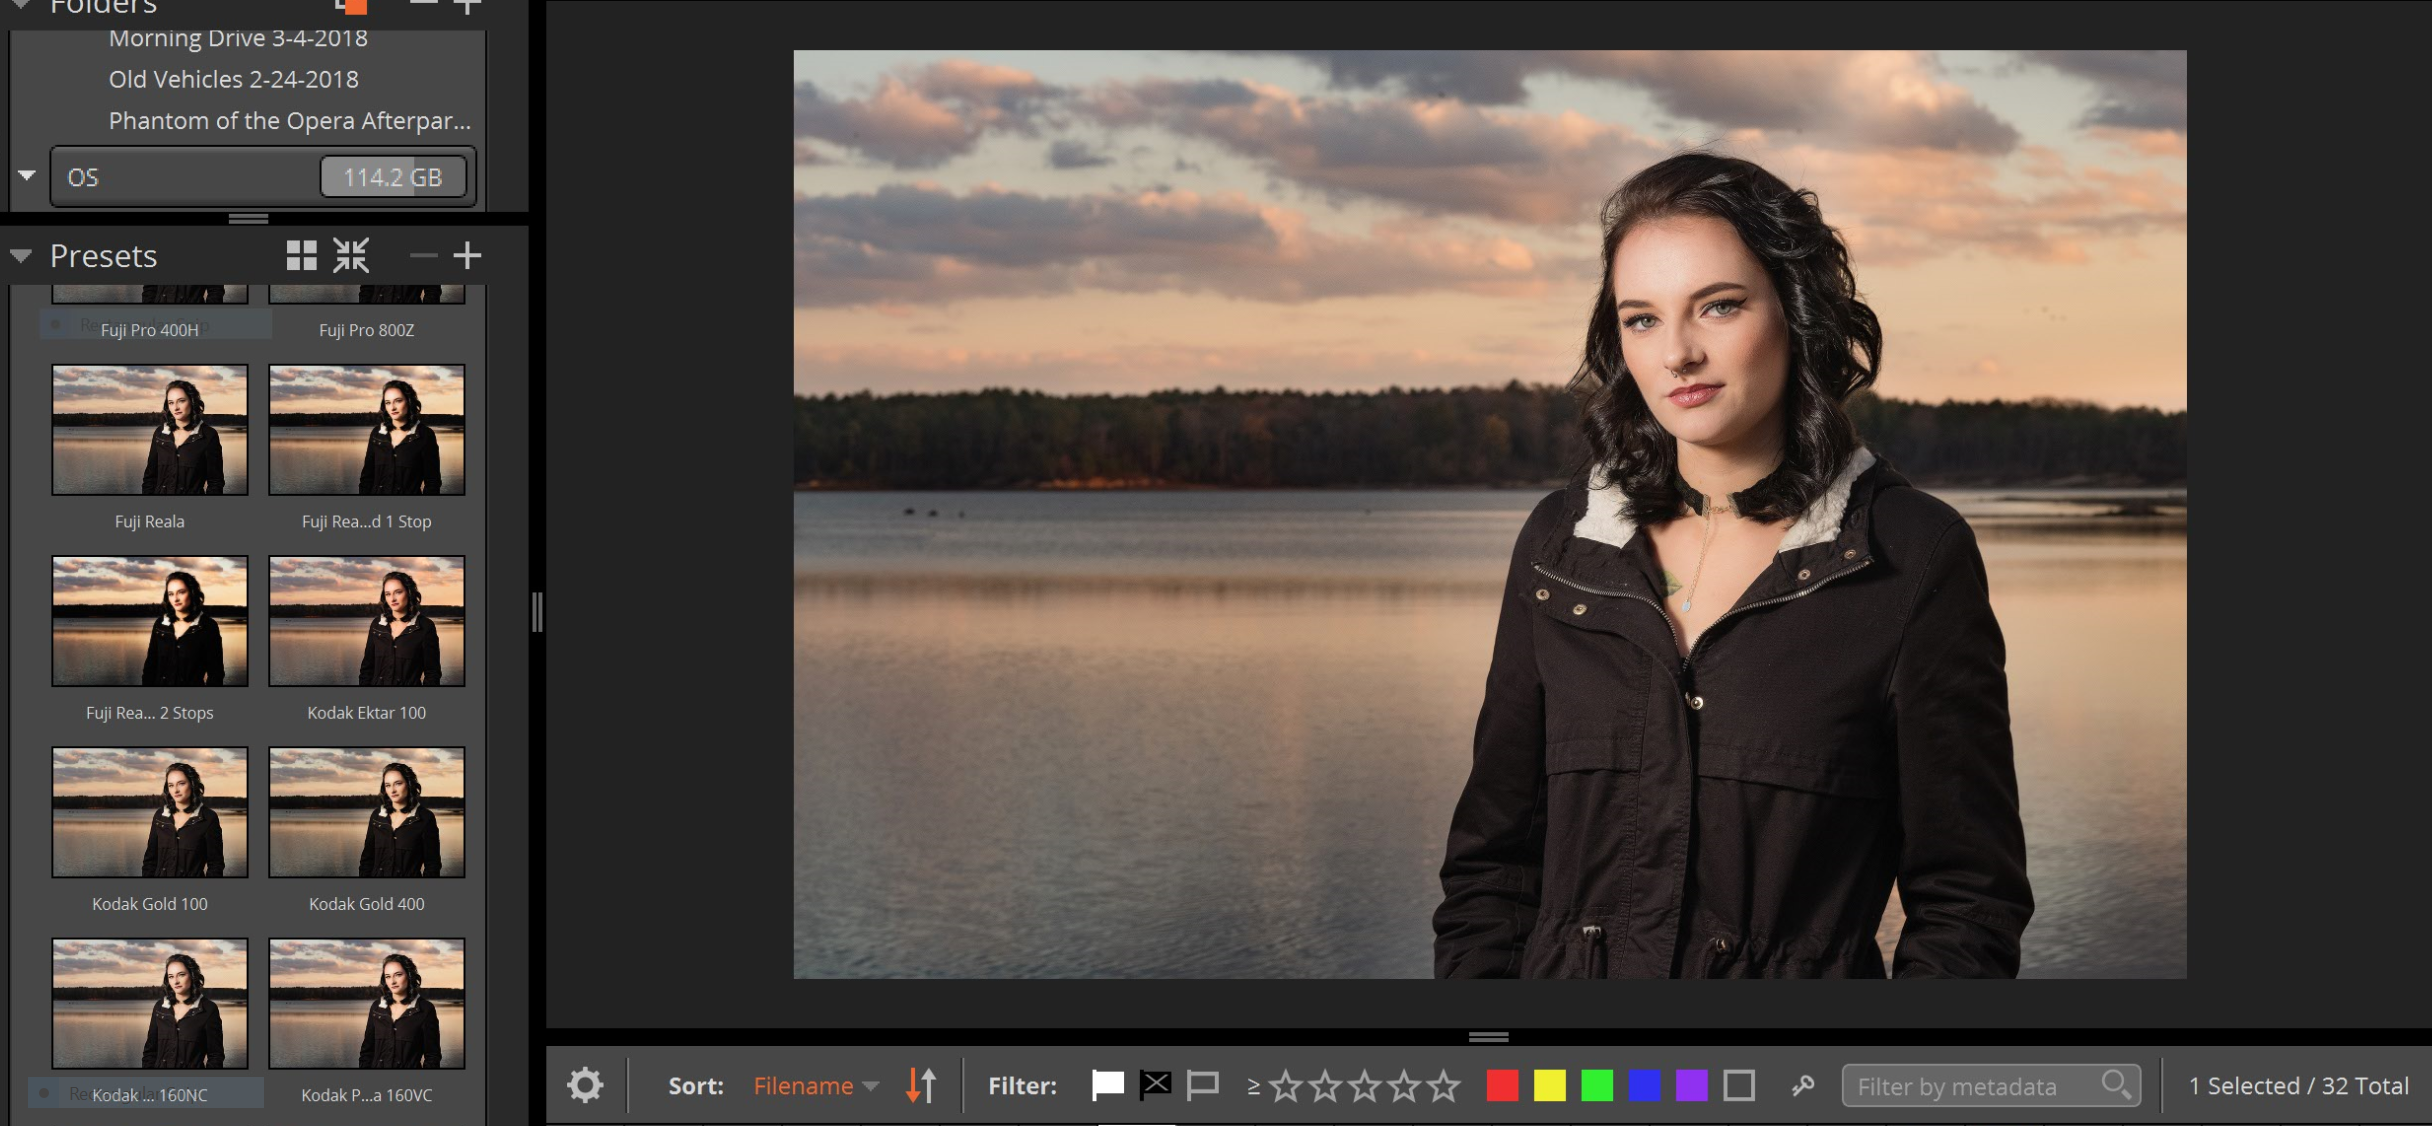
Original image. Click to enlarge.
I chose Kodak Ektachrome 100GX because it adds a bit of contrast and warmth to the image as well as lifting some shadows without being heavy-handed. Again, adjustments can be made afterwards to fine-tune the image if desired.
Kodak Ektachrome 100GX. Click to enlarge.
Let’s quickly take a look at our beloved Acros. I applied the Fuji Neopan 100 Acros Filter to this image and made some slight adjustments. I brought the exposure down a little and very slightly boosted the contrast.
Here’s the result:
Overlays
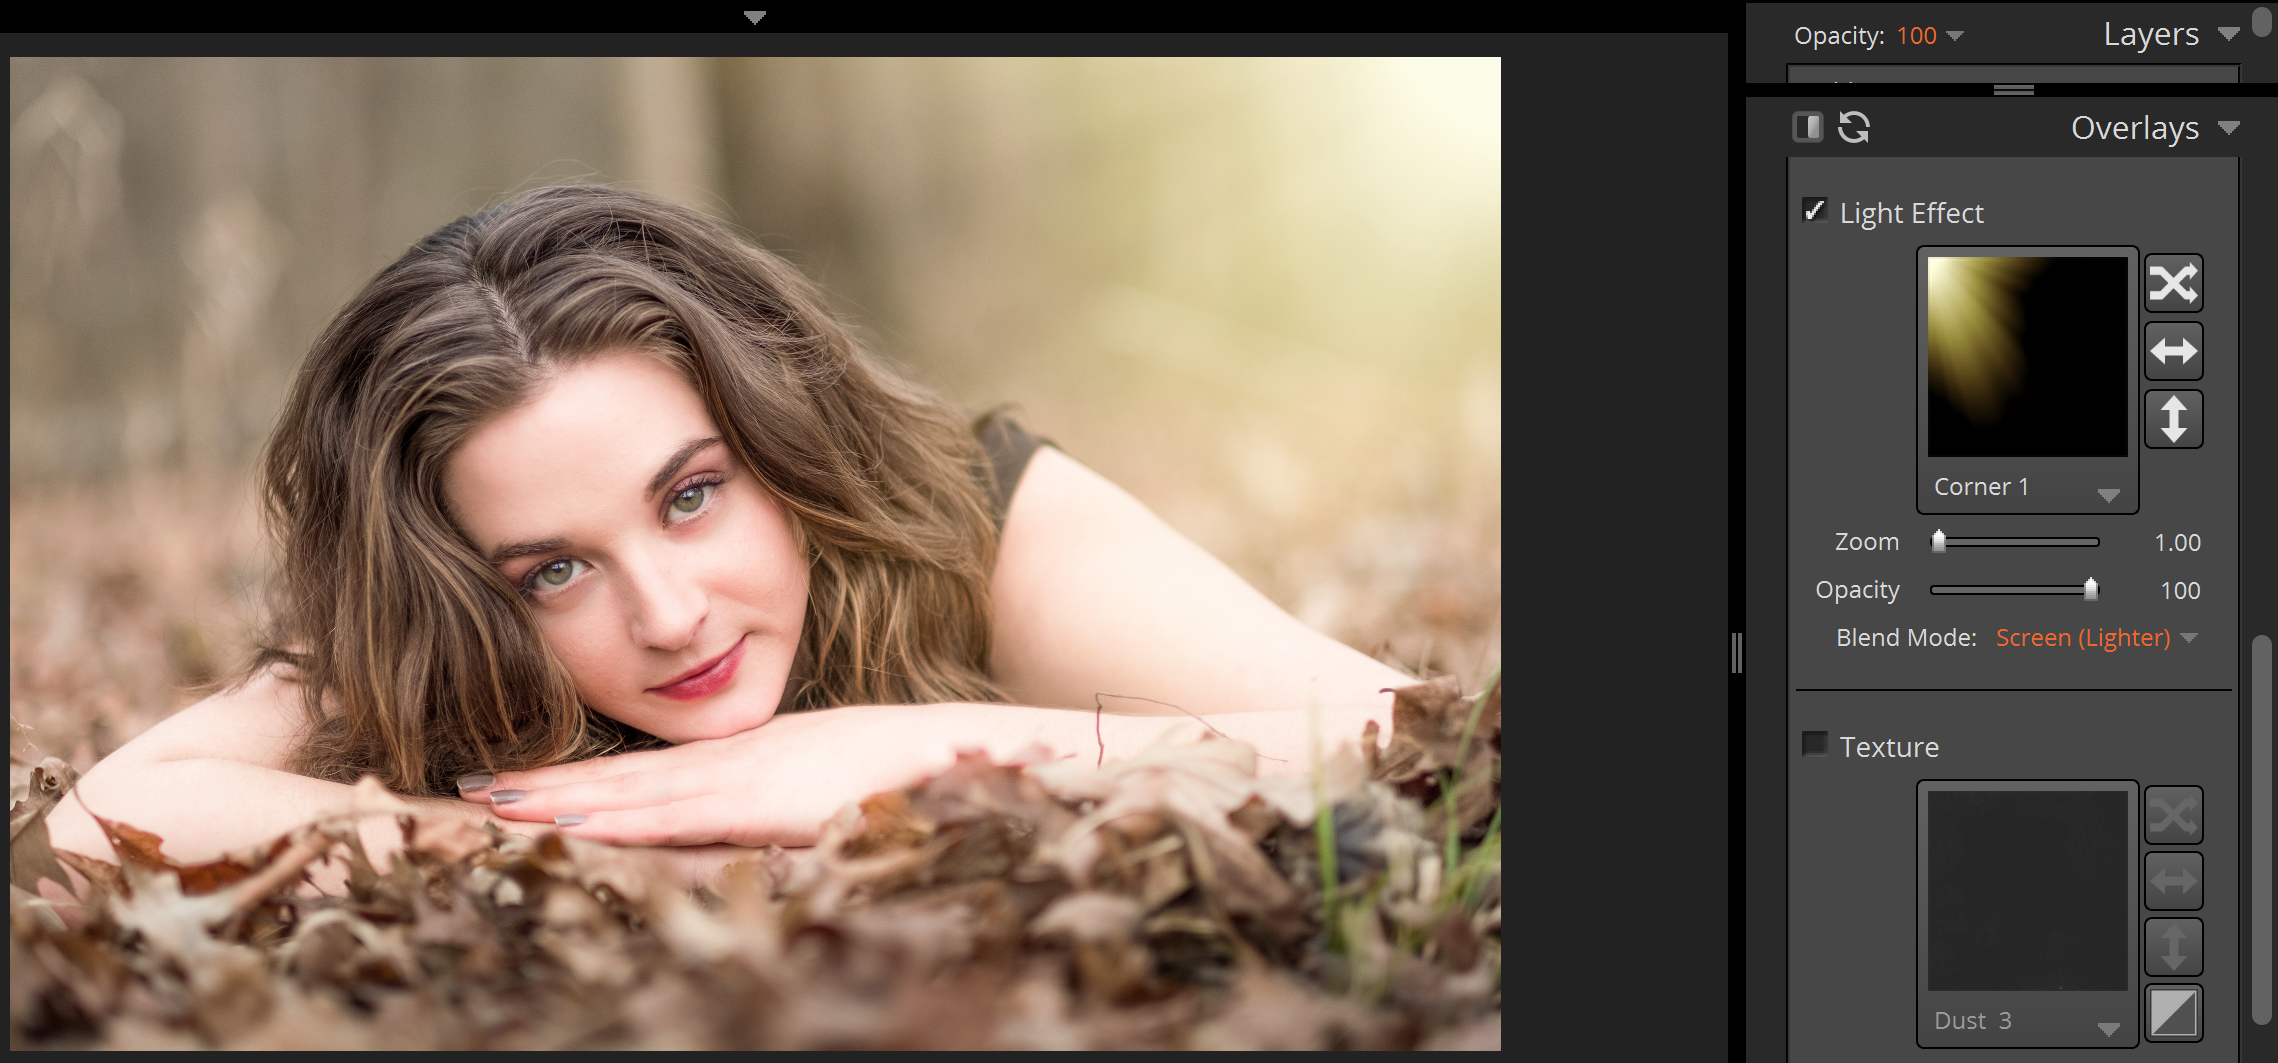
Another handy tool that I use from time to time is the Overlay Panel. There are three flavors of Overlays here: Border, Light Effect, and Texture. Borders contains different effects you can use to frame your photos. Texture is what it sounds like: basic textures that affect your overall image making it appear to be on paper, look dusty, appear scratched, etc. Light Effect is generally what I use most often of these three. There are several light effects you can choose from. One of my favorites is from the “Sunlight” set of Overlays with “Corner 1,” which I’ll be applying for our example below.
For example, if I’m taking a portrait and would like to add some sunlight in the background, I can use a Light Effect overlay to give that appearance. I can control the intensity, opacity, and position of the overlay. With the example below, I’ve added some sunlight in the top right-hand side of the frame, in addition, I warmed up the temp a little via the Temp slider under the Basic panel.

Original image.
Light overlay.
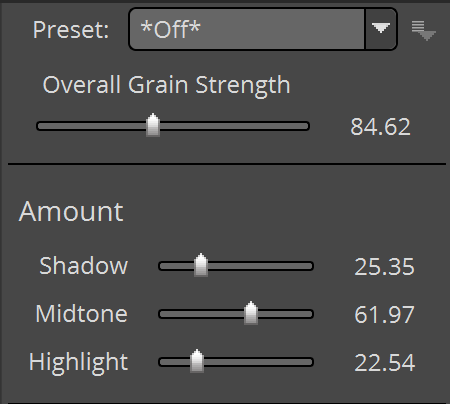
Grain
Another great tool I like is Exposure’s Grain. I really like adding some nice filmic looking grain to my photos. Exposure’s grain enables you to control the overall grain strength, roughness, as well as the amount of grain in the shadows, midtones, and highlights.
My preference for this particular photo was applying grain mostly to the midtones.
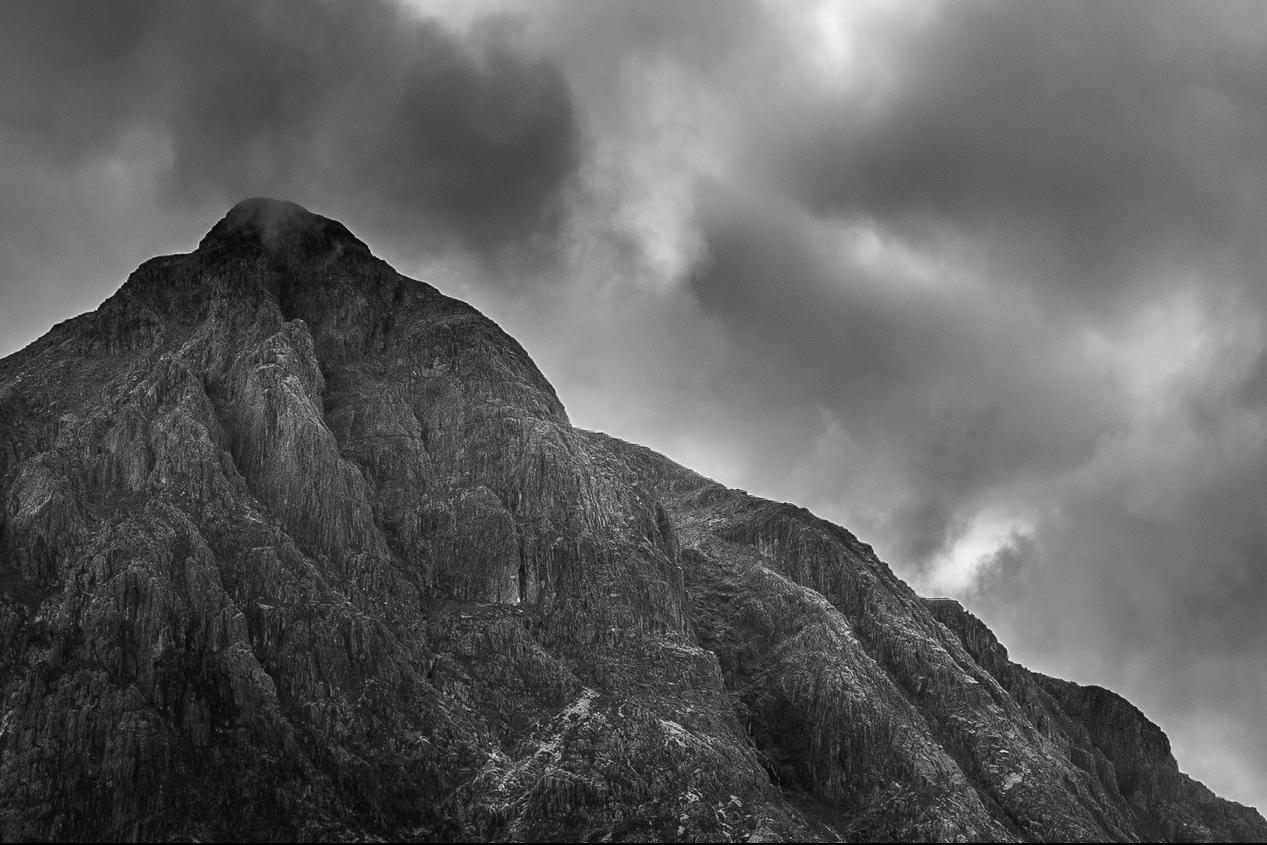
Here is a crop of the image before the grain was applied:
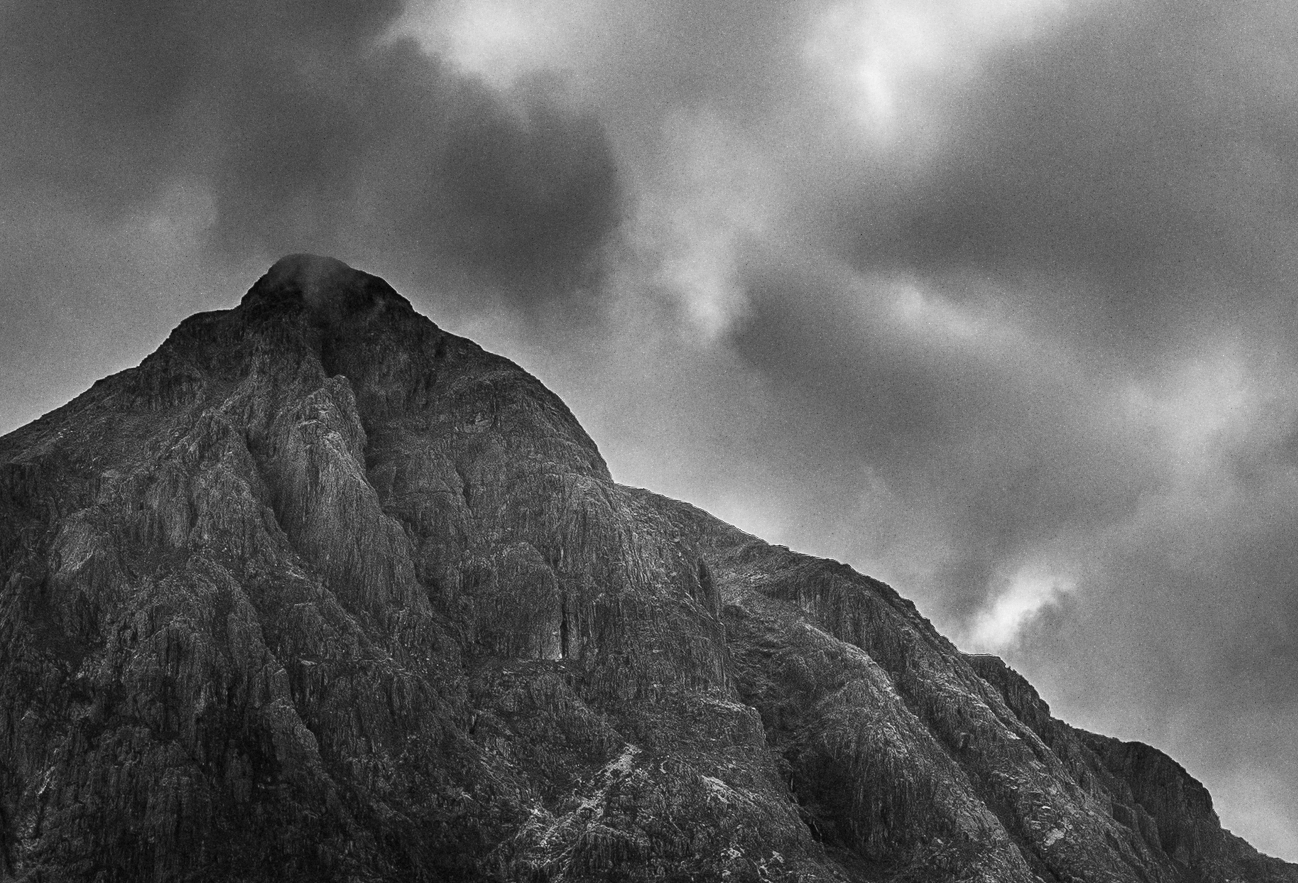
Here is a crop of the image after the grain was applied:
Conclusion
I feel like I’m just scratching the surface of what Exposure X3 can do. I haven’t even gotten into the organizing tools that it offers when used as a standalone RAW editor and organizer. I’m looking forward to using these tools in my future workflow.
Give Exposure a try yourself free. You can download a free 30-day trial.
Thanks to the Alien Skin team and to the great community at Fujilove!
Disclaimer: This article has been sponsored by Alien Skin Software, makers of Exposure X3, non-destructive RAW photo editor and organizer. Alien Skin Software is a FujiLove Partner and we would like to thank them very much for their support.