As regular readers of Fujilove will know, street photography is my passion and indeed I teach workshops in London on the genre. If you have tried street photography yourself then you will know that one of the hardest things is making sure your images are in focus when capturing that fleeting moment. Unlike landscape photography where you have time to set up a tripod and check focus before releasing the shutter, in street photography it’s all about capturing that candid or ‘decisive moment’ as Henri Cartier-Bresson called it.Now the Fuji range of cameras have never been the fastest focusing cameras around when set to auto-focus. However they have come a long way since the original X100, with the X-Pro 2 and X-T2 no longer a slouch, particularly when coupled with one of the newer lenses, like the 35mm f2. But even the fastest autofocus system can still struggle sometimes or perhaps even worse, focus on a different point that you had intended. Okay so you could switch to manual focus, but even with the various and wonderful manual focusing aids that Fuji provide us with, like focus peaking, magnified image or the electronic split image, it can still take too long to achieve focus and by then that once in a lifetime moment has gone.
So is there another way?
Well the short answer is yes and it’s called zone focusing. This is a technique that has been used way back even before AF systems were invented.
Before I talk more about what zone focusing is, let’s take a look at the factors that go into creating depth of focus DOF (or depth of field as it’s sometimes also referred to).
The term Depth of Focus refers to the area in front of and behind a subject that you focus on that will appear acceptably sharp. So for instance, if you focus on a subject that is 3 meters away. Depending on your camera settings that might mean that everything from 2 meters away to 5 meters away will be acceptably sharp. That would be your depth of focus. Also, keep in mind that the area behind your subject that is acceptably sharp will always be greater than the area in front of your subject.
Depending on four factors, your aperture, your focal length, the distance that you are focusing at, and on your camera’s sensor size, your depth of focus can change drastically. Here are the four factors in detail:
- The smaller your aperture, the more DOF there will be in a scene. So if you are shooting at F16, much more of your scene will be sharp than if you are shooting a F2.8.
- The wider your focal length, the more DOF there will be in a scene. So if you are shooting at 28mm, much more of your scene will be in focus than if you are shooting at 100mm. This is why I rarely zone focus using a lens longer than 35mm. I find it works particularly well on my X70 that has a 28mm equivalent lens.
- The further away you focus, the more DOF there will be in a scene. So if you focus on a person 3 meters away, then you may have a range of one meter in front and 2 meters behind your subject that will be sharp (depending on the other three factors), whereas if you focus on a person that is 1 meter away, you may have a range of just 7.5 cm in front and 15 cm behind your subject that will be sharp.
- The larger your camera’s sensor is, the less DOF there will be in a scene. So if you are using a full frame camera like a Canon 5D, then there will be less DOF then if you are shooting with a camera with a smaller sensor, such as our Fuji’s with their APS-C sensor with the same settings.
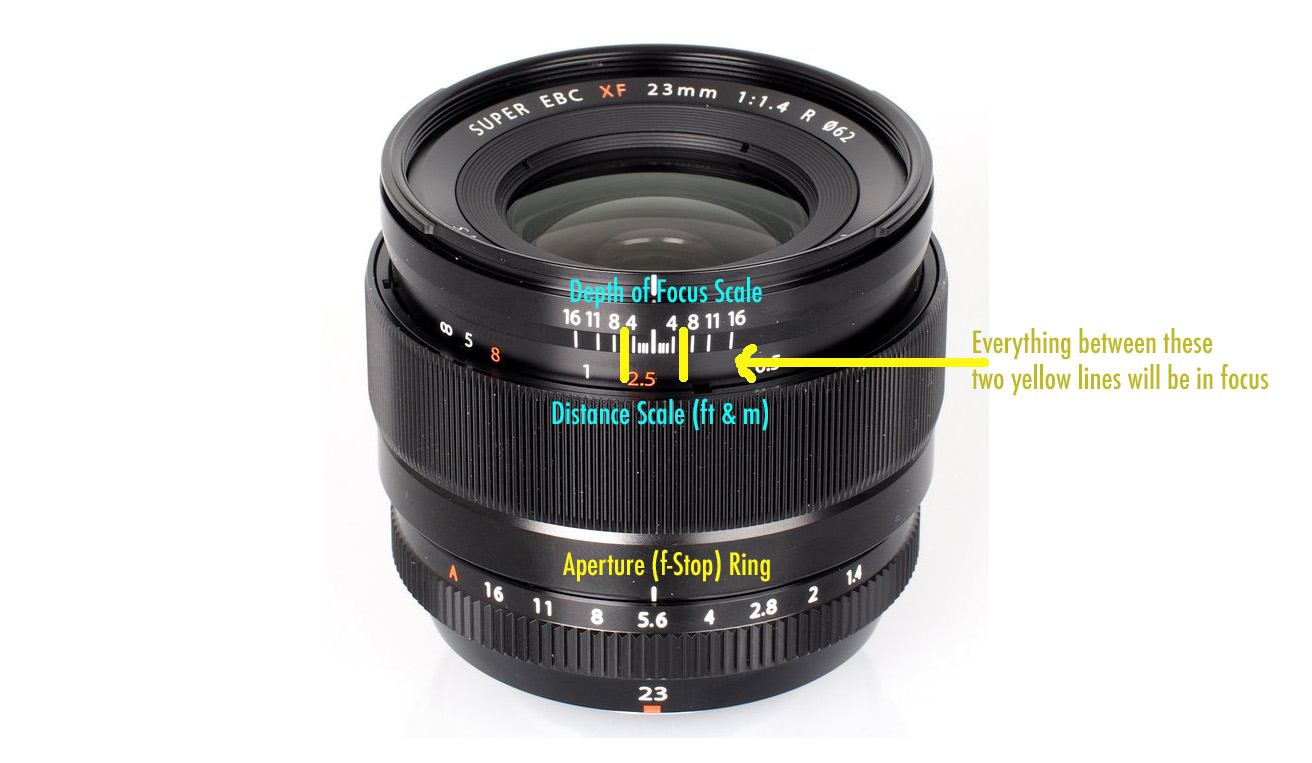
Fujinon XF23mm f1.4 lens showing the depth of focus scale
So zone focusing is basically pre-focusing your lens to a certain distance away e.g. 3 meters and using the ‘depth of focus (or field)’ so that everything within a certain range e.g. 1.5 to 4 meters will be in focus. A few of the Fuji lenses (14mm, 16mm and 23mm) are marked out with a depth of focus scale, so that you can quickly refer to the scale to estimate what the focus zone will be. So with your camera already focus ring set to say 3 meters away, then you can just wait for your subject to enter that range. An advantage to zone focusing (and manual focusing for that matter) is that the shutter release will respond instantly, and you can shoot repeatedly without having to refocus. I often lock in my focus using a spot like a lamp-post 3 meters away using the AEL/AFL button with my aperture set at F11, and then I photograph people between 2 and 5 meters away. Zone focusing works better during the day when you have plenty of light and can use a small aperture like f11 to give you a wider range in focus. I also tend to use a shutter speed of at least 1/250 second and have my ISO set to auto with 3200 as the limit.
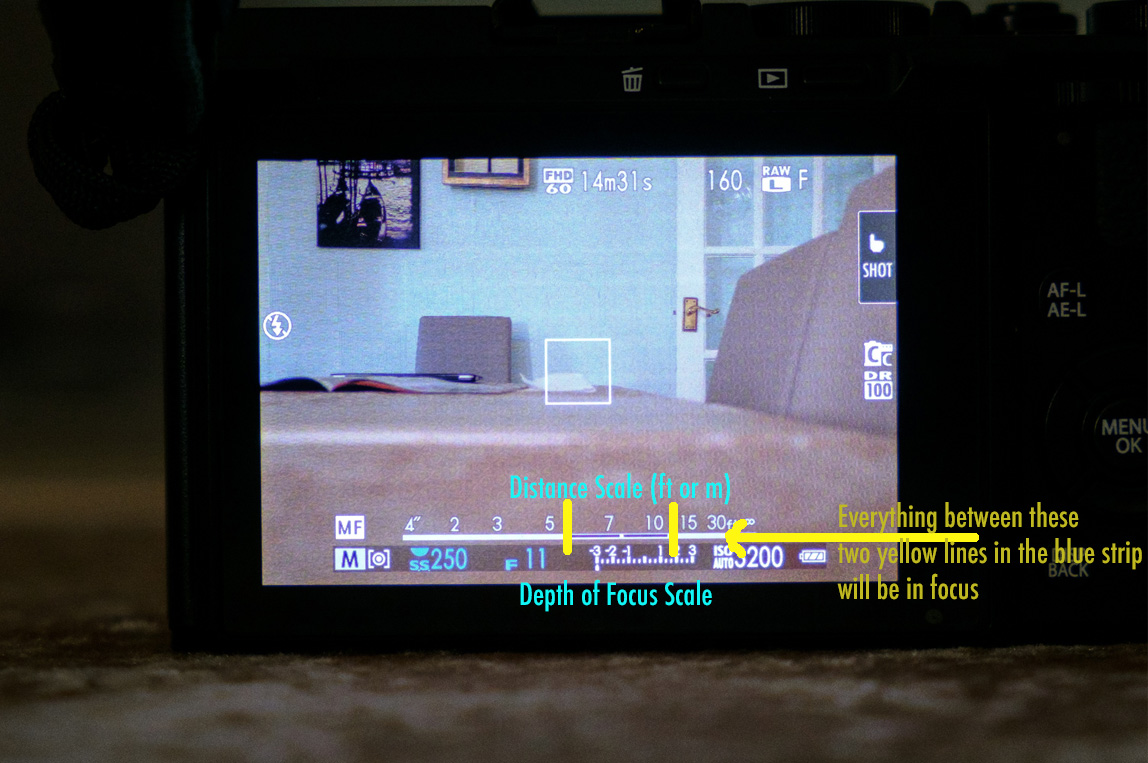
LCD screen of the Fuji X70 showing the depth of focus scale
If you don’t have one of the above lenses with the DOF scale, then in Manual focus mode on your Fuji should see a “depth of focus” scale at the bottom of your view screen (as on my X70 above). Everything in the white bar on the scale that’s in blue should be in focus. However it’s a very basic guide and I don’t rely on it. Equally the 14mm, 16mm and 23mm lenses actually have a depth of focus scale on them that you can also use as a guide. Personally I prefer to use the focus peaking set to red highlights as my quick guide.

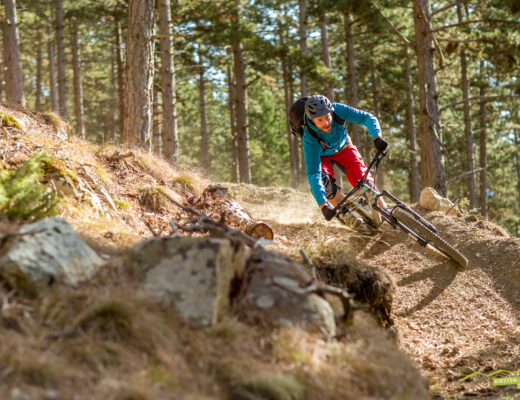
Example of using the zone focusing technique to capture the decisive moment (X70)
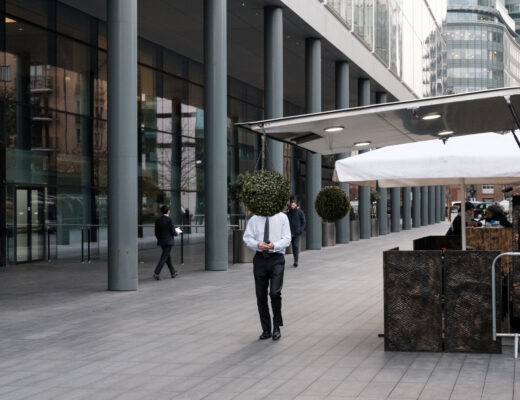
Finally, another advantage of zone focusing is that it will allow you to shoot without looking through the viewfinder and not worrying about mis-focus, for example if you decide that you want to use the ‘shoot from the hip’ technique, popular among many street photographers.
Of course I realize that this technique is of no use when you want images to have dreamy out of focus backgrounds with lots of ‘bokeh’, as the depth of focus at f1.4 for example will be almost non-existent.