Keeping your workflow simple while on the move might be more simple than you thought…
As a photographer whose style does involve a fair bit of editing, I have always found it difficult to be able to edit my work on the move unless I had a powerful laptop with me. This post is about me trying to slim down the kit I carry. The idea was to find a cheaper, simple ‘grab and go’ workflow that would give me a ‘proof of concept’ setup based around a USB chargeable ecosystem. Basically, I want something I can grab on the way out the door, not worry about battery life and still get awesome stuff with.
With this in mind, here are some flexible guidelines that I set for myself:
- No major new cash outlay.
- Everything has to be USB powered*.
- Produce images using this system.
- Find a sensible, sustainable workflow.
*I have not found a way to recharge AA batteries with the flash uses.
Working within these guidelines means that I cannot just say, “Go and buy a new ultra-thin, ultra powerful Surface book, MacBook or awesome Wacom Mobile studio.” Not all people have the money to splash out on awesome high-end gear and I certainly don’t. This article is more for the traveler who is off the beaten path, someone who is traveling solo, maybe by foot or train, or, as in my case, via motorbike. Thus comes the question which leads me to this post. What is the lightest, most compact solution where which I can shoot, edit, back up and still send images to clients via the same delivery system as I would when at home? Is it possible?
The first thing is cost. I already have an iPad but it’s not the pro version and is a few years old, but I have been pleased with how well it has been performing.
Rough costings for low and higher-end systems:
- iPad Pro (€800 – €999)
- MacBook (€1129 – €3390)
- Surface Book (€1169 – €2339)
- Microsoft Surface Pro (€836.57 – €2701.83)
- Wacom MobileStudio Pro (€1288.24 – €2240.42)
Downsides of the laptop-based workflow:
- Weight and portability
- Battery life
- Cost vs performance
- Less choice in programs/apps
- Limited functions
- Durability
- No USB charging (some exceptions)
Upsides of a laptop-based system.
- More power
- Full workflow system
- Wacom tablets and USB tools
- Better calibrated screens
- Full-size keyboards
- Expandable storage and power
Which cameras can you charge via USB?
In short, all of them (aside from the GFX) – you can pick up a USB battery charger for the Fujifilm NP-W126. Have a look at the PATONA Dual Quick-Charger (which I use) and the Lemix Ultra Slim USB Charger. Personally, I use the Patona charger plugged into the mains when I can but when on location, I can use the USB sockets on the motorbike or a USB battery pack. Regarding battery packs, look for the Anker brand, I love them and have never had a problem with them.
** Update – the newly annouced X-T3 will use USB-C and promoise faster charging via USB.
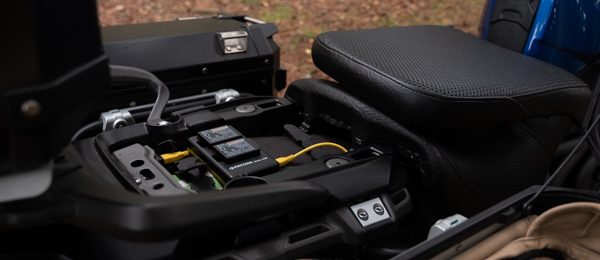
Charging batteries from my motorbikes USB socket
Not all the new range of Fujifilm cameras will charge via USB directly. Only the X-T2, X100f, XF100 and X-H1 will charge directly from USB, and remember that a USB micro will fit in the USB 3.0 port for low power use & charging. If you have the smart idea of using the CP-W126 coupler and plugging directly into a USB power source to power the camera, make sure you get your amps correct, though, as most USB battery packs don’t push out enough to power the camera. (Quick tip: electronic shutter mode uses less power.) I have not tried this, but if I was to try it, a heavy-duty battery pack would be something I would look at. Solar chargers could work, but I live in the UK, so they might not be something to have as an only option.
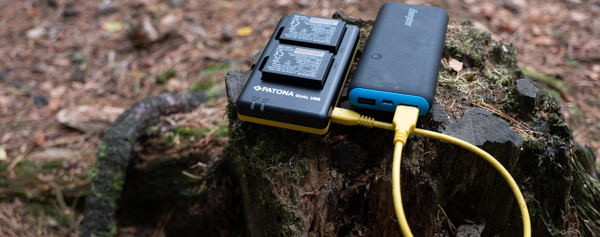
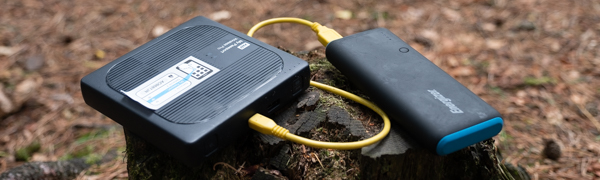
Charging from a portable powerbank
The best way around this is simply to have a few batteries. Use coloured dots for charged batteries and take off the dots when you put them in the camera – a good system for knowing which batteries have juice and which don’t. Charging your camera directly is slower and more hassle than picking up a multi-charger and doing at the mains when you can. A good supply of charged batteries is always going to be better than trickle-charging via USB. I wonder if the next generation of Fujifilm cameras will have USB-C making charging via camera much faster…
Tips for battery life:
- Keep your batteries’ temperature stable.
- Cold temperature does affect performance.
- Warm a battery up in an inner pocket.
- Use the recommended brand and model for your camera.
- Read this article about third party batteries.
- A lithium battery has a lifespan – this is natural. Rotate your batteries’ usage.
- Use the battery until totally dead before recharging.
- Avoid using the LCD screen.
- Turn off the camera between uses.
- The electronic shutter is more power efficient.
- Using OIS dramatically uses more power.
- Choose your moment, choose your shot and shoot carefully.
My kit bag:
A perfect kit would probably have something like the Mobile Studio Pro to give you all the power you could need but, at the moment, I just don’t have the cash. My current laptop is a beast of a custom machine built around an i7 intel chip and it is getting a little old. The major problem with it is that the battery life is getting shorter and shorter as it is getting older, but it does have a 4k screen, fast processor, 1TB HDD solid WiFi, proper USB ports and a proper keyboard. I see my current laptop as a backup or something I use when I have mains power. When it comes to my camera equipment, that area is not perfect at the moment either. I have a pair of X-Pro2s which won’t charge via USB, but I have the USB dock which is faster anyway. Having full GPS tracking info built into the camera would be cool, too, but that would cost more battery life and there is a little workaround using the app. On the whole, though, my Fujifilm kit is compact and has been super reliable for the past eight years (I started with X-Pro1, which I still use). There is just no way I could pack my DSLR kit on to the bike and get the range, flexibility and shooting options.

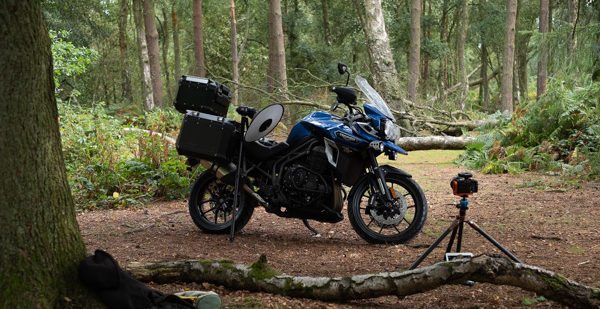
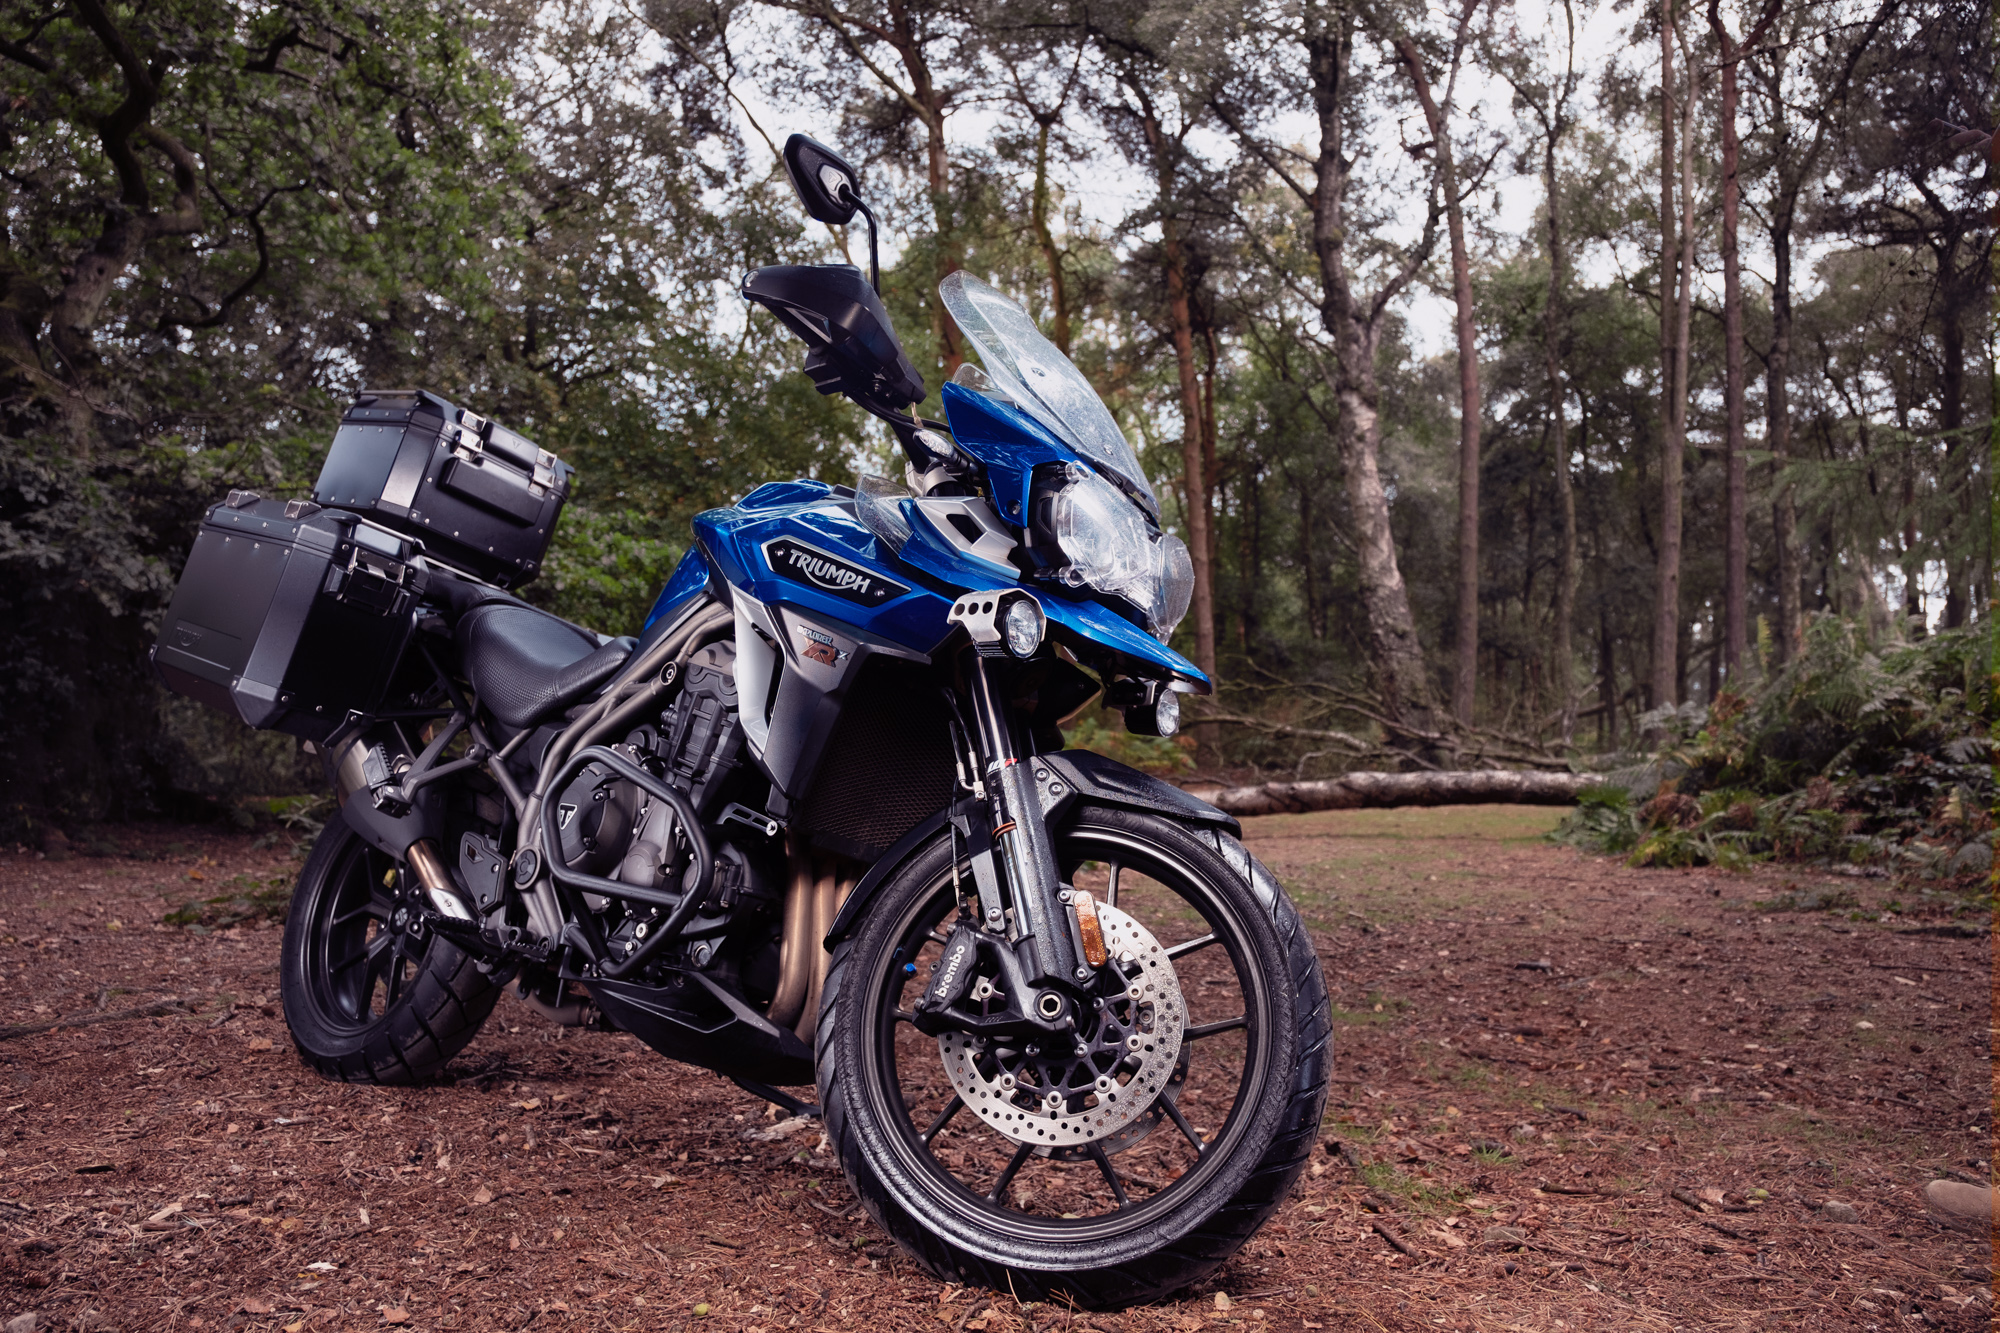
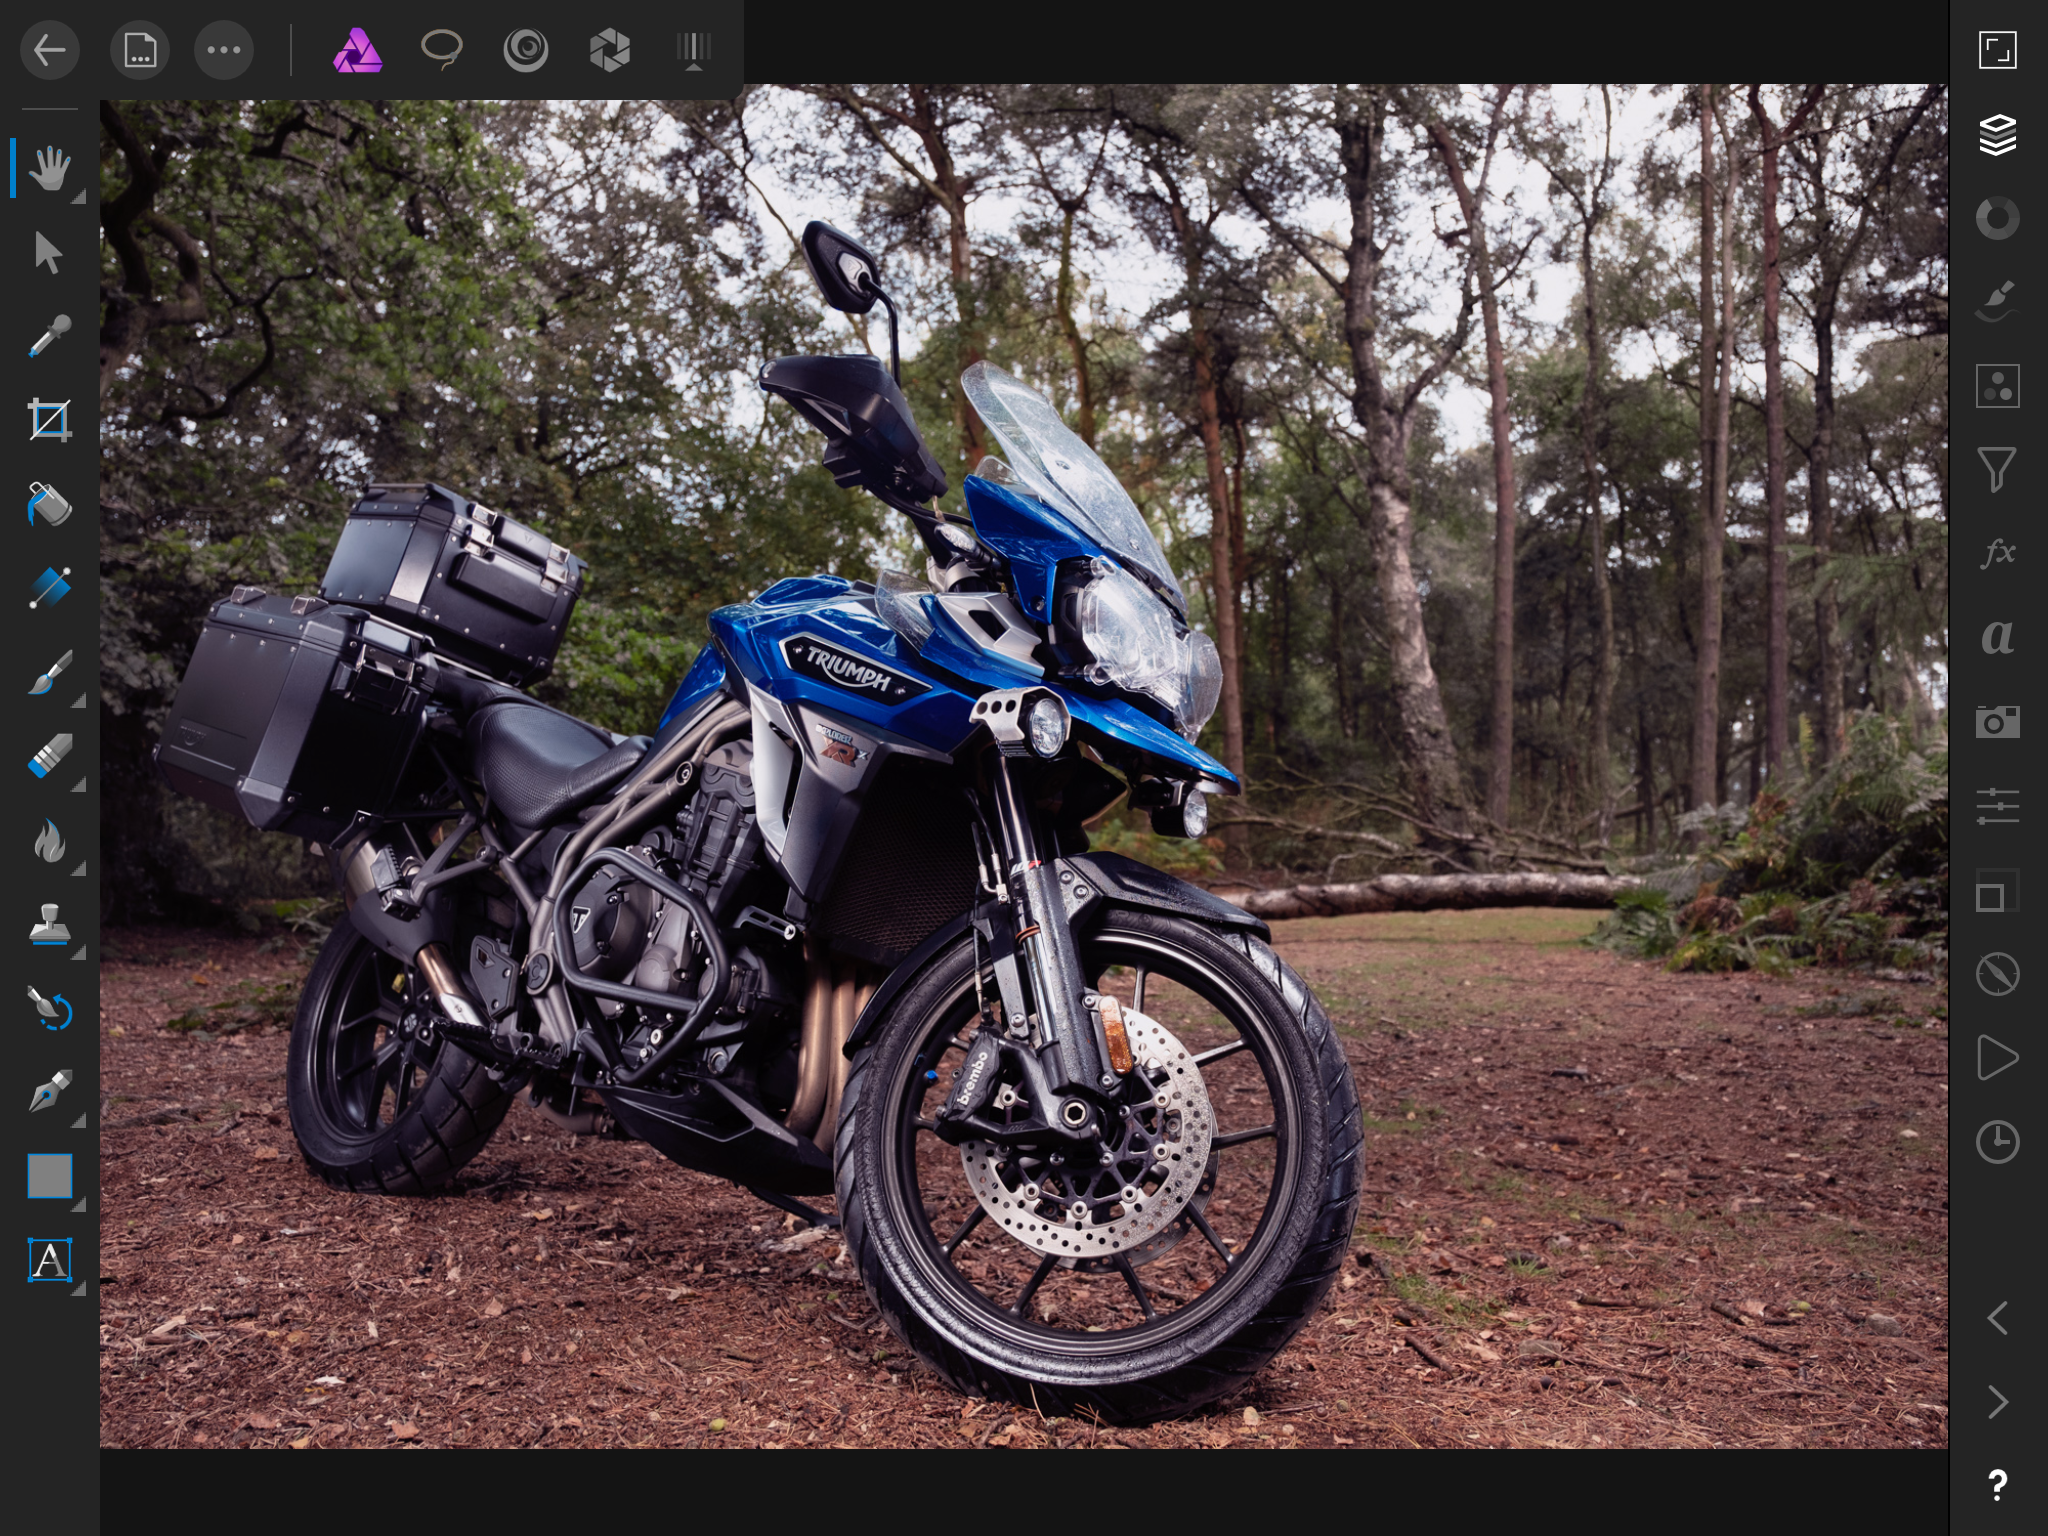
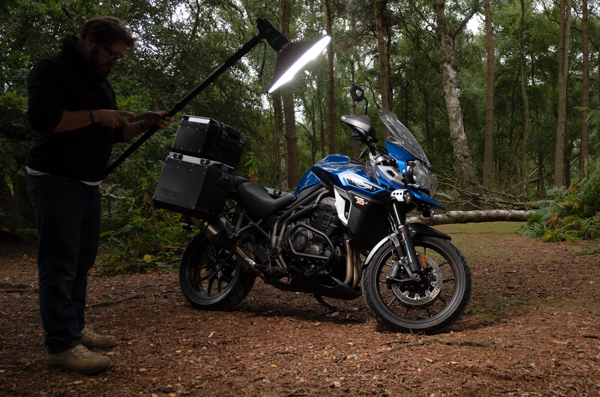
ISO200, 1/400th, f/2.8, 16mm
This image above was taken on the X-Pro2 with the XF 16-55mm mounted on a 3 Legged Thing Tripod. The Fujifilm app was used to control the camera. A single RF60x was triggered via a V6II Trigger, which was mounted on a monopod, working as a boom arm. A Roundflash dish was used to shape the light.
Current camera kit:
- 2x X-Pro2s
- X100F
- 6x NP-W126 battery
- XF35mm
- XF56mm APD
- XF16-55mm
- XF15-140mm
- Lee Filter kit and filter rings
- 3 legged Thing Tripod (straps on top of the bike)
- Cactus Flash kit *
- DJI Spark.
*(AA batteries are the only thing I cannot charge via USB on the go.)
Want some help picking your kit? Check out this post all about selecting the right gear.
Test setup for editing, storage and workflow kit:
- Adobe Lightroom CC and Classic
- Alienskin Exposure 3 – (Highly Recommended Dekstop only)
- Snapseed – great for super quick stuff
- Photoshop – (the king of kings)
- Apple iPad (64 gig version)
- WD passport wireless 2 TB
- Sandisk Extreme Pro 2 TB
- Custom build Laptop – i7 Intel
- Fujifilm app
Looking to boost your storage directly from your iPad? Check out some of these:
- Leef iBridge 3
- SanDisk Connect Wireless
- SanDisk iXpand
- WD passport wireless SSD
If you’re not an iPad or Apple fan, there are tons of awesome ways to attach USB storage such as the SanDisk Extreme Portable SSD, which is crazy good and very well made. Check out getting an OTG, or On the Go Adapter for your device. ‘The rugged SanDisk Extreme Portable SSD delivers high-speed transfers with up to 550MB/s read speeds, making it perfect for saving and editing hi-res photos and videos. Its IP55 rating means that it can stand up to rain, splashes, spills, and dust.”
With all this in mind, do not overlook the importance of using good cables for your devices. Apple cables are getting better, but they are still the WORST and remember that not all USB cables are able to carry the power you need. Invest in good cables and a couple of backups. Try and find something that has a good solid end connection. I have used the Belkin Duratek Kevlar cables in the past and been pretty happy.
I use the Domke Chronicle in the side of the Triumph Expedition panniers. I know a few people who have also gone for the waterproof liners, but I have ridden in some very heavy rain and the Expedition panniers have been faultless.
The SSD version would be far better for a fully rugged mobile set up, but the normal one has done pretty well so far.
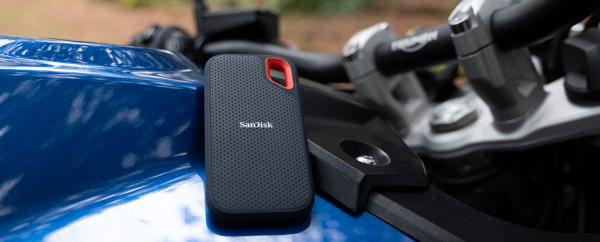
SanDisk Extreme Portable SSD – great for pocket size backup. This one is 250GB and very well-designed to handle the elements.
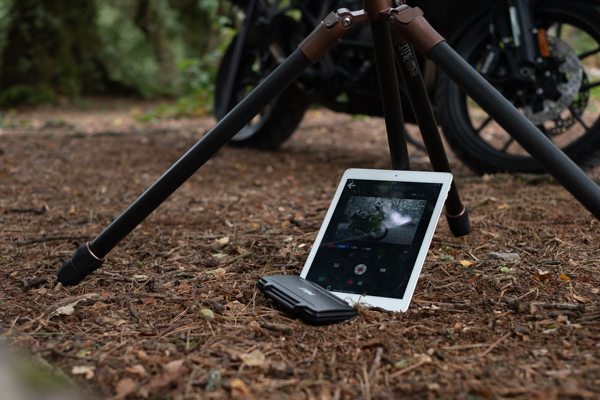
Mobile Workflow:
1: The shoot
Shoot as normal to SD cards. Currently, I am using the Tosibha Exceria Pro cards. By habit, I capture a tweaked JPEG and the RAW file.
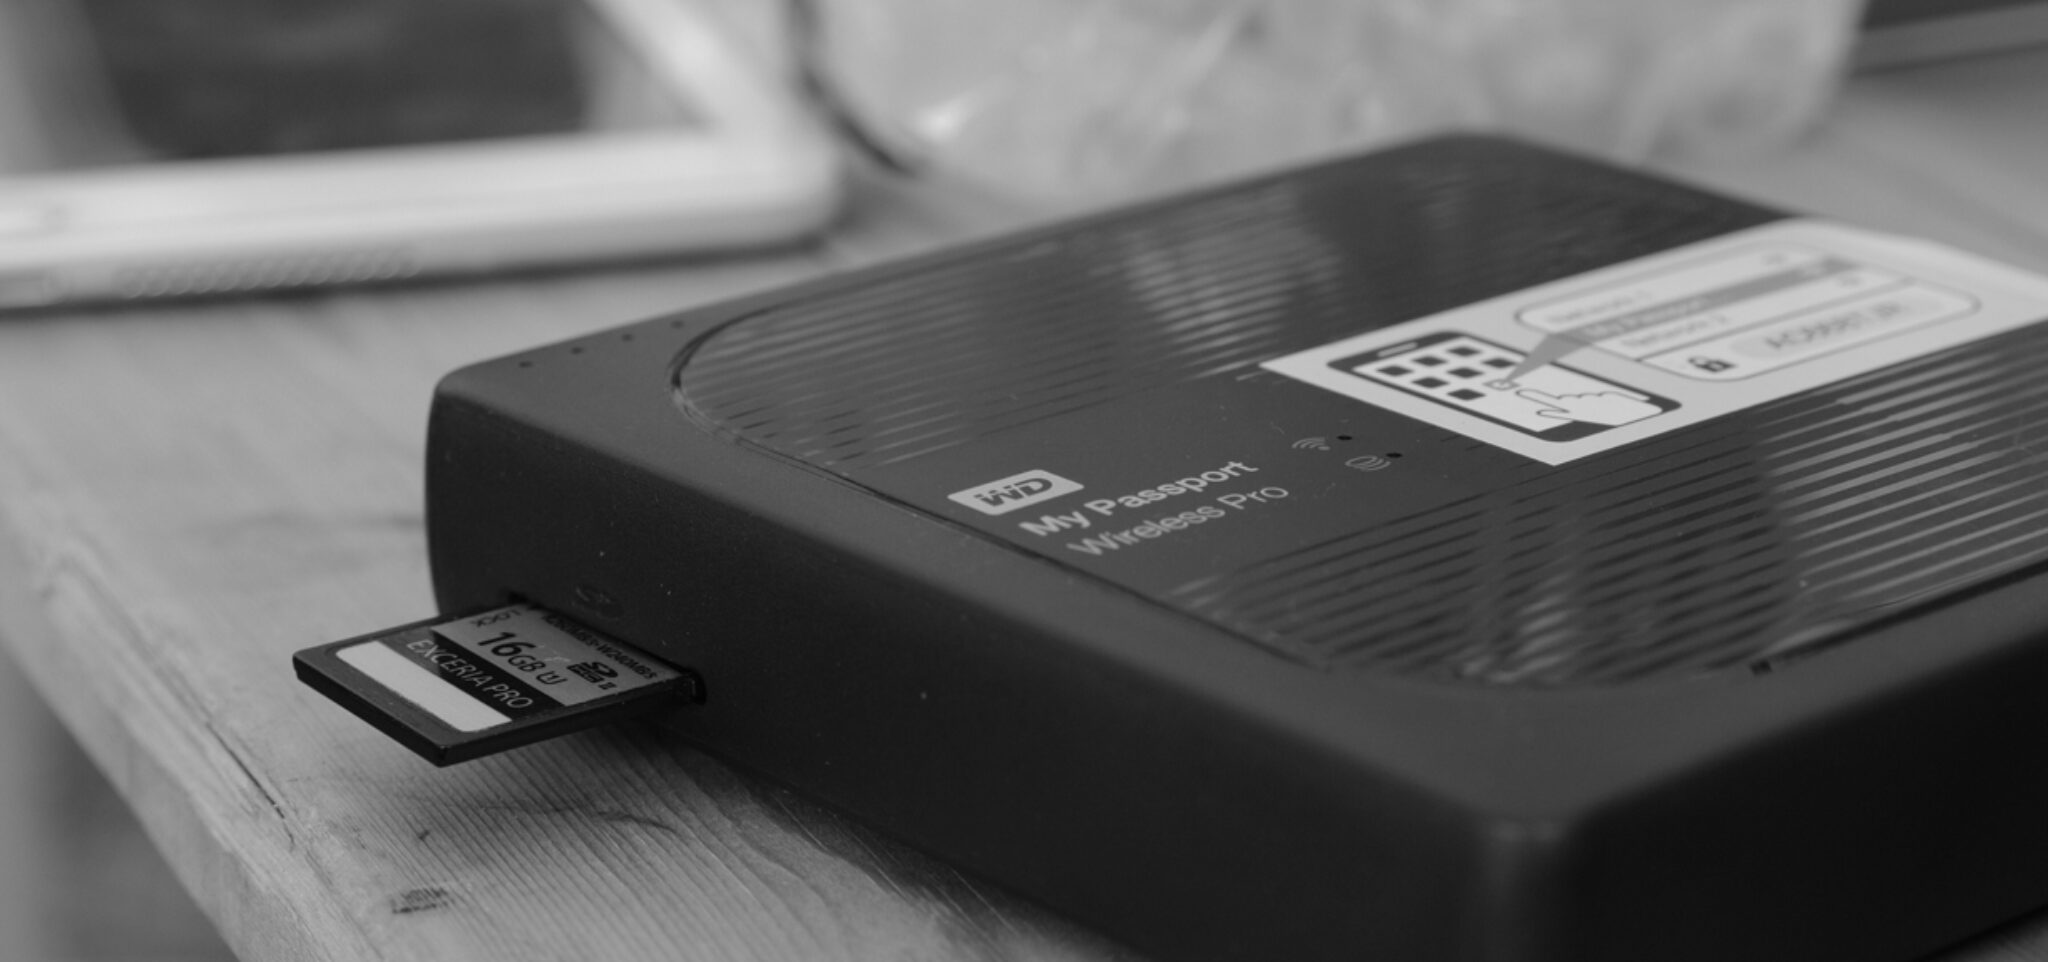
2: Upload
Place the SD into the WD Passport Wireless and move the image to the preselected place (use the My Cloud app to create and plan the destination for the files you are moving over). Remember to move them, not copy them. Your SD card only gets wiped when you have to wipe them; treat it as a backup until you have your images totally backed up and safe.
3: File structure
My traveling Lightroom catalog is also on the WD Passport; I move the images to the drive keeping everything in one folder, meaning I just have to back up this one folder and everything is safe with the Lightroom file structure intact.
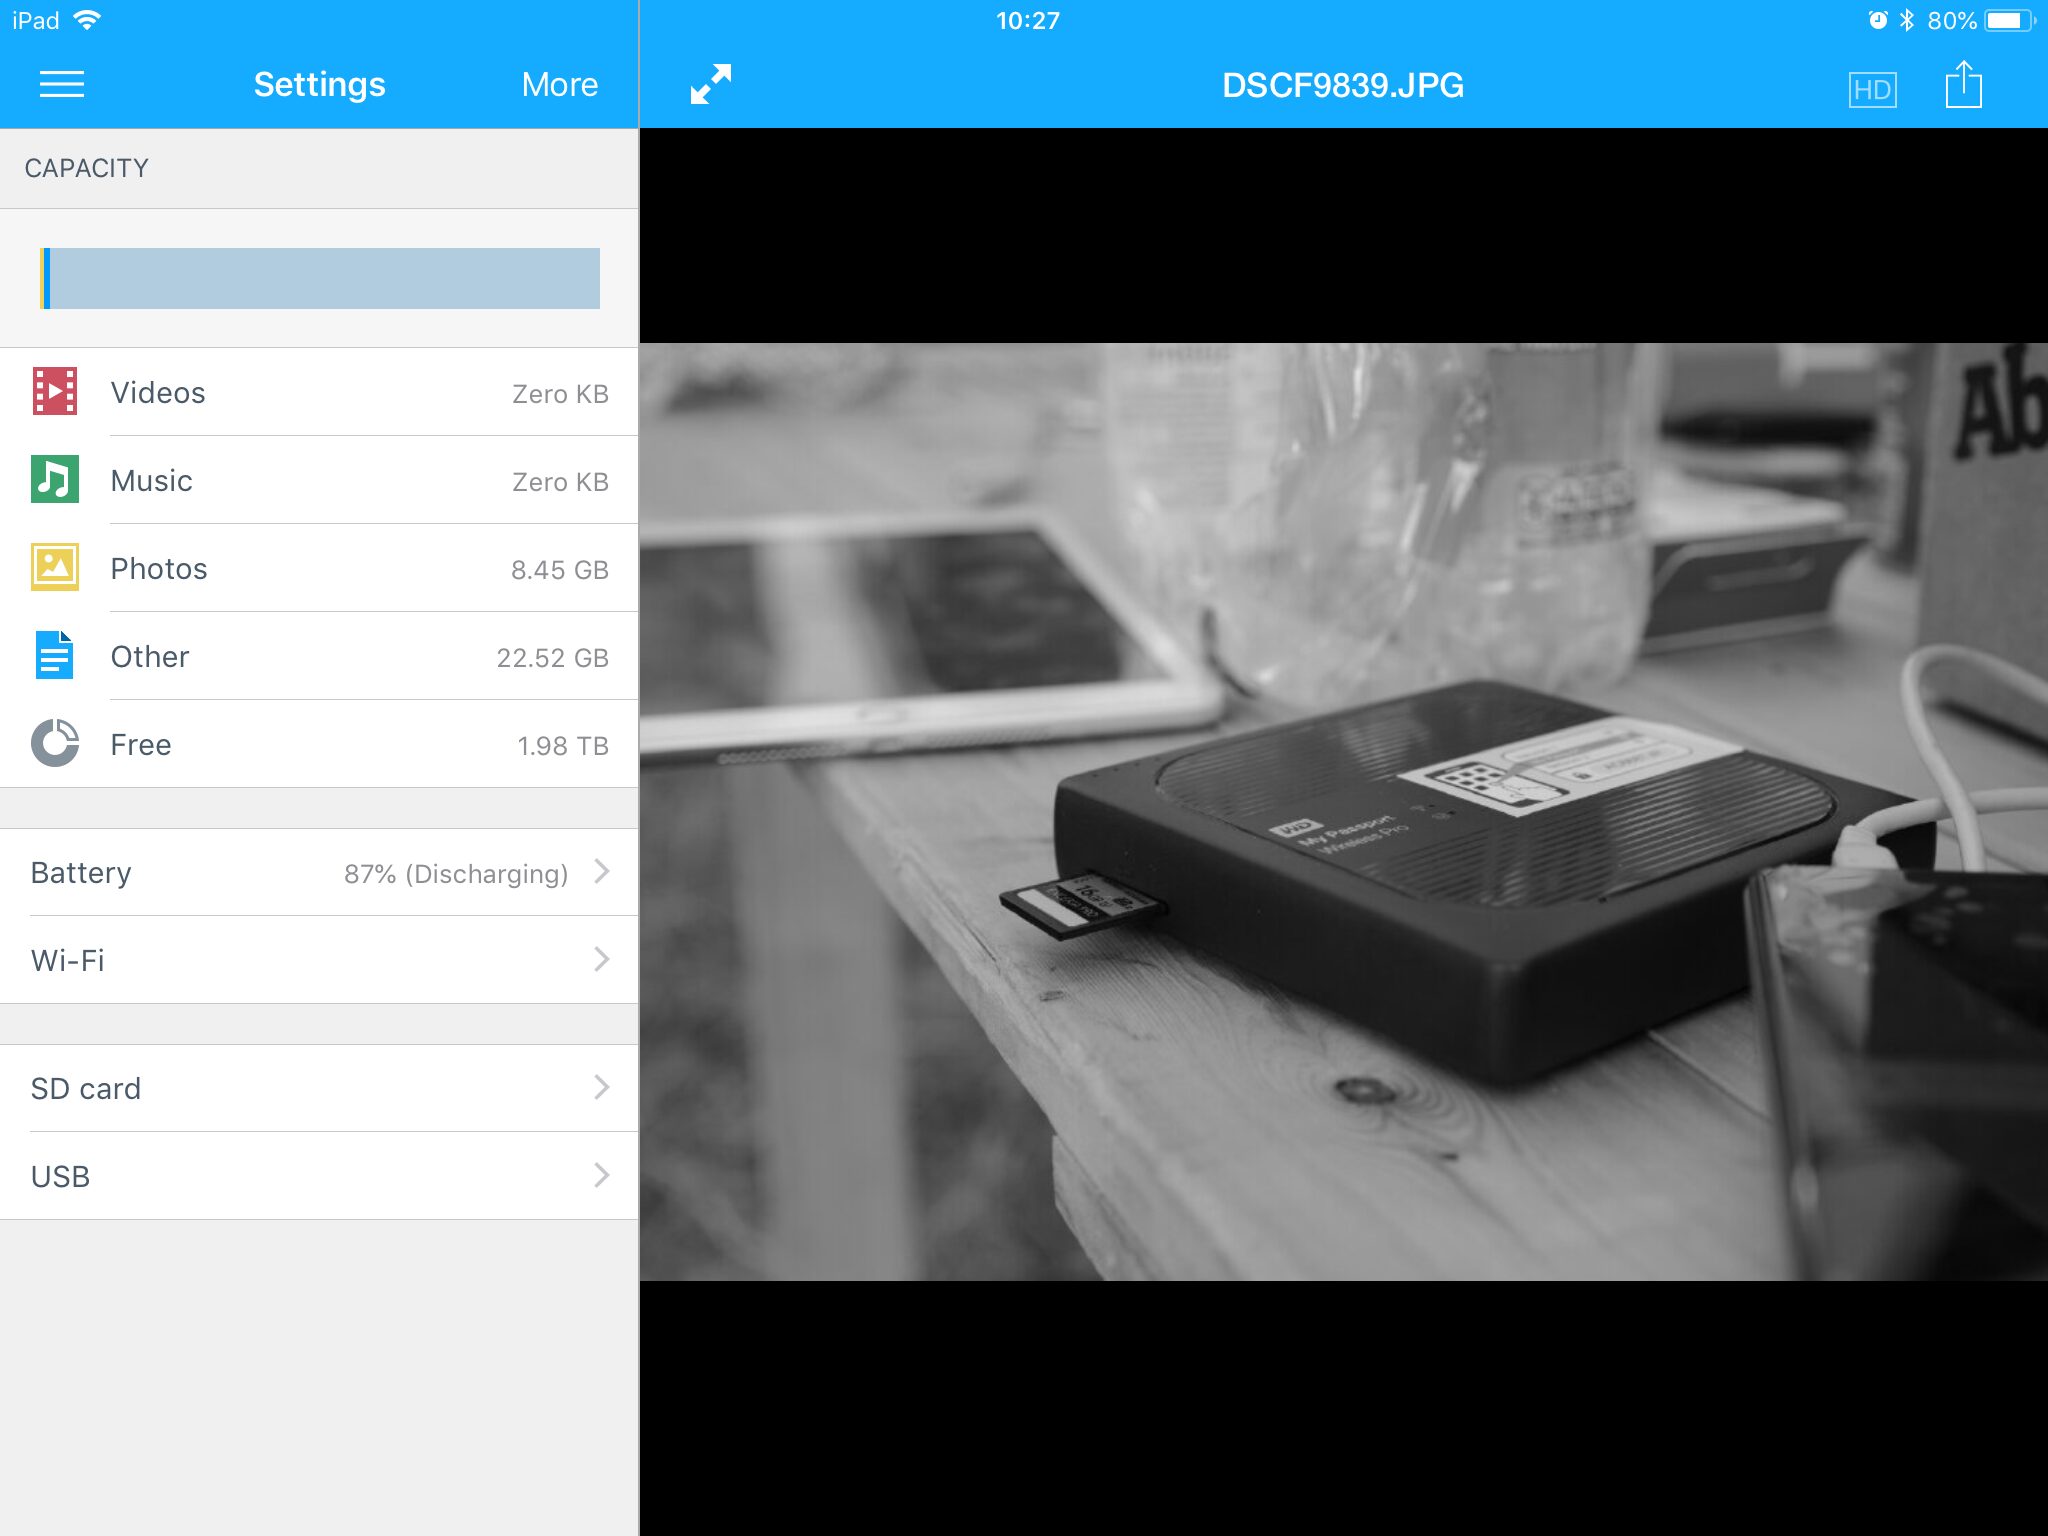
Setting up the device is super simple, and uses WiFi for all controls and settings via the My Cloud app. Check out some of these screenshots that show the app & the functions.
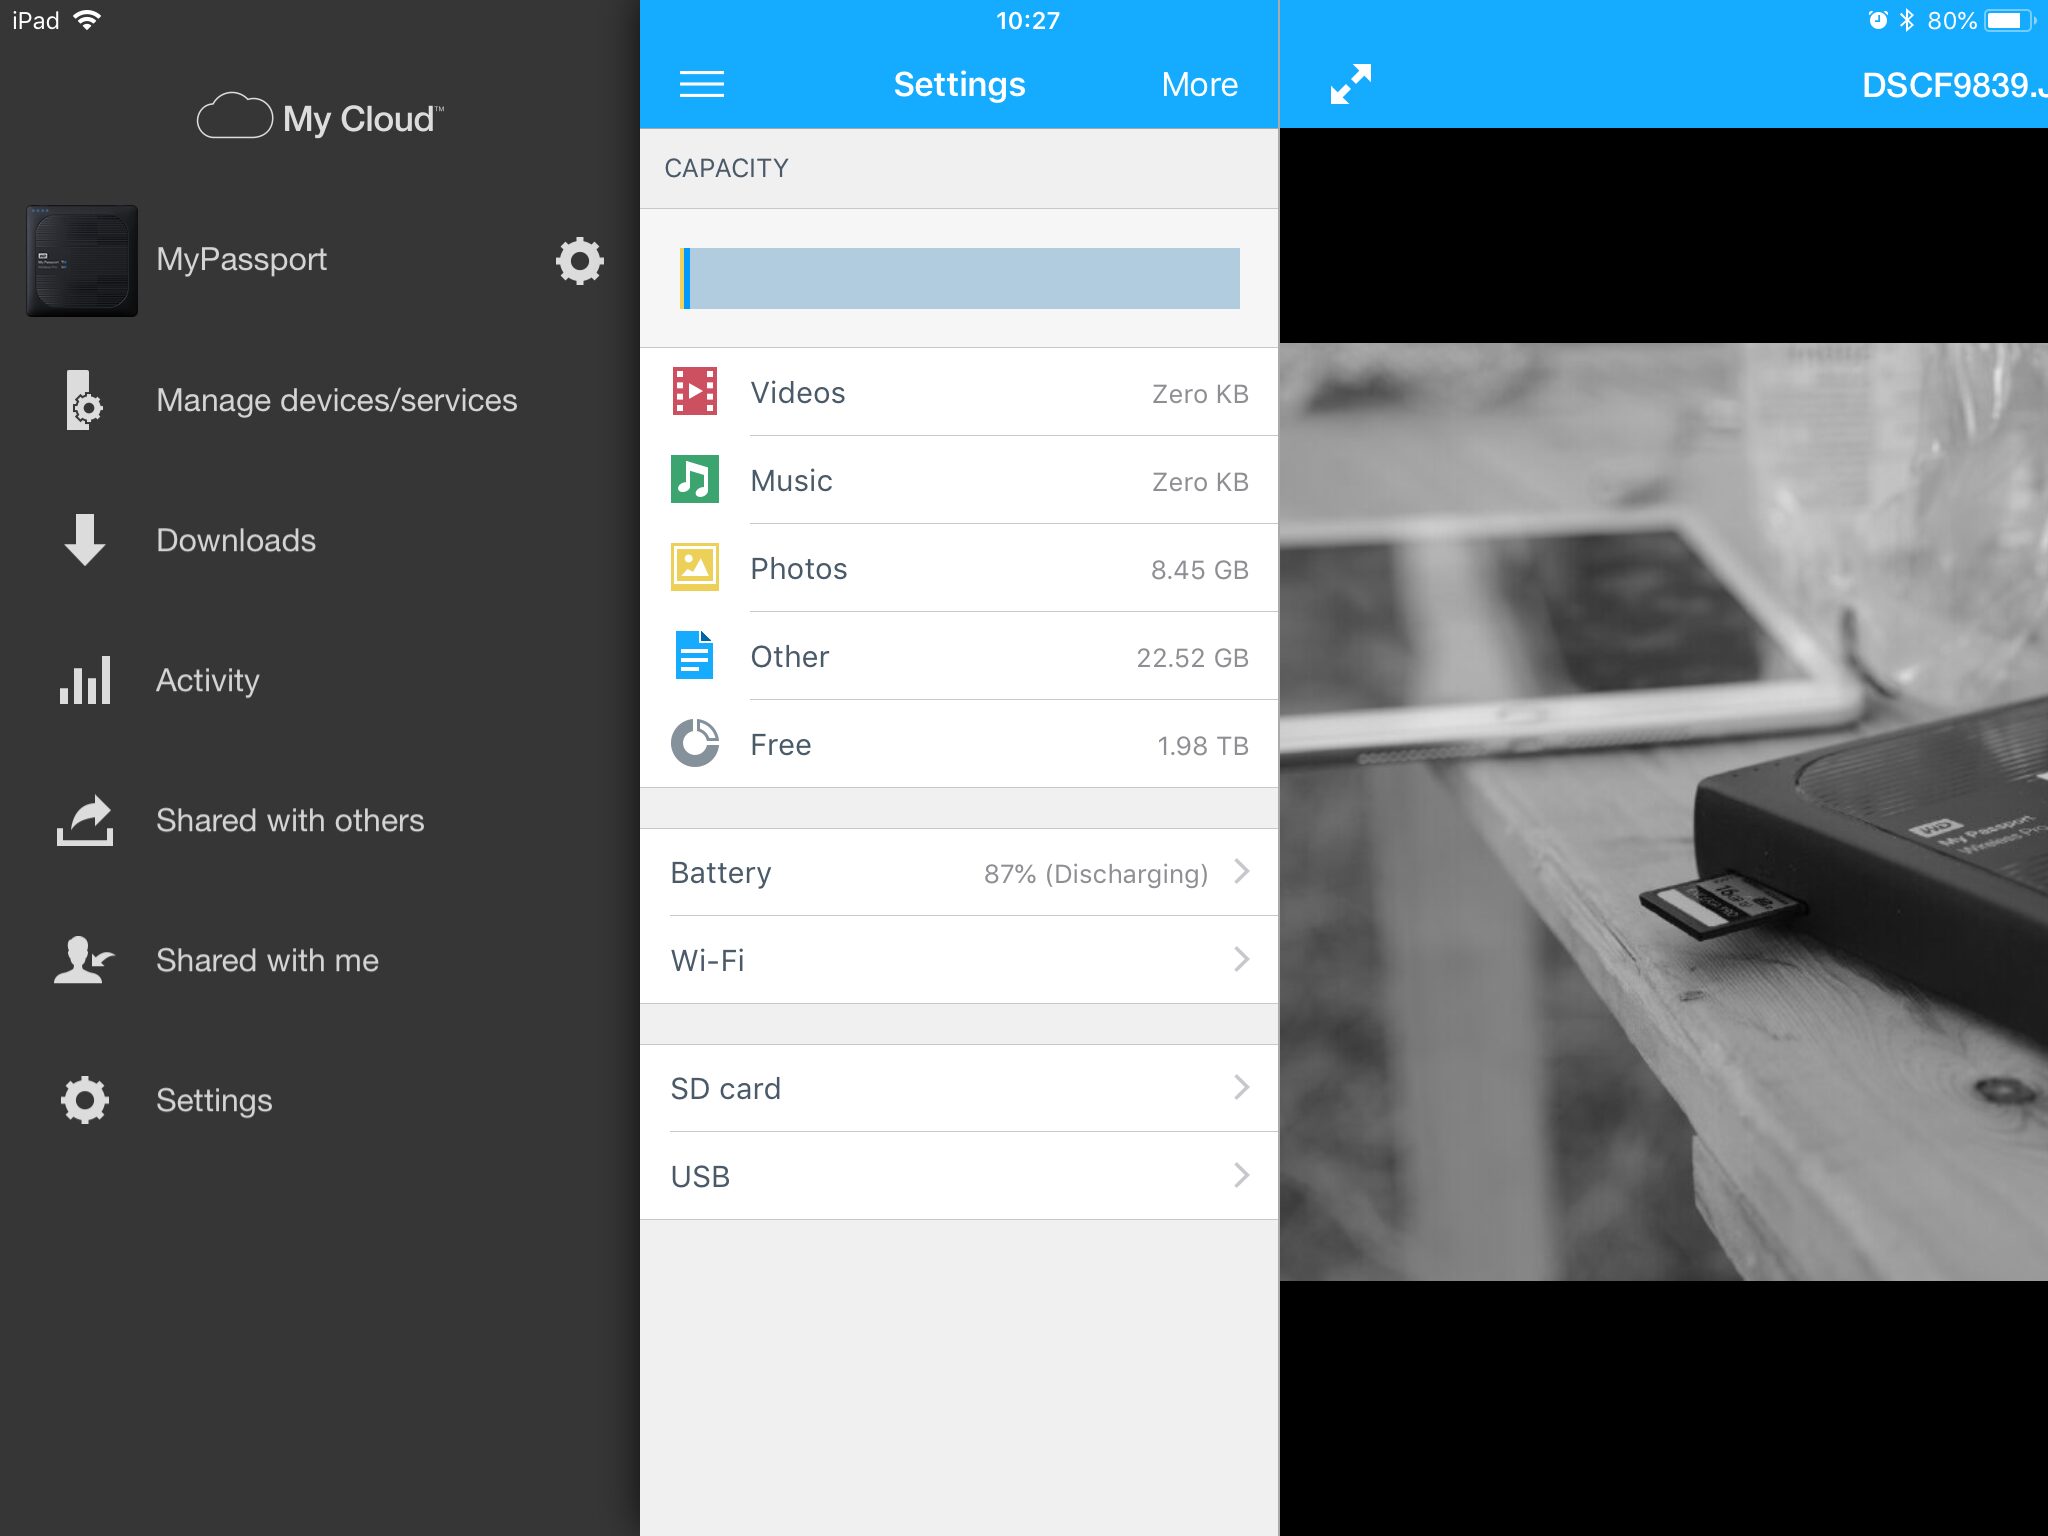


Personally speaking, I really love the WD Passport; it gives me fast access to my images in Lightroom, Affinity or whichever app/program you want to use, which slips into my desktop workflow too. Battery life is really good on the drive – better than expected and charges pretty fast via USB 3.0 too. Although it’s a normal HDD, rather than SSD, it seems pretty durable.
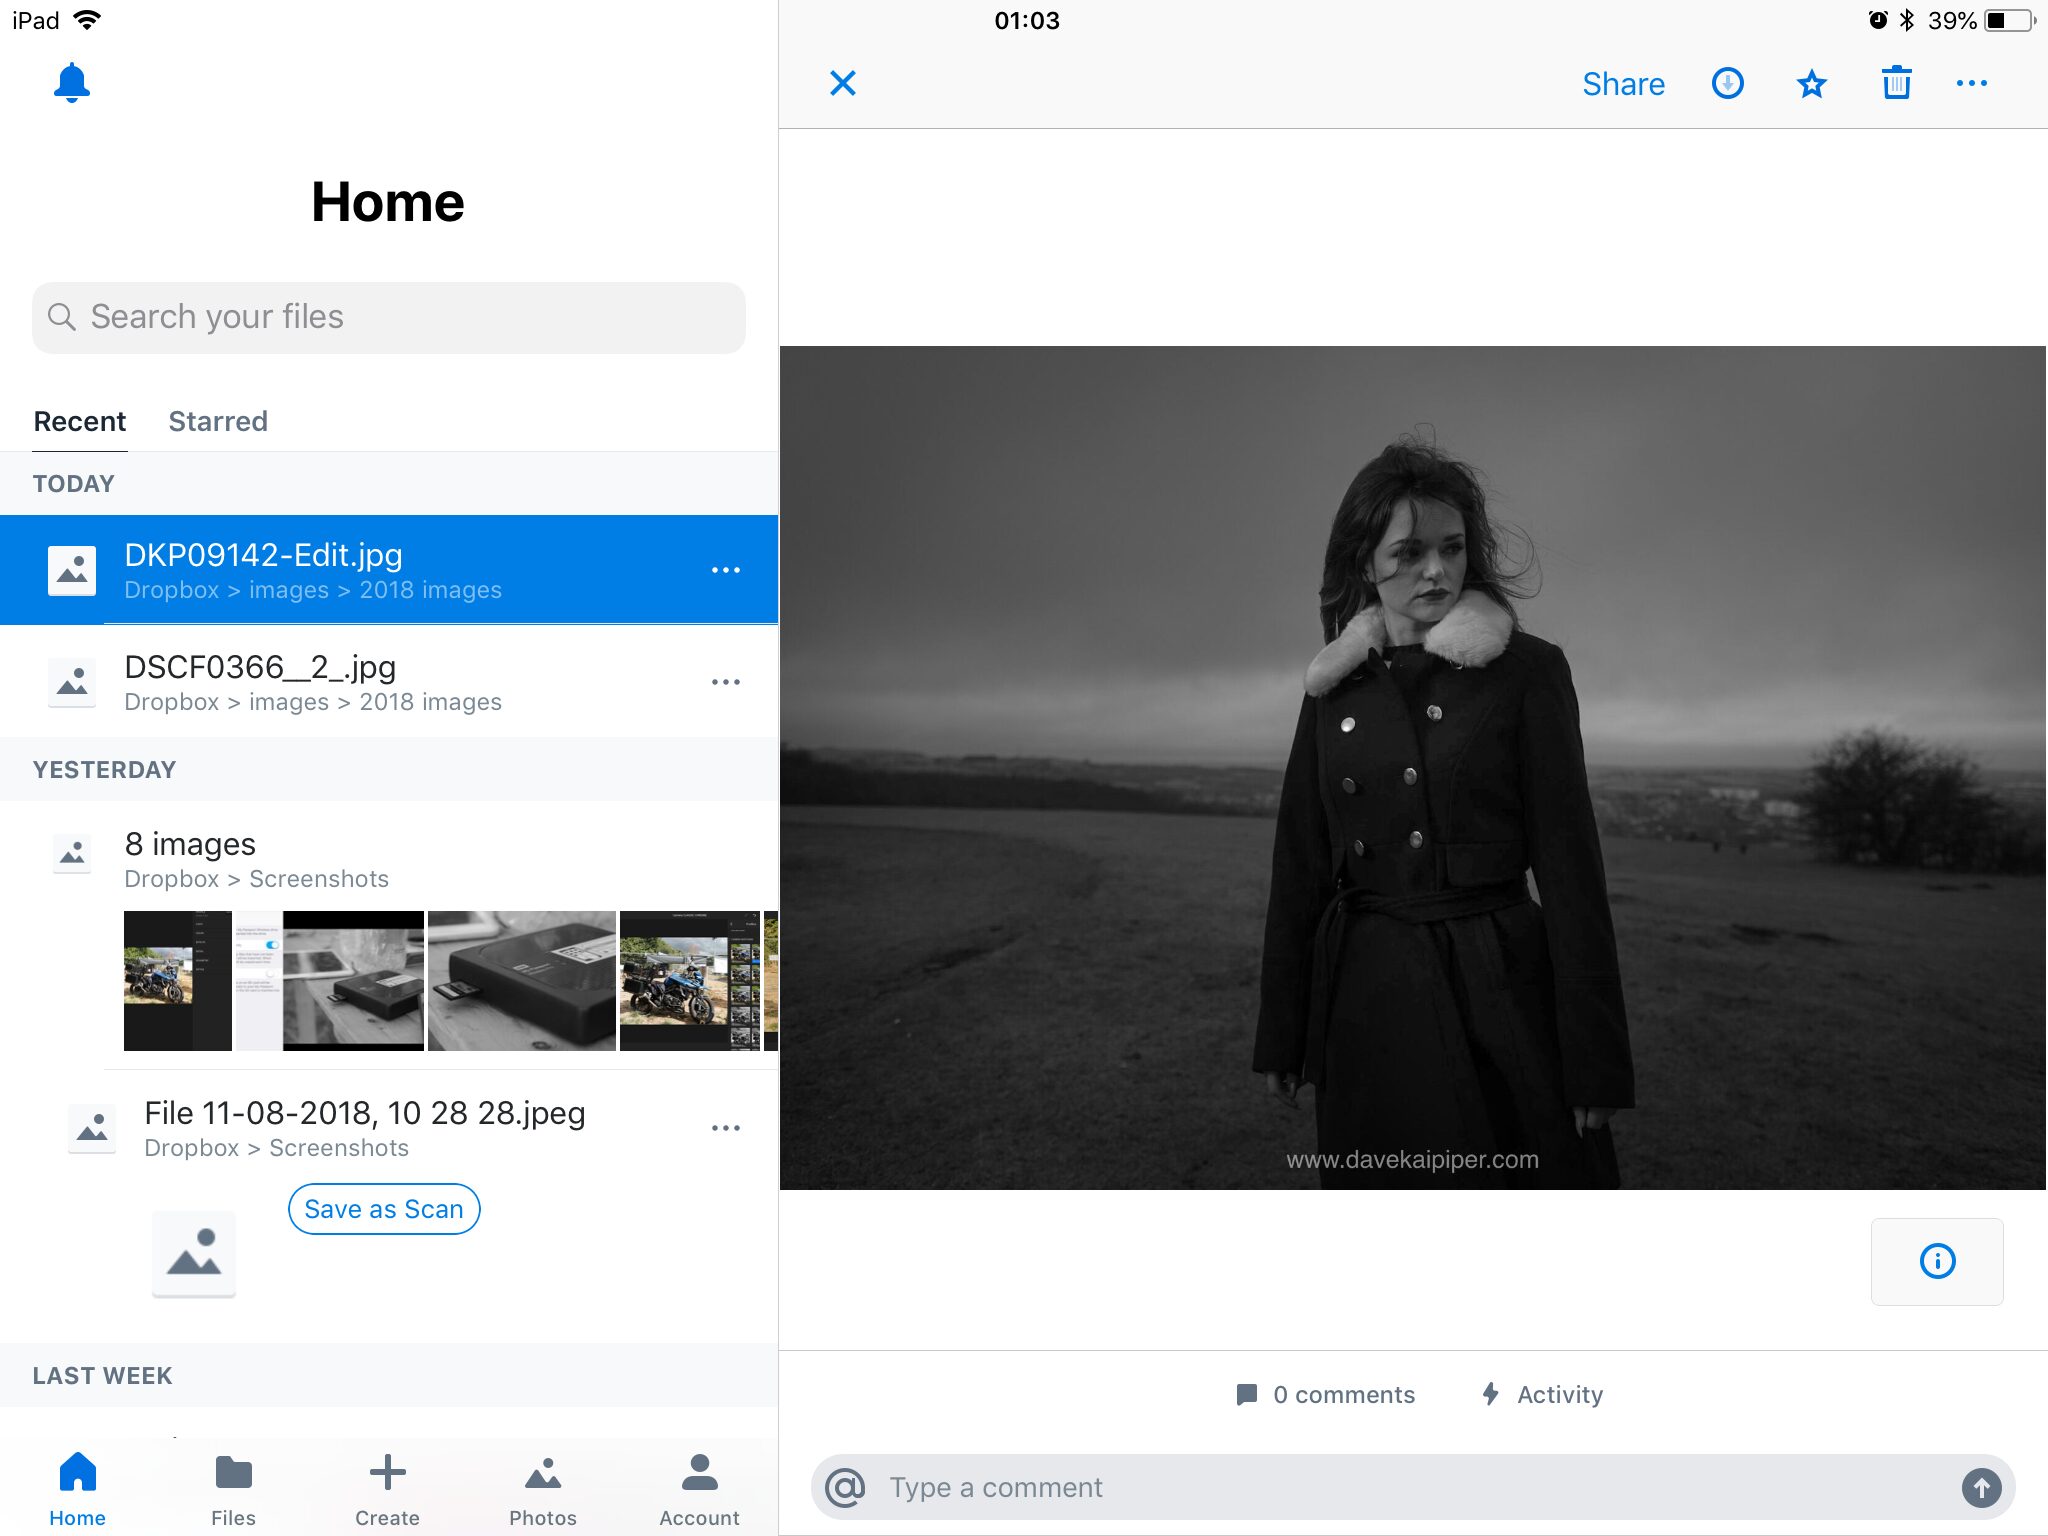
4: iPad editing
Once the images are on the drive, it is a simple matter of pulling them into the editing app of your choice. Affinity, Lightroom, and a few others will accept RAW files and the My Cloud app will give you a preview image of a Fujifilm RAW file, meaning you only have to pull over the file you want to edit.
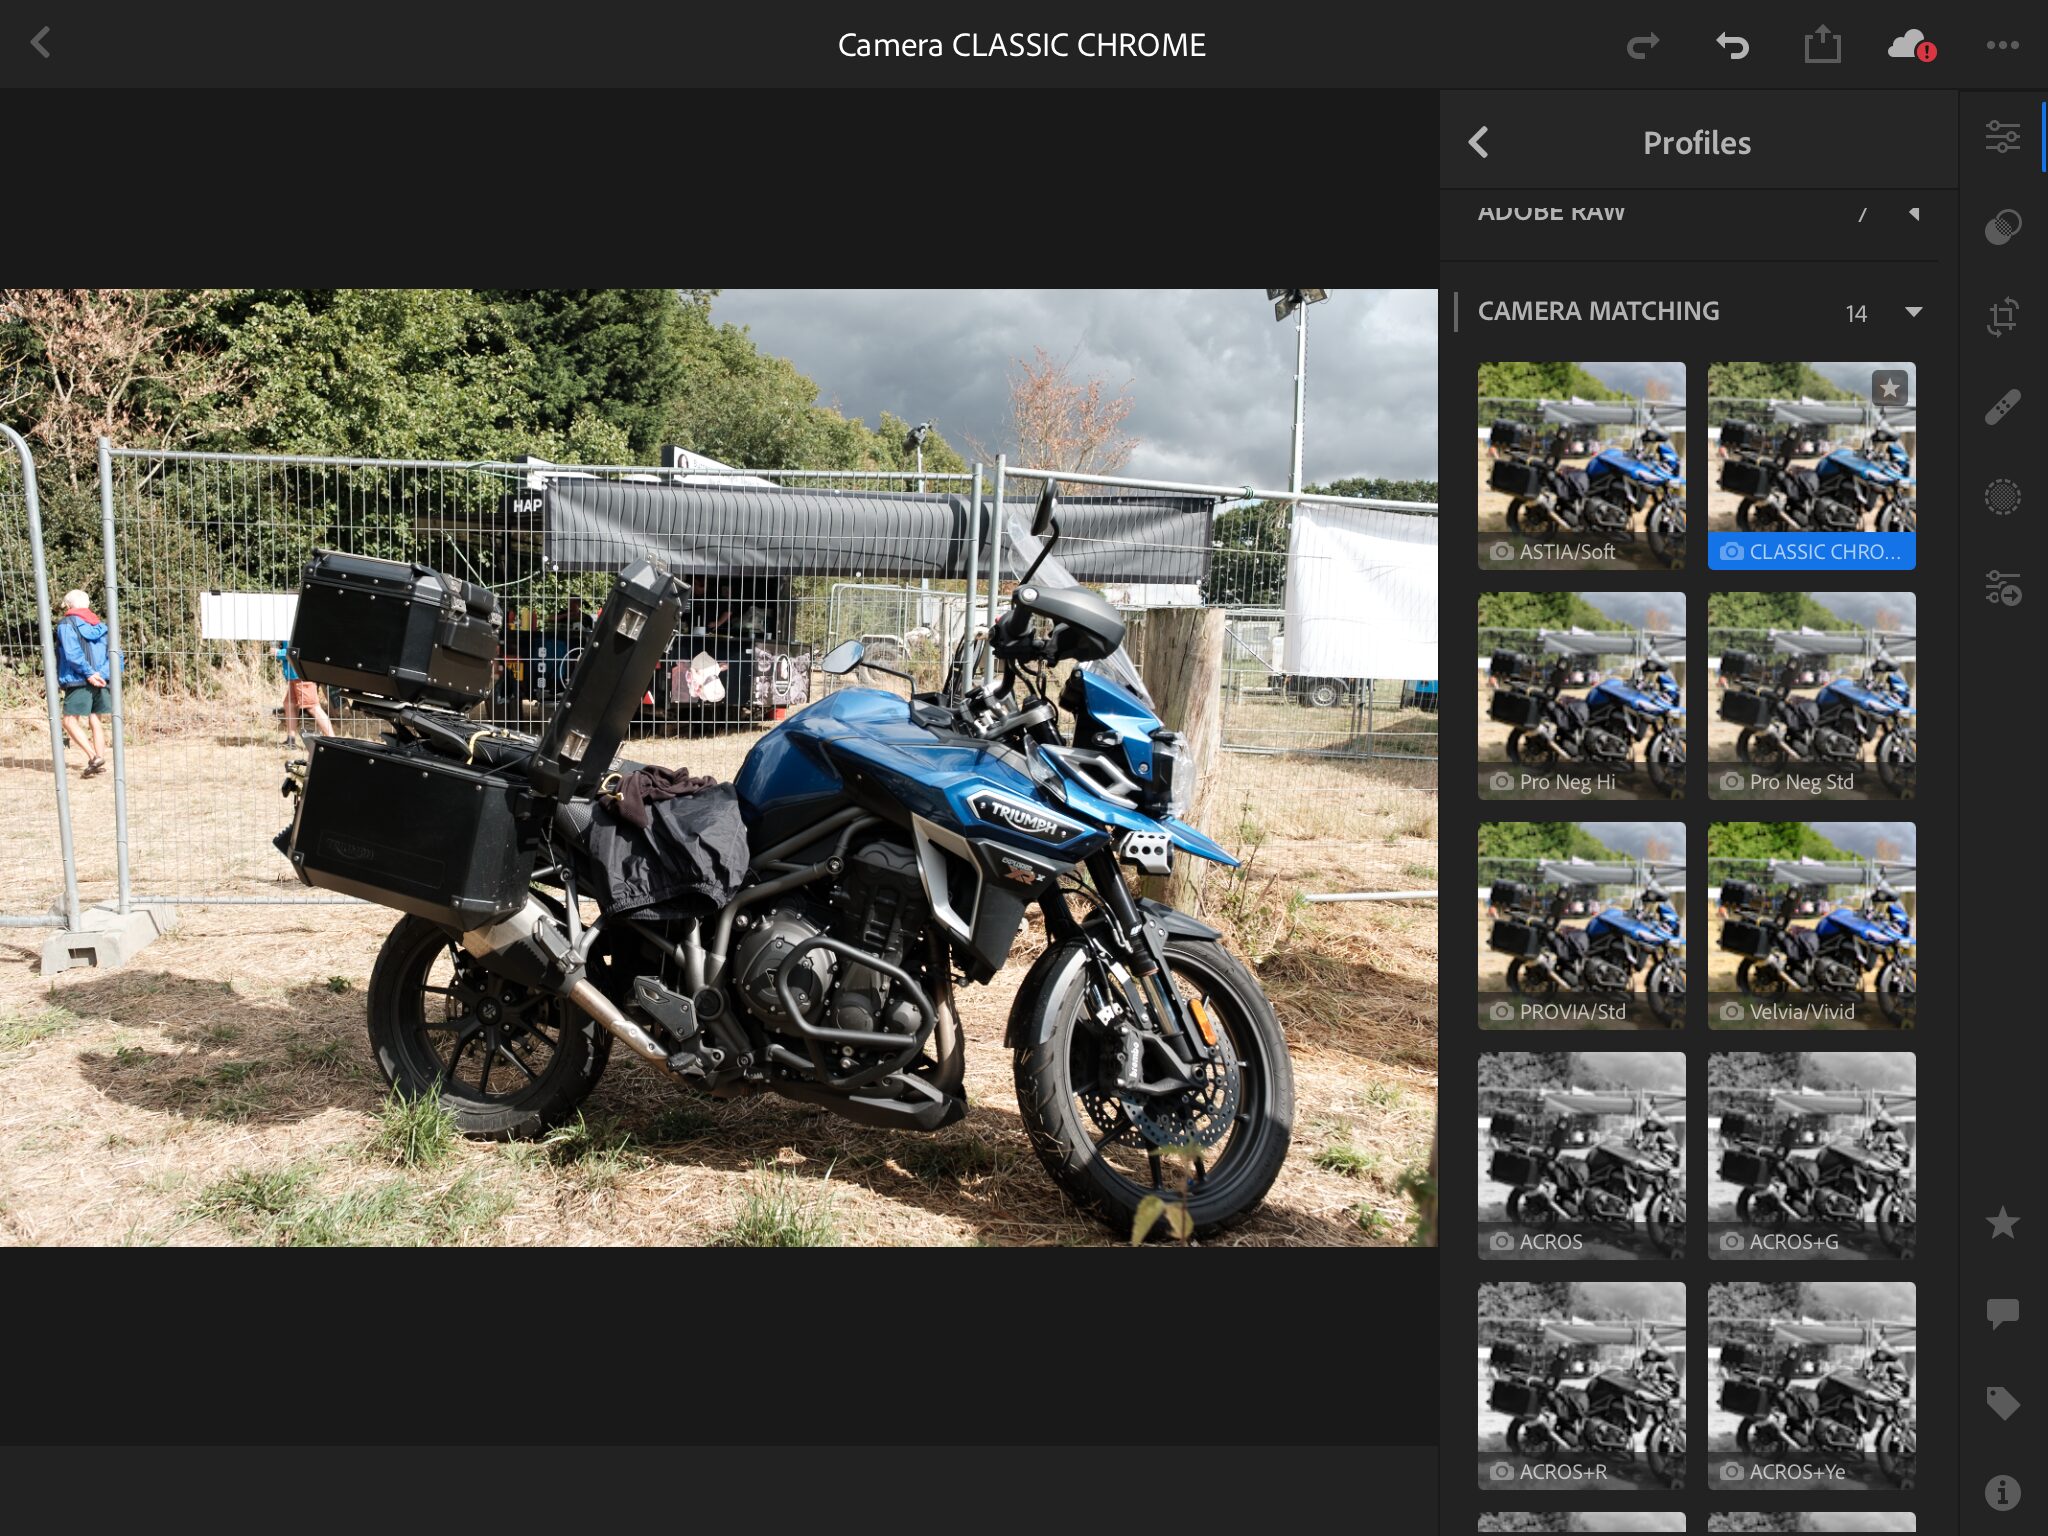

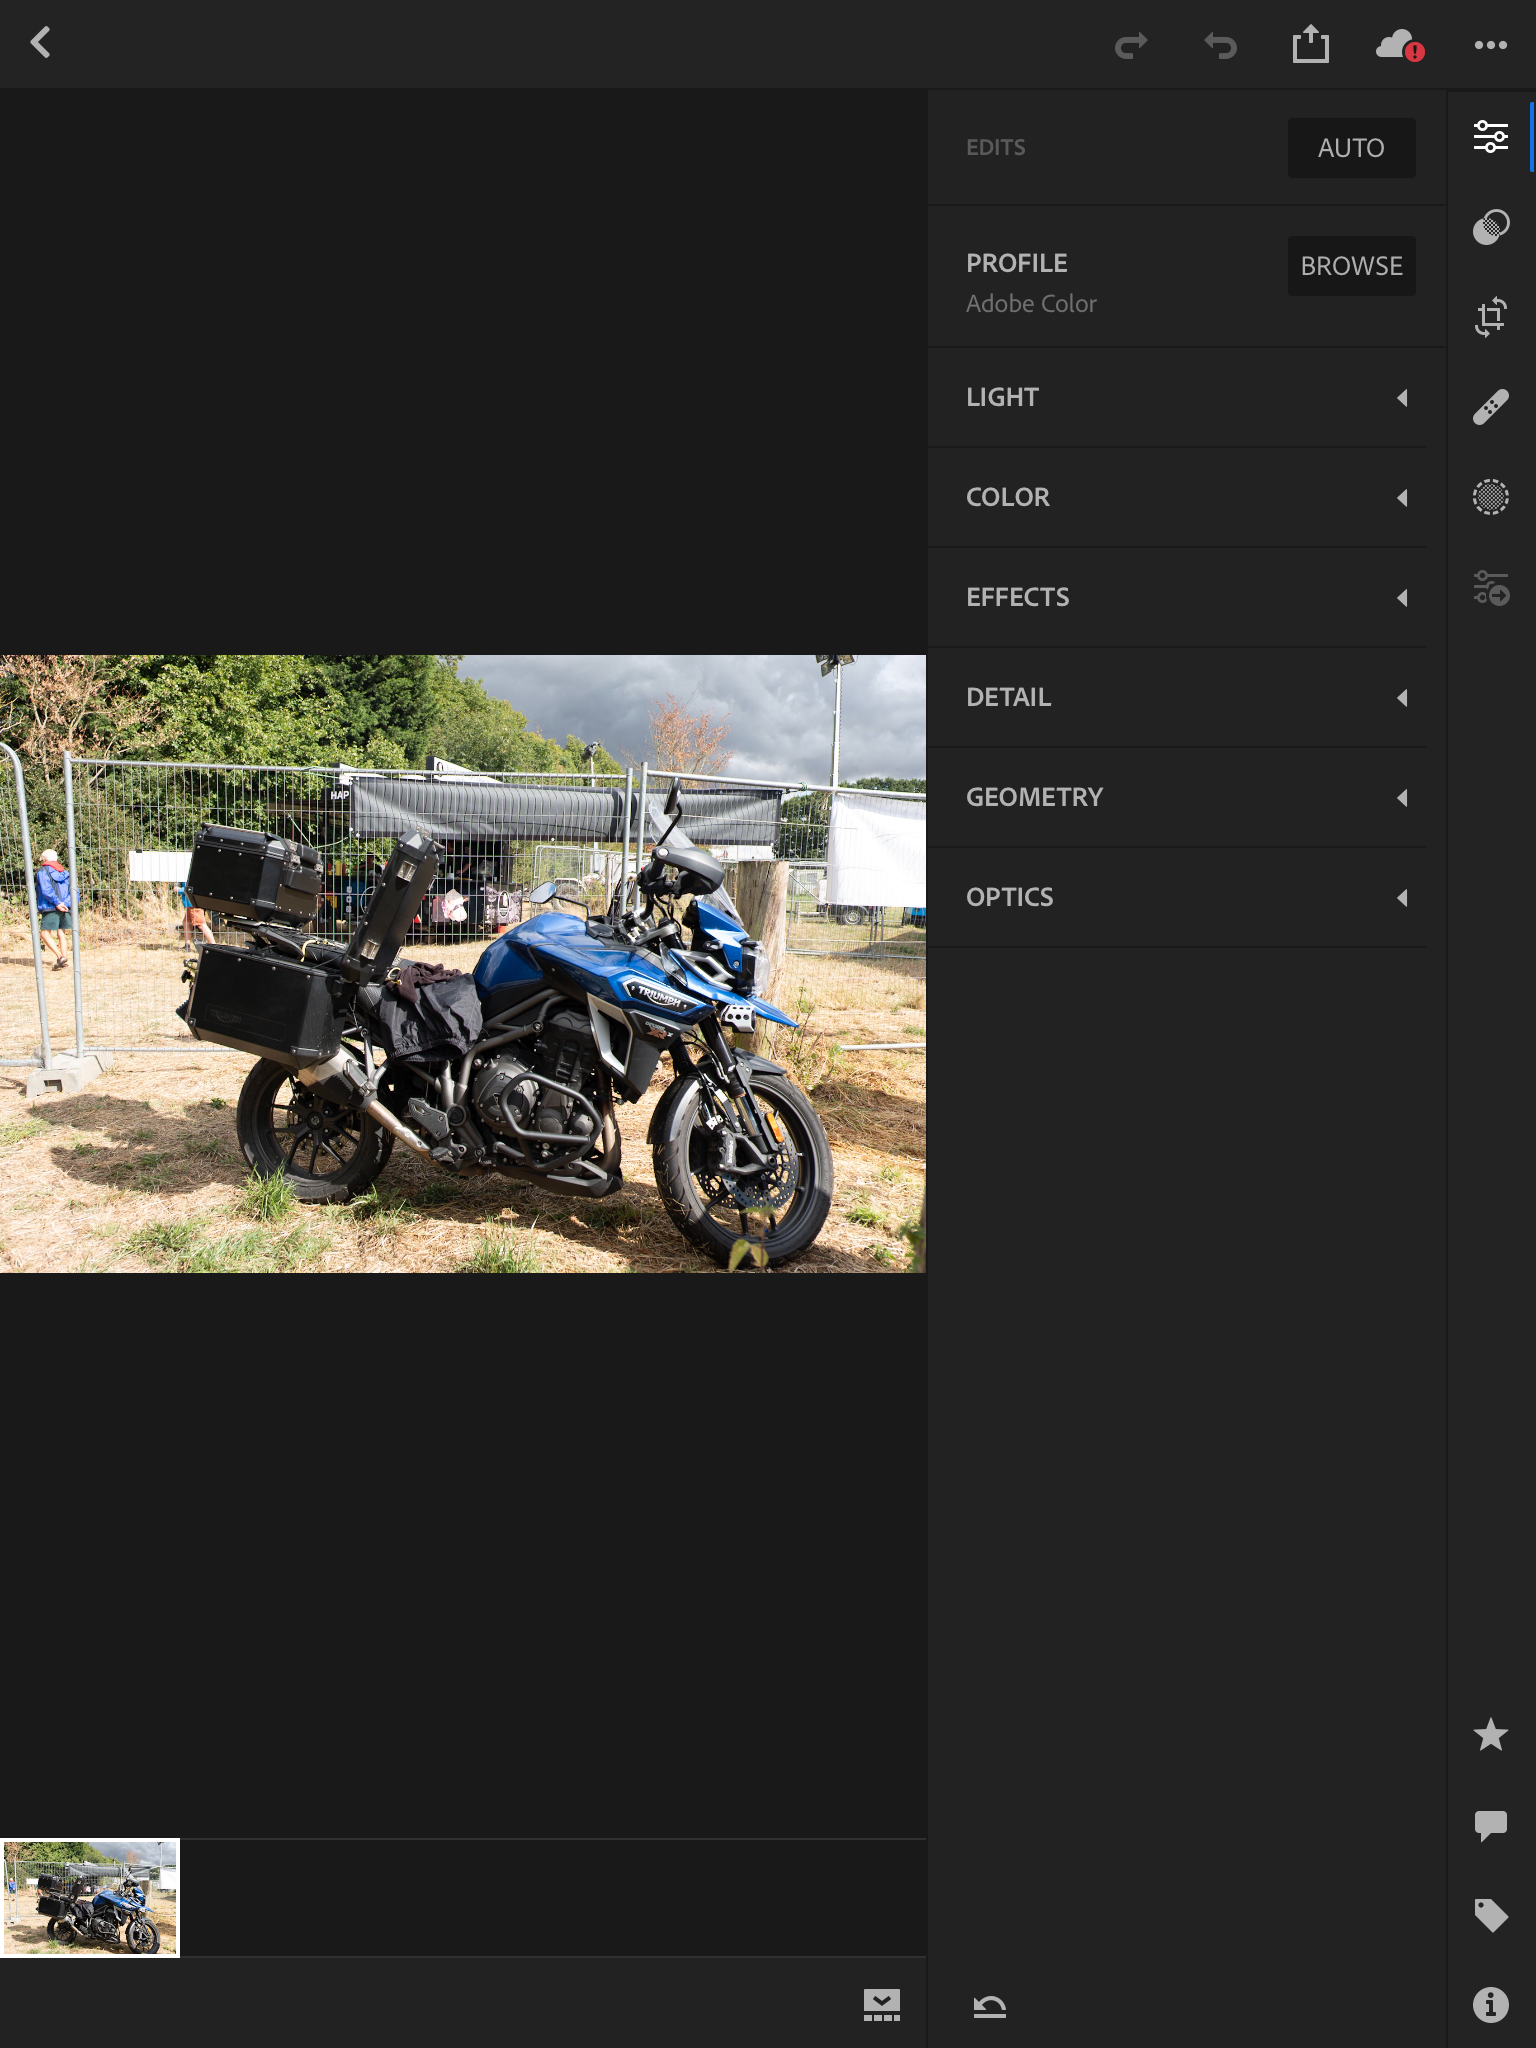

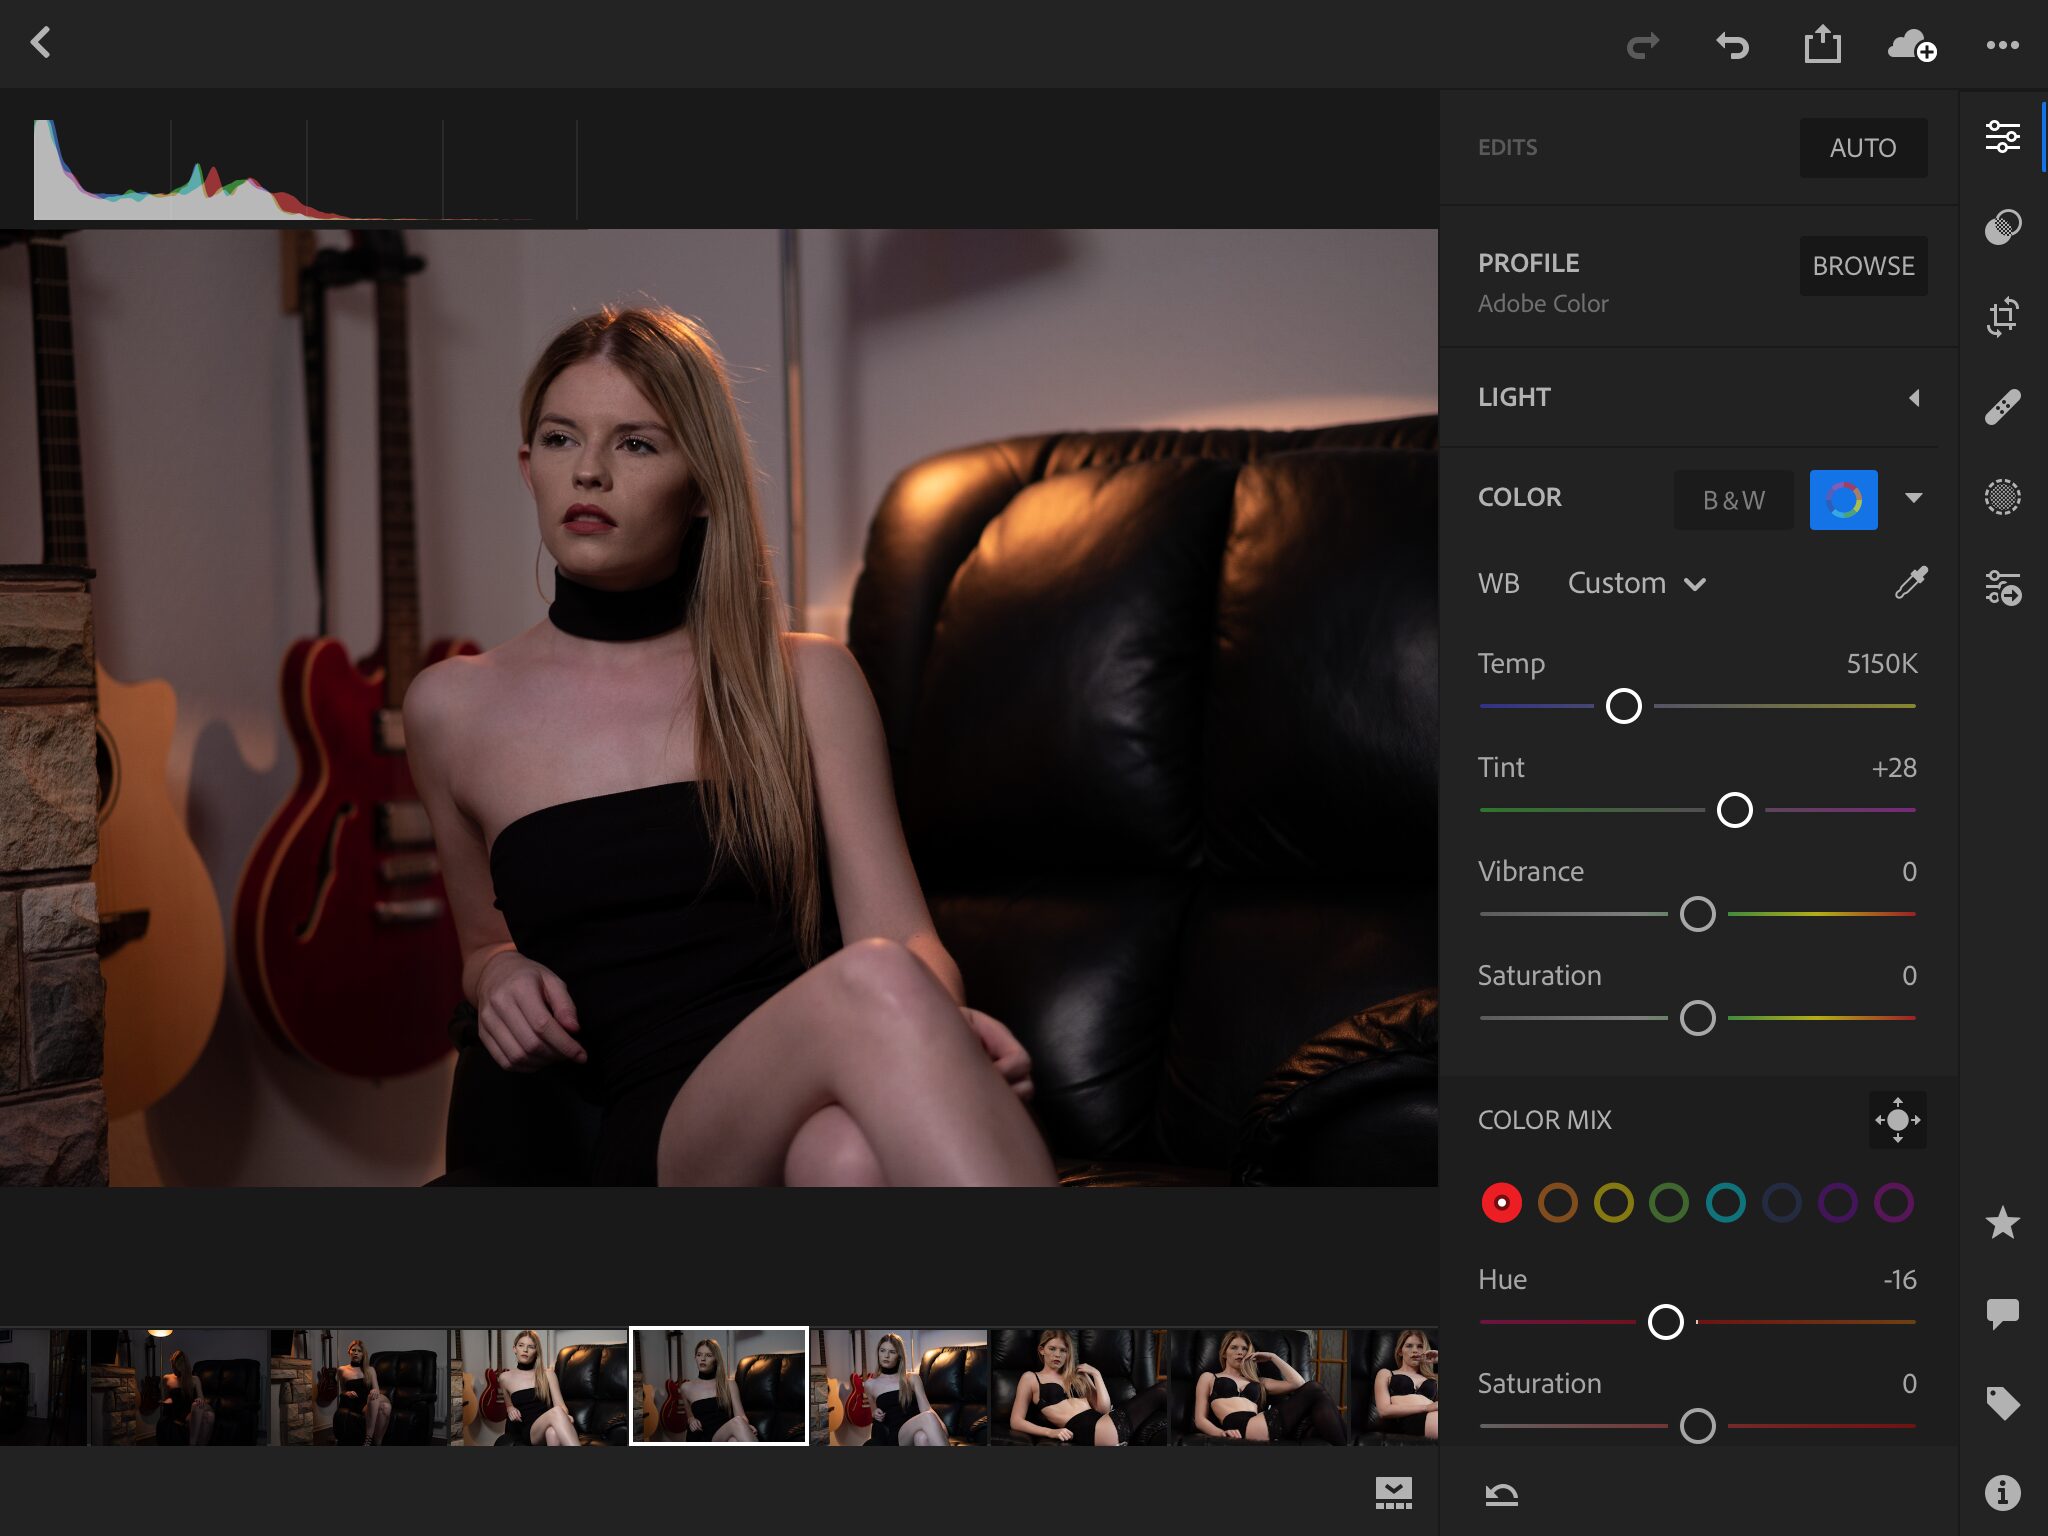
We all love the Fujifilm simulations – they are super simple to use in the Lightroom CC app. All the standard editing tools are in the app, plus some others that you might not have expected. Remember that Lightroom CC is the mobile-based app and works best when used in conjunction with Lightroom Classic, which is the desktop-based app. The Adobe Cloud does a super job of syncing everything together and the awesome use of Smart Previews give you access to all your images (that you have chosen to sync) on a tablet/mobile device, meaning you get edit as you go without needing to be online or have your images with you.
Lightroom is not the only option. At Fuji:ove we totally back the amazing tools from AlienSkin (click here for 30 free days and enter the code ‘Fujilove’ for 10% discount), but at the moment they only have a full Windows or Apple program – there is no app-based version.
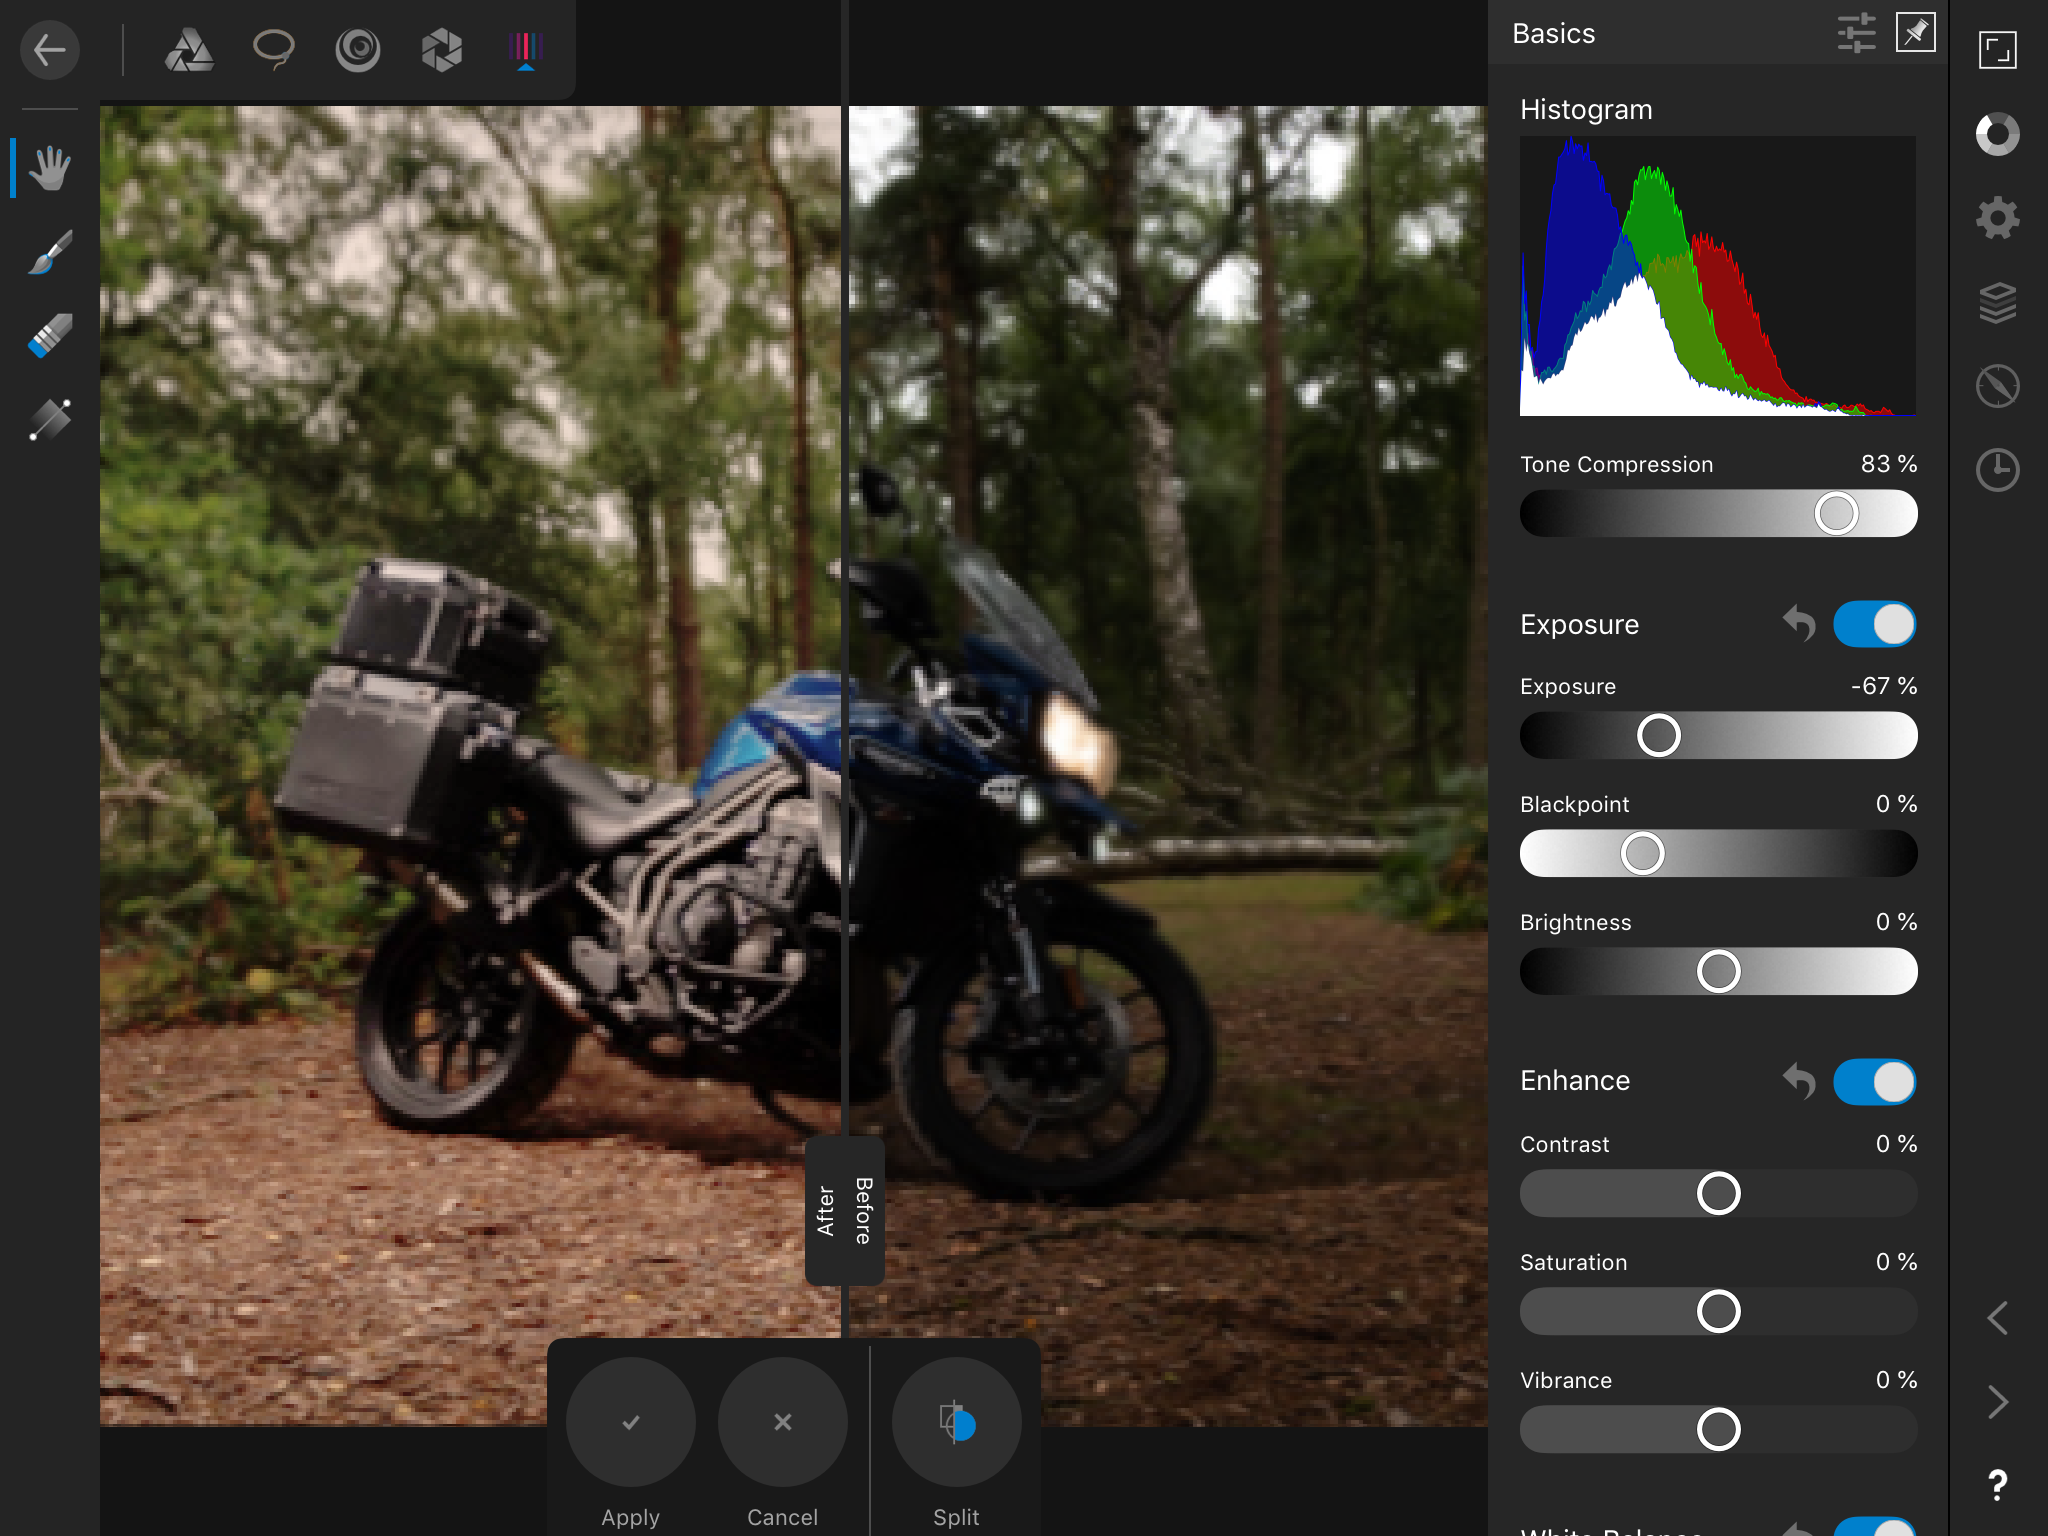
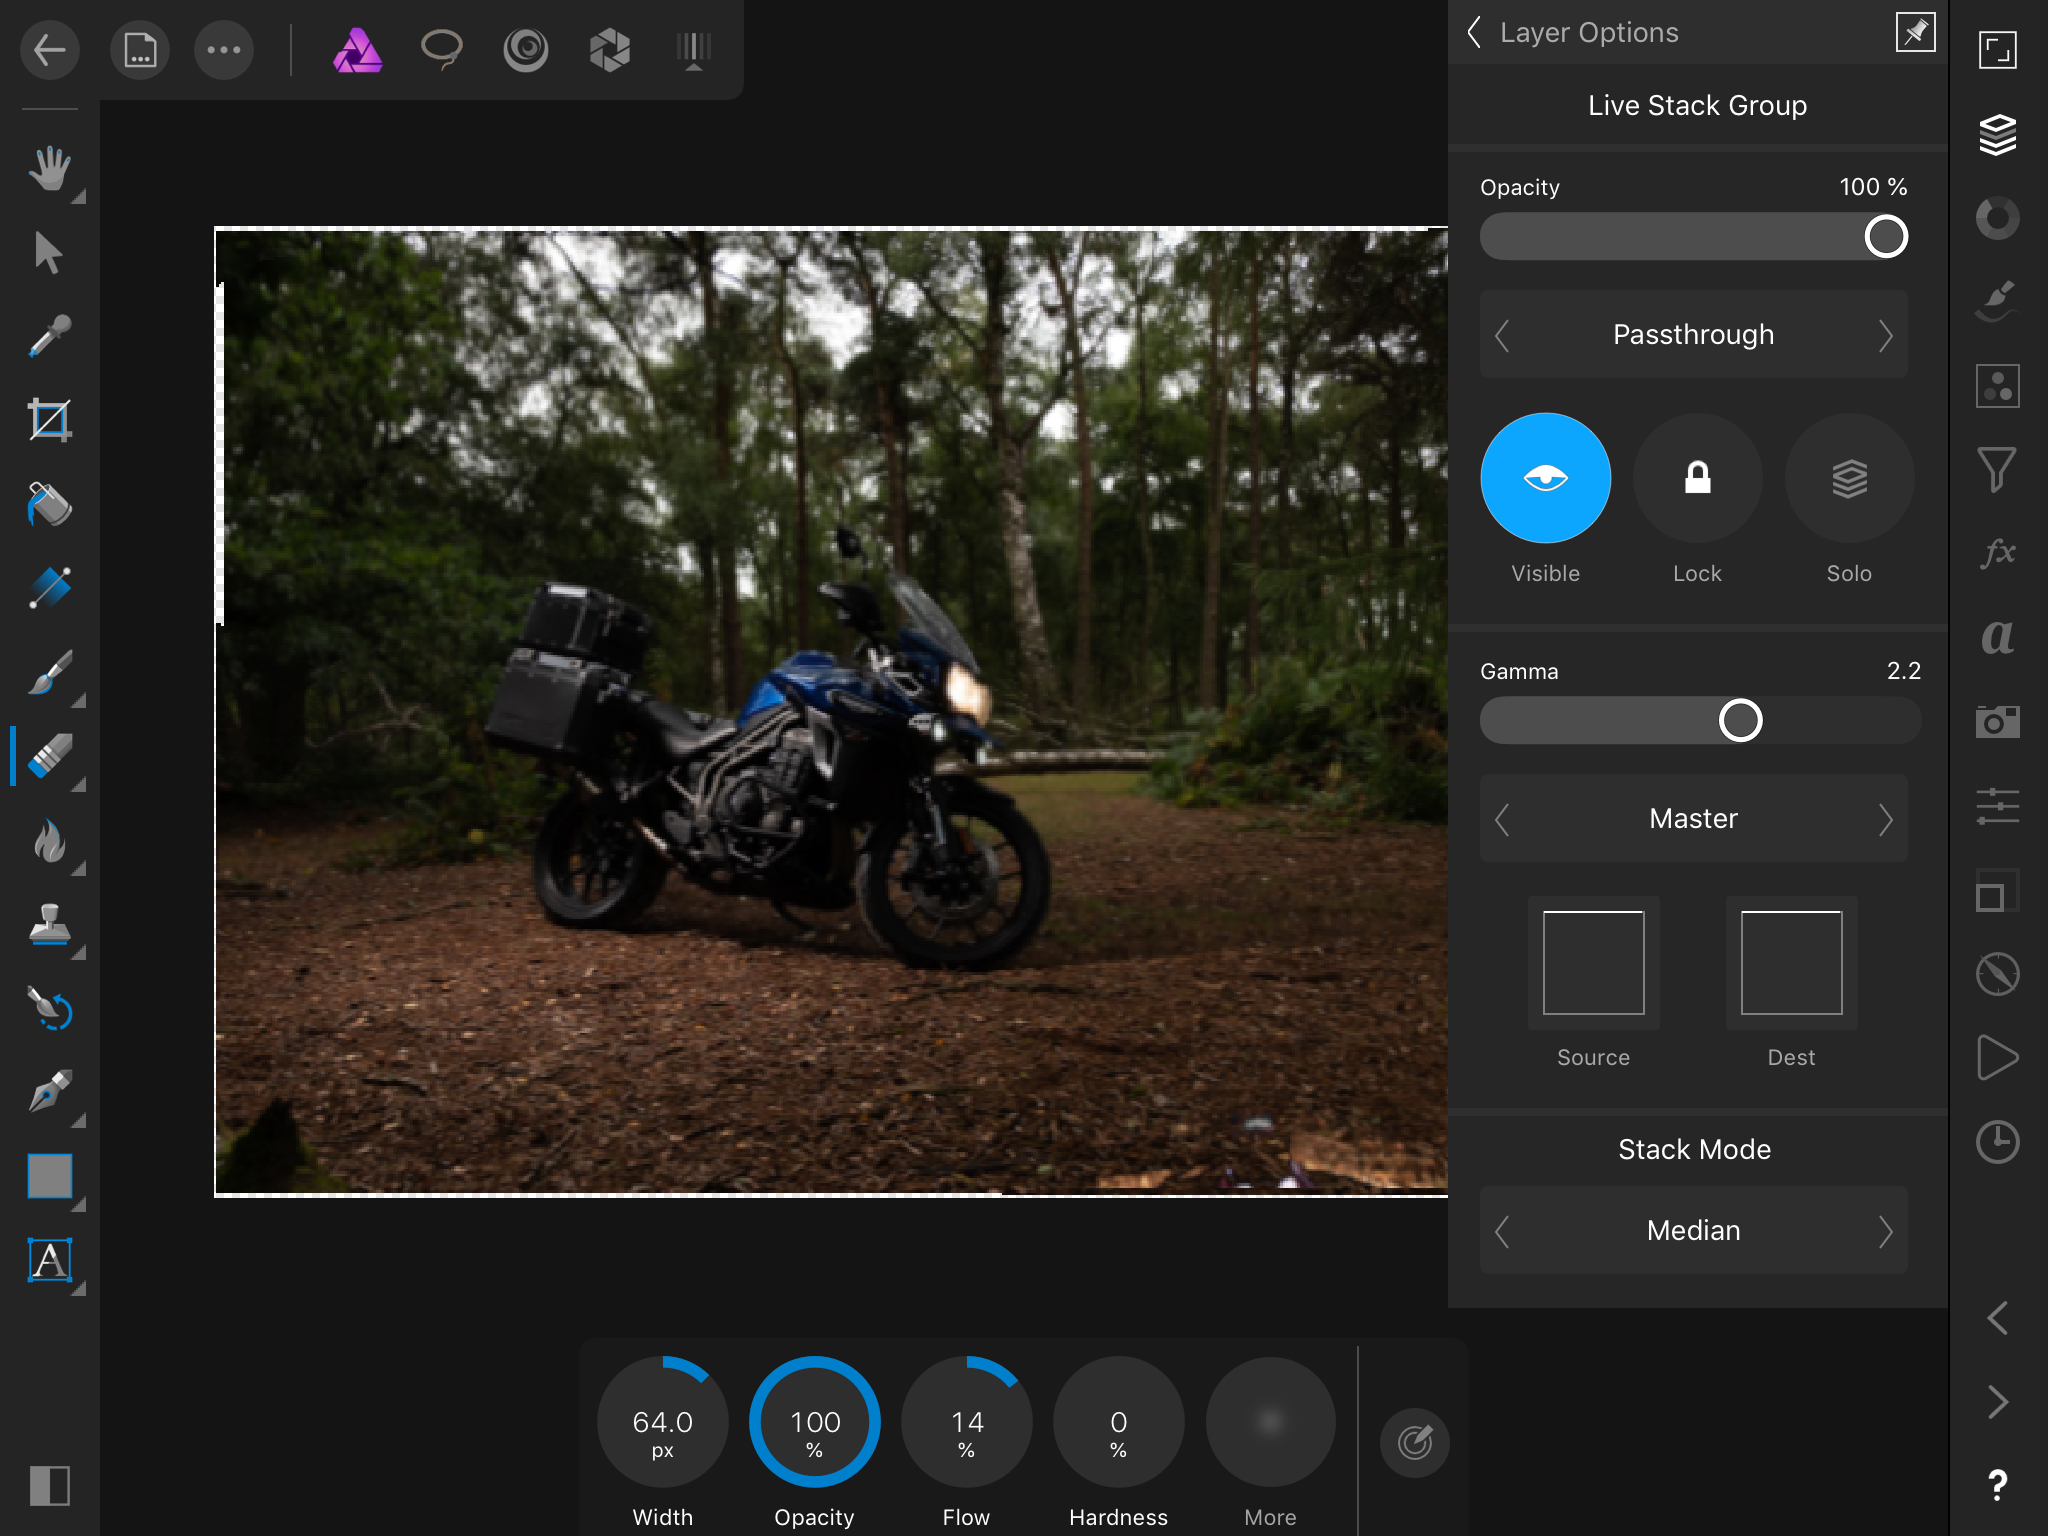
Affinity Photo is a widely loved and used alternative to Photoshop and they have a great app that works with the full desktop version. I used the app on location and it is awesome. I think it will be something that falls into my workflow. Maybe one day they can work with Fujifilm and combine the Photo app with the Fujifilm Camera Control app for a wireless shooting solution. I’m hoping to get some time to have a real look at all three of the programs in the near future, as I am very impressed with the products so far.
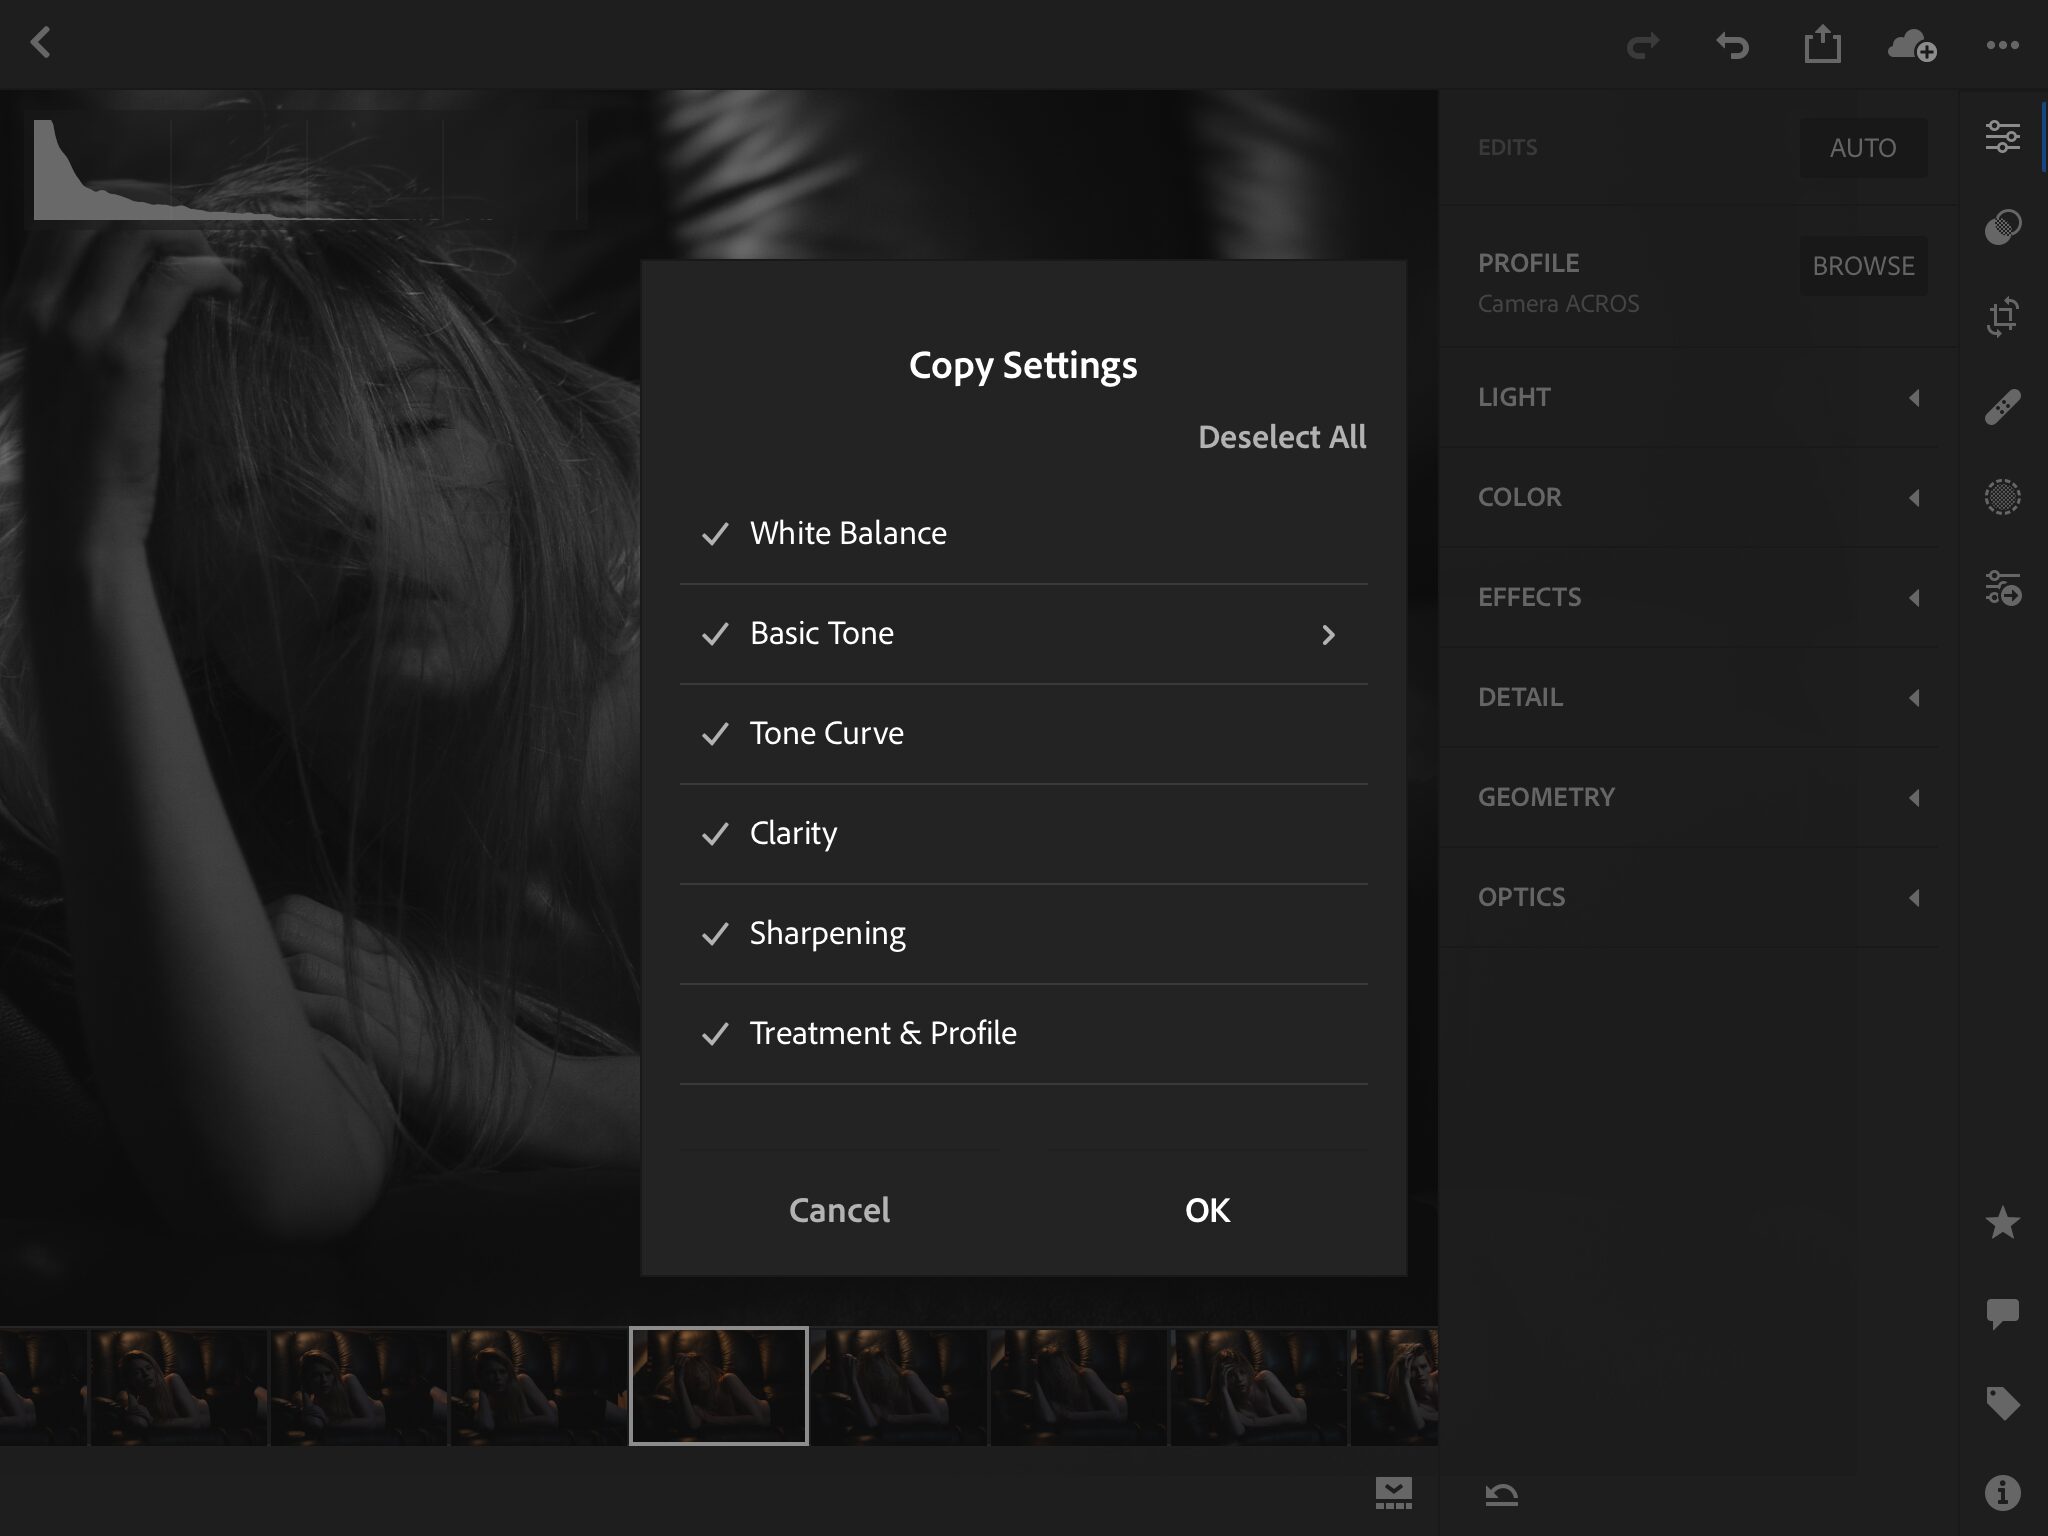
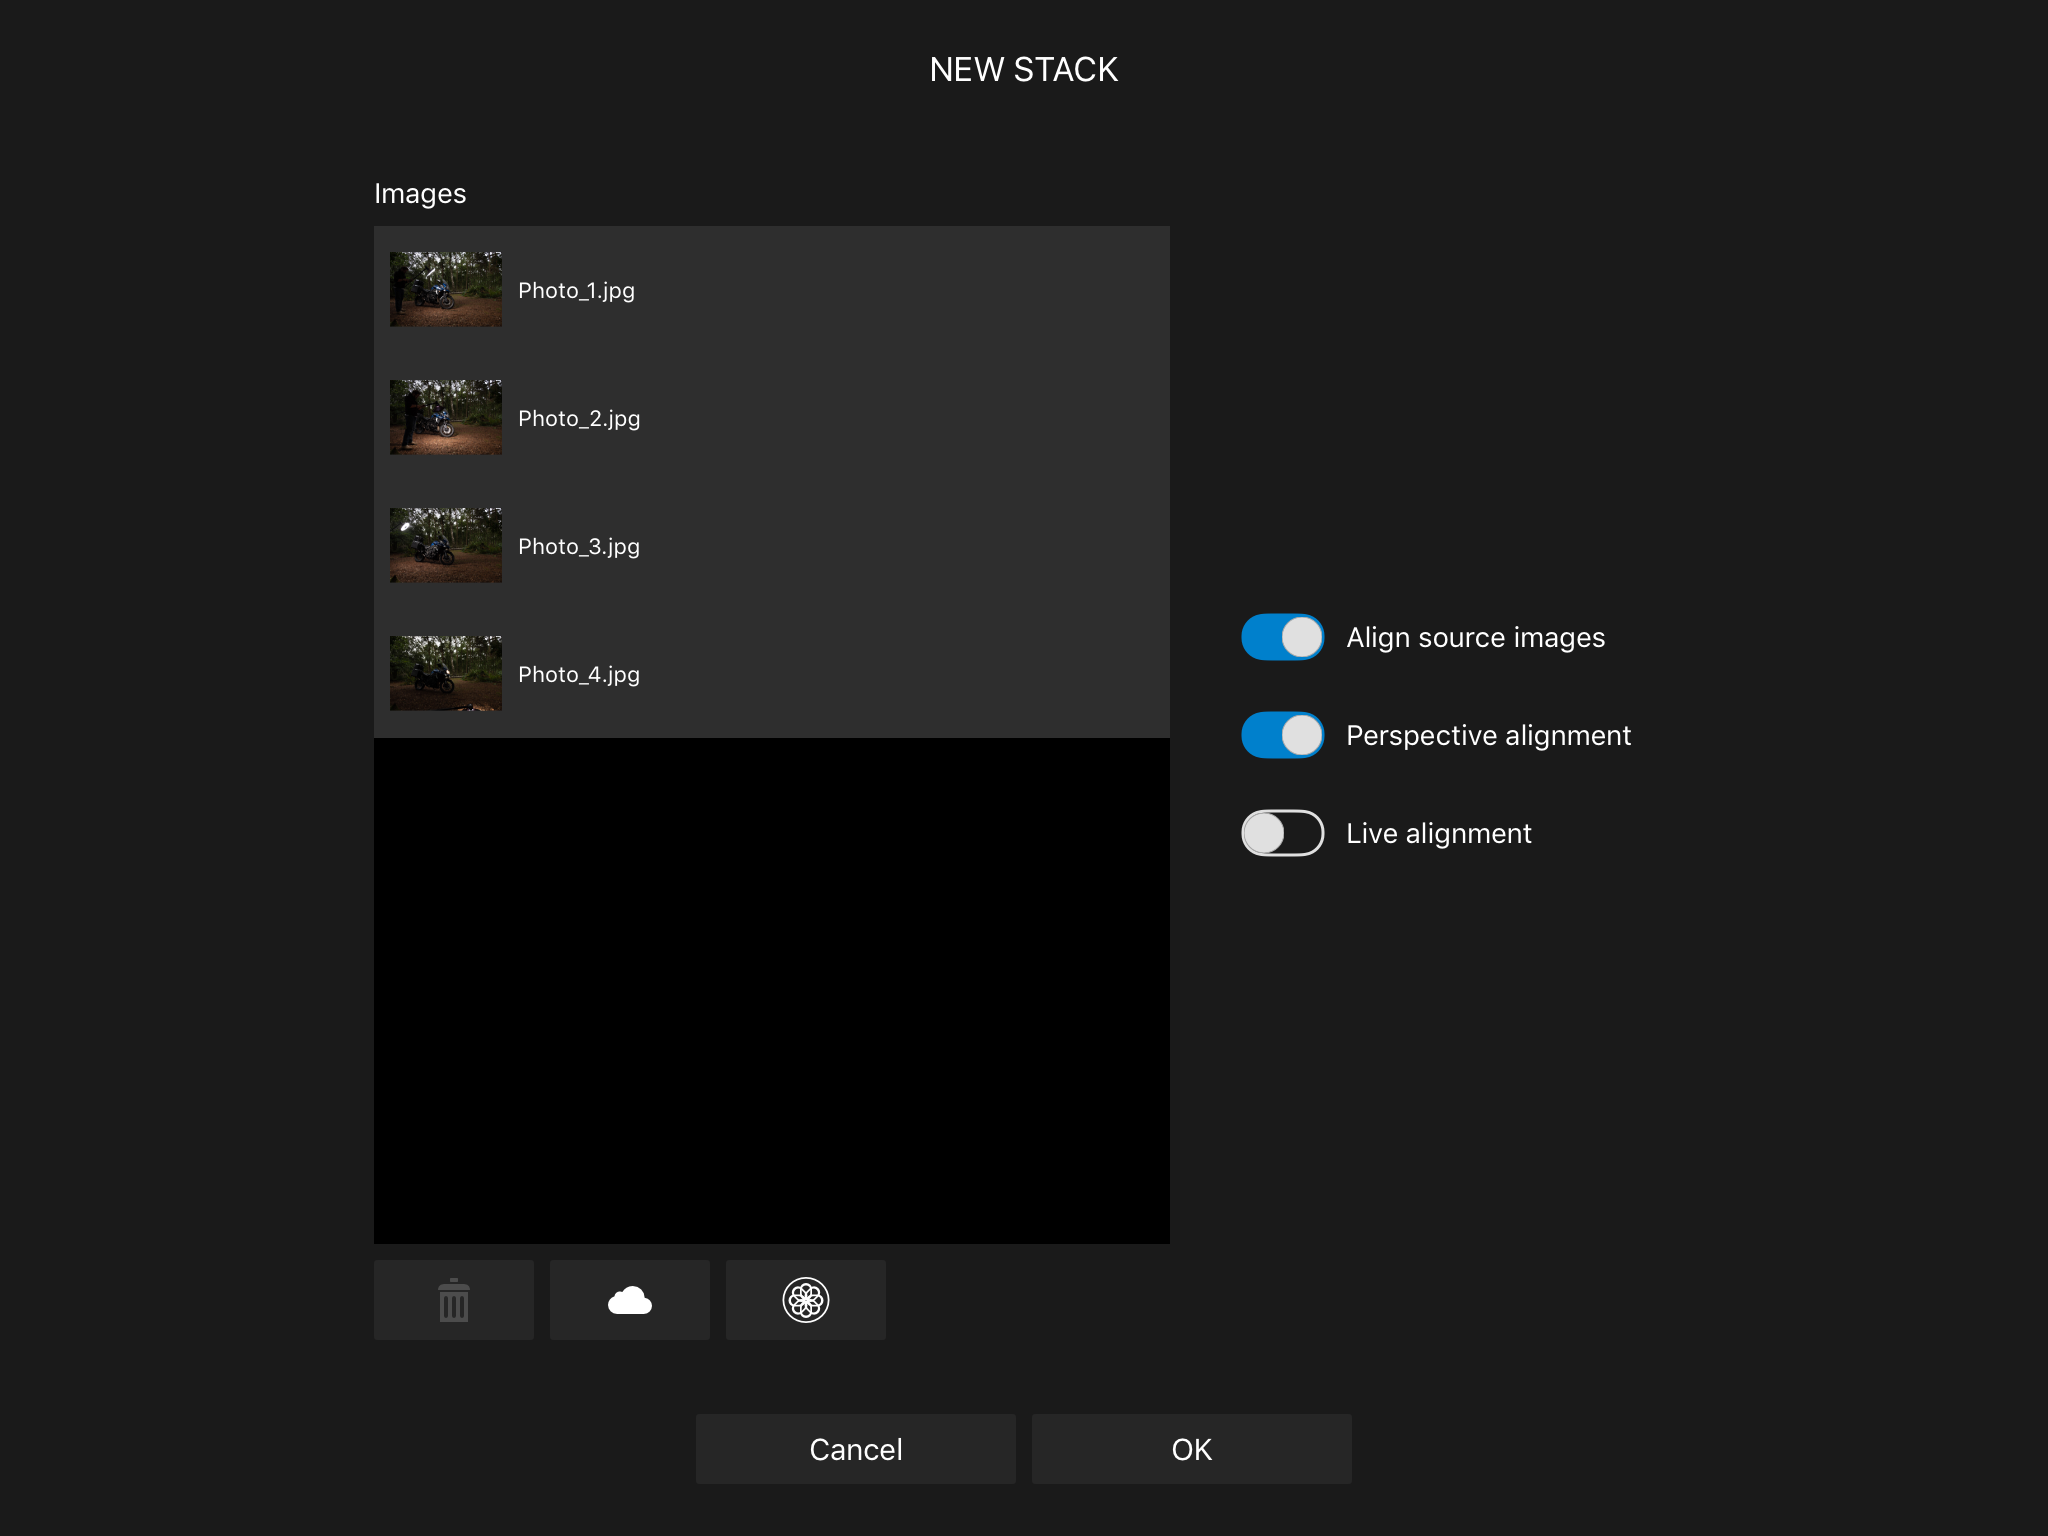
As you can see from the images below, I was able to do all the simple things plus things like layer-stack images, use blending modes and masking tools on the fly, on location – epic!
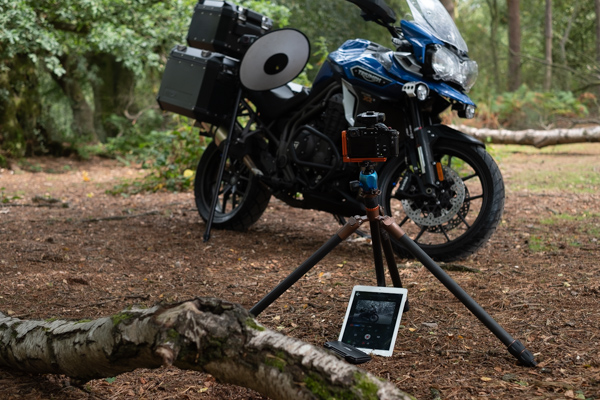
For this shoot, I used the Fujifilm app to wirelessly trigger the camera. I walked around the bike triggering the camera and placing the light just where I wanted it then composited it all together. Yes, I redid the composite when I got home using the full program, but it did let me ensure I had a proof of concept in the field. With some more practice with the app, I think I would be good to go with the app version, especially if I had a bigger iPad and maybe the Apple pen too. Either way, it works and it’s very easy to make work, too.


At the moment, Exposure 3 is not able to plug into Affinity, but things are changing quickly. For more info on which plugins will work, click here.
Trigging the camera using the Fujifilm App
Snapseed (owned by Google) is awesome and I use it loads for quick edits, Instagram posts, travel stuff and the less serious stuff. The app is capable and powerful, and one of the most popular and widely used. The below screens shots from the iPad show all the custom tools you can play with but you also have all of the presets which you can custom modify. I love Snapseed!

Snapseed is great for super quick edits. Works great on a phone and a tablet.
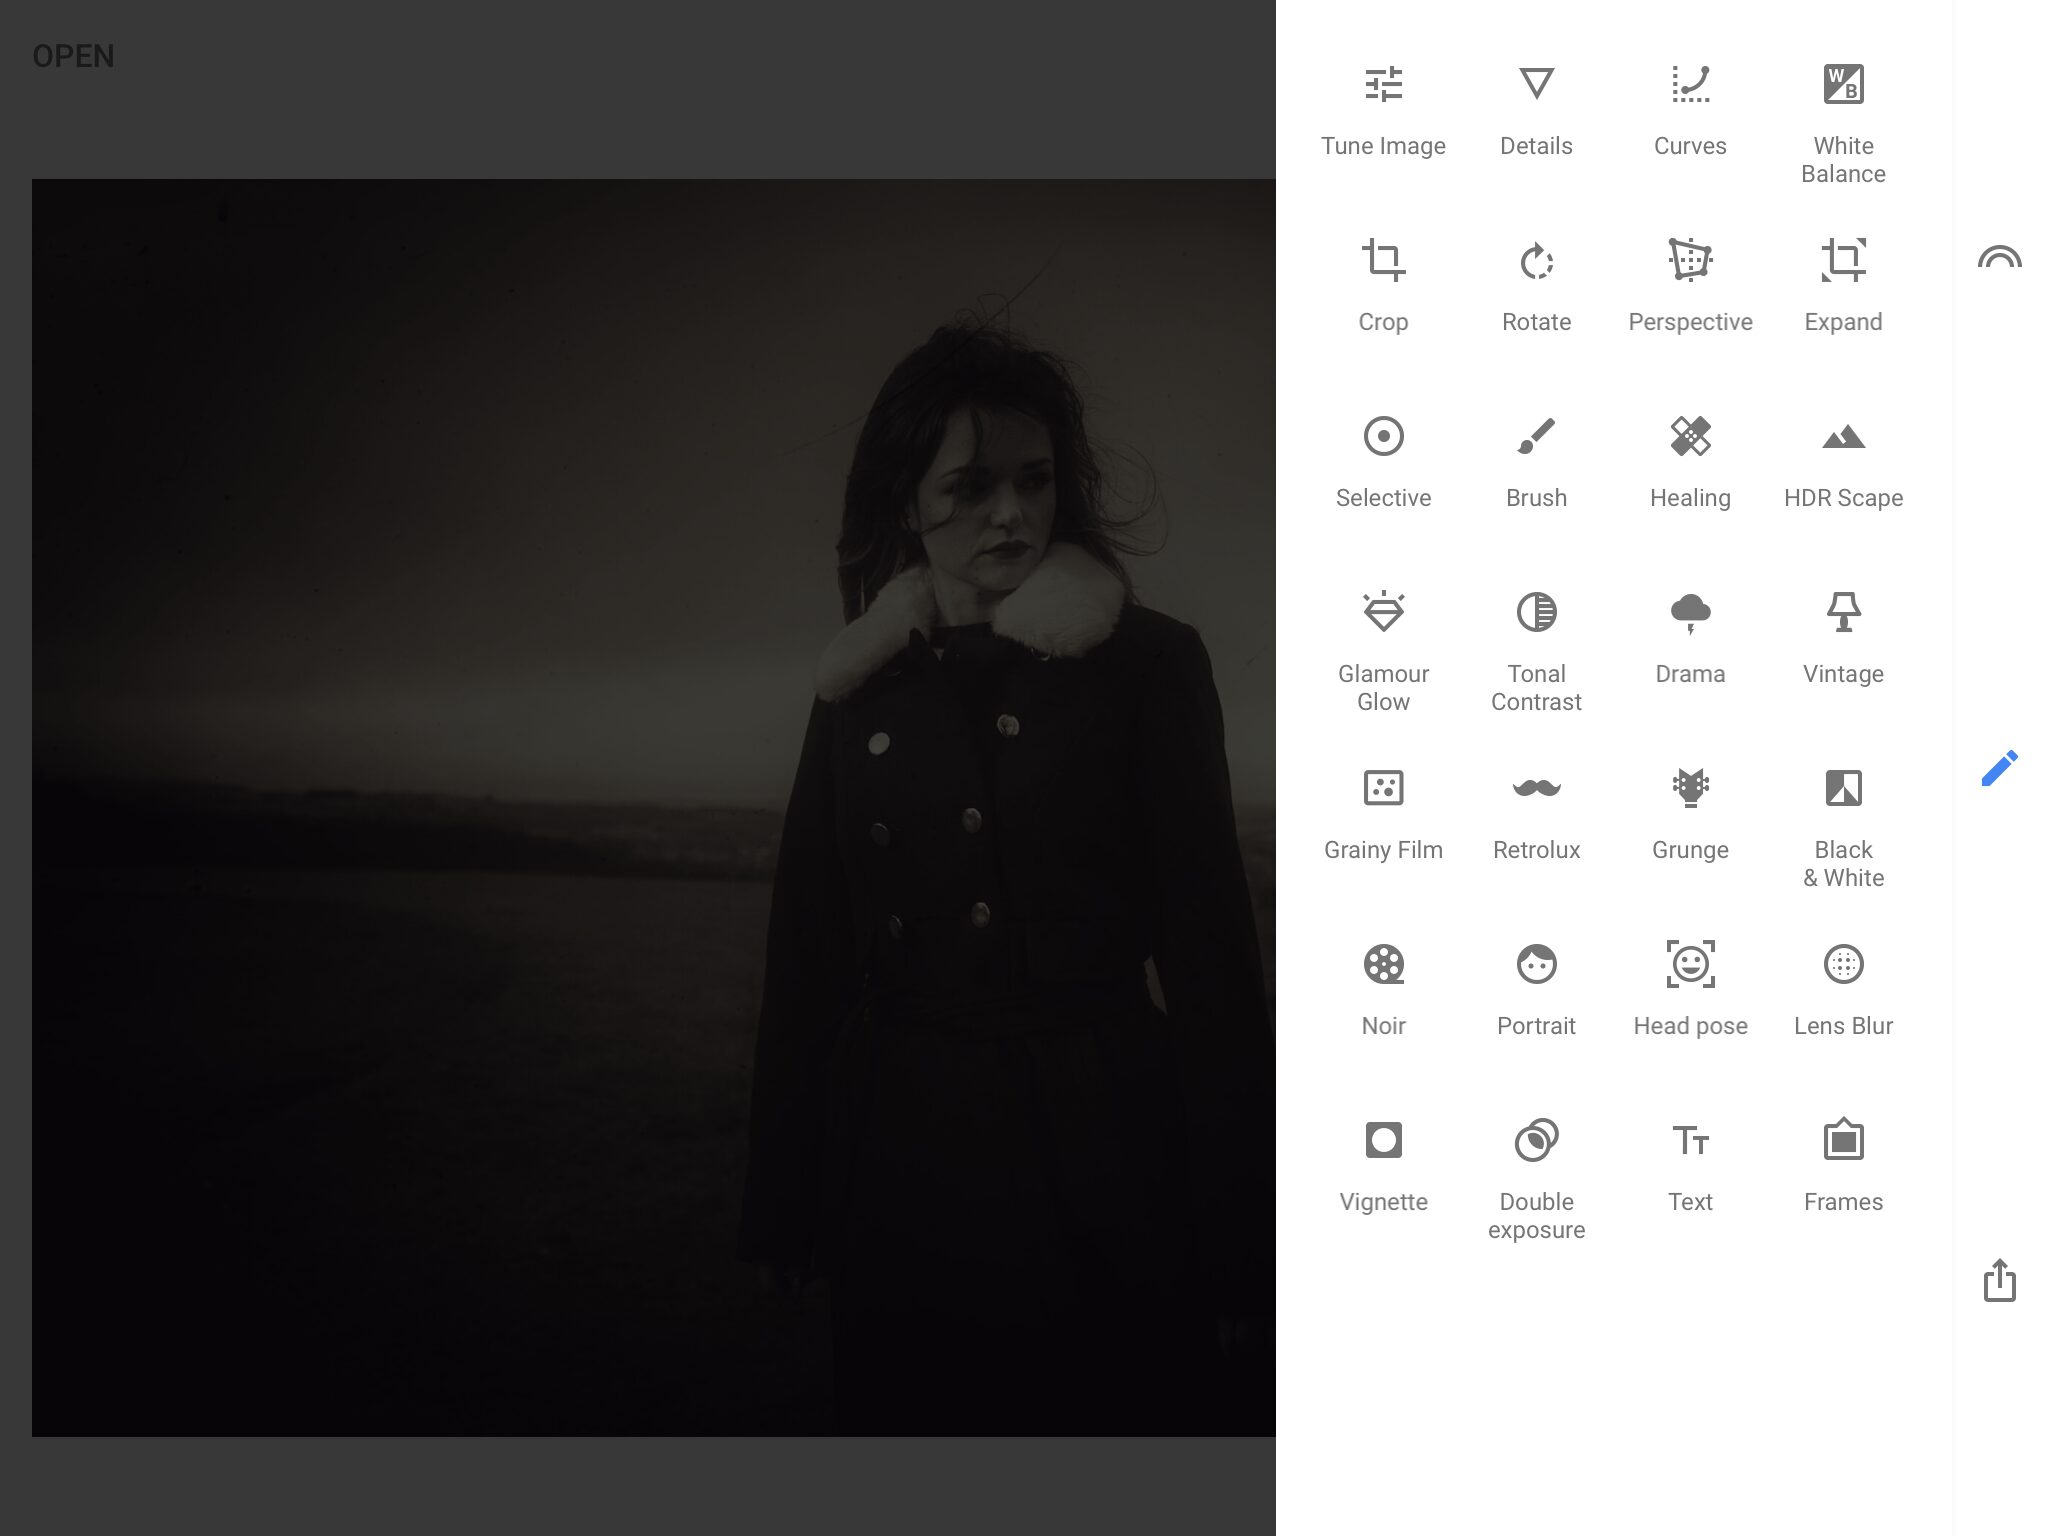
The main editing option screen in Snapseed.
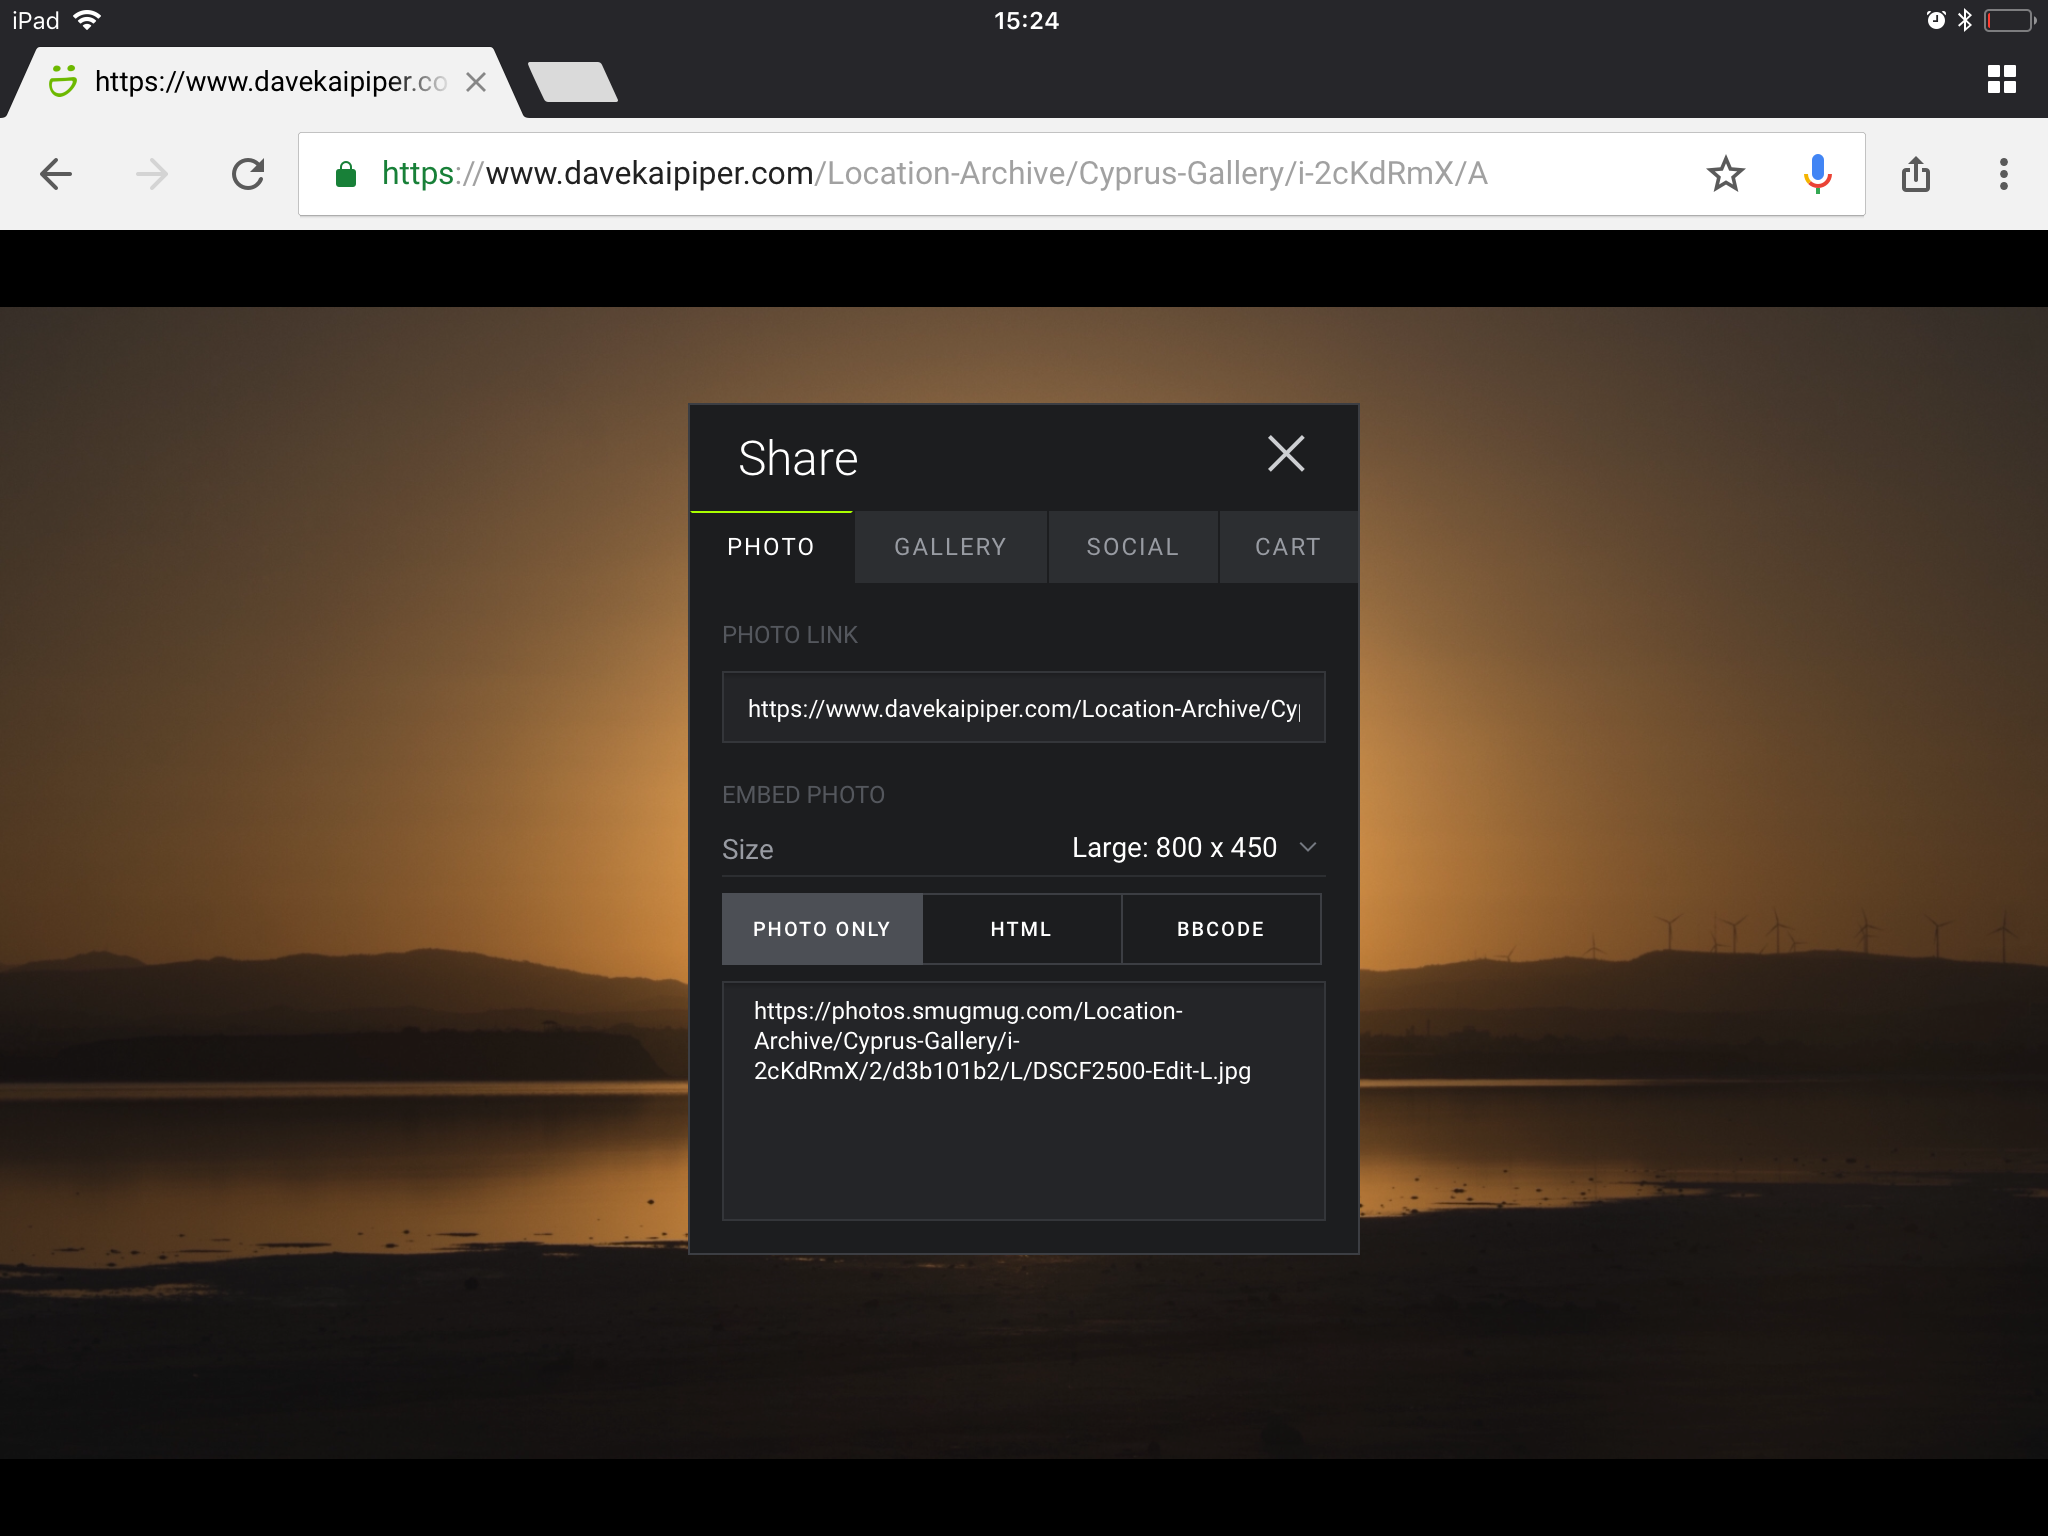
5: Saving, exporting, sharing and online backup
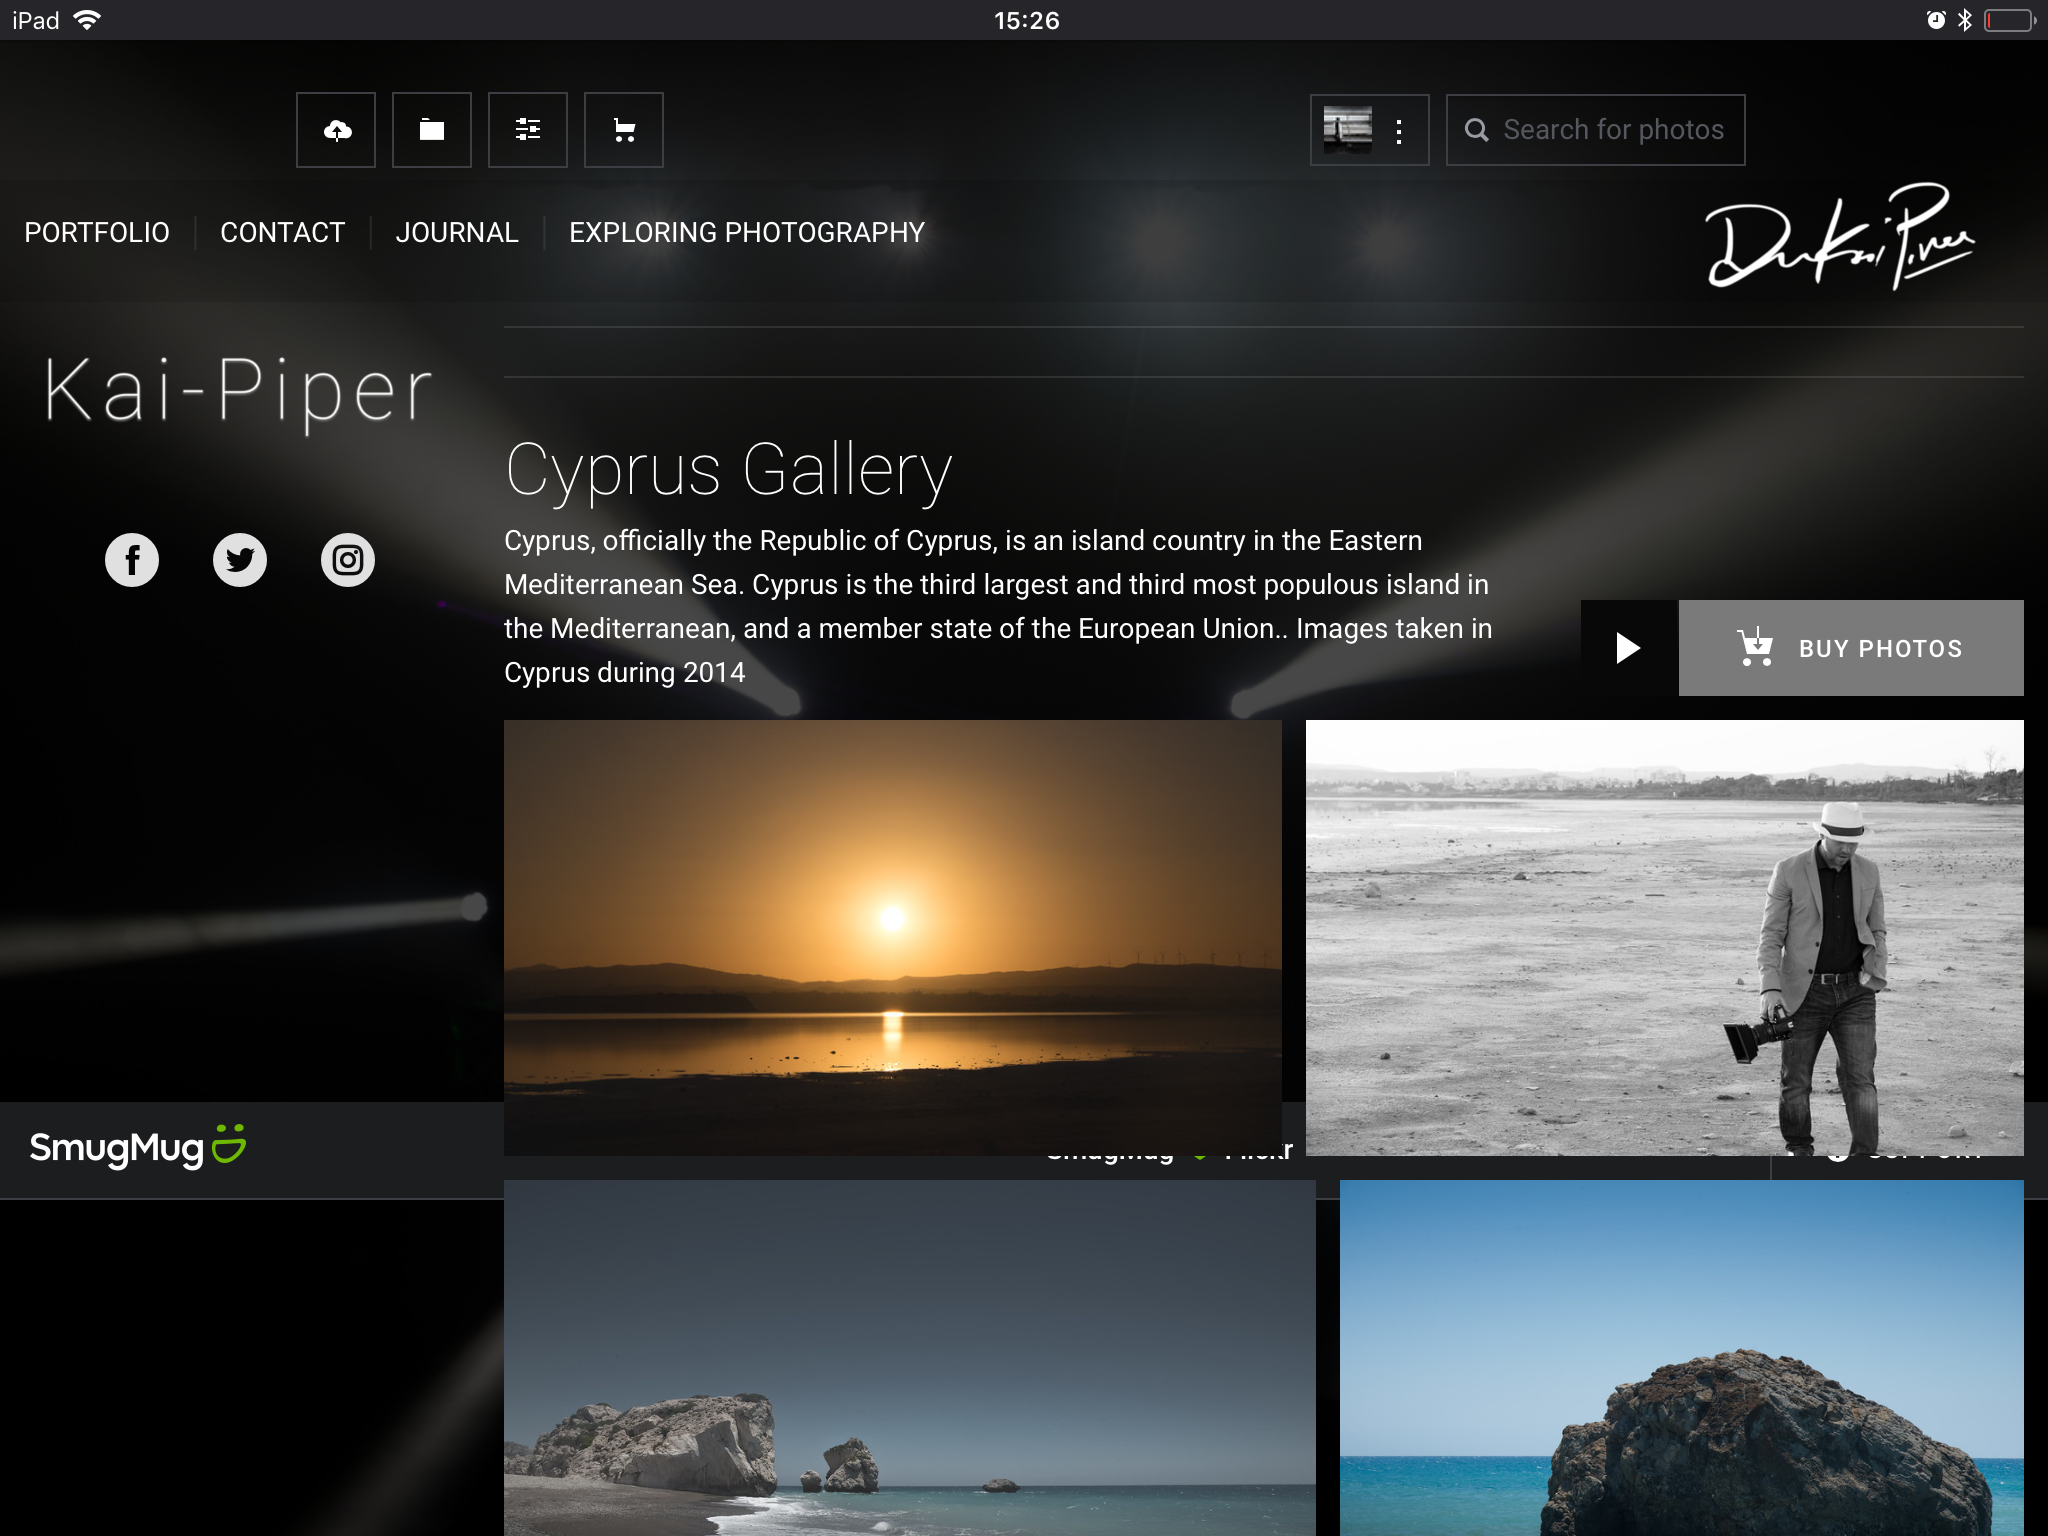
When traveling, backing your images up can be the hardest and most troublesome solution. These days we have a wide choice of methods of backing up images: the Passport wireless using the My Cloud ecosphere, Dropbox, Adobe Cloud, Apple’s own storage and a wide choice of others. Personally, I love to back up directly to my SmugMug account as I have unlimited storage and the app syncs with Lightroom. I upload all the images that I want to ensure are safe (including the edited images), meaning I can give clients fast, easy and safe access to the images. You just upload the high res image, then you can embed or share the image wherever you want and SmugMug do the resizing and compressions, meaning you don’t have to worry about it from the export you are doing.
All SmugMug accounts come with unlimited storage. If you want to read more about why I love and use SmugMug, check out this article.
Once I have uploaded the images and backed them up online, I remove them from iPad, knowing that if I need them again, I can either download them from the local HDD or from my secure backup on SmugMug.

Facebook and Instagram is super simple. just hit the share button on SmugMug app and everything happens for you.
The Fujifilm Mobile app
This is not a fully linked solution for working on the go but it does have its uses. I should remind you that if you want to do any editing, make sure you turn off the auto downsize to 3mp that the app would do on the transfer. This option is in the camera system menu. Check out Gary’s post about it here.
Acclaimed street photographer Nick Turpin uses this simple workflow; he just uses the Fujifilm app to take his images directly to the iPad Pro. Nick says, “The iPad Pro has a proper chip in it, it’s not like a normal iPad. With the Fuji app, you can pass images wirelessly to it. It processes a RAW in about 2 seconds. Dodging and burning with the Apple Pencil is instant and responsive. Only been using it a month but I’m impressed with it.” I want to give a quick plug Nick’s stunning book, ON THE NIGHT BUS, which is published with Hoxton Press. I have been a big fan of his work for many years. Nick’s recent project was his first project created entirely using the Fujifilm system.

Shooting JPEG vs Raw
Normally, I am definitely an advocate for shooting RAW. However, shooting JPEG rather than RAW can resolve the need for fast processors and save space on storage, both things being concerns when travelling super light, meaning that there is a very good justification for shooting JPEG in these conditions. Kevin Mullins (our good friend at FujiLove) has an awesome article on his blog regarding JPEG settings and Fujifilm cameras.
Using the Fujifilm simulations is a great way to get the very most out of your camera. Check out this post about what the film simulations are doing and why
Other advice
In the last few weeks since I got asked about mobile workflows on the Fujilove Support helpline, I have been thinking about what the right advice is and the best ways answer the question. Workflows are very unique things; there is no one way to solve everything and to help everyone. We each have to build up our own and sometimes we have many different ways of working. Everything depends on the needs of the user, the needs of the image, who the images are for and the value of them. A mobile workflow for one person can be taking photos on a phone and it could be a set of custom Peli case’s with Tethertools cables and portable power generators.
The key is to work out your needs and your requirements, then work around that.
- What is your image turnaround time?
- How valuable are the images?
- What are the images for.
- How far did you have to go to take the images?
- What would happen if you lost the images?
- Are you editing these images?
- Are these images sensitive?
- How many images are you taking?
- Do these images have to be uploaded on-the-fly?
- Are you on foot, car, bike, plane or donkey?
- How much kit can you carry & how are you carrying it?
- What is the location & terrain like?
- What is the climate like?
Try and balance out your needs and wants. This sounds more simple than it is: just pick which camera to use or which lenses to take. A good question is, why don’t I use the GFX? In my eyes it is the best camera but not the most suitable for travelling. It is bigger, weighs more as a system and is harder to charge on the go, but on the other side of the coin, if you are travelling a long way, why not take the best camera to a place you might never vist again? Everything is balanced and your kit bag might never be the same for two trips.
The X100S
This is an awesome camera for anyone wanting to build a system around a grab and go ecosystem. Having an X100 series camera is a must-have item in this case. My good friend David Cleland has written an awesome blog post all about the compact premium system.
Lens and camera wraps
A cheap and efficient way to look after gear when on the road or at home. If you don’t want to pay out for something custom-made, old socks work just as well!
AA batteries
In my personal view, the Eneloop Pro batteries are the only rechargeables to go for but having a new pack of powerful Energizer Lithium packed away can be a lifesaver. I would also love to know if there is a way to recharge AA’s via a USB source? If you know of one, ping us an e-mail to dave@fujilove.com.
The Gnarbox & Lacie DJI Copilot
The little Gnarbox seems a pretty cool thing but is still in Kickstarter phase. The specs are looking very smart and the product its self-looks smart too. However, the Lacie Drive is ready to go. BOSS, which is short for Backup On-Set Solutions, will help users spend more time shooting and adventuring in the field, and less time stuck behind a computer. Check them out here: https://www.gnarbox.com/ and https://www.lacie.com/gb/en/products/dji-copilot/.
Peak Design and 3 Legged Thing
Peak design offers some cool compact neckstraps that work in a system with the wrist cuffs. I like systems that can have a few uses, like the Swiss Arca mount plates that work with the Peak Design system.