A big selling point, or at least a big marketing point, to Fujifilm’s X-Series and their cameras in general is their excellent color reproduction and their film simulation modes. You would be forgiven if you thought that these film simulation modes were nothing more than Fuji’s version of color profiles like those from Canon, Nikon and Sony.
It is true, to an extent, that these FIlm Simulation Modes are Fujifilm’s version of those color profiles, but in reality, while serving a similar function (to determine the look of the output jpeg files), there is more to them than that. Today we will look at some of those differences, as well as compare what is actually happening to these images using one film simulation over another, and how much difference there is between using a film simulation preset in camera vs in Lightroom.
This would not be the first Film Simulation mode comparison ever done, there are many out there. But given the new additions to the Fujifilm lineup in the X-Pro 2 and (soon to be available) X-T2, as well as significant improvements to Lightroom’s Fujifilm support, we thought it would be as good a time as any to revisit this subject for ourselves.
In all there are currently 6 color simulations, 1 Sepia simulation, and 2 Black and White simulations with 3 additions ‘filter’ versions for each of them – so 15 film simulations in total. Let’s get into it.
Testing Methodology: I set up a quick test scene on the shelf next to my desk, the light isn’t great, but I wanted to show how the simulations effect both light and dark areas of a scene, so this accomplishes that. I shot this using my X-Pro 2, with an adapted Olympus OM 50mm F/1.8 stopped down to F/2.8, ISO 800, and SS of 125th. I shot the RAW to card slot one, and the JPEG to card slot two, so both were captured simultaneously. I spot metered the image just under the visor bridge (where the nose would be) of the storm trooper, which based on the camera meter was a +.3 exposure.
Provia
The Provia is the standard ‘general use’ film simulation. It is meant to produce the most true to life colors and can be used in a variety of situations.
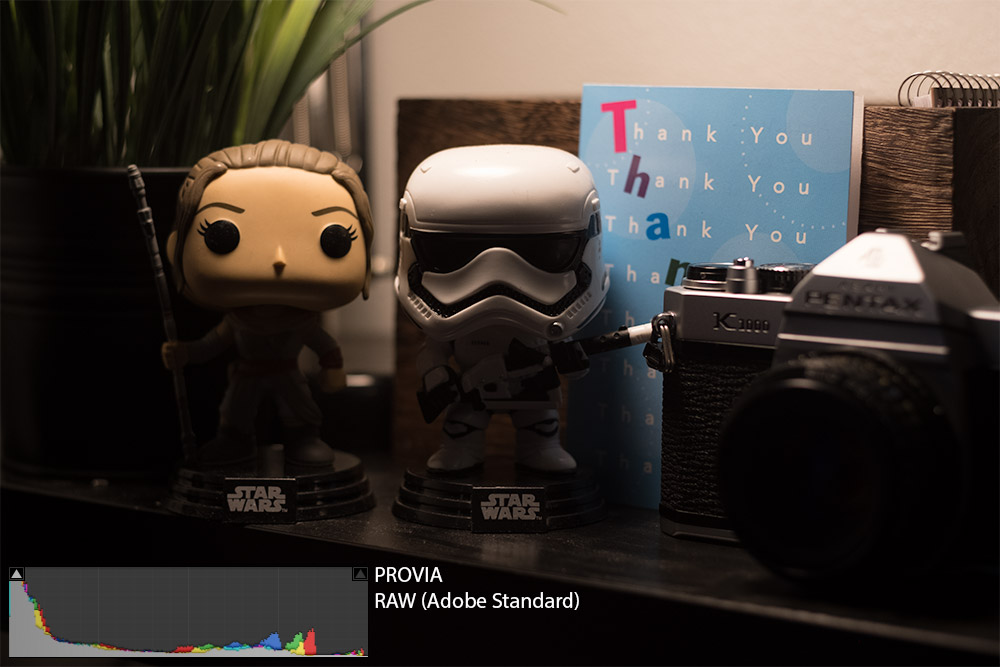
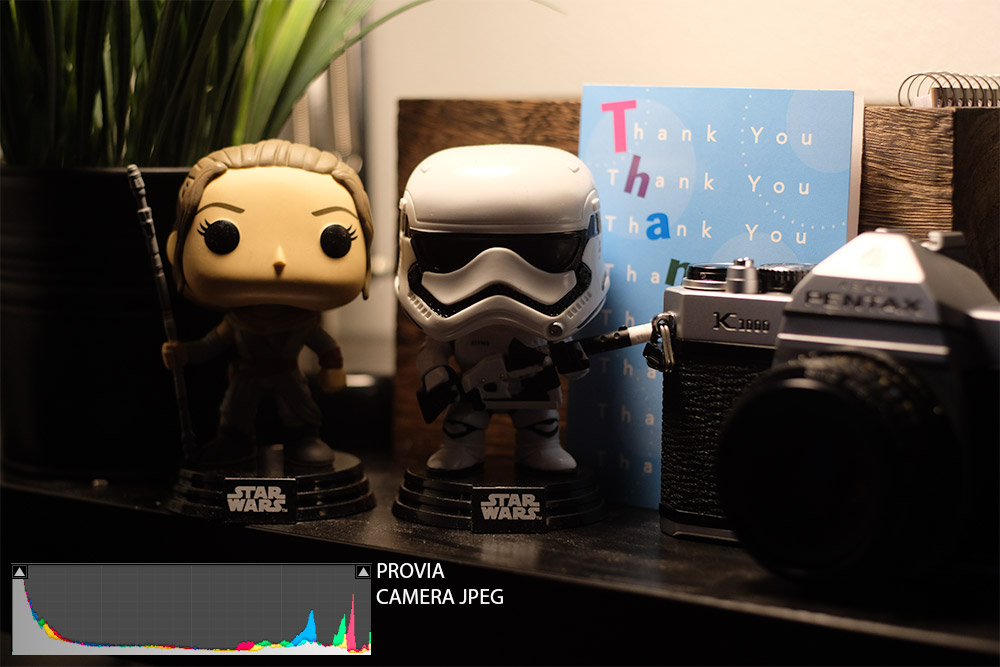

As you can see here based on the histograms, the Provia film simulation is doing quite a bit to the RAW file here. It is worth noting that in order to get the Adobe Film Simulation mode (Adobe’s version of Fujifilm’s Film Simulation) that I had to add about 1 stop to my exposure. The original conversion was much darker, more like the RAW file. It was interesting to see such a difference in the perceived exposure between that of the Jpeg and the RAW file, considering both were captured at the same time, with the same settings. But this goes to show you what these film simulation modes are doing for your images when you use them – it’s not just a color/saturation tweak.
Note the differences in how the red, blue and green channel peaks in the highlights on the three versions. In the RAW they are way back in the midtones, while on the Camera jpg and Adobe jpg they are much more into the highlights. Also note the difference between the Camera jpg and the Adobe jpg, they are very similar, but not identical. You could probably get them identical with some more tweaking, but I wanted to show this with as little meddling as possible. Adobe’s simulations have come a long way, that is for sure.
Velvia
Velvia is the vivid color film simulation, perfect for landscapes and other situations where you want to pull a lot of saturation out of your colors. Generally not a great choice for portraits as it produces a pretty unnatural skin tone.

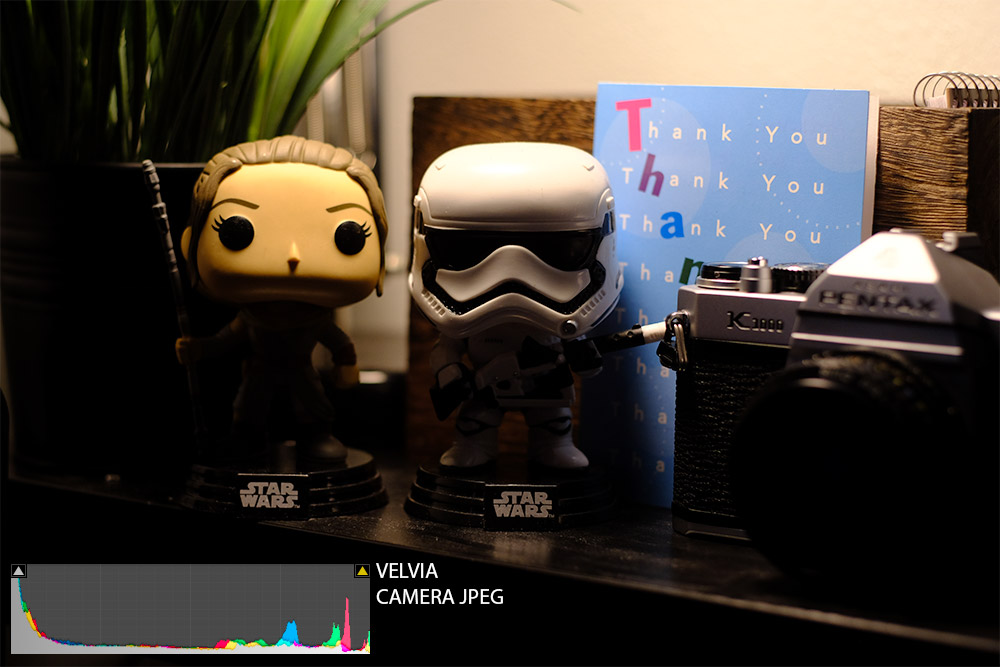
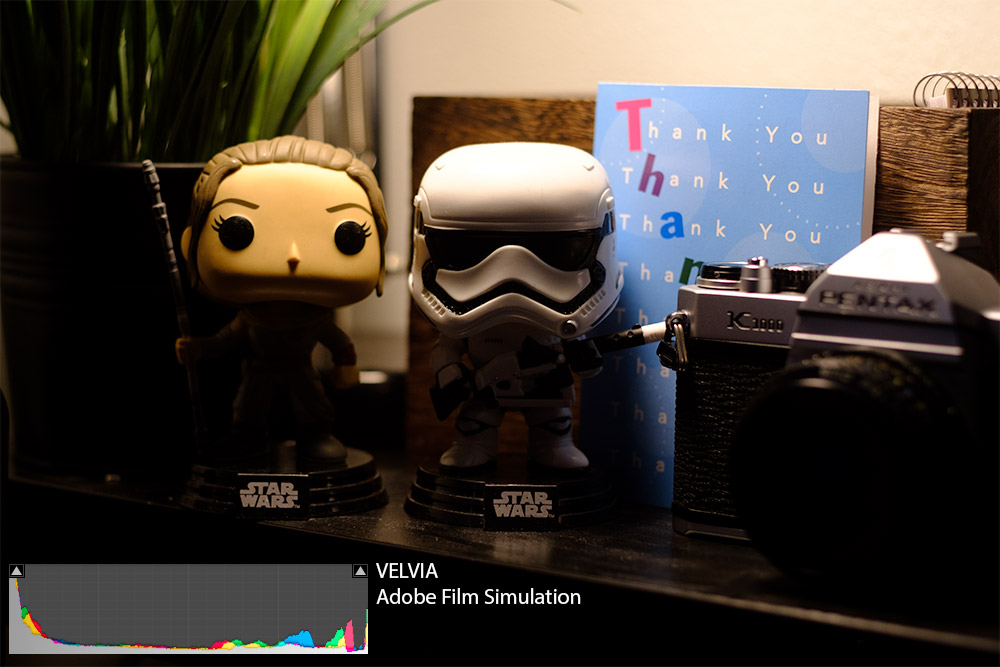
Again, we see similar looks from the camera jpeg and the lightroom version, but not as close as the Provia. Specifically, if you look at those RGB peaks, you can see the camera jpeg shows a much taller narrower peak, while on the lightroom version you see they are wider and not as tall. You can also see a pretty big difference in the highlights, which looks much better on the camera jpeg in my opinion.
Astia
Astia is the soft color film simulation. This is a great choice for portraits and other subjects where harsher contrast and color can take away from an image.

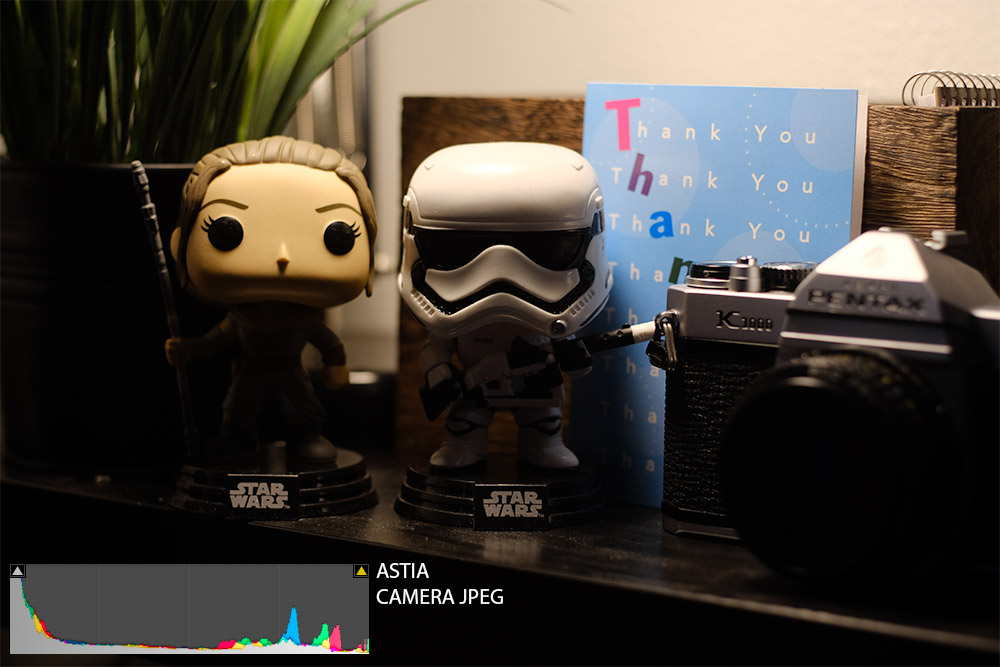

More of the same here. A very similar look from the Adobe simulation, but not quite identical. The theme here is that the RGB mountains are wider and shorter than on the camera JPGs where they are narrower and taller. Again, you could probably spend some time and tweak this to help it match perfectly, but honestly, the look is so similar I don’t see a point unless you have time to kill.
Classic Chrome
Classic Chrome is meant to replicate the old chrome film stocks of the early film days. It creates a soft color, and ‘enhanced’ shadow contrast for a calm, somewhat dated look.
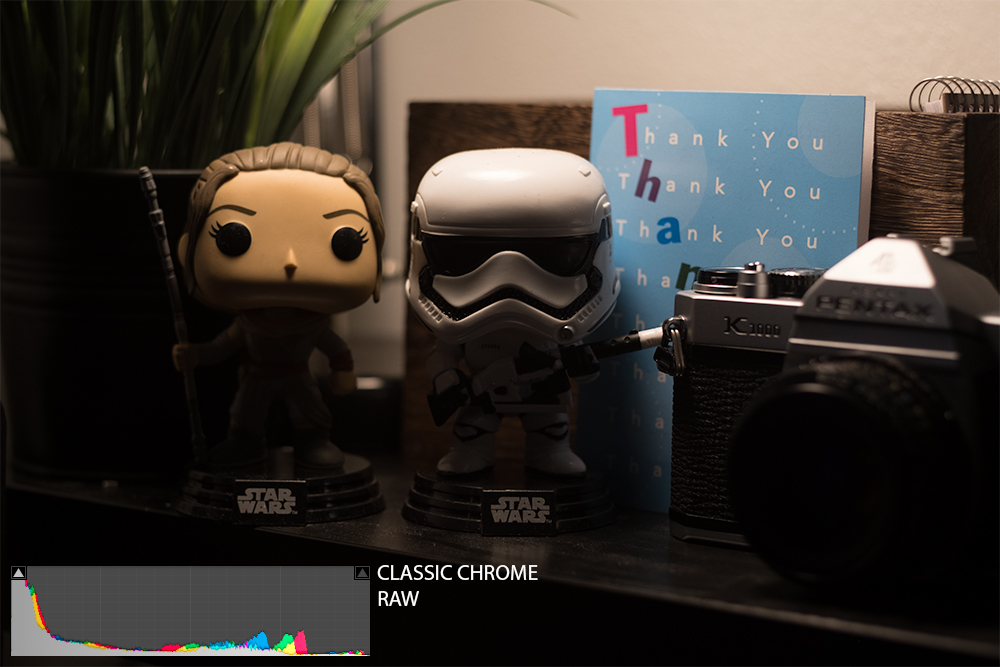


This one is reaaaaaallllly close, maybe even better than the Provia simulation in terms of the Adobe version of the edit. There are some very slight differences in the histogram, but not quite as significant as with the others. The biggest difference on this one is in the highest highlights, both visually and on the histogram, the highlights aren’t quite as nicely controlled in the Adobe simulation. However, besides that the overall look was nailed fairly well in my opinion.
ProNeg High
An ideal for portraits where you plan to post produce and color correct. This offers some slightly enhanced contrast across the board.

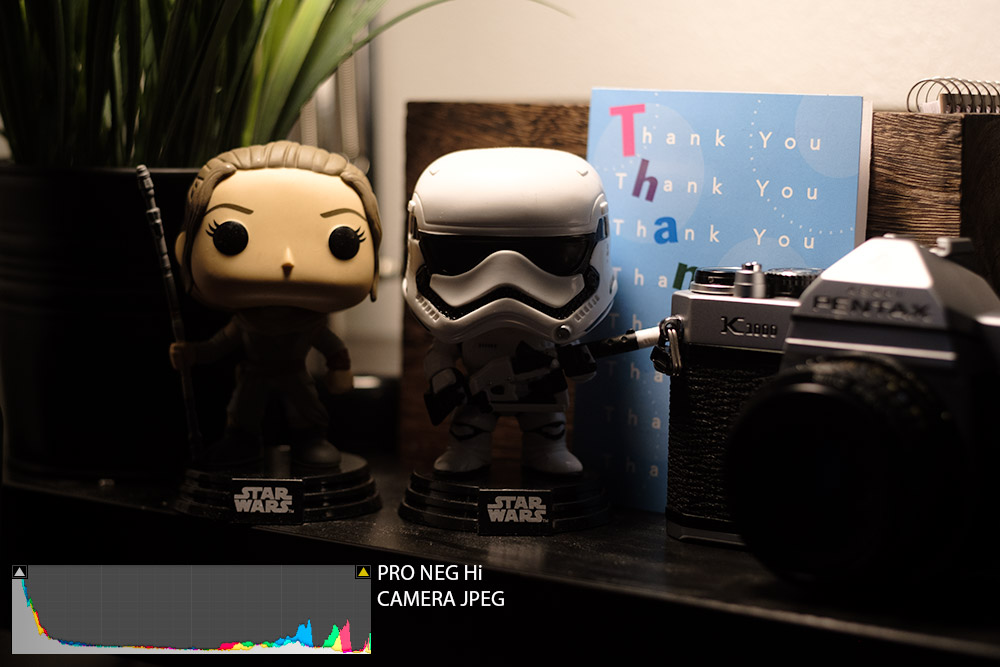

Visually, this one is not bad, but as we can see via the histogram, the Adobe simulation is clipping a bit more on the green and yellows than the camera jpeg is. The shadows also don’t retain quite as much detail.
ProNeg Standard
Another good choice for portraits and other subjects where you plan to do a lot of color correction and post production. It’s known for its soft gradations in color and beautiful skin tones.
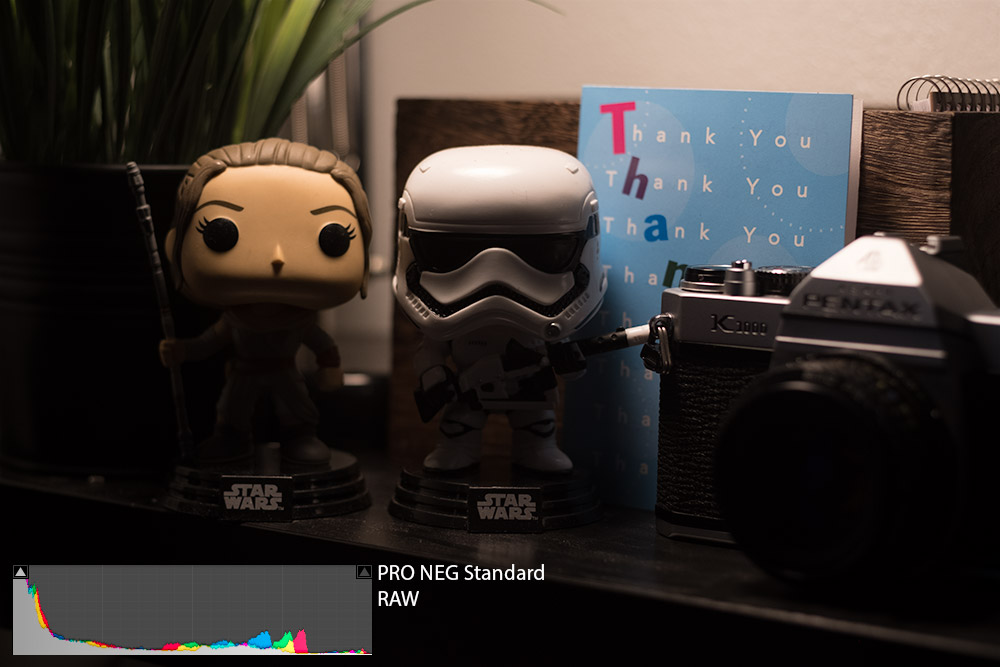
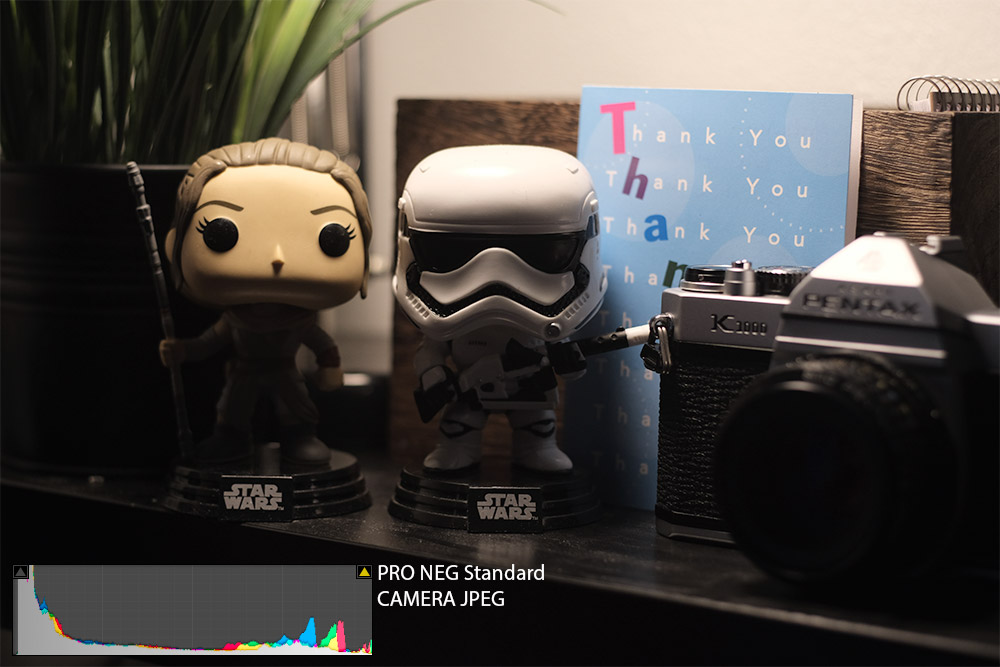
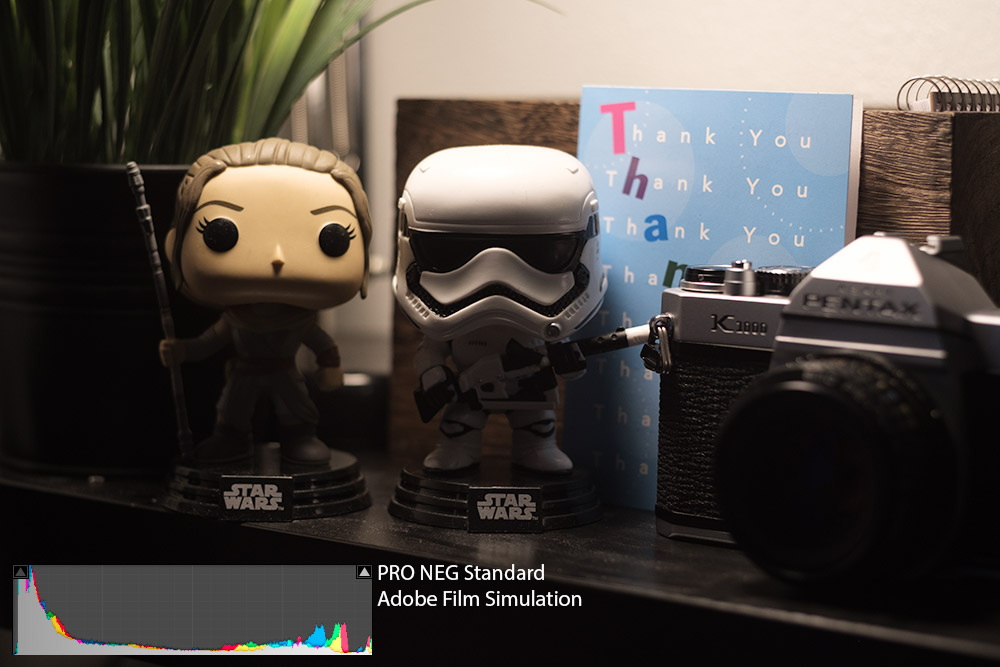
Similarly to the ProNeg Hi, this one offers a pretty close match to the camera profile as well. But again, the theme of slightly worse shadow and highlight control continues. Again though, not enough of a difference in my opinion to worry about taking a ton of extra time to goof around with it in post, unless you figure out the exact differences and can reproduce them on every shot. Then could make a preset to automatically offset the differences.
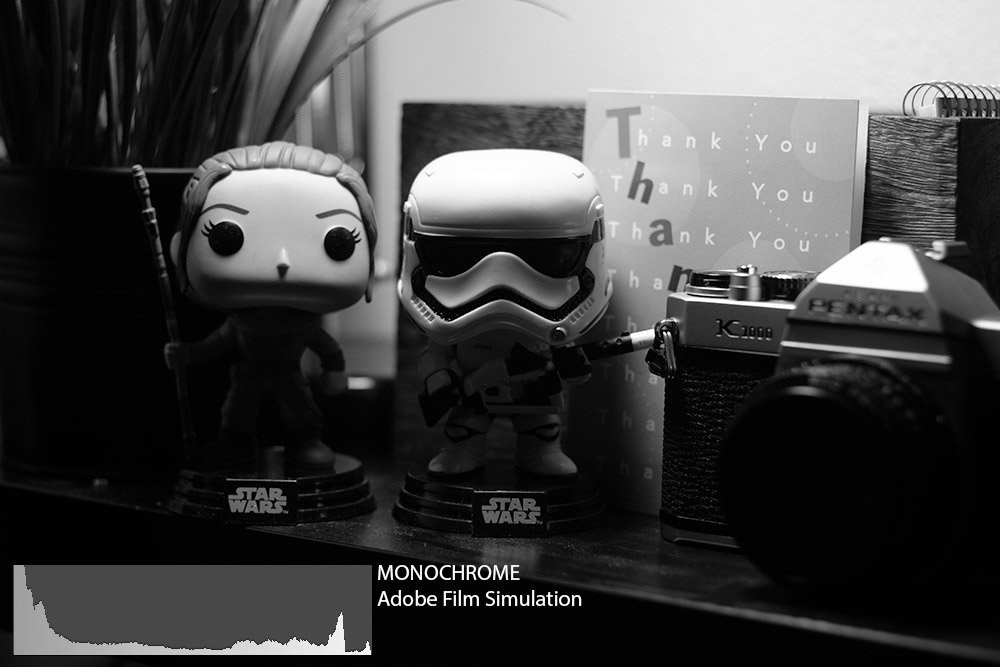
Monochrome
A standard black and white look.


- Monochrome Green Filter
Produces pleasing skin tones for portraits

- Monochrome Red Filter
Enhances contrast and darkens skies considerably

- Monochrome Yellow Filter
Enhances contrast and darkens skies

Acros
A black and white look to mimic that classic Acros film stock, bumps up the details and increases the sharpness of your images.


- Acros Green Filter
Produces pleasing skin tones for portraits

- Acros Red Filter
Enhances contrast and darkens skies considerably

- Acros Yellow Filter
Enhances contrast and darkens skies

Sepia
That classic old time style process, which depending on who you ask is either the best thing ever or the worst thing to ever happen to the world of image processing. Need anymore proof? Adobe doesn’t even have its own simulation of the Fujifilm Sepia.

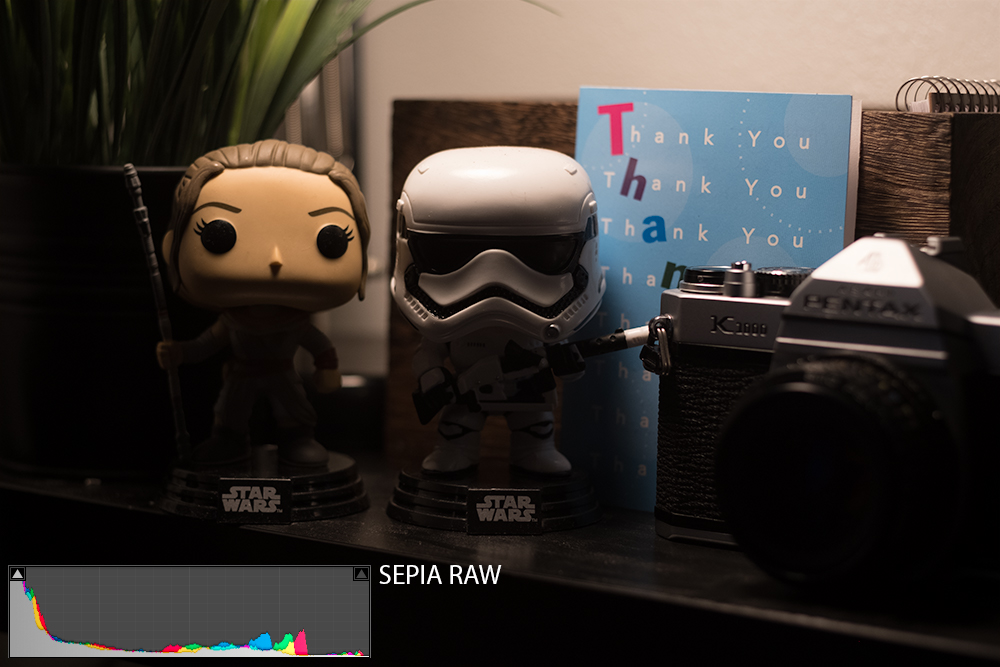
Obviously since there is no Adobe Simulation here there is no commentary on how accurate or different it is. That said, you can see clearly in the Histogram what the Sepia film simulation is doing to the image.
Wrapping It All Up
Ok, so what have we learned today. First, that Adobe’s Film Simulations are actually fairly accurate these days, with some being closer matches than others, so close I would say that its hard to notice a difference visually without a side by side to compare. In other words, a client would never tell the difference. So shoot RAW with confidence knowing that you can still get those incredible Fuji Film Simulations through Lightroom.
Secondly, we have witnessed, with the histogram, not just visually, what these film simulations are doing to our images when we capture with them. Knowledge is power, and knowing what the film simulation you use is going to do to the colors and tone of your image is key to choosing an appropriate one for the shoot at hand.
I could continue, but this post is already a novella by blog standards. Let’s continue the conversation in the comments below, what did you guys notice that I maybe didn’t point out? How did you feel about the Adobe Simulations?