Fujifilm simulations. For those of us who shoot Fujifilm, it’s probably one of the main reasons we do so. I love the great color science that Fuji brings to the table with their decades of knowledge and experience from the film days. Provia, Astia, and Velvia give great filmic color tones while PRO Neg. Std and Pro Neg. HI give great skin tones. Even back when I shot with Nikon, I was always impressed with the colors Fuji shooters got from JPEGs. It was late last year that I ultimately made the switch from Nikon to Fuji and have been enjoying those great Fujifilm simulations ever since.
An update by Alien Skin added several of these great in-camera simulations to Exposure X3’s list of presets. Being an avid Exposure user, I was excited to see that these new presets have been incorporated. In addition, the great thing about using these presets is that I can tweak them once applied to get the exact look I am going for.
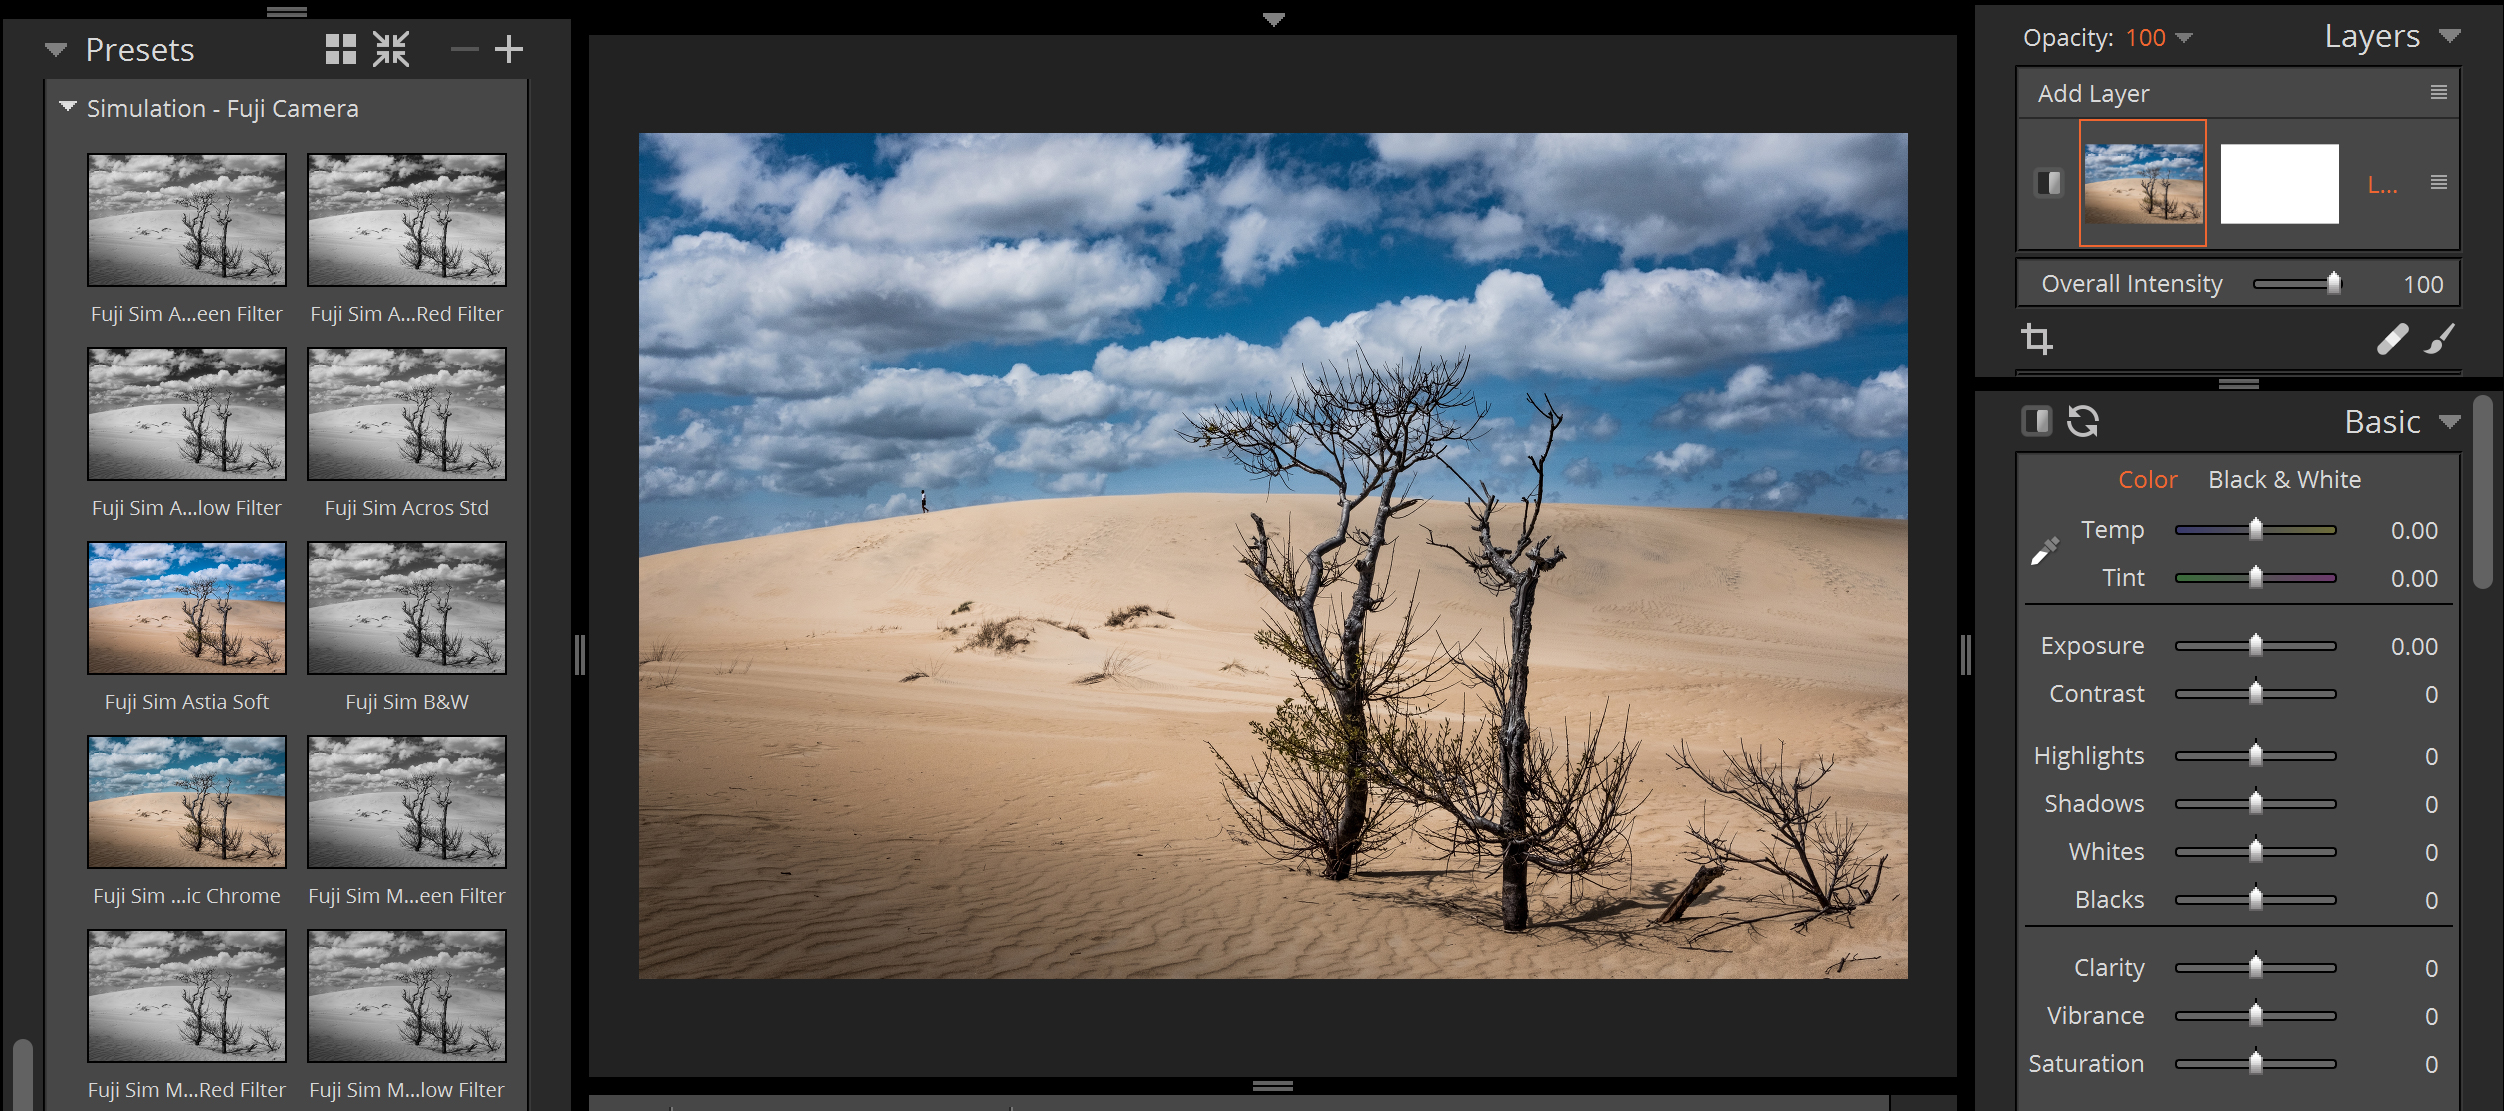
While there are several Fujifilm presets and preset variations to choose from in Exposure, I’m going to take a look at some of my favorite presets here that are listed in the Fujifilm Simulation folder pictured below. Just a note: the in-camera JPEG shots are displayed with factory settings and are not adjusted in the camera settings menu (shadows/highlights/etc.). All photos in this article were shot with the Fujifilm X-T2.
Provia In-camera JPEG
Below is a JPEG shot straight from the camera. This was shot with the in-camera Provia film simulation. I really like Provia as it works well in almost any situation. It’s not over-saturated, but still gives great tones and colors. It doesn’t really add much contrast to the scene, so it works well should you want to adjust the shadows and highlights a bit.
Exposure X3 Provia Std Preset
Below is the same shot, but with Exposure’s Provia Std preset applied to the RAW file, which as you can see, looks similar to the in-camera JPEG. This preset gives you similar overall tones with the same great colors, but not overly saturated. It offers nearly the same level of contrast as well.
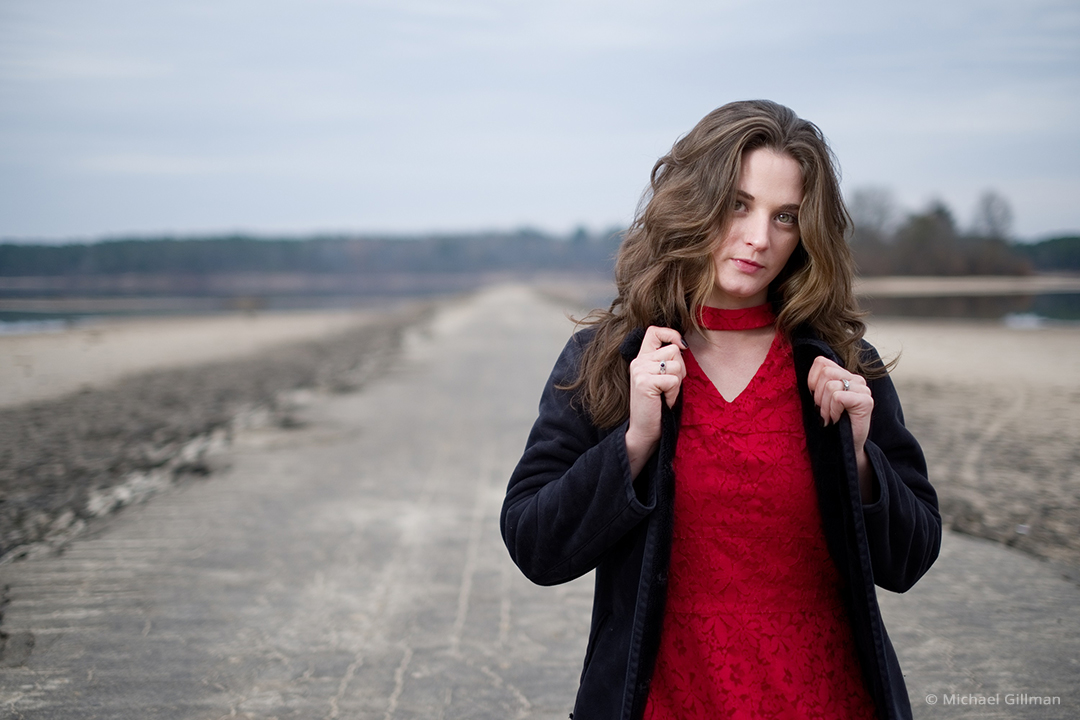
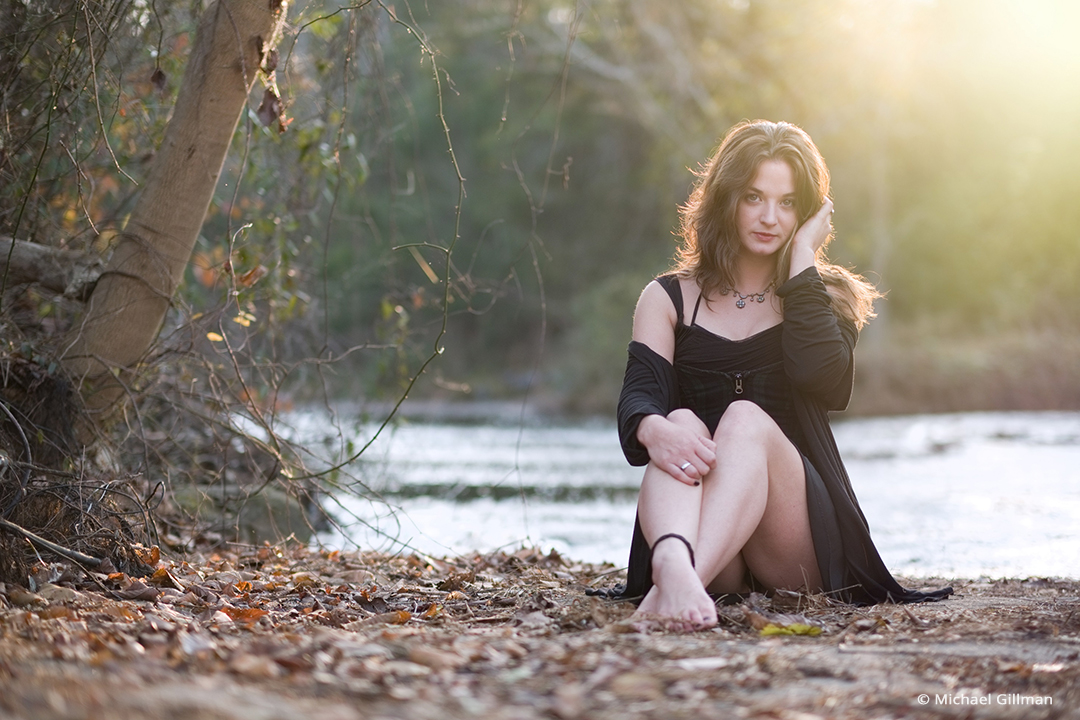
Astia In-camera JPEG
Astia is great choice for portraits in that it renders nice, soft skin tones. It’s a little less saturated than Provia, but still has a great color profile. Pictured below is an in-camera JPEG straight from the camera. The skin looks nice and soft.
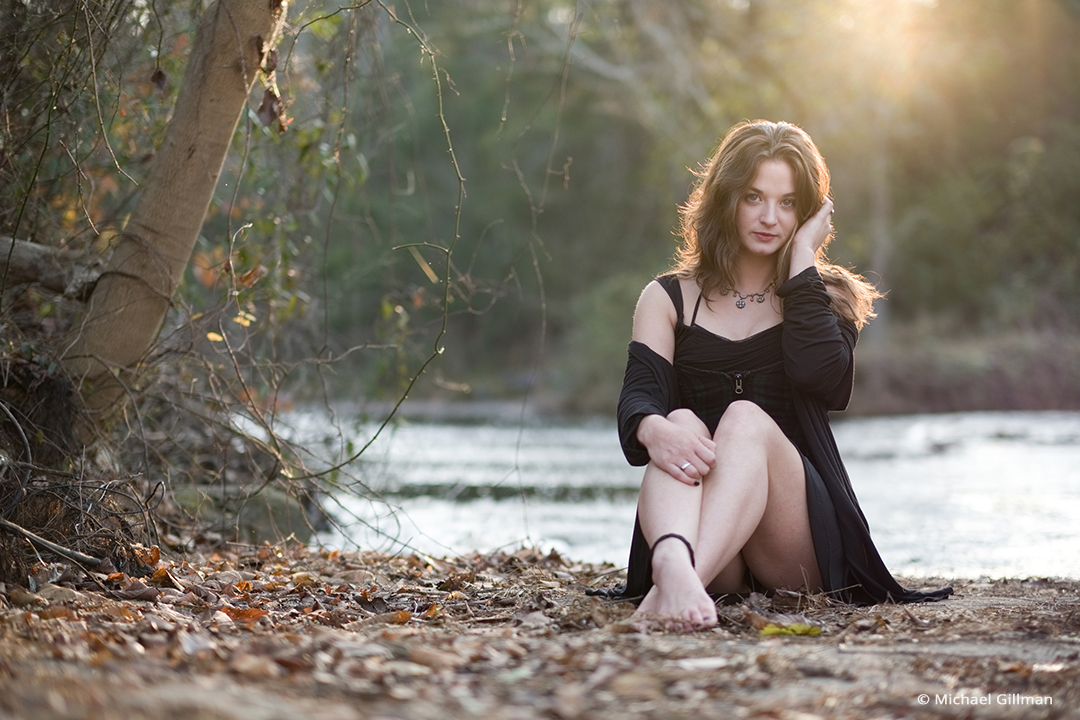
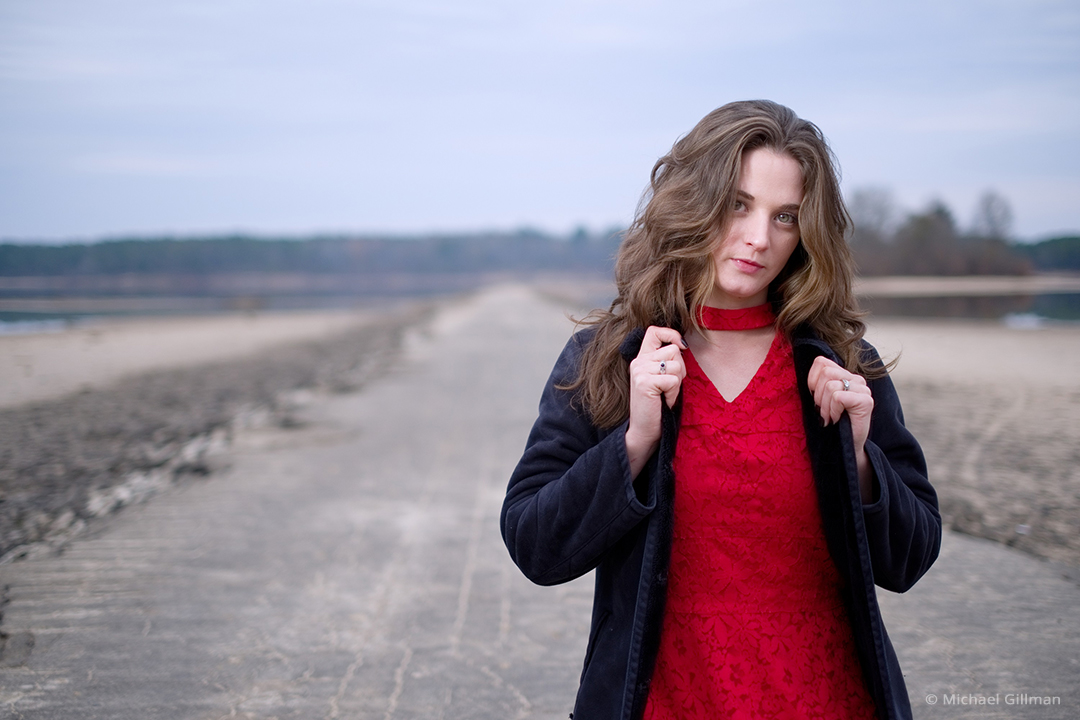
Exposure X3 Astia Soft Preset
The shot below uses Exposure’s version of Fujifilm’s Astia film preset, which as you can see, like Provia, it looks very similar to what you would get inside the camera. They’ve really knocked it out of the park with this one! It looks fantastic. Same great skin tones and colors within this preset with very little image editing done other than just applying the preset and adding a sun flare overlay.
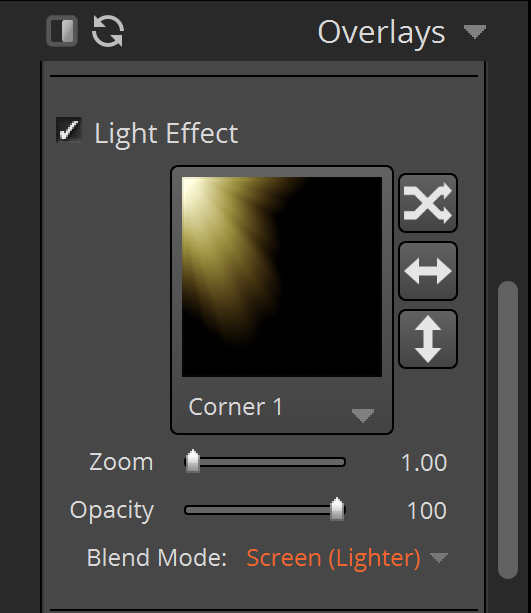
Exposure’s Overlays panel is located on the right. For this particular shot, I added the Corner 1 light effect overlay in the Sun Flare collection. You can also adjust the strength and opacity of the effect to your liking with the controls on this panel. Additionally, I set the Protect Location and adjusted the slider to control how much of the image the overlay affected.
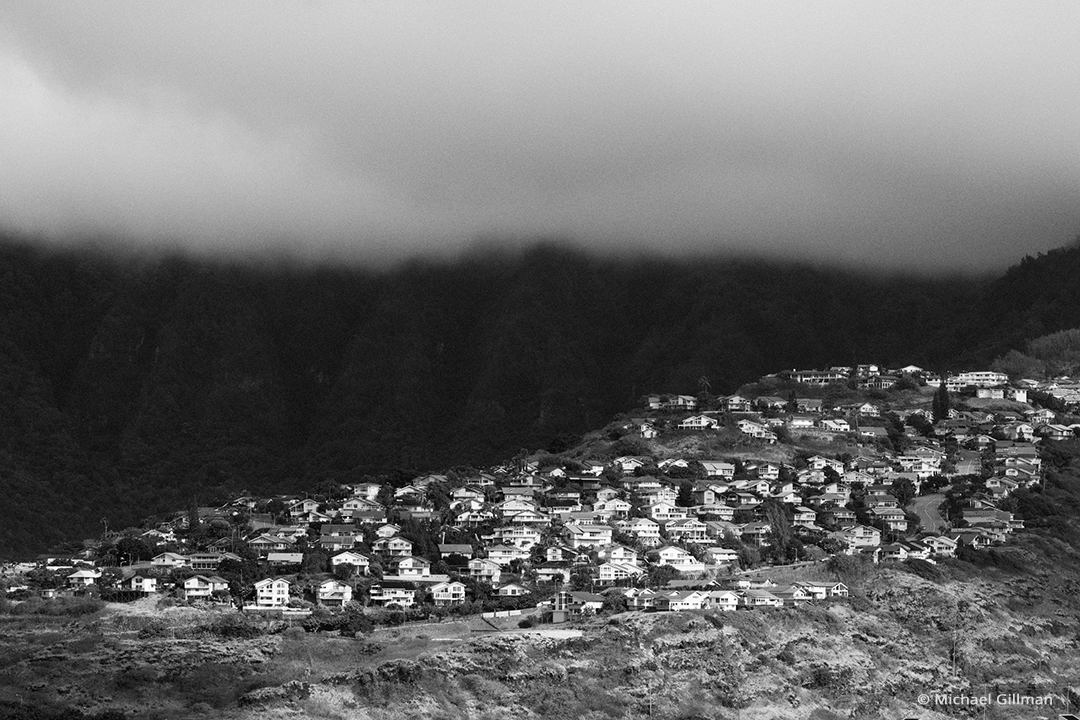
Black and White Presets
For this example, I wanted to start off with a Provia photo straight from the camera and then apply a black and white film preset to show the contrast between the two images. I really tend to favor the Fuji Neopan 1600 preset for a lot of black and white photos given Exposure’s amazing grain science. Just a note: The Fujifilm Simulation folder does not contain these particular presets. There are several variations of Fuji Neopan 1600 available in Exposure. The easiest way to find them is by using the text search at the top of the preset panel.
Exposure Fuji Neopan 1600 Preset
As you can see below, this preset produces great black and white tones and adds some fantastic looking grain to the image, being especially apparent in the clouds. Even if my intention is to print an image in color, I find myself applying this preset to many landscape and street photography images during editing just to see what it looks like.
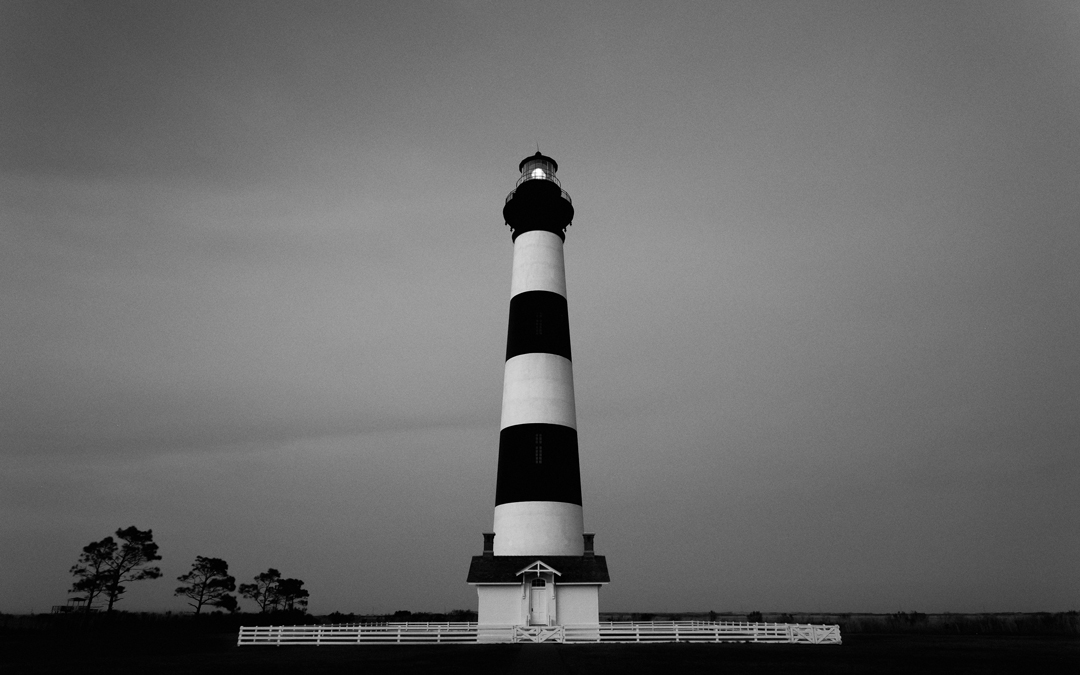
Speaking of Printing
While a little off topic and before we get to our next example, I’d like to mention printing the images after applying Exposure presets. I bring this up now directly after the Fuji Neopan 1600 example because I wanted to make a print with this preset that I had applied to a lighthouse photo I had recently taken. So often we look at our images on a screen of some sort, be it a phone or laptop/desktop, but those images don’t always make it to print to see what they actually look like on paper.
With that, I decided to print this lighthouse image out with the same Fuji Neopan 1600 preset. I also applied minor adjustments to the image on the basic panel. In addition, I was able to print the image from Exposure X3 by simply going to File> Print. Once the Print page opens up, you have several adjustment choices that can be made to the margins, grid, grid spacing, and cell size, to name a few. The image turned out great. The tones and the grain look amazing on paper!
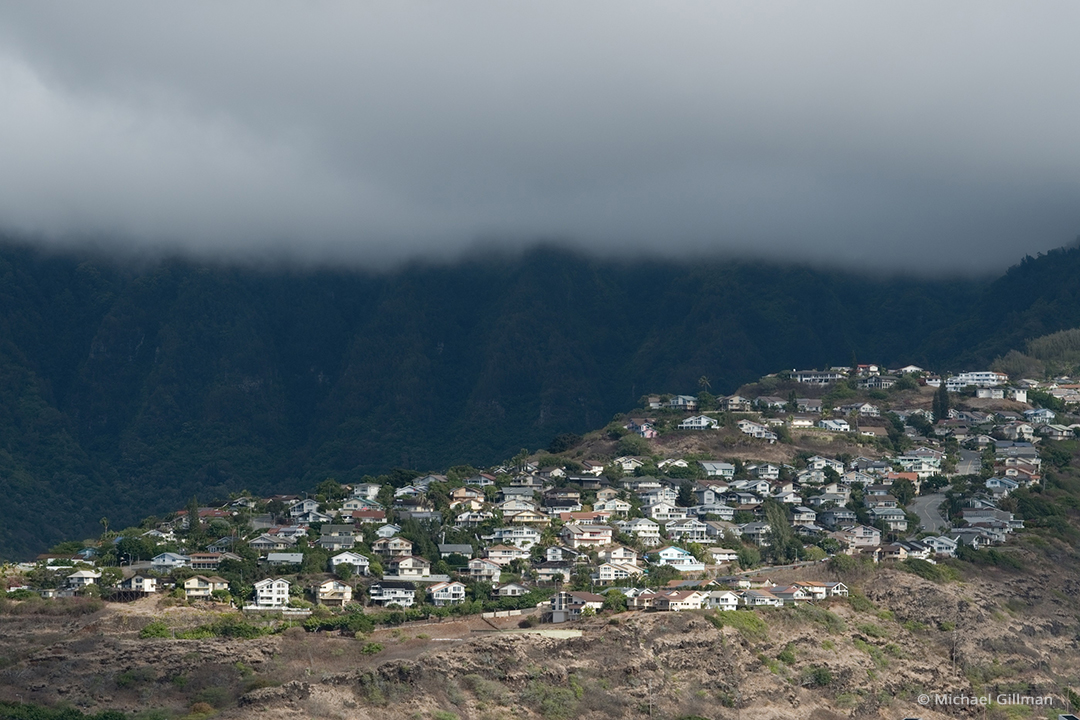
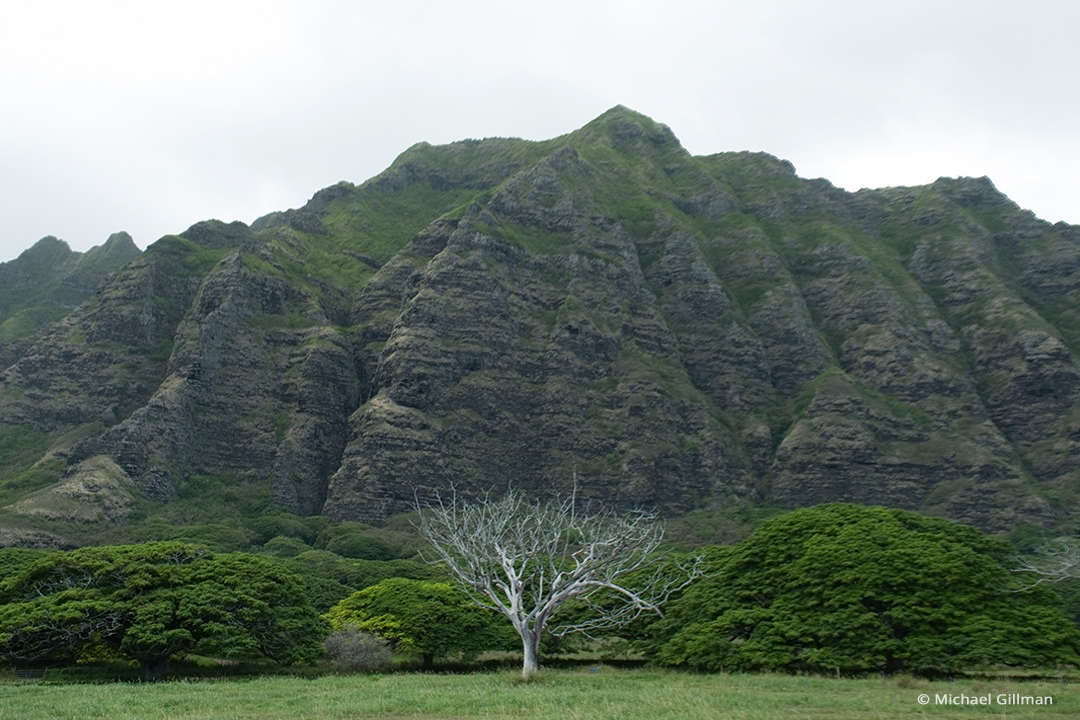
Velvia In-camera JPEG
This film simulation really punches up the colors and contrasts. While I do use Velvia during sunset photos and the occasional landscape, I generally won’t use it for portraits. Let’s take a look at the in-camera Velvia JPEG. In this photo, I feel it works well with the beautiful greenery that Hawaii has to offer. My intent for this photo was to emphasize the bare, white tree in the middle of the scene. Velvia works well for this situation because it really brings out the colors and adds quite a bit of contrast.


Exposure X3 Fuji Sim Velvia Vivid Preset
This is Exposure’s Fuji Sim Velvia preset added to the RAW file. It takes the contrast and color a step further as you can see. The greens are boosted as is the contrast. Of course, if this is a little too strong to your liking, all it takes is a small adjustment to the saturation or contrast sliders to bring the image back down to levels that may be more pleasing to your eyes.
Many More Options
In closing, I’d like to mention that there are several more Fujifilm preset options in Exposure, as well as plenty outside of Fujifilm, which vary in tones, overlays, borders, and effects. As mentioned, once applied, they can be modified further using Exposure’s editing panels. There are a lot of possibilities to be had using these presets.
Exposure X3 takes what I love about shooting Fujifilm JPEGs and experimenting with different in-camera film simulations and expands it even more by offering many great-looking variations of those presets as well as many of Exposure’s standard Fujifilm presets matching closely to what I get in camera.
Disclaimer: This article has been sponsored by Alien Skin Software, makers of Exposure X3, non-destructive RAW photo editor and organizer. Alien Skin Software is a FujiLove Partner and we would like to thank them very much for their support. Go ahead and download your free trial copy of Exposure X3. If you decide to purchase the software, make sure you you use the coupon code FujiLove to get a 10% discount.