If, like me, you are always searching for that perfect RAF editing solution, you have probably tried Adobe Lightroom. It was a good solution for my needs and did all that I needed it to with one exception. The sharpening of the Fuji X-Trans raw images lacked detail and accuracy.
This was one of the reasons I began looking around for an alternate method of processing and enhancing my RAF files. I had hit upon a great, albeit, laborious workflow that went something like this: 1) Iridient Developer to set tonal range and sharpening, 2) Lightroom forcoloring and tone, 3) Photoshop for any alterations/fixes, and finally, 4) Alien Skin Exposure X3 for the final color grading using some of my favorite presets.

This workflow was effective for me when I was only editing a few images that I knew I would be printing large, or on images that were truly special to get the full editing treatment. However, this workflow was unsustainable when it came to any kind of volume which I am often doing after weddings, events, or for other high-volume client work. I needed a more efficient solution.
I had been familiar with Alien Skin’s film emulations and used them in the past as a plug-in with Photoshop, but now it seems Exposure X3 is poised to change my work flow again! If you have used Lightroom in the past, getting used to Exposure X3 is easy as the user interface is very similar. I have used a few different RAF converters and when I began using Exposure, it was comforting to feel like I was already familiar with it just by the look and feel of the user interface.
A game-changer for me is the fact that I can open my RAF files directly in Exposure X3 from the folder where they are located. For every job I shoot, I have a folder for RAF images and one for the selected RAF files on which I will work. I also have a folder for all the finished processed images. It is neat and tidy to be able to open these RAF files and have them stay where they belong – less chance of things going missing.

At the front-end of Exposure X3 is a file management system that makes my life easier by assigning a ranking for my files. By using the numeral keys, I can rapidly rank my images from 1-5 stars, which makes culling images fast and easy. I rarely go beyond the first three stars, but it is nice to know I can. When I shoot a large job with several hundred images, this ranking system really speeds up my workflow. Assigning keywords also helps when I need to return to the session after I have finished.

Fujifilm’s film simulations are one of the reasons I love the Fujifilm X-System. Exposure has added superb Fujifilm simulations into their library of presets. This is a huge deal and one that has pulled me closer to using Exposure as my RAF processor of choice.

I routinely add custom presets to my own user preset library. I re-name them after the location or shoot, as this gives me a memory-based idea of the shoot and look of the preset rather than the name of a film simulation upon which I based the custom preset. Being able to do this in Exposure is extremely useful.

With some of my images, there can be many adjustments to balance light, color and detail. The fact I can I can make these adjustments on separate non-destructive layers in Exposure is a huge help. With an adjustment layer activated, I have the ability to increase or decrease the intensity of the adjustment as well as add to it or remove part of the adjustments, allowing fine control over my enhancing.

I recently photographed a wedding where the couple was on a rooftop at night with the city in the background. With a large softboxlighting them, the image was very contrasty. I tested the image in Lightroom and Photoshop, trying my best to be faithful to the enhancement in those apps, as well as in Exposure as the third app. Hands-down, the control I had with sharpness and noise were far superior in Exposure. And that grain! If you have ever spent years in a darkroom, you will no doubt love a little grain. The control one has with grain in Exposure really solidifies this programmed as an artistic tool, much akin to film.
Another client of mine is an artist and regularly needs her artwork photographed for reproduction in print and online. As with cosmetics and fashion, it is very important to make sure the colors are accurate and the detail precise. Using a grey card, I use the eyedropper to quickly get the piece of art looking as it should. I may make some fine adjustments in areas of the artwork. Exposure’s Hue, Saturation and Luminance sliders work as expected, but the really cool thing is that you can use the eyedropper to sample a color, then drag the mouse up and down to adjust the color sampled. This saves me a lot of time going back and forth between the image and the adjustment panel.
Included with the Saturation sliders is the ability to saturate and desaturate highlights, midtones and shadows. This ability saves me a lot of time adjusting various colors and is surprisingly powerful.

I recently photographed a young girl for her mother. She wanted the final image to be very film-like rather that a perfect and often too sharp digital image. In these cases, Exposure’s huge array of film simulations come into play, enabling you to really have some fun creatively. Using Exposure’s helpful audition function to preview various simulations is a fantastic way to try out different looks before heading in a particular direction. While in the audition view with 6-up images, I can click on an image and all of the previews will enlarge to 100%, so I can really make a careful study of all the presets.


After choosing a simulation with its pre-programmed settings, I can get even more creative. Again, Exposure’s grain is one of the stars here. I love grain, and for this client, grain was important and added a lot of that film-like quality the client was looking for. Exposure’s grain and its adjustment power are not noise, but look and feel like actual film grain!
As a full-featured, high-volume production tool, the responsiveness of Exposure is quick. When I have multiple images that require the same settings, it is a breeze to highlight them all and apply the settings in a batch. This is much faster and easier than in Lightroom.
While not image related, I must say, I like the fact that Exposure is not subscription-based. One purchases the software, installs it and is good to go. Updates are released occasionally and are fast and easy to update.
Another aspect I appreciate is that the folks at Alien Skin Software are listening to their end-users and are keen to upgrade and refine the software based upon user feedback. Have you ever tried getting hold of someone at Adobe? It is next to impossible. If I need help with something that I can’t understand, I know I will be able to speak with someone at Alien Skin. To me, that level of customer service means a lot.
These are only a few of the features that impressed me as I move even closer to Exposure X3 and further away from the subscription-based RAF processors I have relied upon in the past. There are a few little functionality issues I would like to see refined, such as Shift-click between points to constrain a tool in a straight line. This is a feature I use a lot and would like to see added, but it is by no means a deal-breaker.
Exposure has come a long, long way since its early plug-in days and is now a mature, viable alternative that I am embracing and using as a fine-art tool for my portraits and landscapes, as well as a production workhorse for weddings and high-volume work.
Just like the Fuji X-System cameras and photography, Alien Skin’s Exposure X3 has made enhancing images fun again!
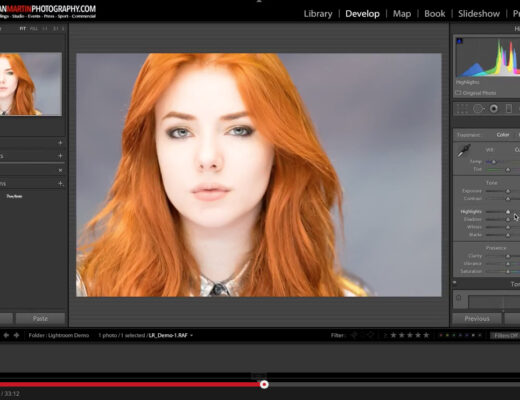
Finally, here is a small selection of images that I’ve used Exposure to bring to life:


Disclaimer: This article has been sponsored by Alien Skin Software, makers of Exposure X3, non-destructive RAW photo editor and organizer. Alien Skin Software is a FujiLove Partner and we would like to thank them very much for their support. Go ahead and download your free trial copy of Exposure X3. If you decide to purchase the software, make sure you you use the coupon code FujiLove to get a 10% discount.