With the launch of my FujiLove eBook this week, ‘Flash & Fujifilm’, I’ve decided to celebrate by sharing the story behind the cover image. This image is of a Shaman from the Apatani people and involved all the basics that we will cover in the book. It’s a simply lit image and a great way to get your feet wet in flash photography.
For the visual learners among us, I’ve also included a video here in which I set up the lighting for this portrait on myself and walk you through it step by step. You can see that below.
The gear
Let’s start with the gear I used for this shot. Thanks to Fujifilm Korea, I was travelling with the GFX 50S. Don’t feel like the camera made this image what it is, though. You could create this same image with an X-E1 or any other X Series body you happen to have. The lenses used below are the GF63mmF2.8 and GF23mmF4. For the X Series, good substitutes would be the XF35mmF1.4 (or even the F2) and the XF10-24mmF4 at 12mm (or something like the Samyang 12mmF2). The GFX simply gives us more resolution, a slightly different rendering of depth and a slightly different tonality.
The flash here is a Godox AD200. These make great travel flashes as they can be tucked into a lens pocket in your bag and controlled remotely using one of Godox’ triggers. In this case, I was using the X1T-F. Once placed on the hotshoe of a Fujifilm camera, this trigger communicates with the Fujifilm system and enables all functionality in the FLASH FUNCTION SETTING menu. While this gives you access to TTL metering and High-Speed Sync, I wouldn’t be using those functions here. I would only use the most basic functions of the trigger, sending a ‘pop’ message to the flash.
As with every image I make using flash, I followed my simple flash workflow. I first decided what I wanted to achieve, evaluated the existing light, then added flash and finally worked towards a final image. By working in this way, I can isolate any issues as they arise and not get bogged down in problem-solving while trying to make the final image. Let’s jump right in and see what that process looks like for this photograph.
Step 1
This was the most complex part of the whole image. I had only been living with the Apatani people for a few days at this stage and was still learning a great deal about them with every conversation. I knew I wanted to make a portrait of a shaman, but I had no idea how yet. I simply didn’t have enough pieces of the puzzle to draw from in order to create a fitting image of this man.
The answer to this problem was to defer to him. We sat around his fireplace and talked about his world, his work and his life. I asked him what the important parts of his job were and tried to get a feel for how I could present him in my photograph. He insisted that he wear his traditional clothing for the photograph but did not know where it was. His wife stored it safely, he said. Since she wasn’t home, we were invited back at sunrise the following morning to make the portrait. This was great because it gave me time to mull over how I was going to photograph this man.
He was an extremely proud man with a rich history and a lot of knowledge. He was also well-respected in his community so I wanted my photograph to be reverent. Each of these pieces would fall into place but before actually making the photograph, I didn’t know how.
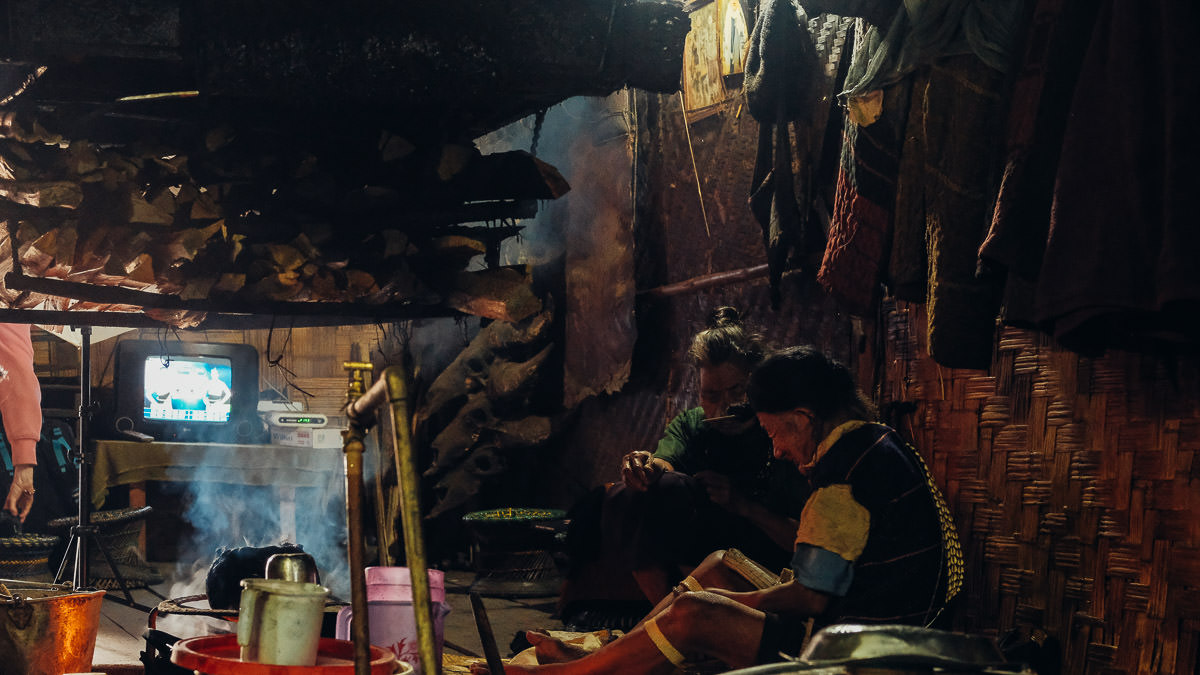
Below is an image of the man’s house as he was getting ready. This image was taken at f/5.6, 1/15 sec, ISO 10,000 on a Fujifilm X-T2, so you can get an idea of how dark it was.
Step 2
The second step was by far the simplest part of the image. Before adding any flash to an image, I always evaluate my existing light and decide how I want to use it. Apatani houses are extremely dark so I wasn’t going to be able to use any of the ambient light. This meant I could set my shutter to its sync speed or slightly below (1/125 sec for the GFX 50S) and my aperture to whatever value was necessary for the depth of field I wanted. I wouldn’t need to worry about the ambient light at all. From the camera’s perspective, this would render a black scene with no light that I could then build on with my flash.
Step 3
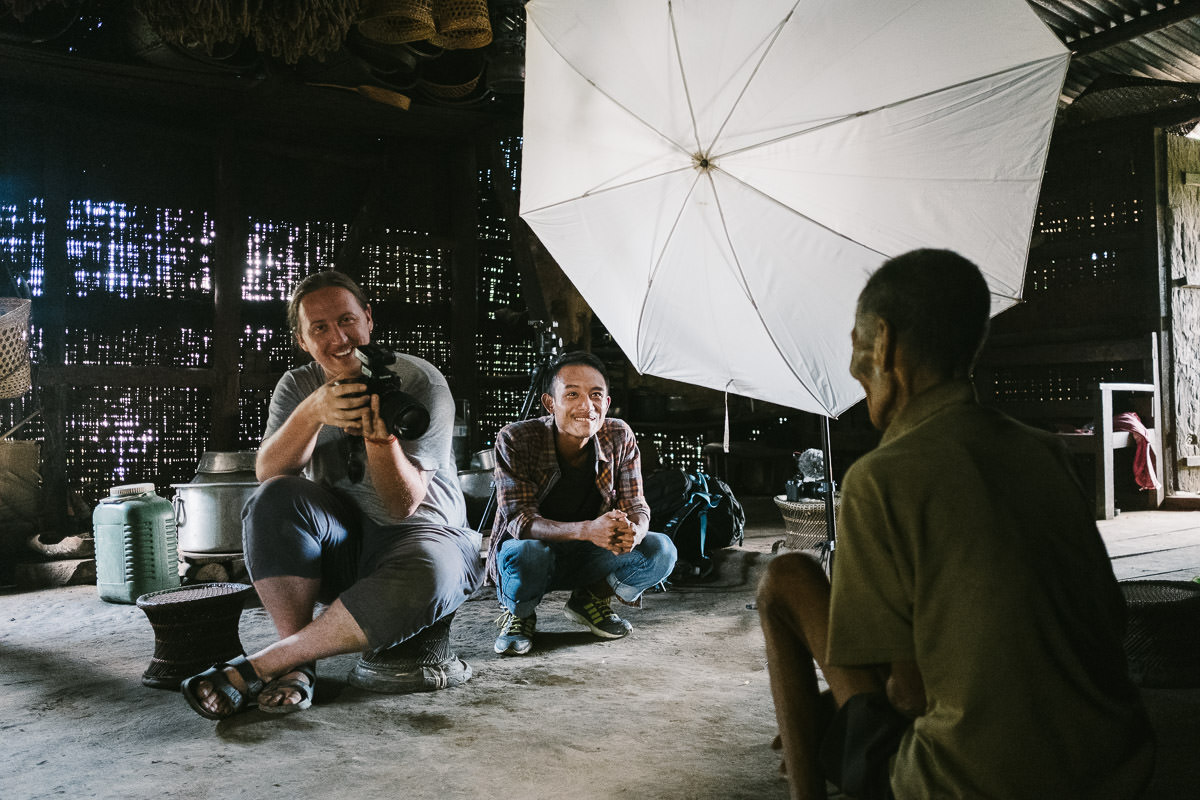
This next step was also simplified by necessity. With the size of the man’s home and the clutter of things kept in it, there was really only one place to put the flash. This ended up being off to camera right. You can see that clearly in the video.
The next decision was how hard or soft I wanted that light. Since I was travelling, I only had one modifier with me. I would have the choice of using it or not using it. A bare flash would result in extremely harsh light with hard-edged shadows so I decided to use the 172cm umbrella I had with me to soften it. The softer light would not draw attention to itself as hard light would. It would give the viewer the ability to explore the contents of the photograph and not the lighting I used.
My aperture was set to f/8 as I wasn’t concerned about using a shallow depth of field, so all I had to do was dial in the power of the flash until I got an exposure that felt good. Using the Godox X1T-F and the AD200 makes this easy. I could set the correct power from the camera position. So, at this point my camera settings were 1/60 sec, f/8, ISO 100. These wouldn’t change throughout the shoot as I was working in all manual on the camera and flash. This way I could be certain that every image would have the same light and I could focus on my subject. I also used the Classic Chrome Film Simulation both on the shoot day and in post-processing as a base for my work. I love the way it renders the earthy tones of this photograph.
A similar setup can be seen in the image here, although it is a different home on this trip (in Nagaland, where the doors tend to let in more light!).
Step 4
Once all of this was set up and I was happy with the exposure, I waited for my subject to be ready for me. After he had fully dressed and checked that everything was in order, he came over and sat in the scene I had framed. He then proceeded to relight his pipe and rested his arms on his knees before looking at me as if to say, “Now what?” That was my cue.
I asked him to stay exactly as he was. He was comfortable – that much was clear. He had lit his pipe and was content to just be. This gave me a window to make a few images using the GF63mmF2.8. Although these images were well-exposed and had good composition, they missed the two components I really wanted from this image: reverence and thoughtfulness.

I decided to switch lenses to a much wider angle using the GF23mmF4. This would allow me to physically get much closer to this man, thus bringing my viewers into his space. I would also be able to look up at him and display him with reverence. There was the first element in finalising the image.
The next thing I needed to work on was his thoughtful gaze. Every time we stopped making pictures or fell into a moment of silence, he would disappear into thought. I wanted to capture that about him. This was a man of great knowledge and I wanted to convey that. So, for the final image, I had him look over the top of the camera and into the darkness and asked him to remember a time when his knowledge had helped one of the people of his village. This gave me my final expression.
If there is one thing I absolutely love about this image, it is the matchstick in his pipe. Our shoot was actually pushed back nearly 10 minutes while we searched for a box of matches for him to light his pipe with. Once he had them, he lit the pipe, left the matchstick there and proceeded to puff away. This quirkiness tells me one final thing about this man and I love it!

In conclusion
As you can see, the lighting portion of this image was a game of fitting the puzzle pieces together. As I only had limited options, I was able to get the lighting set up quickly and focus on making an image of this man. By listening carefully, learning and making good use of the equipment I had with me, I was able to create an image that was about the subject, not about my camera and light.
I hope you’ve enjoyed this short guide to making the cover image of my eBook. There are 10 case studies in the book that range from simple, like this one, to much more complex images. Each has the equipment and techniques laid out step-by-step for you and includes an assignment that will lead you through creating your own image. Please head over and check that out here.