
Before I get started with how I control my speed lights off camera, with the X-T1, this write up is aimed at beginners. Those that now want to explore off camera lighting, and ways to trigger and control the light from the camera.
Equipment I used for the shoot includes:
- X-T1
- XF 56mm f/1.2 R
- 3 x Canon 600 EX RT
- 3 x Yongnuo 622C
- 1 x Yongnuo 622C TX
- 3 x Light Stands with flash brackets
- 1 x Octobox
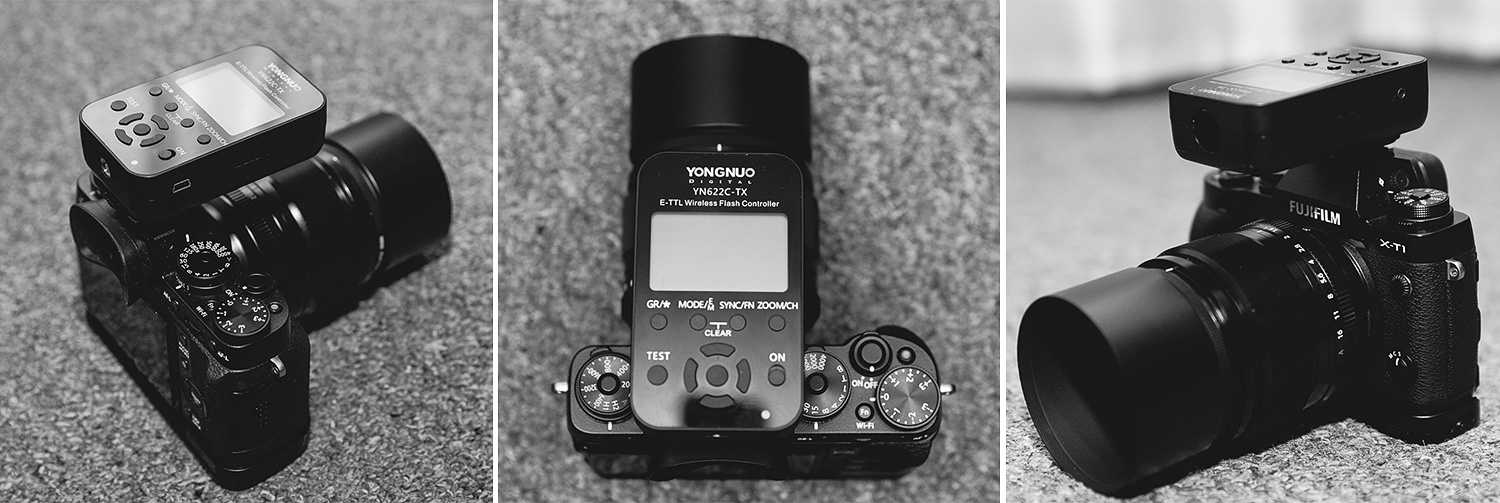
The thought of off camera lighting can be daunting to those that are only just starting to explore photography further, so this is an explanation of how I set up certain scenarios, control my flash power and camera settings. What I will be explaining below can be applied to all camera brands, but in this instance I have used my Fujifilm X-T1. Unlike a DSLR, with the X-T1, there are a number of steps you need to take to have the YN 622C TX system working correctly.
Firstly I connect all my flashes to a Yongnuo 622C unit, making sure that all the units are set to the same channel. This is done by selecting the channel on the 622C, then by holding down the zoom/ch button on the 622C TX and selecting the same channel. Once they are connected, I try a test fire from the 622C TX unit to make sure that all flashes are firing correctly. Now that all the flashes are in sync, I mount the 622C TX controller to my X-T1.
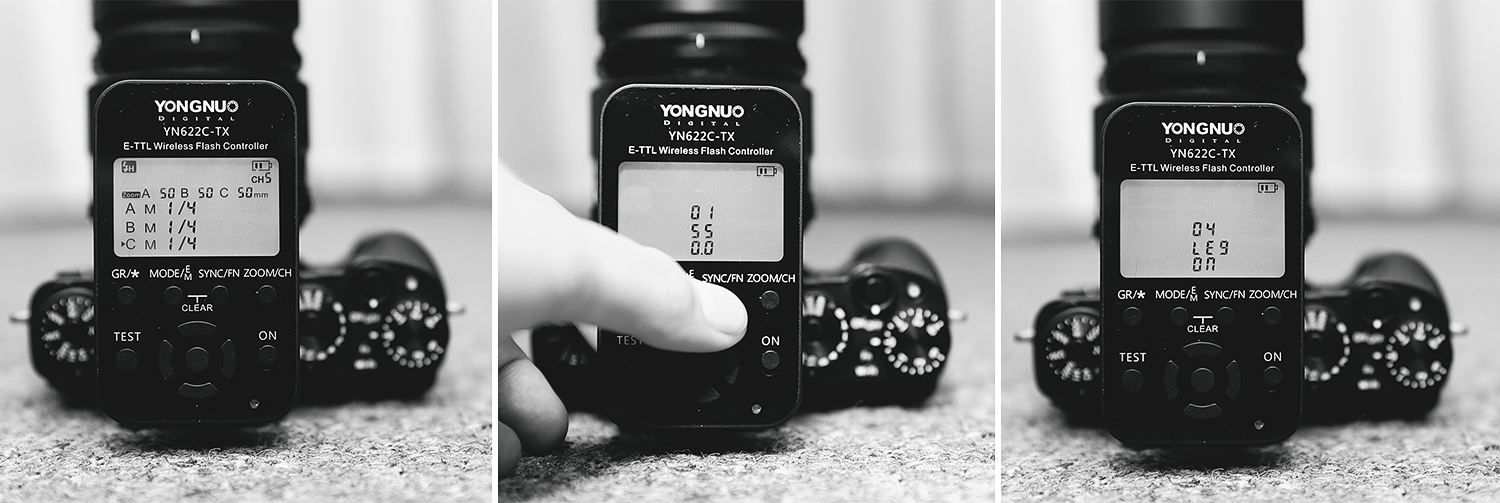
The 622C TX is designed for Canon cameras, but their latest firmware update included a mode called Legacy. The Legacy mode tricks the Fuji body into thinking that a compatible flash is attached, allowing you to send flash power signals to your off camera 622C units and reliably triggering them. To activate Legacy mode on the 622C TX, hold down the Sync/FN button till the custom menu appears, scroll down to option 4 (LEG), press right on the directional pad so the ON option is selected. Now your triggers are ready to be used with the X-T1, or any other Fuji body.
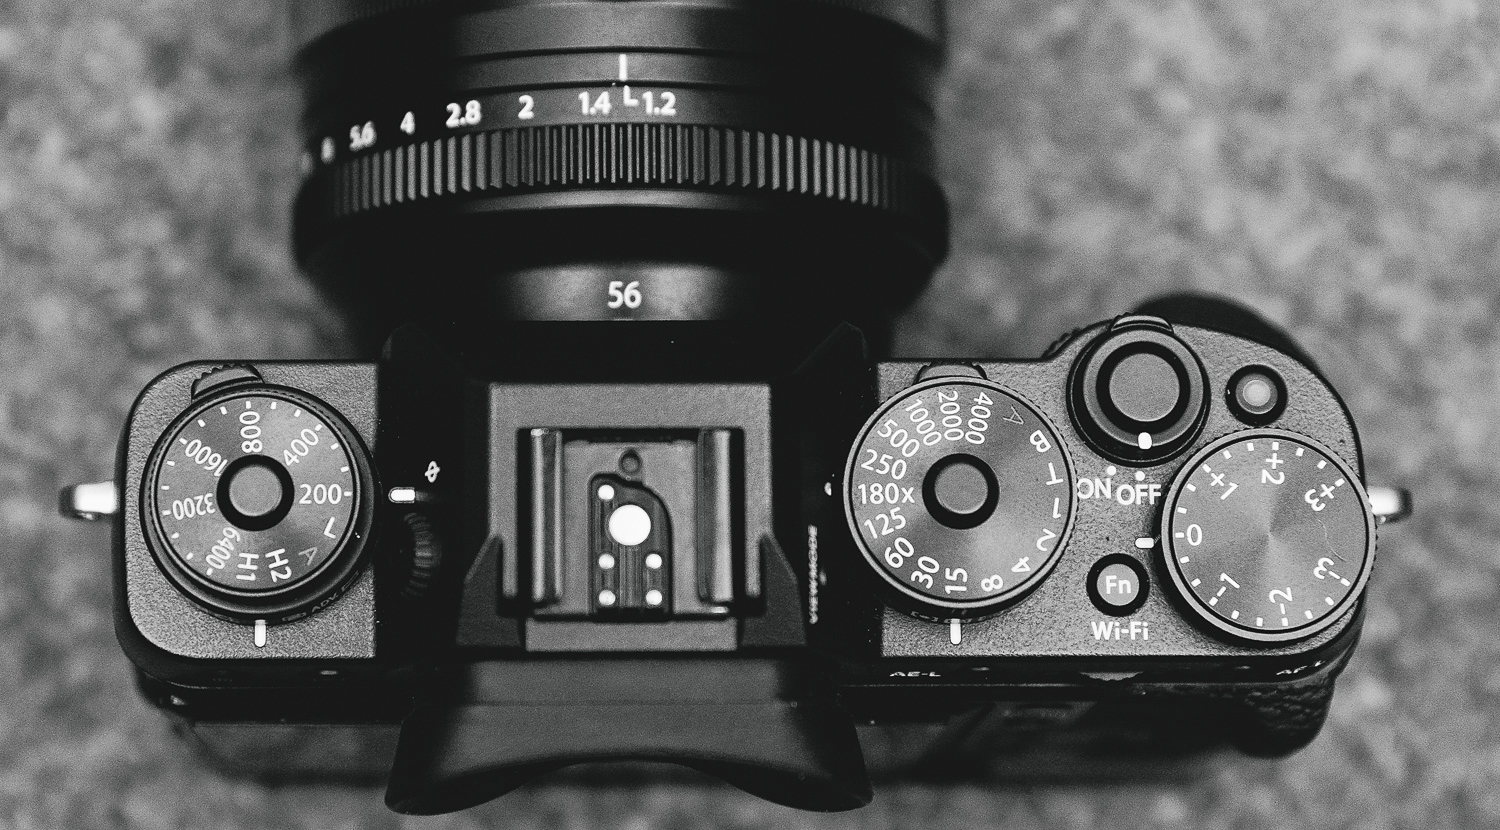
Now the final two steps before we move onto light setup and exposure settings. We need to make sure that the X-T1’s shutter is set to Mechanical. Having Mechanical and Electronic, or just Electronic selected, cuts all function to the hot shoe pins, so that no flash can be used.
Revision: X-T1 firmware V3.10 now allows you to use the hot shoe when Mechanical & Electronic (Ms&Es) is selected. Previously this would not work, so kudos to Fuji for the update. The hot shoe pins are still deactivated in Electronic mode, so make sure your shutter type is set to either Mechanical Shutter or Mechanical & Electronic (x100s/t users, make sure that your flash settings are set to external flash).
Secondly, you need to make sure that your exposure simulation in manual is turned off. We turn of the simulation as in most cases, you are controlling the light, therefore the actual exposure of the scene is generally under exposed without flashes. With the simulation turned off, you will have your full brightness back in your viewfinder, allowing you to see your subject more clearly.

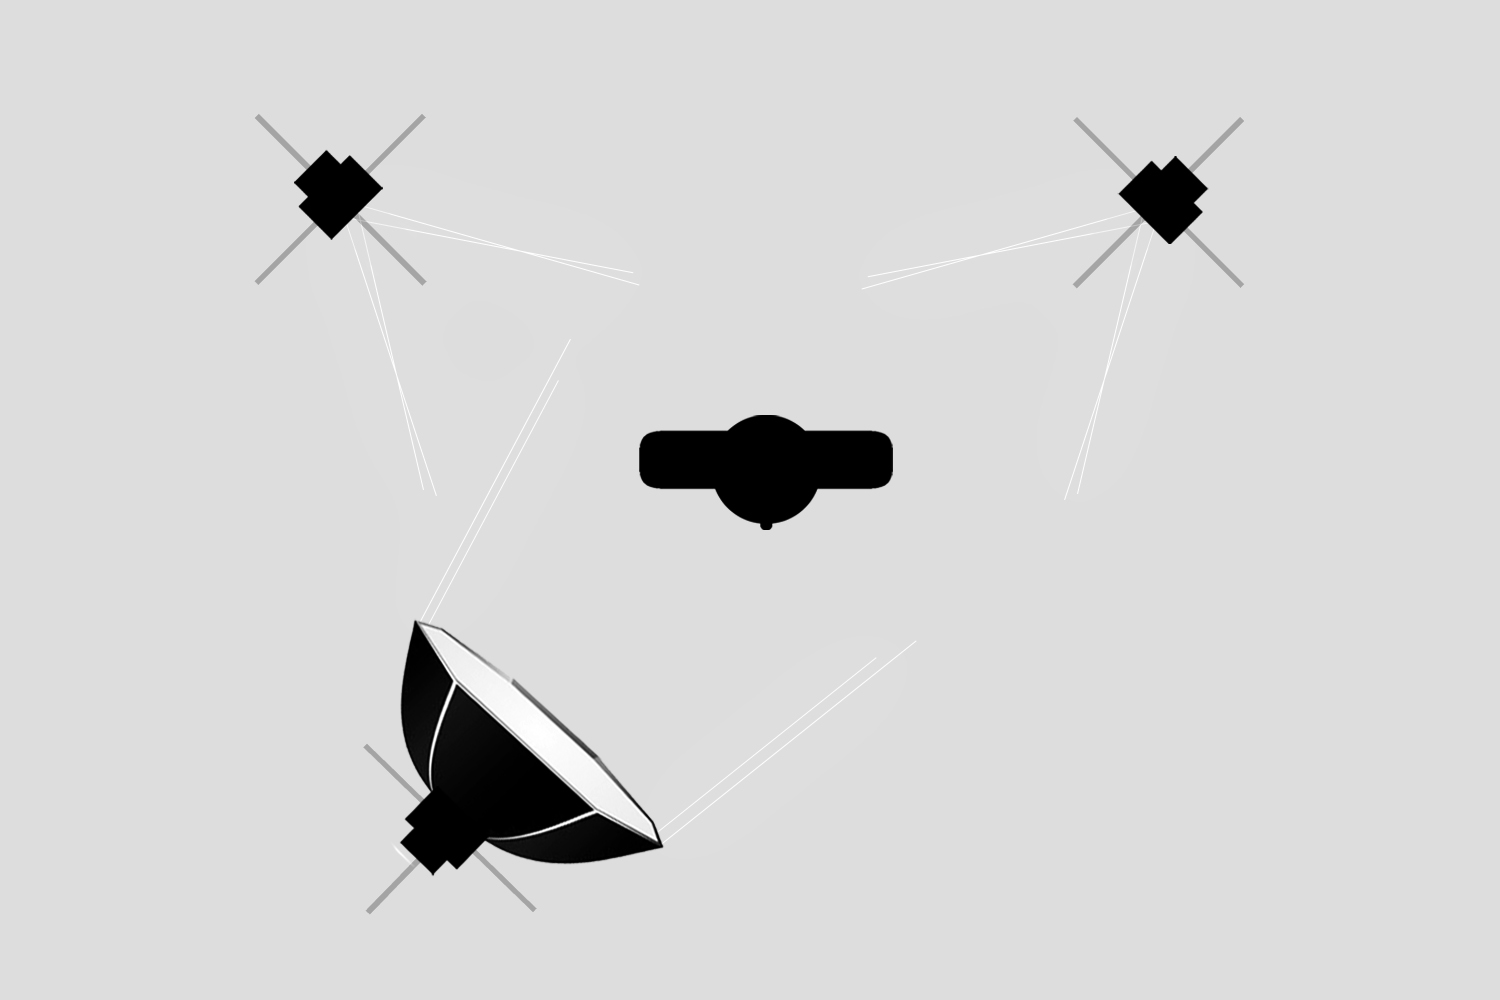
Now that the camera, triggers and flashes are all set up, you are ready to start setting up your flashes for shooting. I always use a minimum of 3 light sources, either 2 at the rear and 1 at the front, or 2 at the front and 1 at the rear. In this case I used 2 speed lights at the rear to separate my subject from the background, and 1 speed light at the front as my main light.
Now that the light sources are in the position that I want them, I choose the camera settings that I want to create the desired effect that I am after. In this case, I was outside, early evening so the light was low. My location wasn’t the most glamorous, so I opted for the widest aperture that I had to completely blur the background. As I wasn’t happy with the location, I opted for a darker background by increasing my shutter to the max flash sync speed. Finally I always like to keep my ISO as low as possible. Final settings: Shutter 1/180, Aperture f/1.2, ISO 200.
Now that my camera has my desired settings dialled in, it is time to set my flash power. First, we need to set each flash to Manual mode. We do this by pressing the mode button on the 622C TX till the M sign appears. Then pressing the GR/* button to scroll through the groups and change the mode setting to Manual. Once all groups on the 622C TX are set to manual, I then set my flashes into groups. I set the main light to group A, the rear left to group B and the rear right to group C. This gives me remote control of each individual flash. With flash power, I tend to try and keep each flash 1 stop behind the other. I.e. the rear left is 1 stop darker than the main light, and the rear right is 1 stop darker than the rear left. This creates more of a 3 dimensional effect, rather than the image being flat.
Now to change the power of each flash direct from the 622C TX unit. Firstly you press the GR/* button on the 622C TX till it is on the flash group you want to sent power settings to. Then once on that group, you press left or right on the directional pad to adjust the power. Then you repeat the same steps above to adjust the other flash group settings.
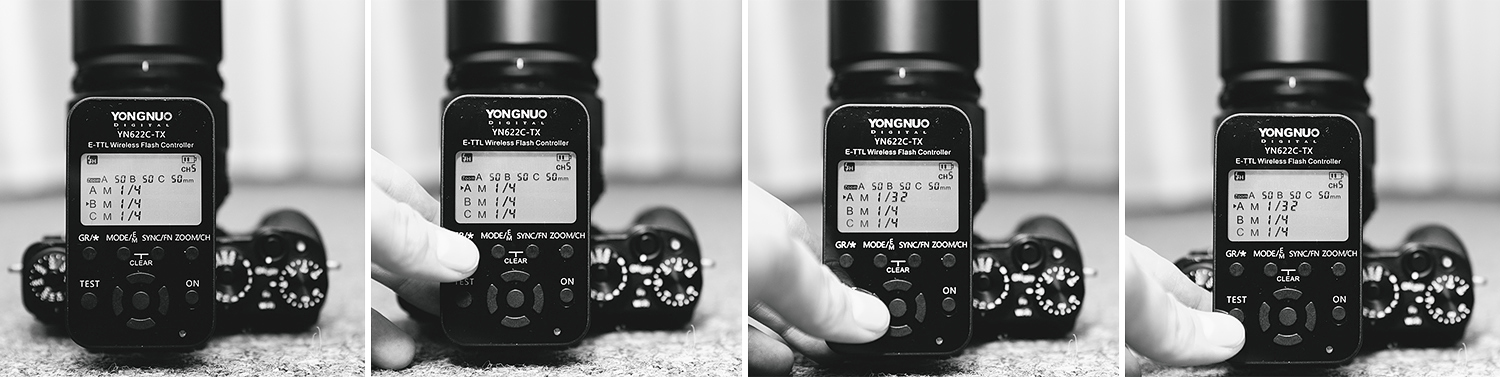
Once I have the settings dialled in, I always press the test button on the 622C TX unit, just to make sure the power settings have been sent to the 622C units (you do not have to do this as all is done automatically, but I like to be sure).
First I start with the left rear flash, I dial in the power and take a test shot (with all other flashes turned off via the MODE button on the 622C TX). Once I am satisfied with the power output, in this case 1/64 power, bare flash, I know that my rear right needs to be 1 stop darker, so I dial in 1/128 power on a bare flash. Now that both of the rear flashes are at the power that I want, I set the main light to 1/32 power (through an octobox), then press the test button to make sure all the settings have been transmitted, now my flashes are ready for the main shot. A lot of photographers that specialises in off camera lighting, use light meters. I didn’t use one this time, I took test shots and judged my results via the histogram. Here are the 3 test shots below setting the flash power before the final shot.

Now that all my lighting has been set up, all flashes are triggering just fine, I am ready for the shoot. In this instance I was after a head shot. Final image is below.

I have tried many different trigger systems throughout my photography career, using Canon, Nikon and now Fuji. For the price, functionality and reliability, I believe that the Yongnuo 622C TX system is the best that I have used. The 622C TX system has more functionality than my Canon E3 RT system, which was the main reason I always packed it when primarily shooting Canon. Now that I am exclusively Fuji for all studio shoots, there isn’t another system that I’d use.
To buy the YN 622C TX from Amazon, click here.
To buy the YN 622C from Amazon, click here.
If you have any questions regarding the YN 622C TX system with your Fuji camera, leave a comment or feel free to visit www.deanmartinphotography.com and email me through the contact page. If you found this post useful, don’t forget to subscribe to the site and share it on social media.
Below are a few more off camera lighting examples, using the X-T1.
Gridded light, rear left. 30x90cm soft box front above. 30x90cm reflector front bottom.
2 x LED video lights front right and left.
60cm Octobox from right, 120cm Octobox as a background.