This is part two of a two-part article. Click here for part one.
Button / Dial Settings
Focus Leaver Setting: The language is a bit of a misdirection here, what they mean is the joystick. Use this setting if you want to be able to move the focus point using the joystick while shooting. There are 3 options to select.
LOCK (OFF): The focus stick cannot be used during shooting.
PUSH TO UNLOCK: Press the stick to view the focus-point display and tilt the stick to select a focus point.
ON: Tilt the stick to view the focus-point display and select a focus point.
Edit/Save Quick menu: The quick menu is the MOST used menu button on the camera. This hidden gem lets you optimize and change which settings appear when you press the Q button. For example, it is very rare that I shoot JPEG, so I have removed the JPEG shooting settings with other camera controls directly on the Q menu. This just makes more sense for me and how I shoot. Spend a few minutes working out how best to set up your camera
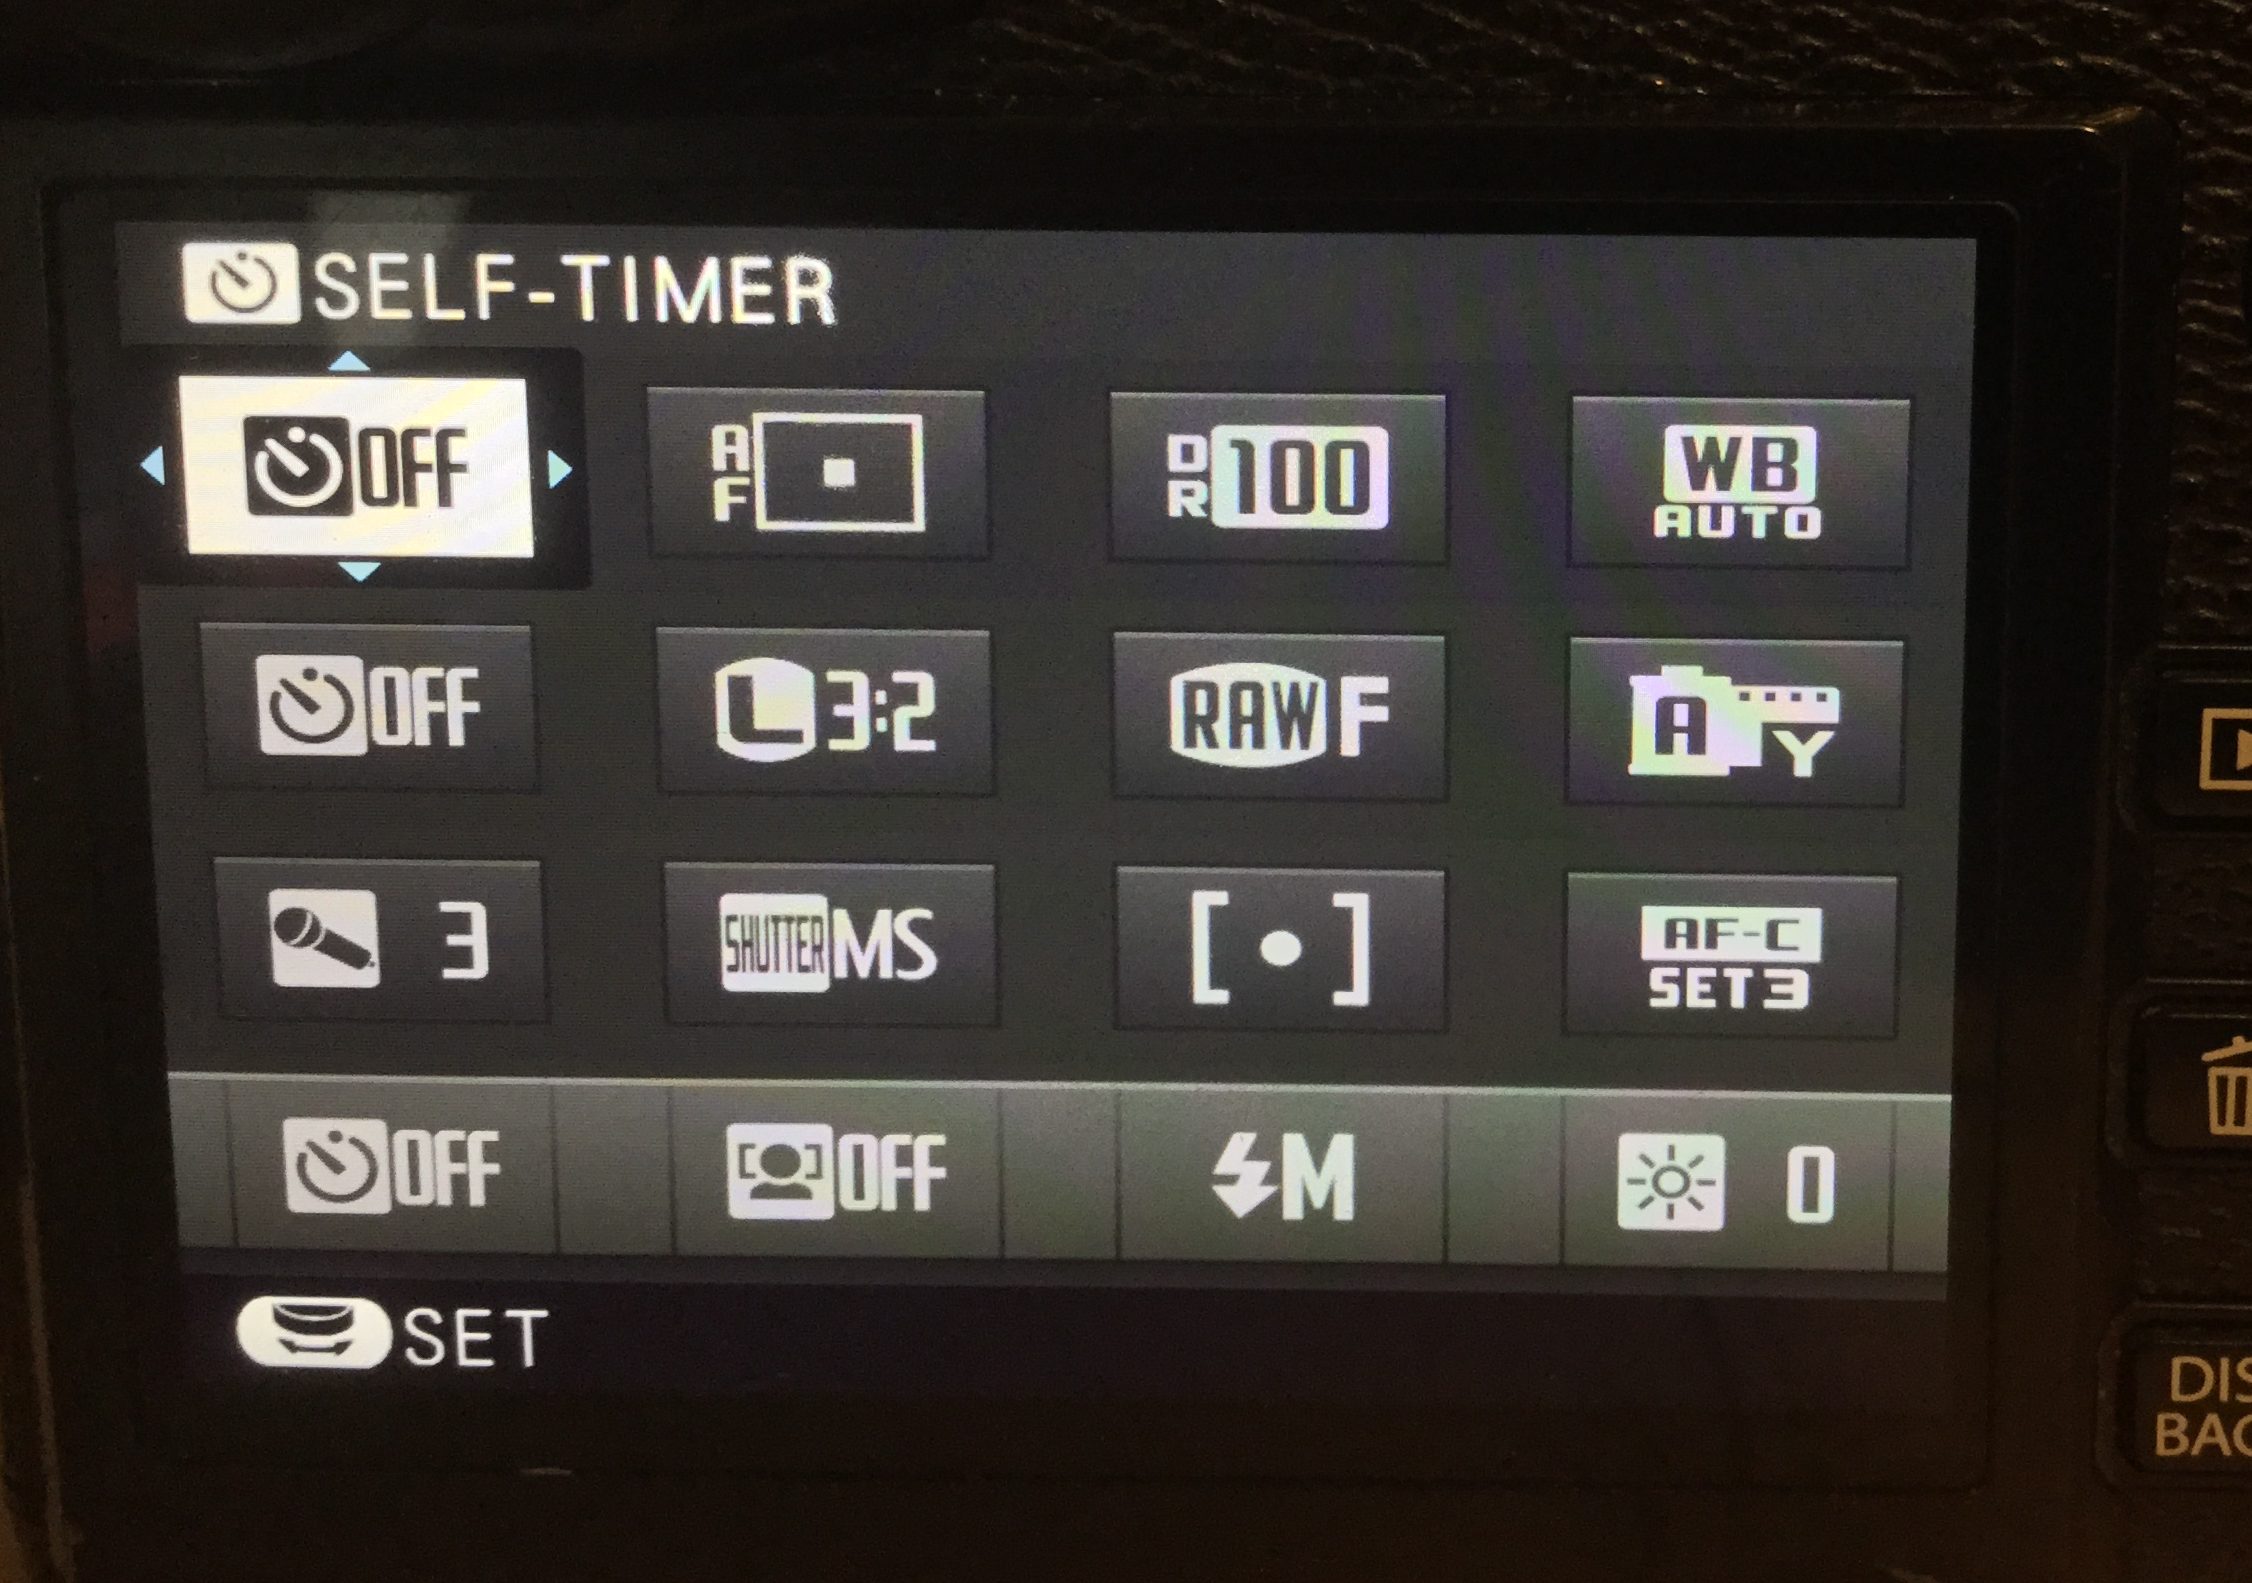
Function setting: Similar to the above setting, you can optimize and set the camera up for you to find the settings you want to use most often.
To assign roles to the function buttons, press and hold the DISP/BACK button until the menu below is displayed. Select buttons to choose their roles.
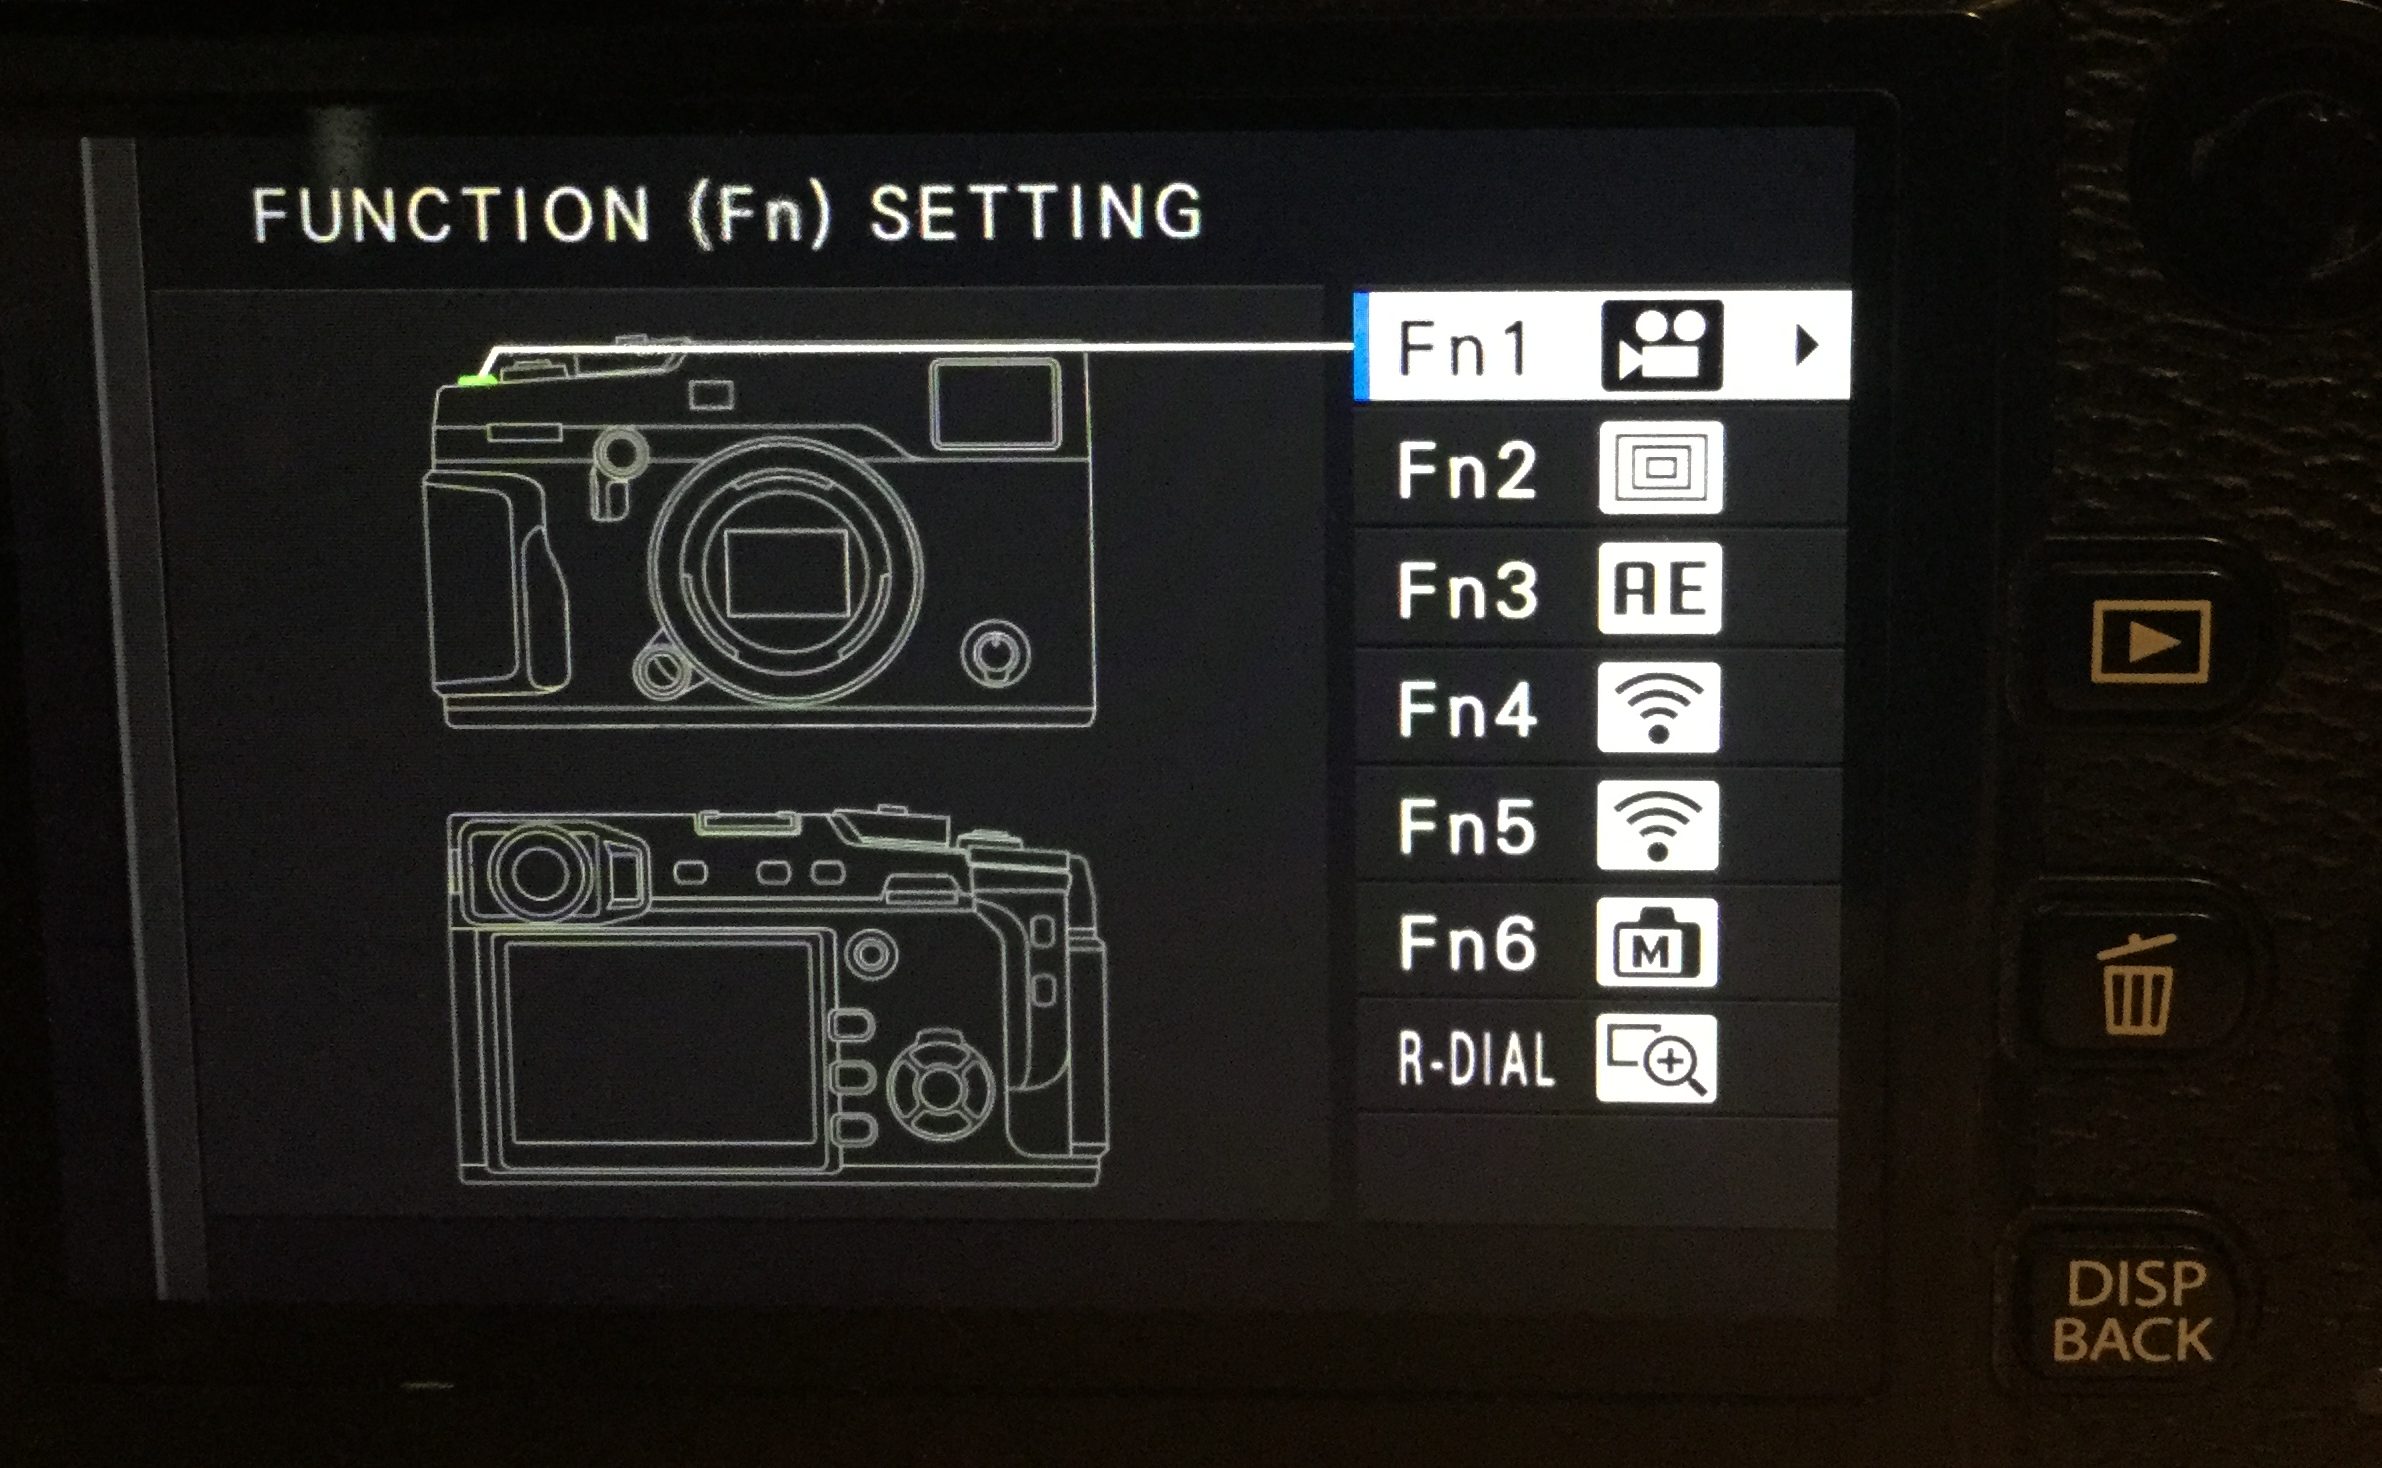
Command Dial Setting: There are two command dials on the camera. One on the front and one on the back. Normally, in shooting mode, they can control the f-stop or shutter speed. This setting can reverse the button layout.
In different camera menus or settings, the dials can do much more, such as.
- Adjust aperture.
- Choose a shutter speed.
- Adjust settings in the quick menu.
- Choose the size of the focus frame.
- Zoom in or out during focus zoom or in full frame or multi-frame playback.
- Perform the function assigned to the DIAL function button.
- In manual focus mode, you can choose a focus display by pressing and holding the center of the dial.
- Zoom in on the active focus point during playback.
- Adjust exposure compensation when C is selected with an exposure compensation dial.
- View other pictures during playback.
- On some cameras, Press the center of the dial to switch back and forth between shutter speed and exposure compensation when C is selected with the exposure compensation dial.
On the GFX cameras, you might also have noticed that you can put the lens aperture setting into the ‘C’. This will let you have a DSLR style control over the Shutter Speed and Apertures when set-up correctly.
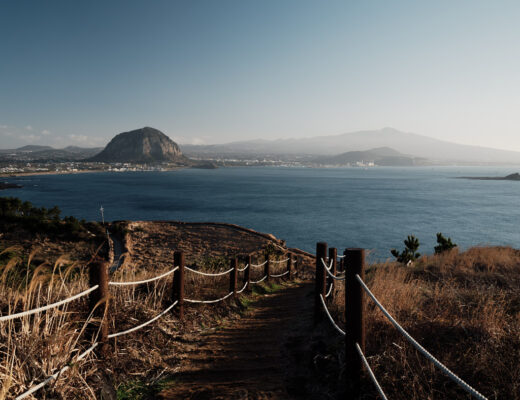
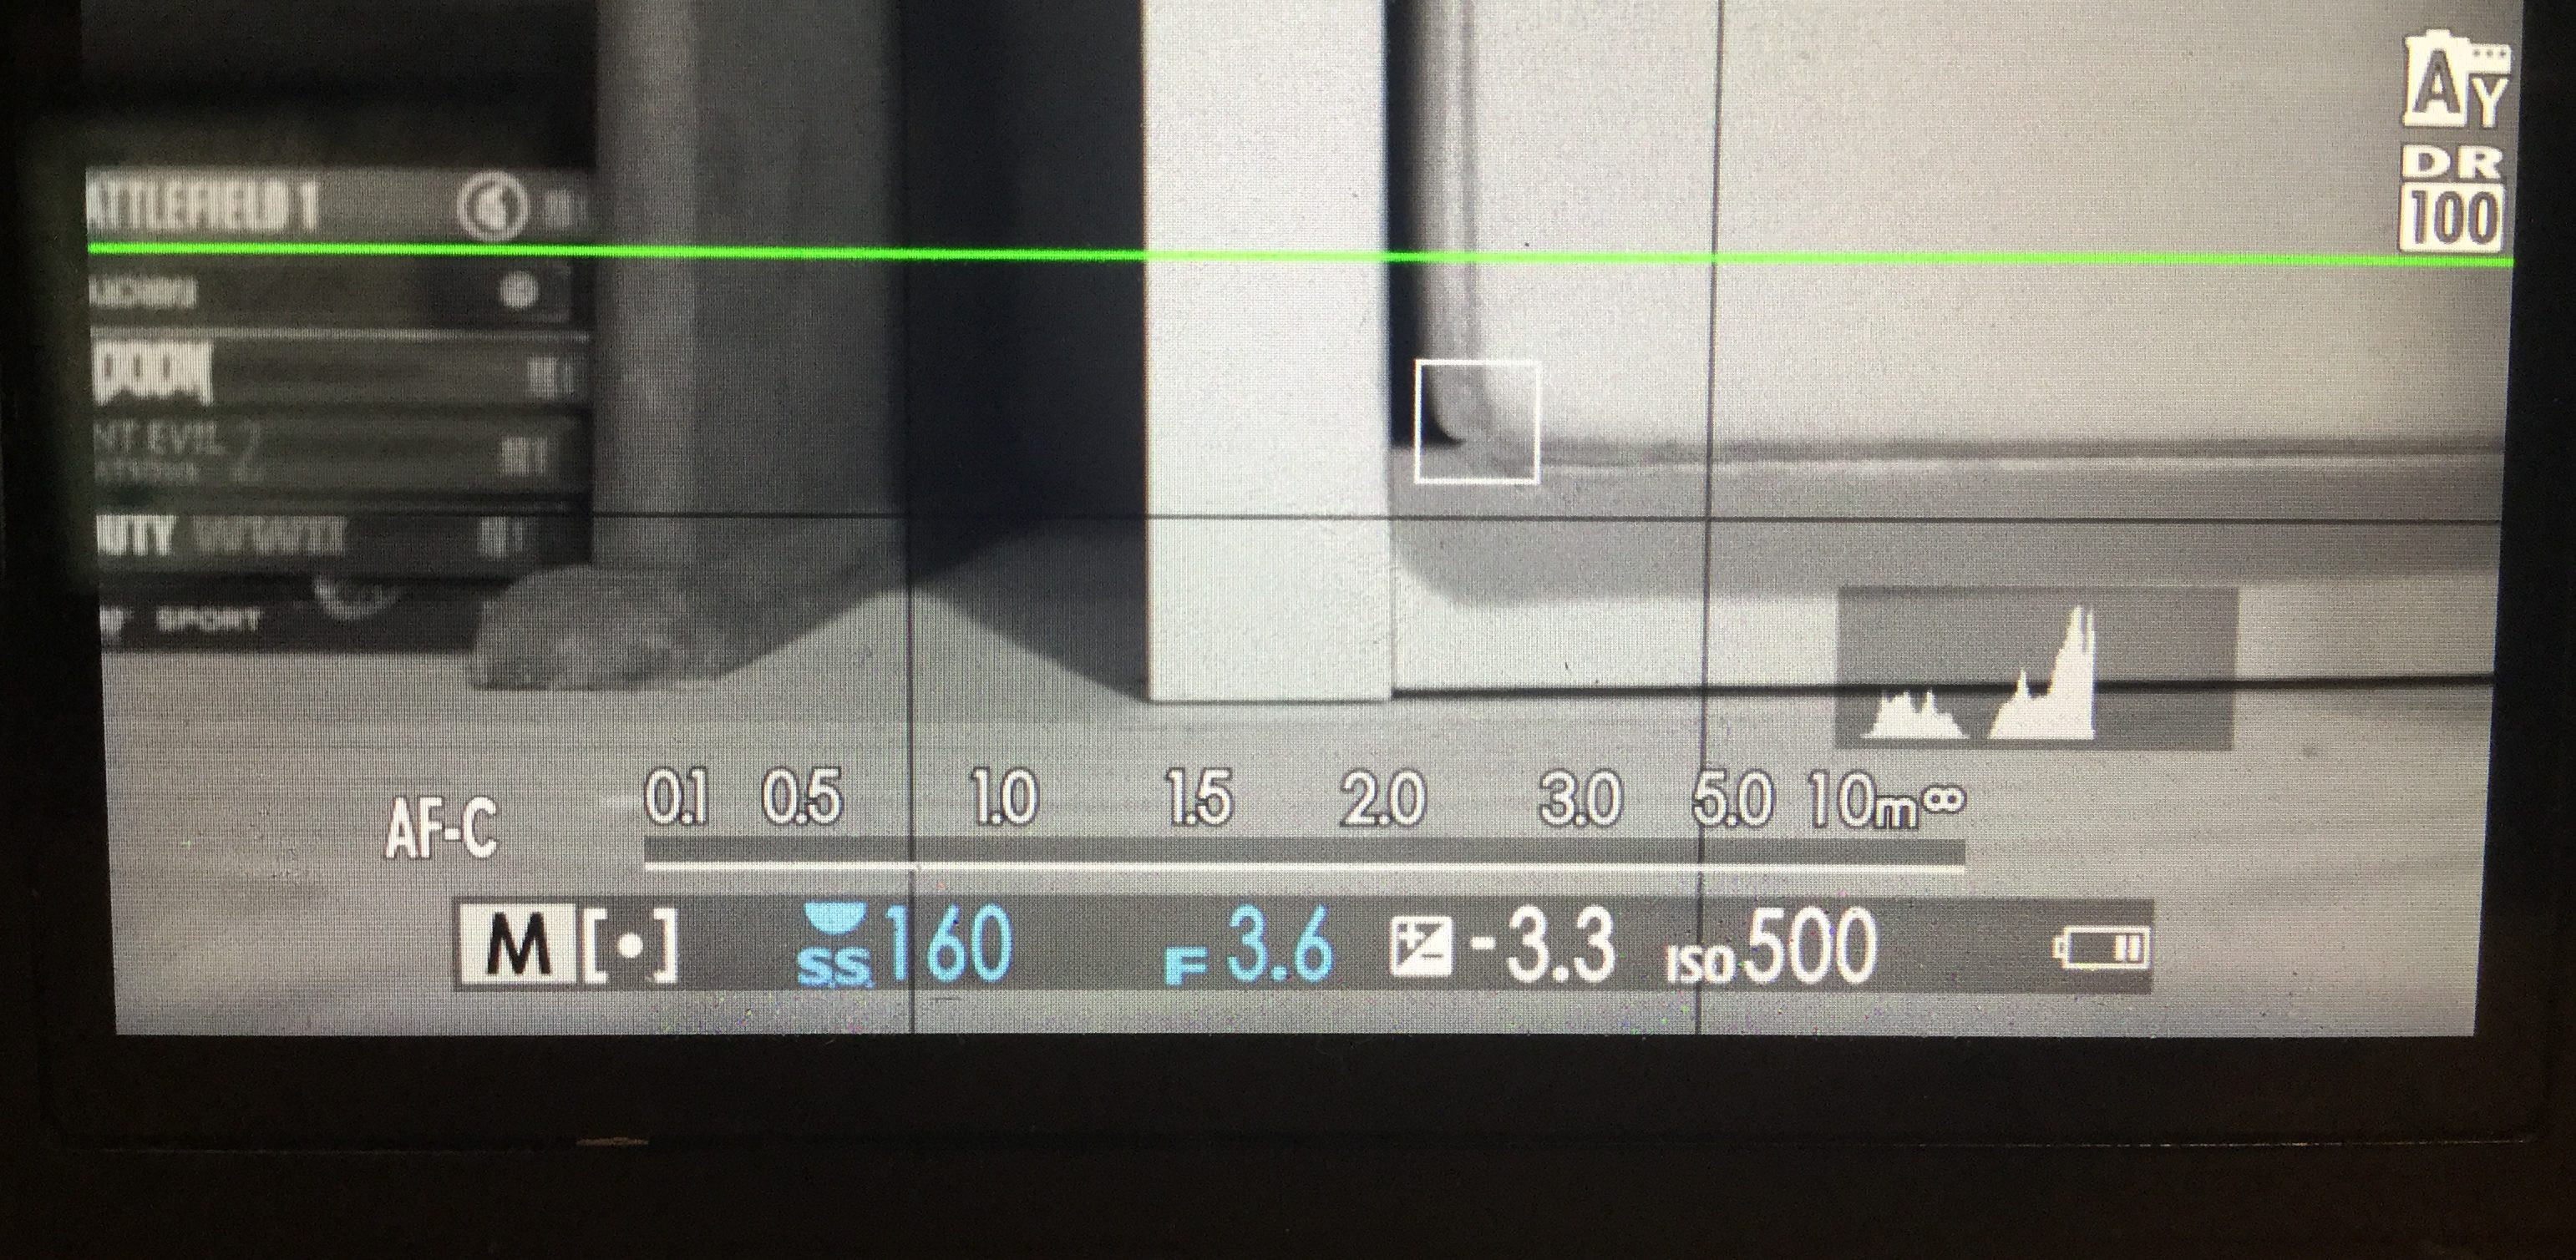
Shutter Speed Operation: This is just an On or Off setting. If we want to have fine tune control of our shutter speeds, this is an option that lets us do it.
For example in the image below, I have set the camera to 125th then made a small manual adjustment to select 160th, which is a setting not marked on the top shutter speed dial.
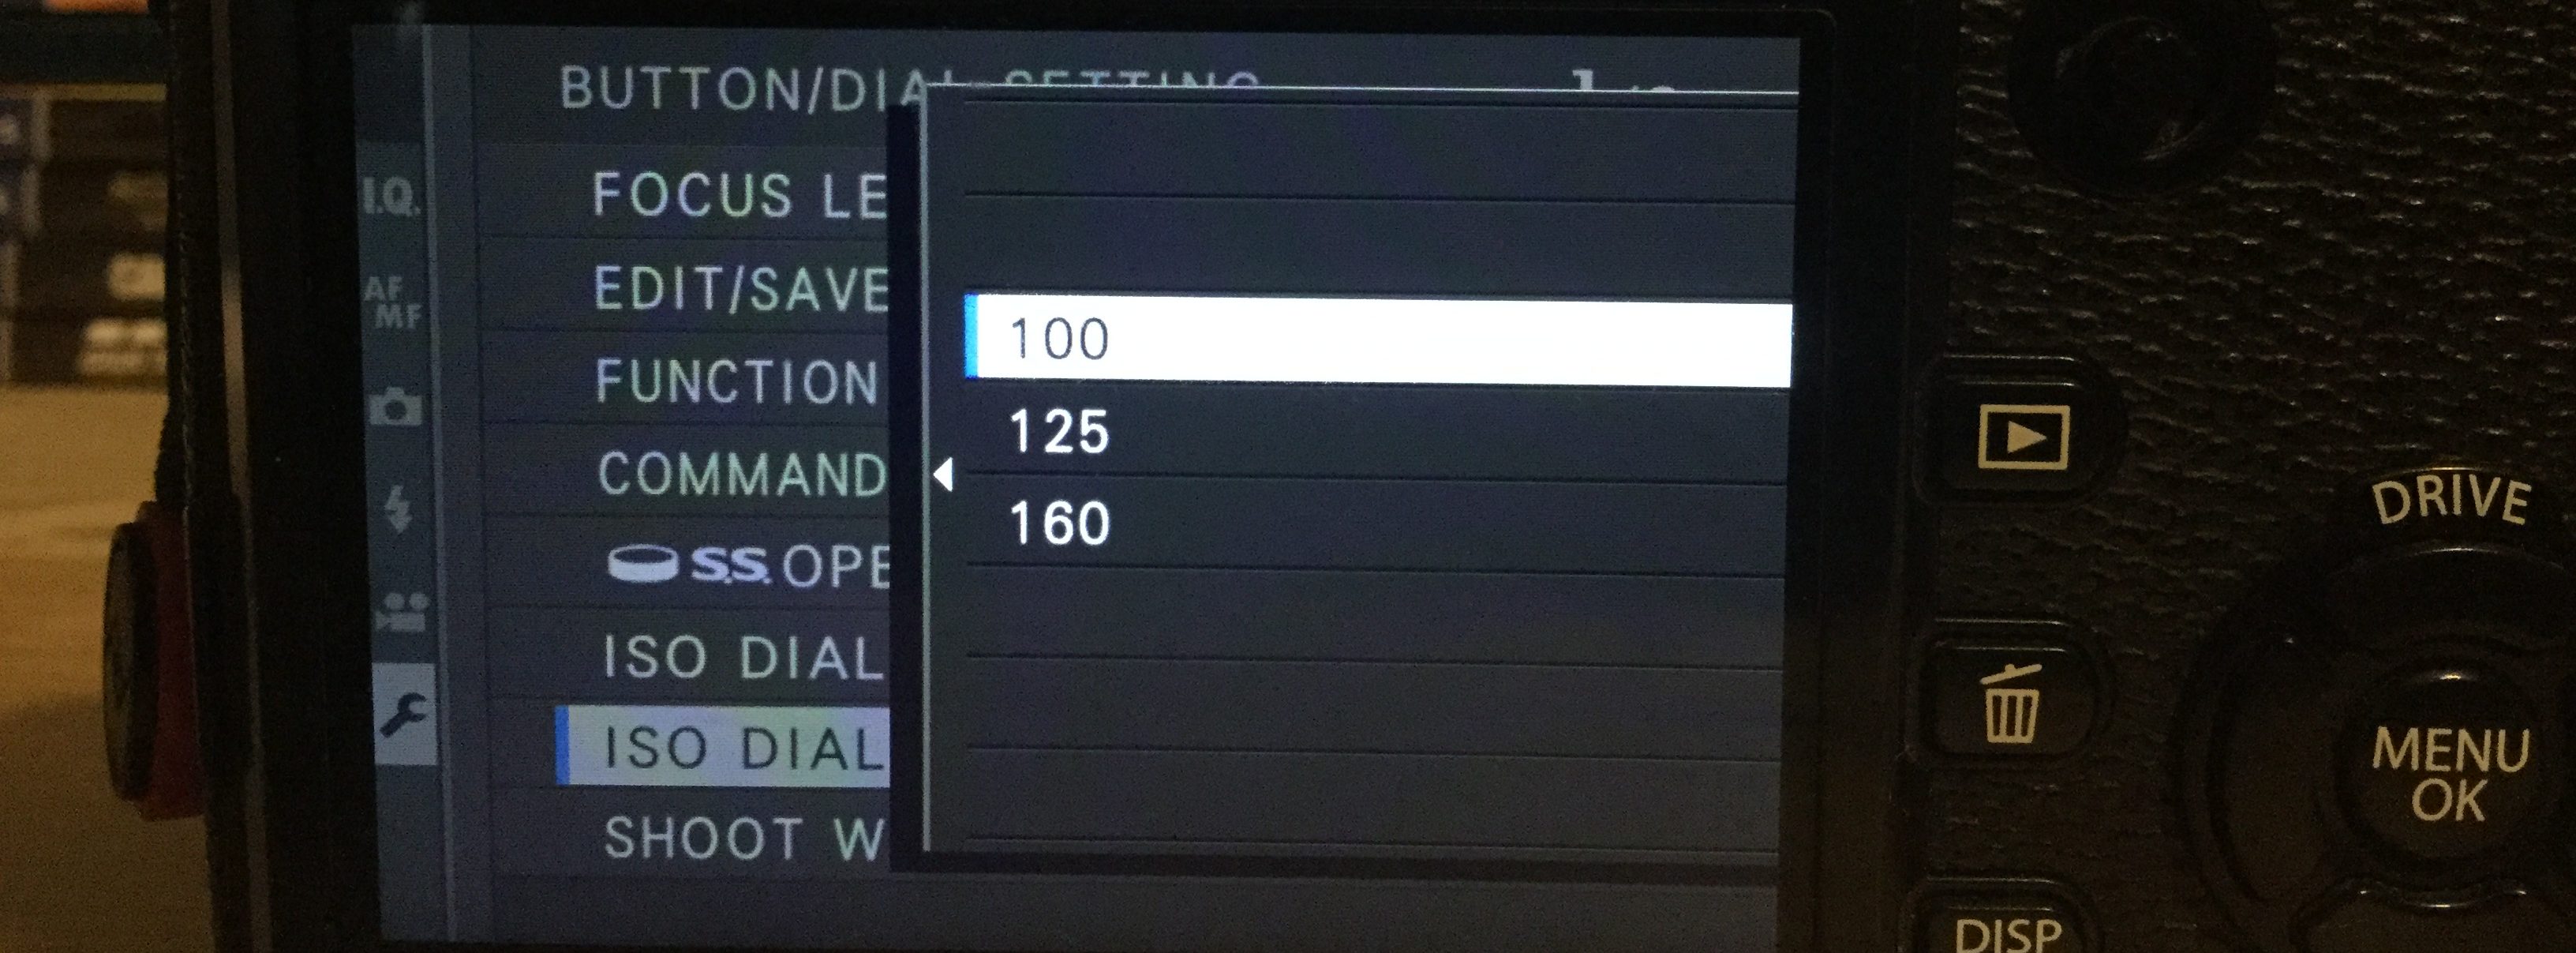
ISO Dial Setting High & Low: This is going to be the two setting options merged into one explanation. If you are looking to push your ISO range down to 100 ISO or up to 51200ISO, this is the place to do it.
The dials on the camera have a H postion, this represents the highest setting the camera can use. You can select this to be 25600 or 51200 iso. The same applies to the L setting at the other end. Select L and the camera will be at whichever ISO value you select from 100, 125 or 160 ISO.

Shoot without lens: If you are shooting using a third-party lens you might want to use this setting. Not all lenses have an electronic connection with the camera. By default, the camera will not capture an image if it can not detect a lens.
Shoot without card: With the updates of tethered shooting, this setting is more relevant for people. This setting will let you take an image when there is no SD card in the camera. However, I would suggest that even if you are shooting tethered using an SD card in the camera just makes sense in terms of a back-up. If you are using these cameras recording the HDMI output, this is also linked.
Turning this setting to off does mean you might run the risk of thinking you have a card in the camera when you don’t.

Focus Ring: We can change the direction in which the focus ring operates. If you are switching from Canon to Fujifilm, this might be a good option for you to look at.
AE-L/AF Button Setting: Switch the roles of the AF-L and AE-L buttons. Simples.
AE/AF lock Mode: The manual says: If AE & AF ON WHEN PRESSING is selected, exposure and/or focus will lock while the AE-L or AF-L button is pressed. If AE & AF ON/OFF SWITCH is selected, exposure and/or focus will lock when the AE-L or AF-L button is pressed and remain locked until the button is pressed again.’
I read this simply as fix your exposure and focus points by half-pressing the shutter button if you are using full or semi-auto modes.
AF-Lock Mode: Choose the role played by the AF-L button.
- AF LOCK ONLY: The AF-L button locks focus only. AE/AF LOCK: The AF-L button locks both exposure and focus.
Aperture Setting: This setting will be ghosted out if you are using a lens with an aperture ring. This setting is to help control and adjust aperture when using lenses that don’t have an aperture ring.
AUTO + MANUAL Rotate the rear command dial to choose the aperture. Rotate past minimum aperture to choose A (auto).
AUTO Aperture is selected automatically; camera functions in exposure mode P (program AE) or S (shutter-priority AE).
MANUAL Rotate the rear command dial to choose the aperture; camera functions in exposure mode A (aperture-priority AE) or M (manual).
Power Management
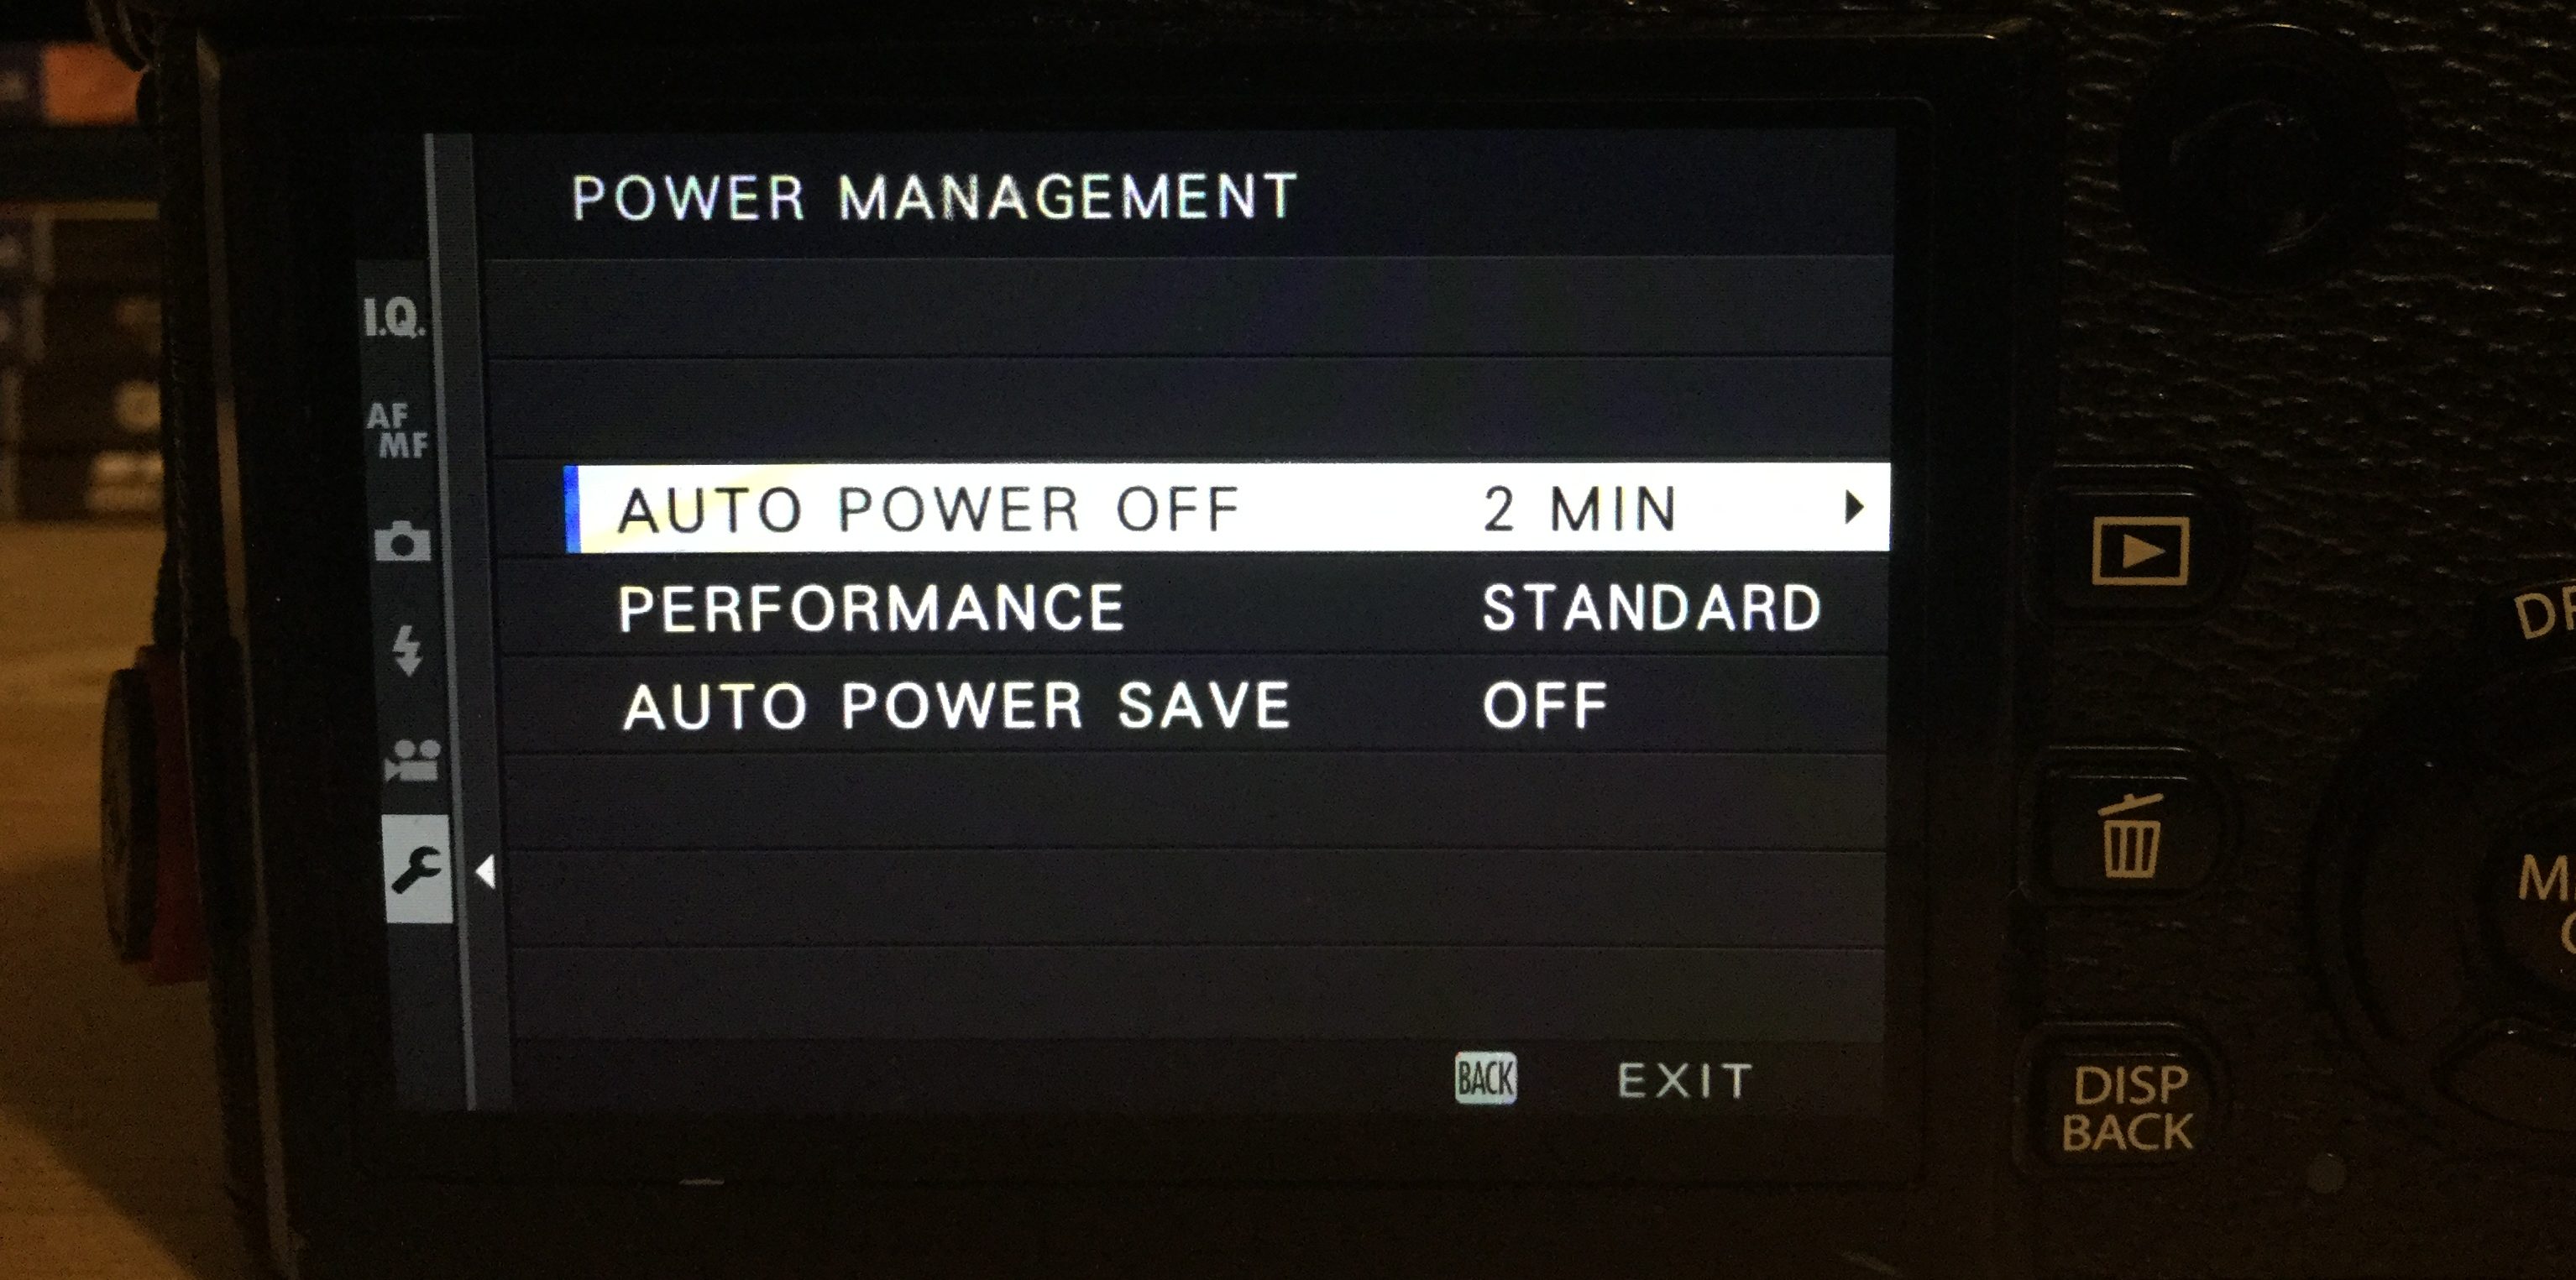
Auto Power Off: To save battery power, your camera will turn off after a preselected time of non-use. I have mine set to 2 mins in the image below.
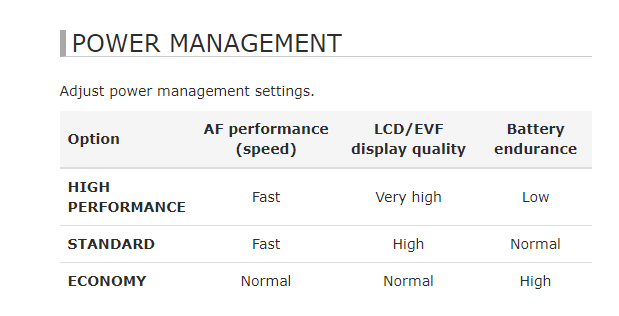
Performance / Power Managment: Adjust power management settings. The Fujifilm website has this neat little explanation of the camera. These settings are not linked to ‘boost’ modes using battery grips, they fall under a different setting.
Auto Power Save: This is another set to try and limit any extra power wastage. It is just an On-Off setting.
ON: When HIGH PERFORMANCE or STANDARD is selected for POWER MANAGEMENT, the LCD and EVF will switch to a standard-quality display if no operations are performed for a set period. Operating camera controls restores the high-quality display.
OFF: Display quality does not change when no operations are performed.
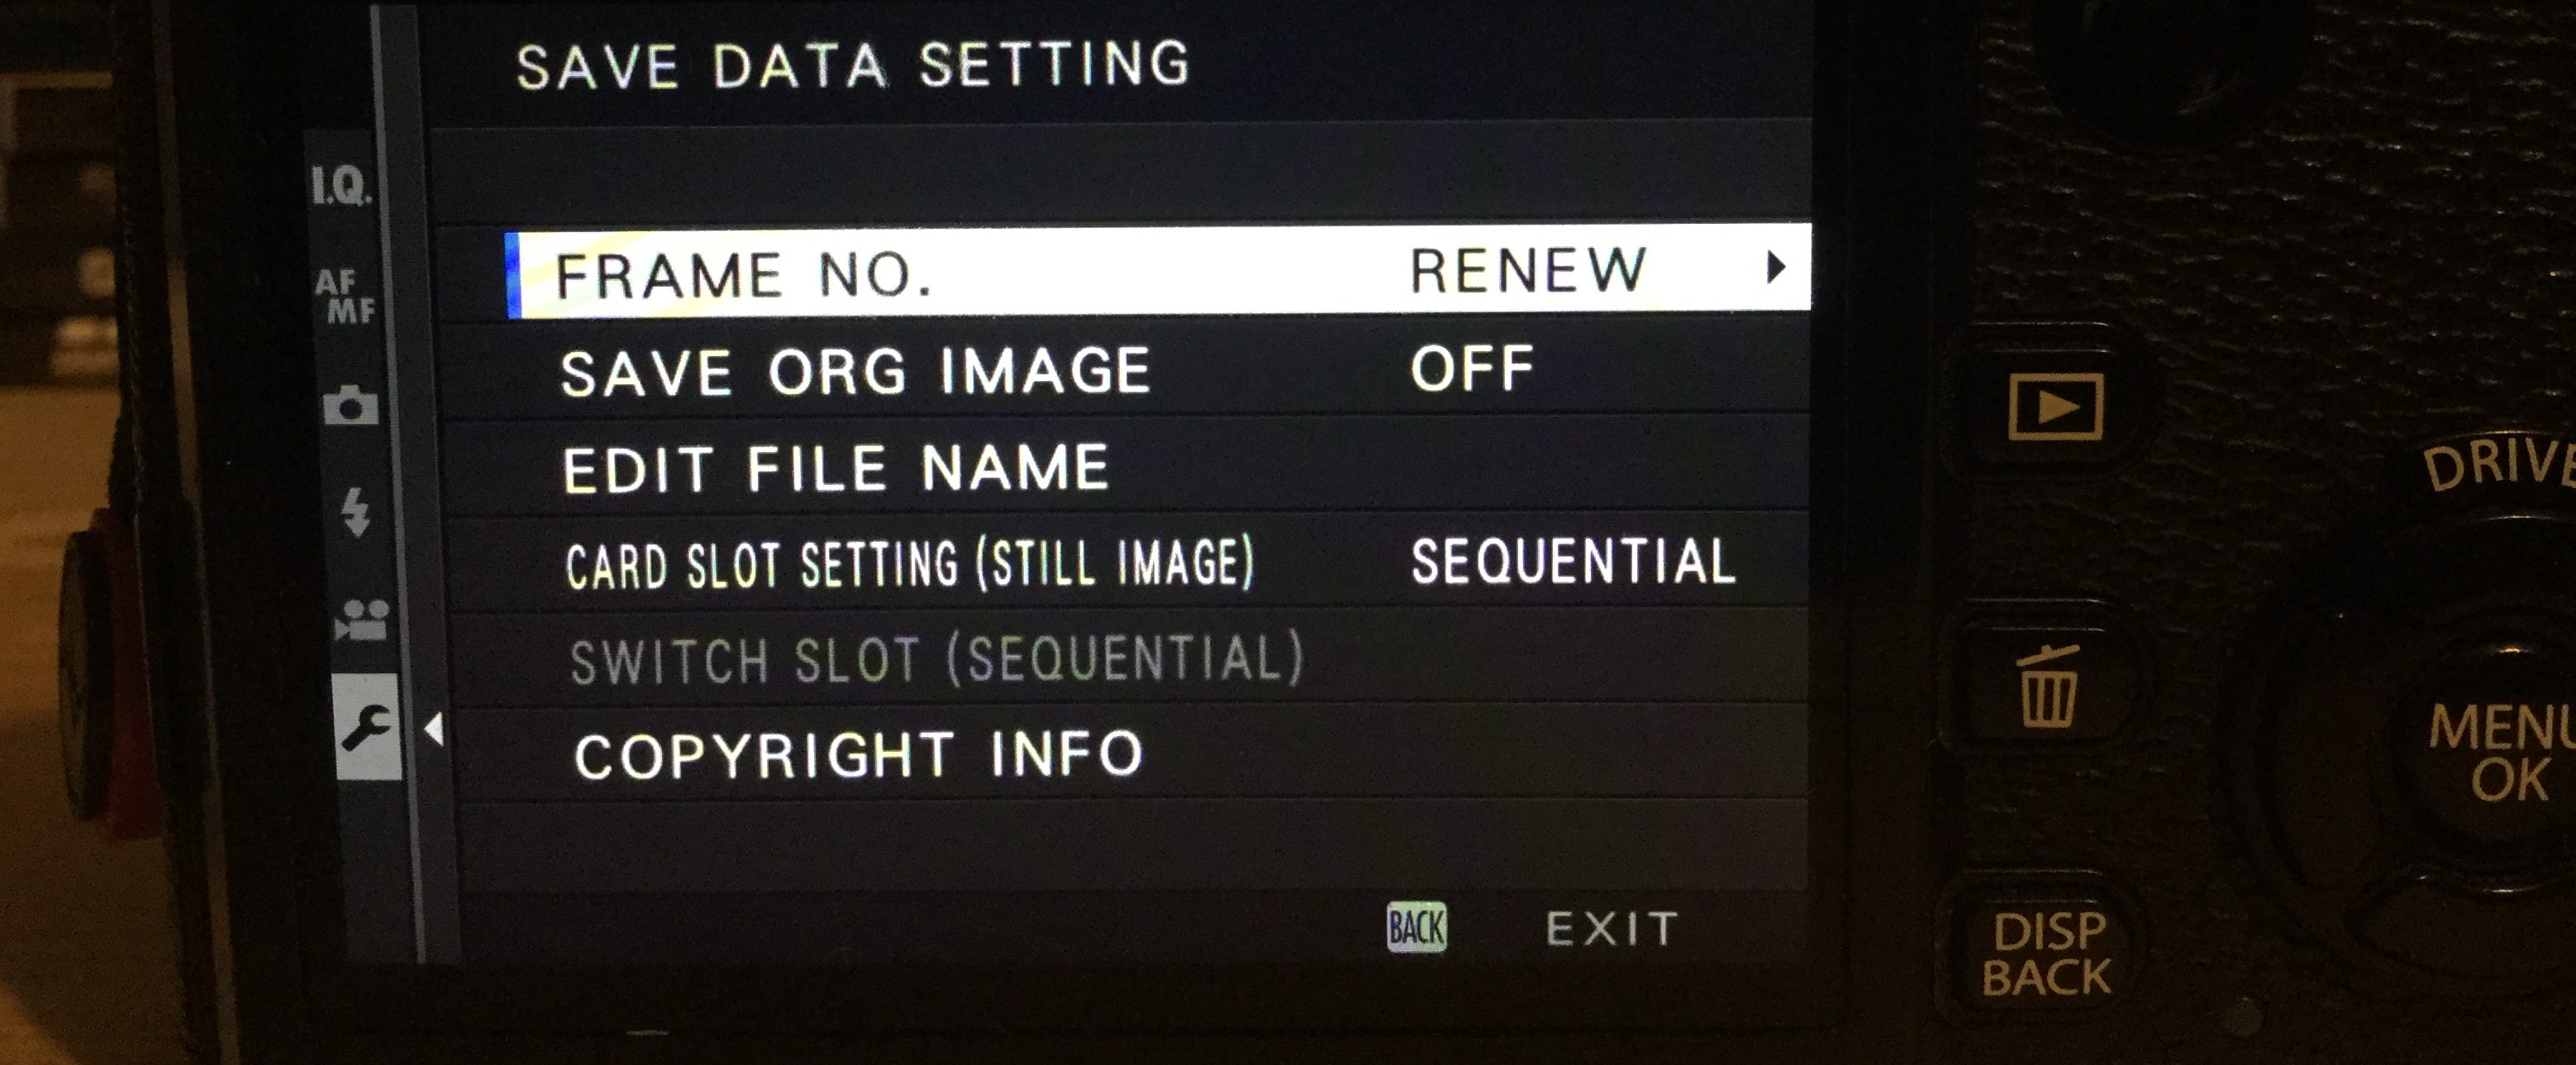
Save Data Setup
Frame No.: There are two options. Renew and Continuous. Most of the time my camera lives in continuous mode, as I want to avoid having overlapping file names when backing up and storing my images.
Frame numbers are created in four-digit file number, if you use renew mode, every time you insert a new memory card or current card is formatted the number is reset. Using the other option will just use the last file number in the sequence, which I think is a better option but will mean you will, after some time hit frame number 999-9999. If this happens the shutter release will be disabled and you will need to reset the file numbers but selecting renew, formatting the card, taking a photo then re-selecting continuous mode will fix your problem.
Save Original Image: The Fujifilm manual just says ‘Choose ON to save unprocessed copies of pictures taken using FLASH SETTING > RED EYE REMOVAL.’ There is little to add here.
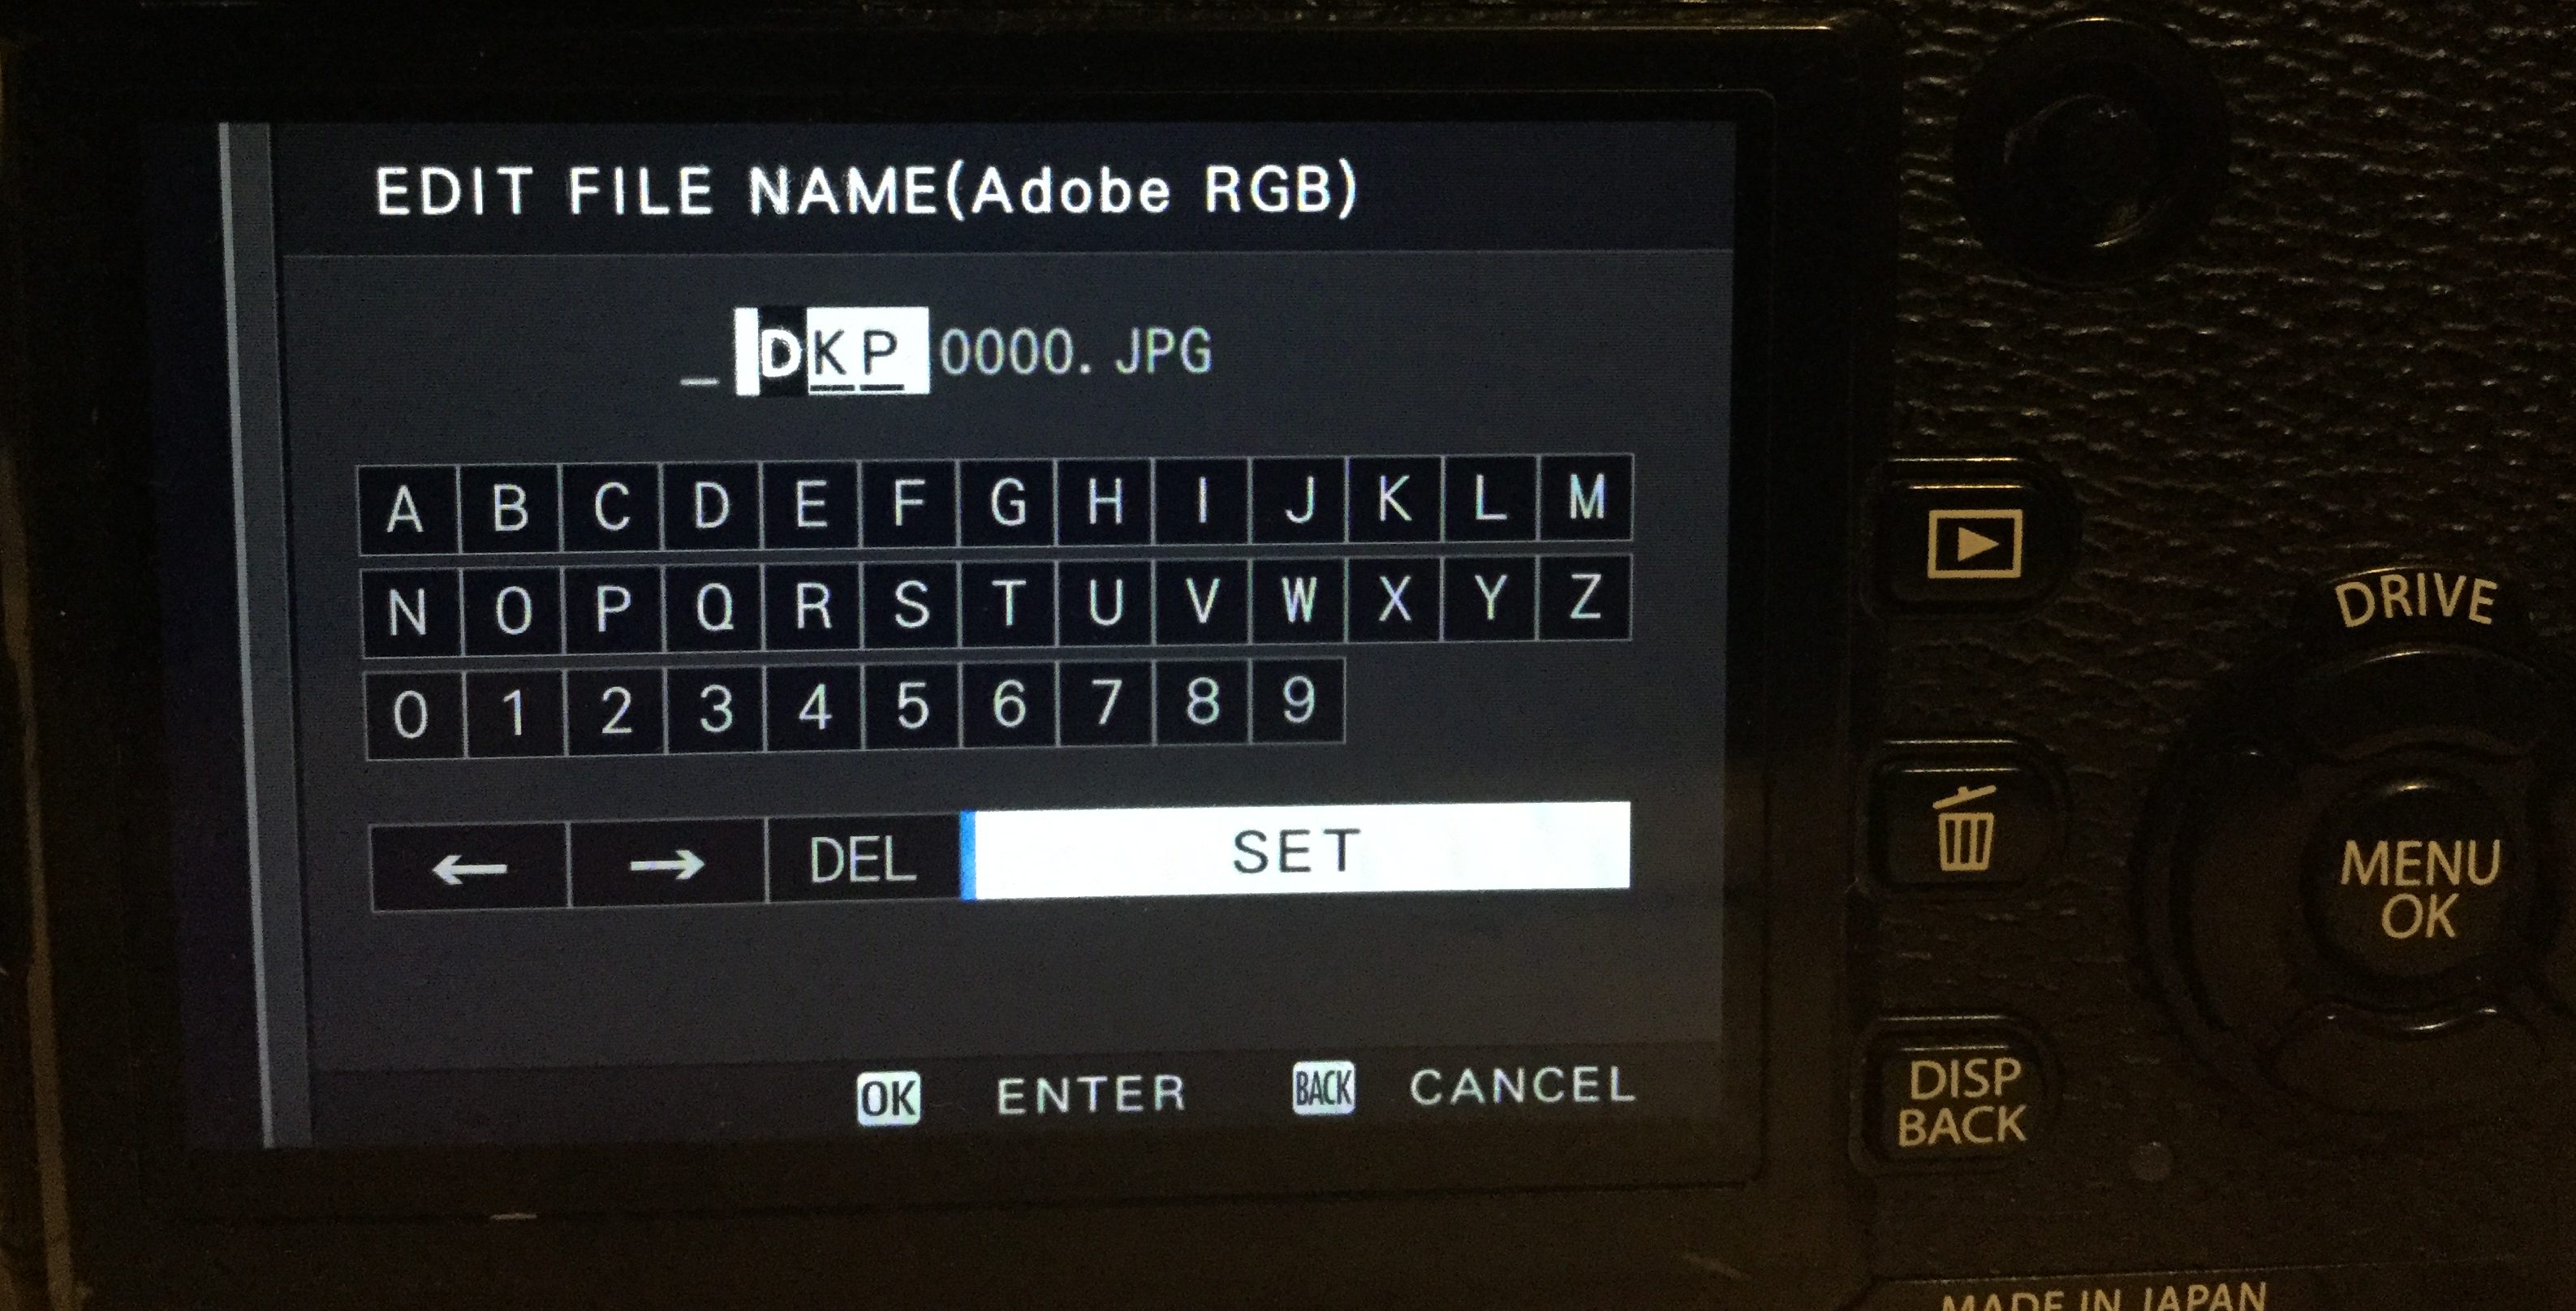
Edit File Name: I like custom file names. It helps me keep track of my files and just adds a little custom take on my stuff. By default the camera uses the Sony based three and four-letter system. DSC for sRBG and DSCF for Adobe RGB images is placed before the numbers for each file.
The process is very easy to change the letters to anything you like. I use my initials DKP and DKP0 but I know some people use a code linked to a job they are working or a project title.
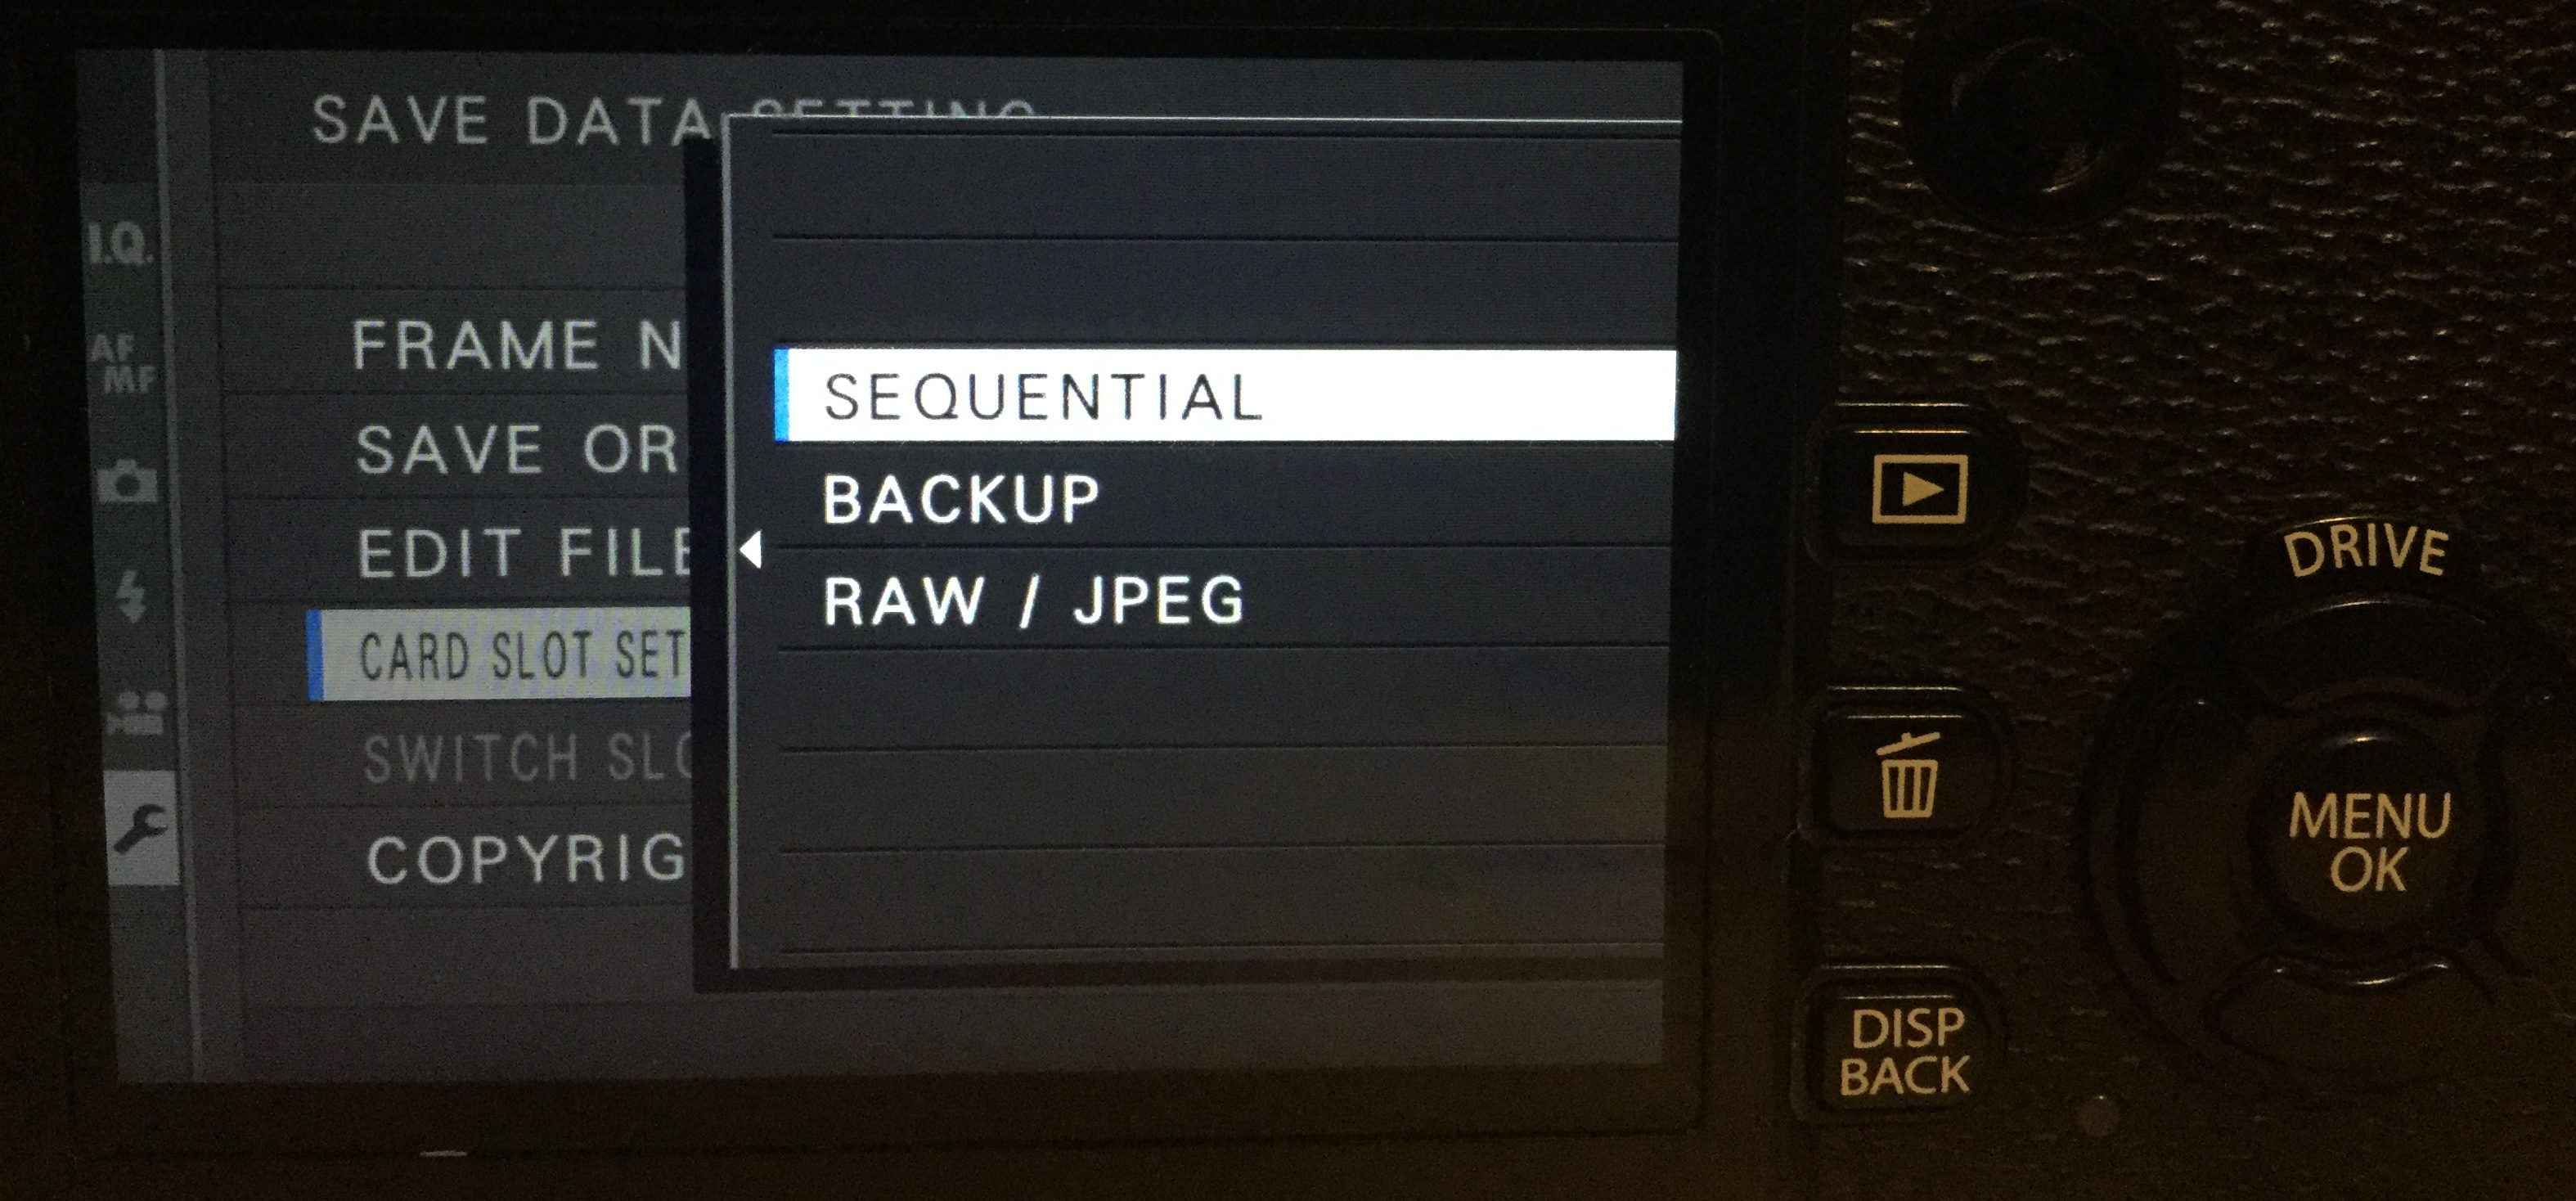
Card Slot Setting (Still Images): This is a very popular setting and something many people look for. Most Fujifilm cameras have dual card slots. This is the setting that gives us control over how the camera saves the images.
Sequential mode means that you will fill one card up, then the other. If you are using Backup mode and using RAW+JEPG, both cards will have an identical set of images. Meaning the camera will be saving FOUR images each time you click the shutter button. RAW / JPEG modem in simple saves RAWS to one card and JEPGS to the other.
Below is what the manual says:
SEQUENTIAL: The card in the second slot is used only when the card in the first slot is full.
BACKUP: Each picture is recorded twice, once to each card.
RAW / JPEG: As for SEQUENTIAL, except that the RAW copy of pictures taken with FINE + RAW or NORMAL + RAW selected for IMAGE QUALITY SETTING > IMAGE QUALITY will be saved to the card in the first slot and the JPEG copy to the card in the second slot.
Switch Card Slot: Pick which card you want to use if you are using Sequential mode
Select Folder: Some cameras can create folders on the SD card. Use this setting to create and name them.
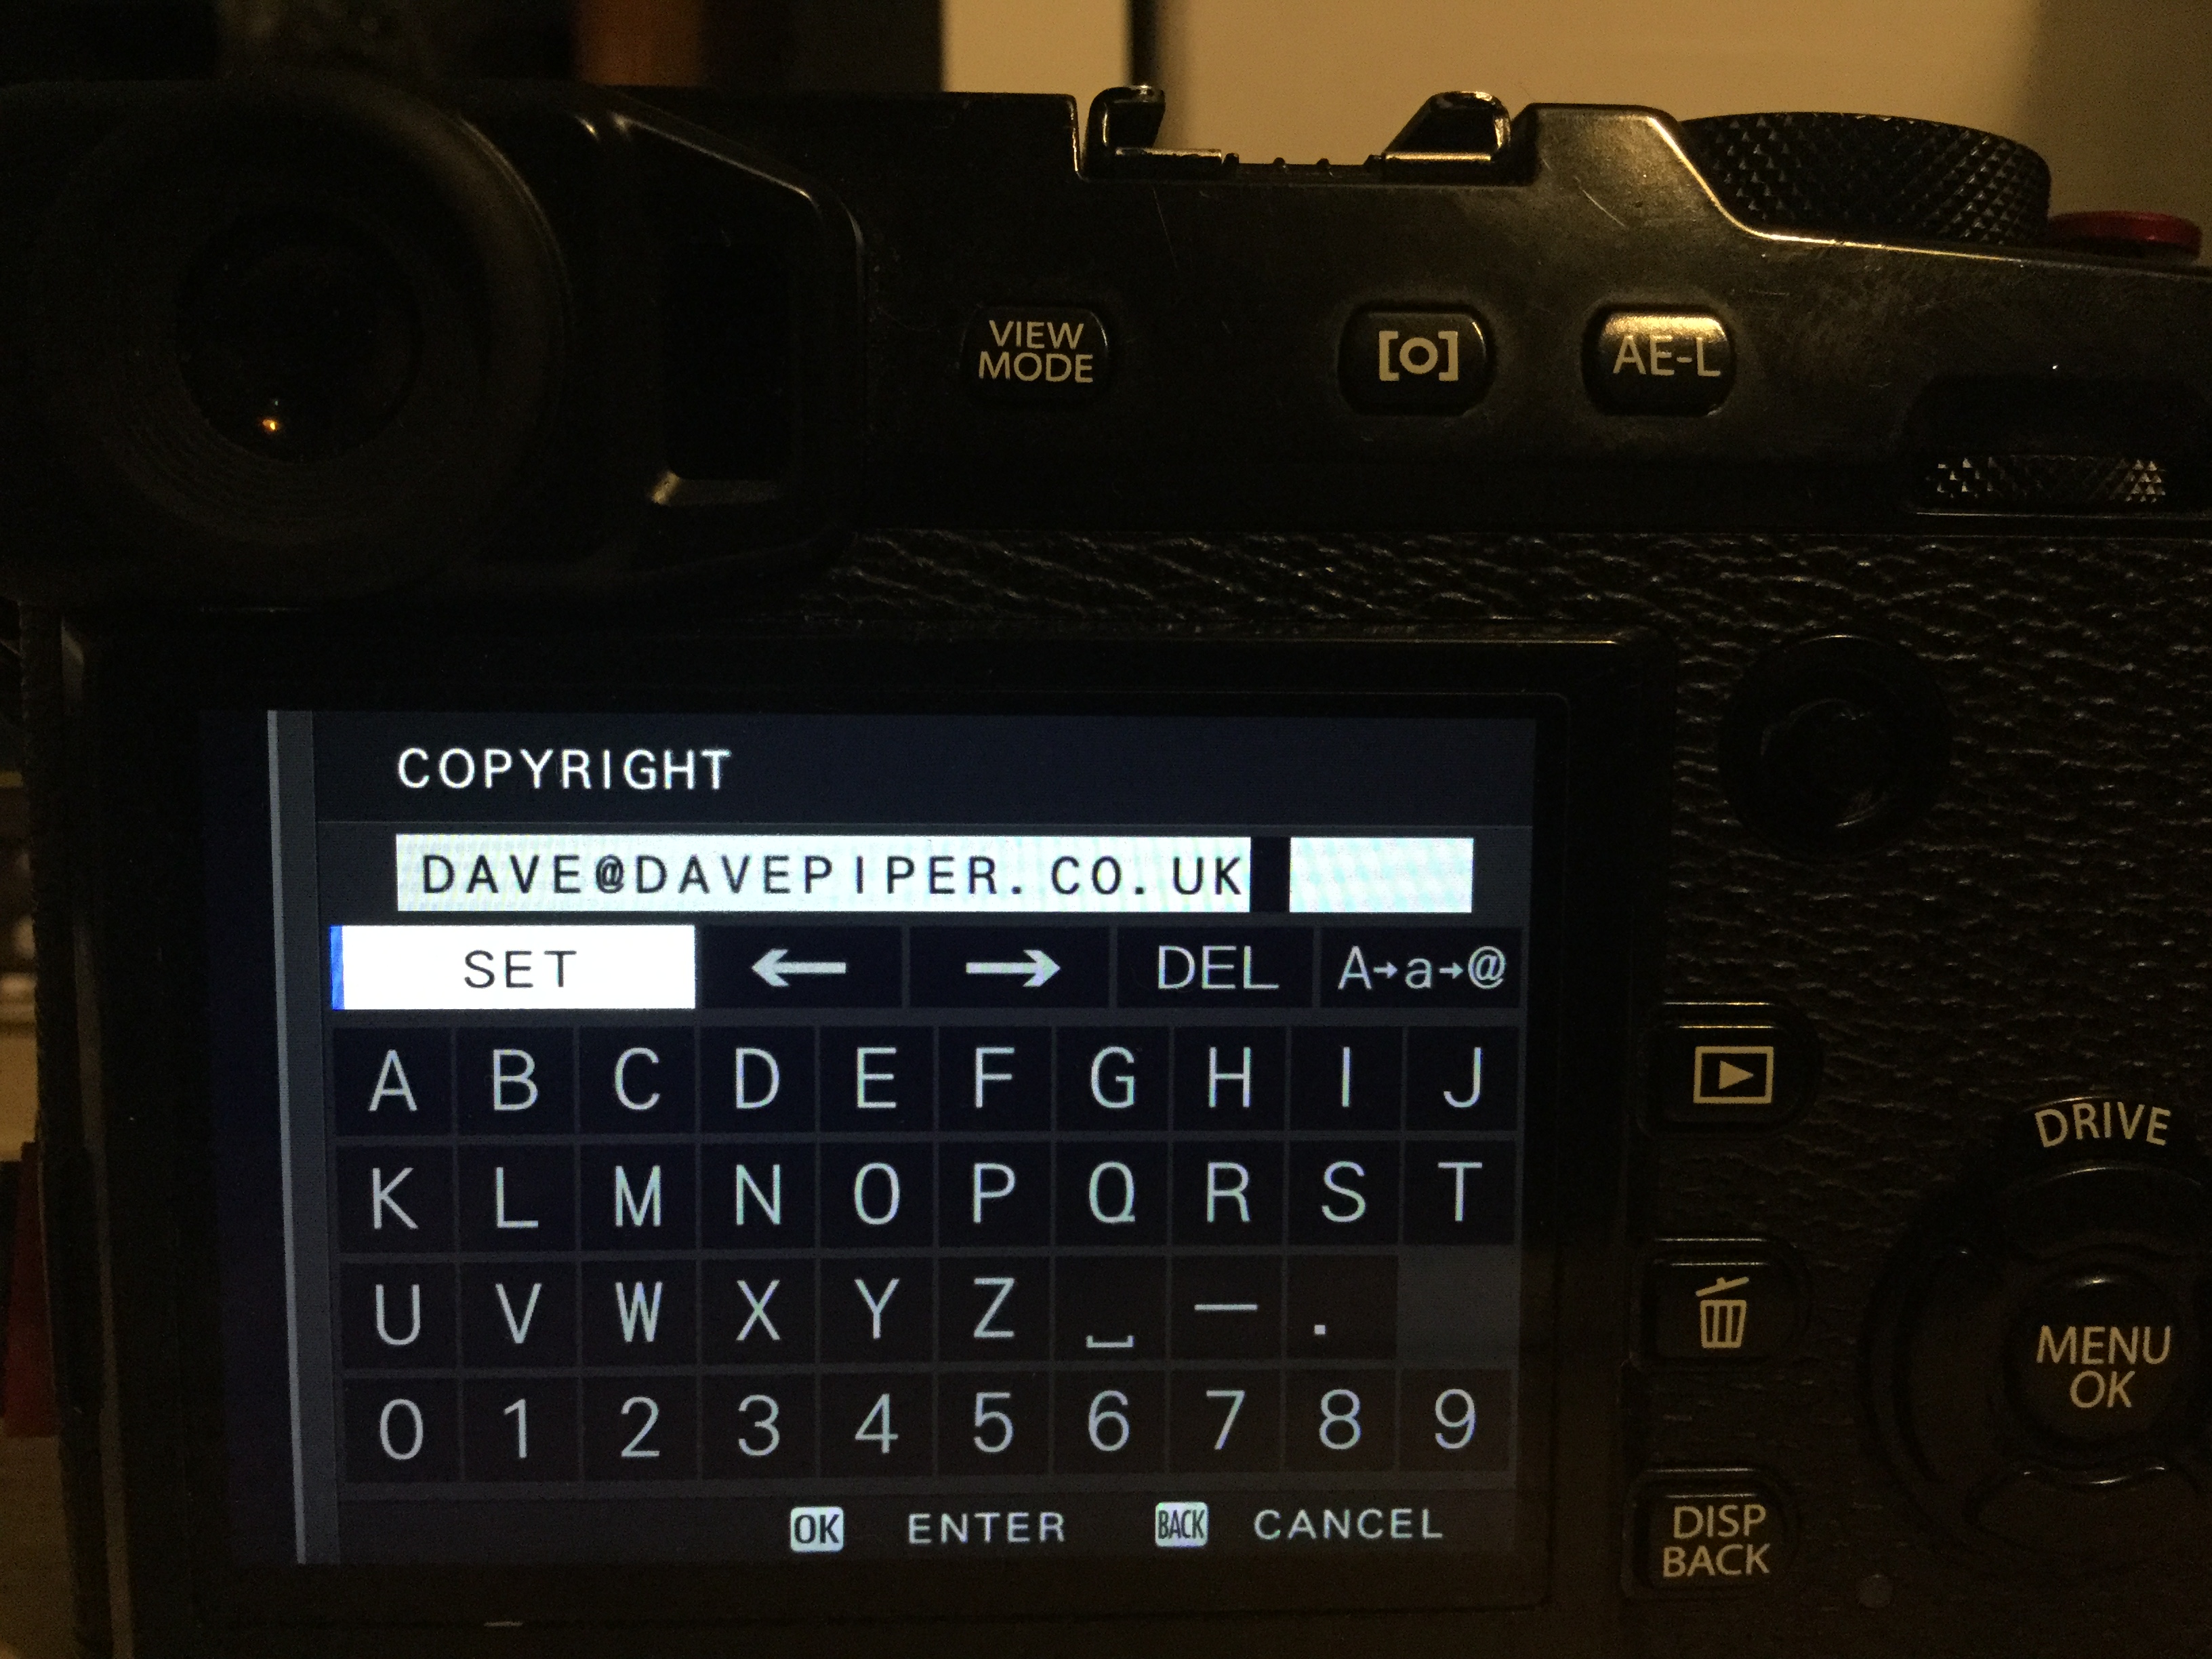
Copyright Information: Adding in your contact info and copyright info directly into your RAW EXIF data is a good idea. In fact, it should be something we all do. I feel that strongly about this I might just do a whole whole blog on this topic.

Connection Setup: There is a full blog coming about linking up and syncing up your camera and connection set-up options.
This is part two of a two-part article. Click here for part one.