A couple of weeks ago my dog had an accident with the chemicals which some stupid constructors works left on my terrace without telling me. She (my dog is a she, not an it, I’m afraid) had an eye injured to the level that she could lose her sight from it. The doctors prescribed a cure which included staying home and taking several different eye-drops every two hours, which, at the same time, forced me staying home instead that going with the rest of the family on holidays on the beach.

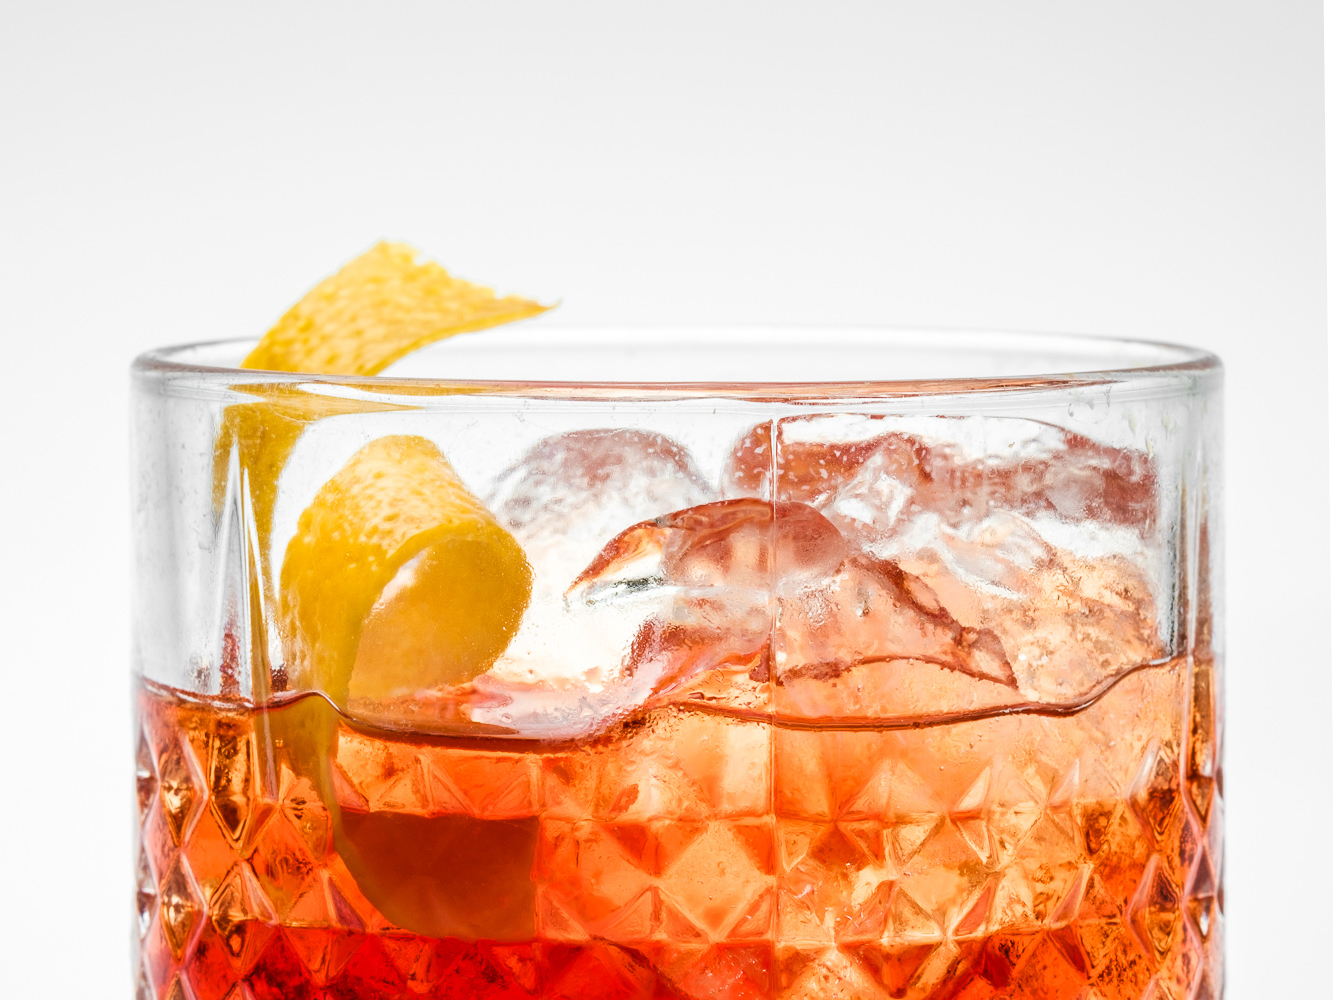
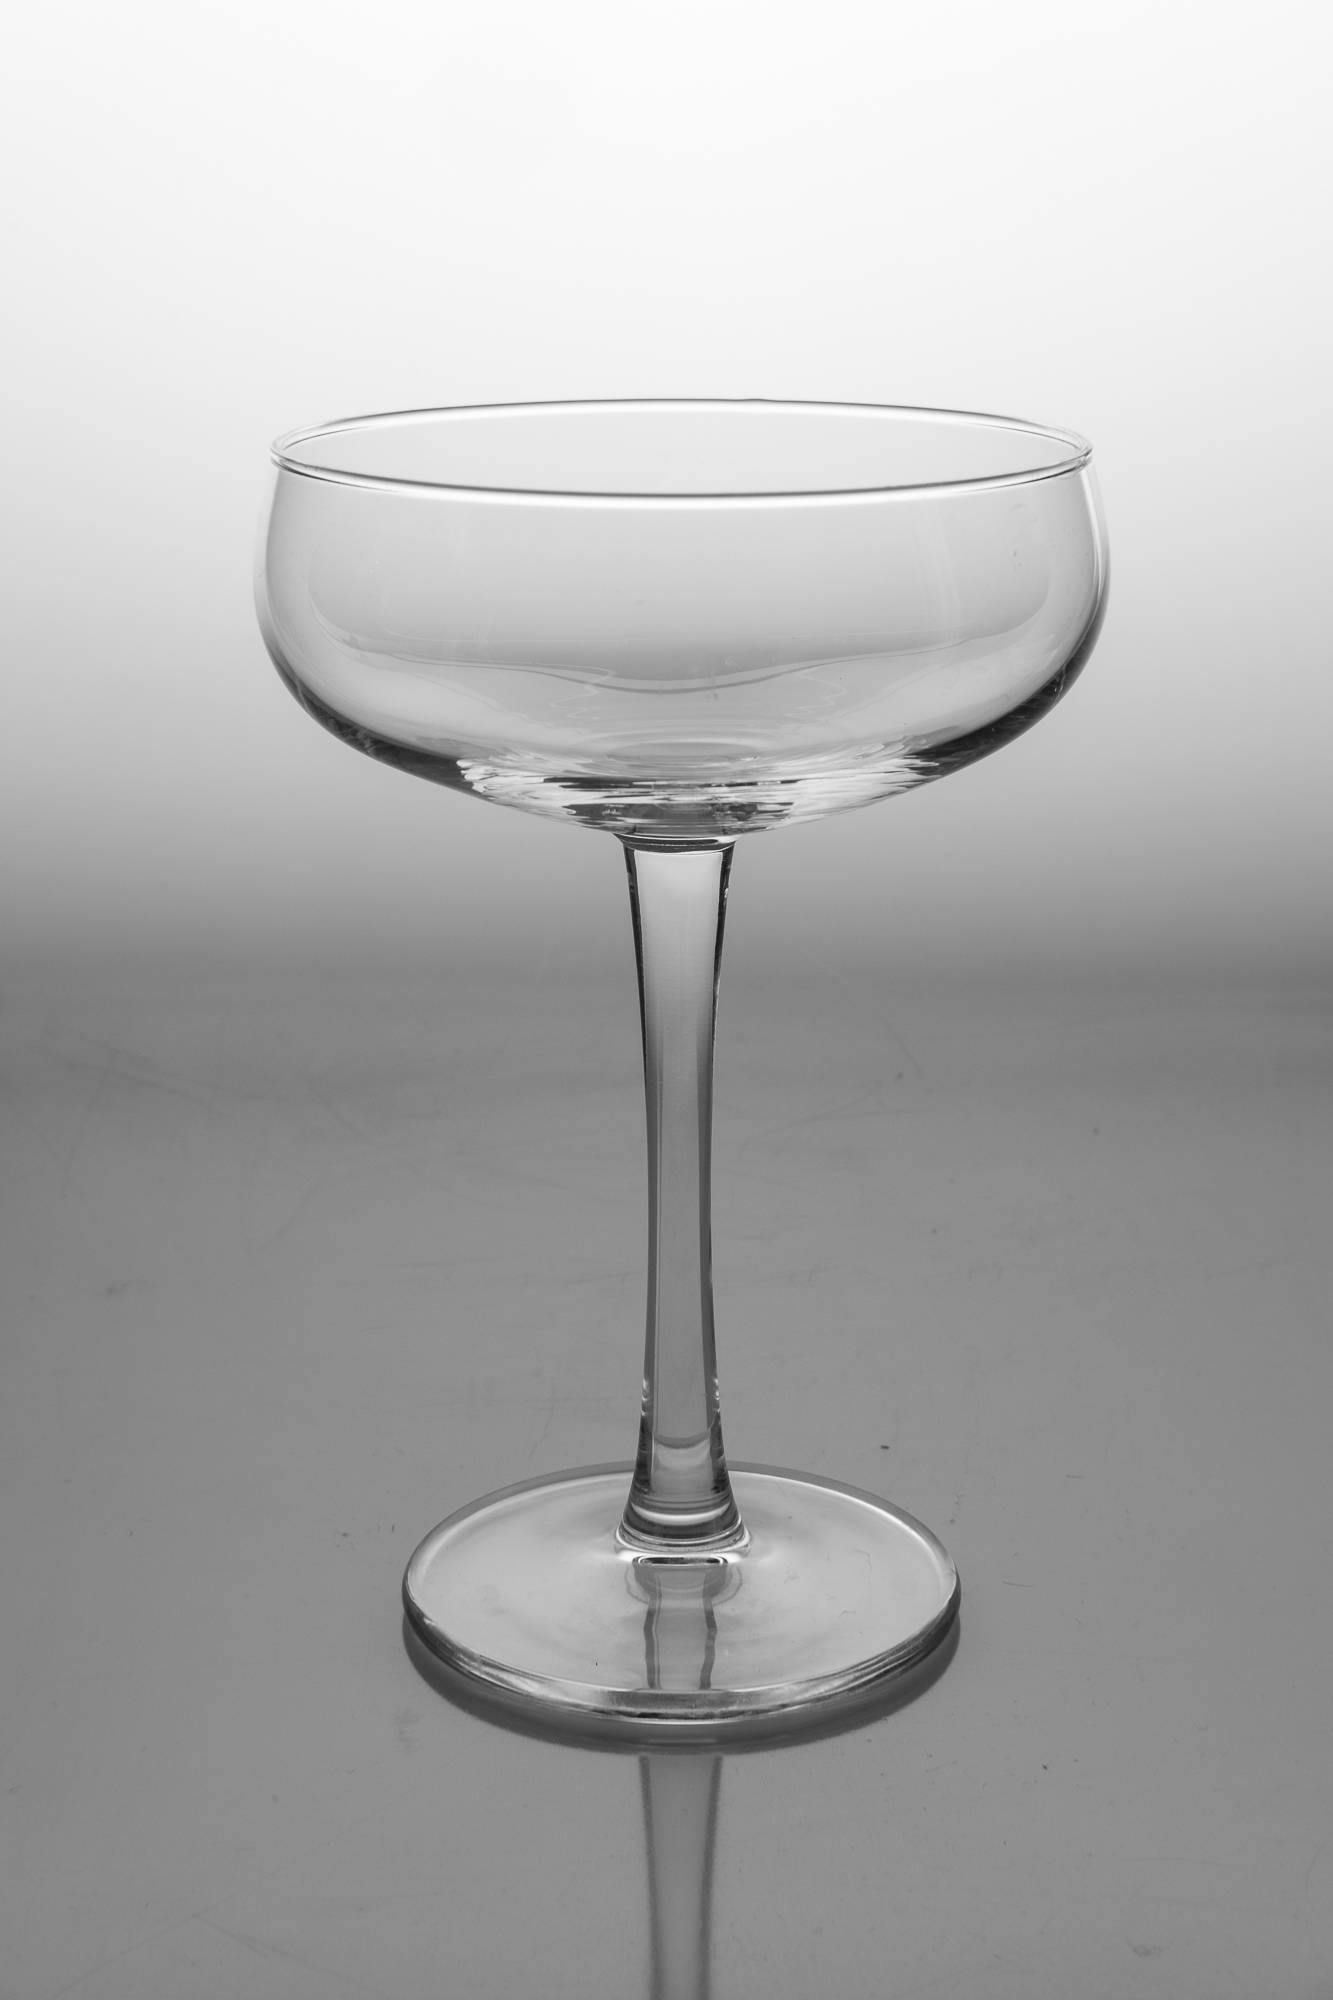
A cocktail glass will be the “test product” for today’s tutorial on the use of the still life table. I love the vertical tilting of the X-T2 screen!
First of all, the dog is now fine! She can stay out, so can I, so I’ll see my family pretty soon. This said, I used those few days extra at home to clean up my studio, which gets always messy during high season, and while doing so I noticed a piece of equipment I never talked to you about.
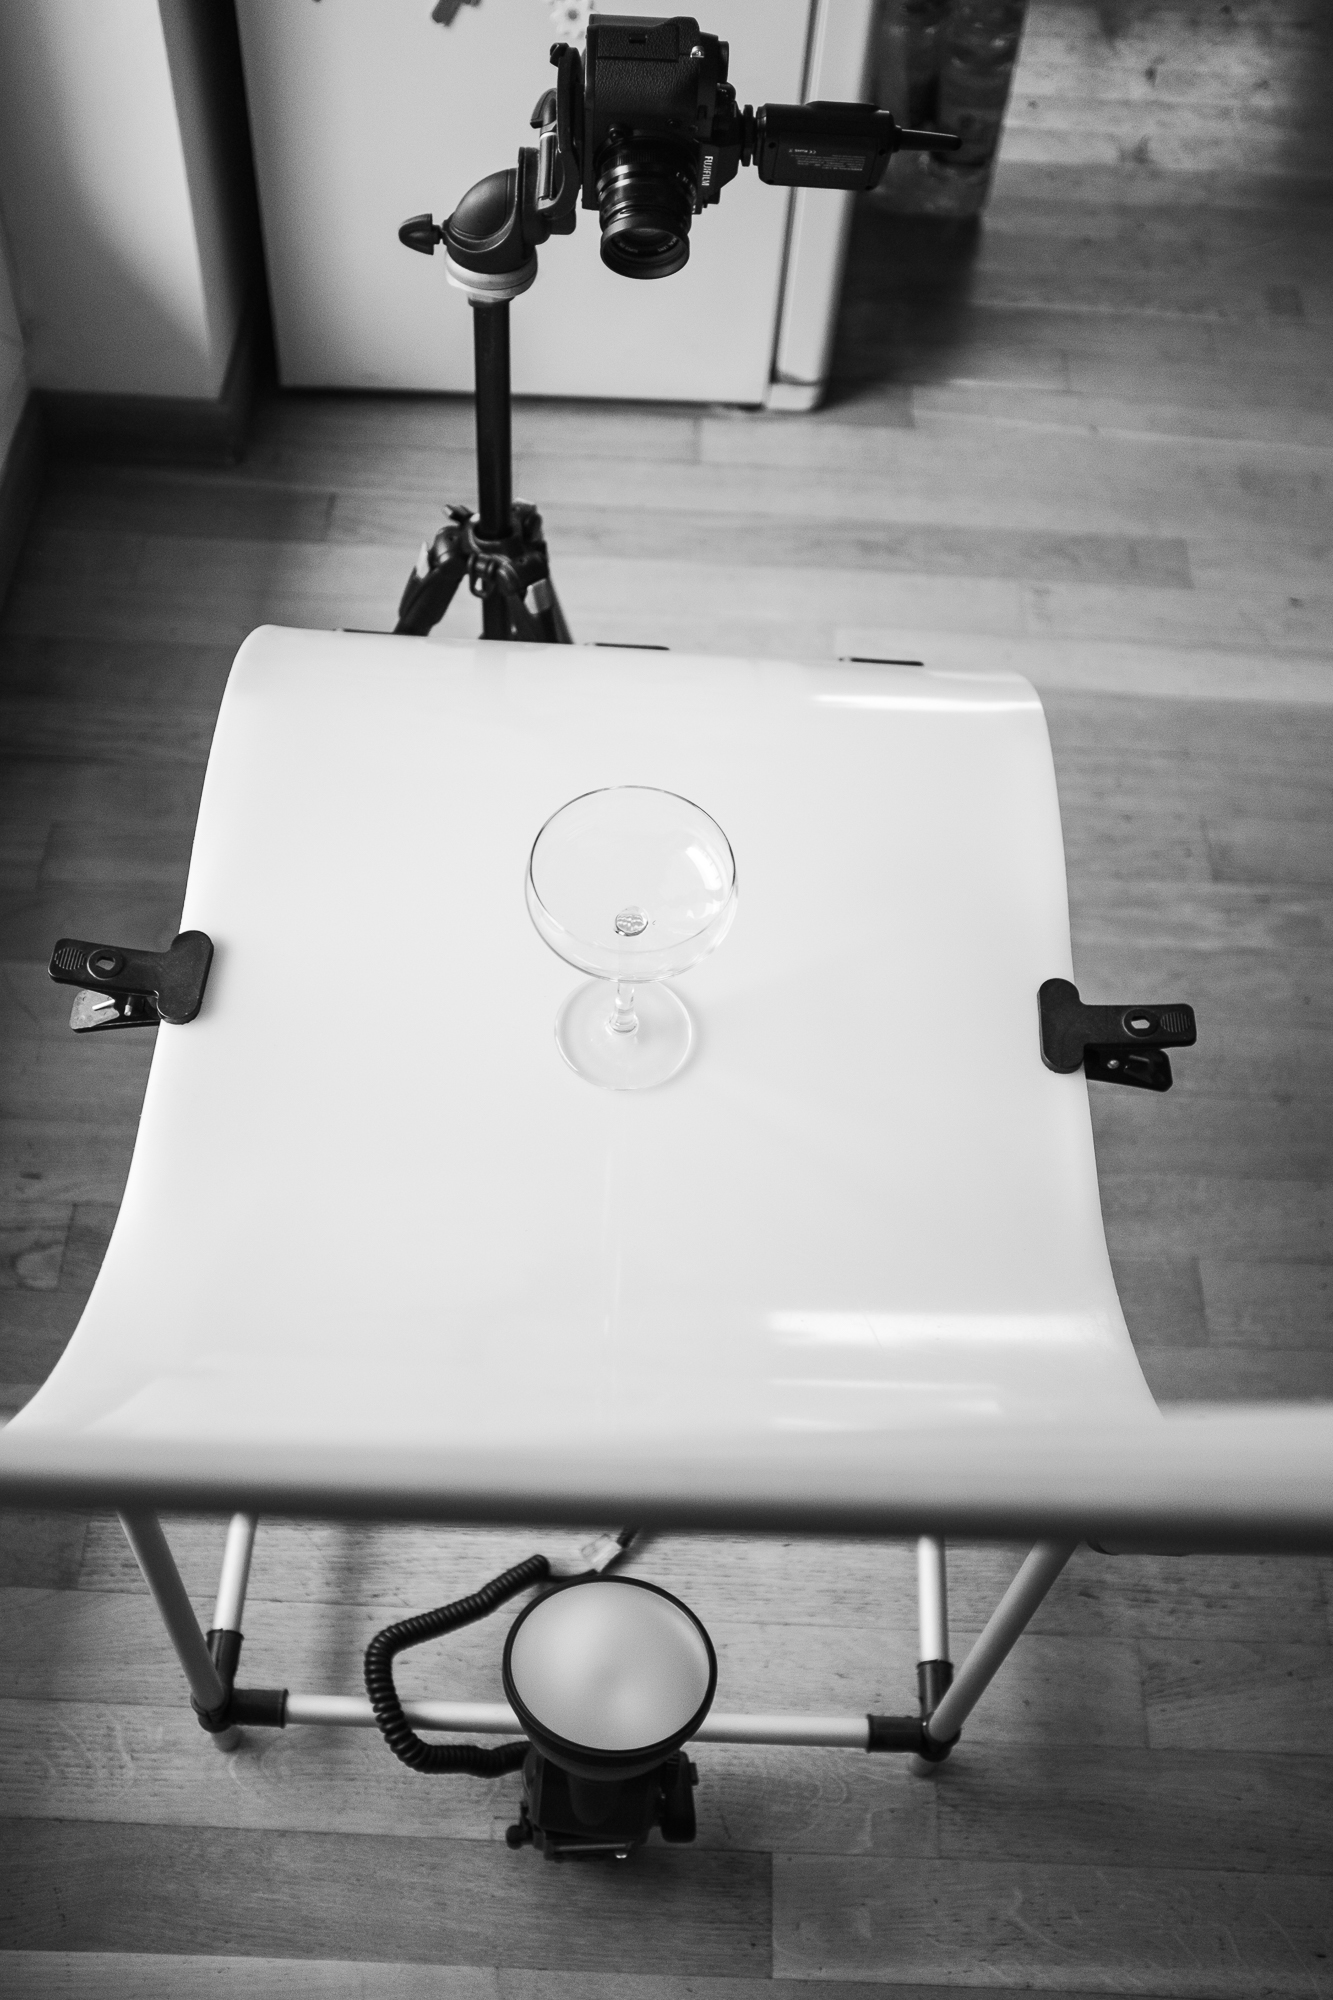
Here you can see how I placed the 2nd light (more on it on the light scheme later on).
It’s the still life table, a cheap and simple piece of equipment that can be really useful when dealing with product photography, especially of shiny, glassy, glossy, transparent, or opalescent subjects. When I said cheap, I meant that the still life table is really a simple thing, made of a structure that does nothing else than keeping a white PVC sheet in its proper position. Unless you have to mount and dismount it often for using in different locations, you don’t need to go big brand on this – just be careful not to scratch it too much or it will become a hell to clean up in post production later on.

This one is the 1st light as from the scheme in the article. You can also see the 2nd and the 3rd lights under the still life table.
Thanks to the opalescence and the “limbo-like” shape of the white PVC sheet, the still life table allows you to professionally capture super-polished and interestingly-lighted product photographs. The opalescence lets the light (from a flash, a continuous led headlight, or whatever else you want to use) to come through the sheet and, at the same time, to hit the product. So, depending on where and how to place the lights, you can get several different light effects on the table. The limbo-like shape, instead, allows the background to fade evenly, without any angles or thresholds showing up.
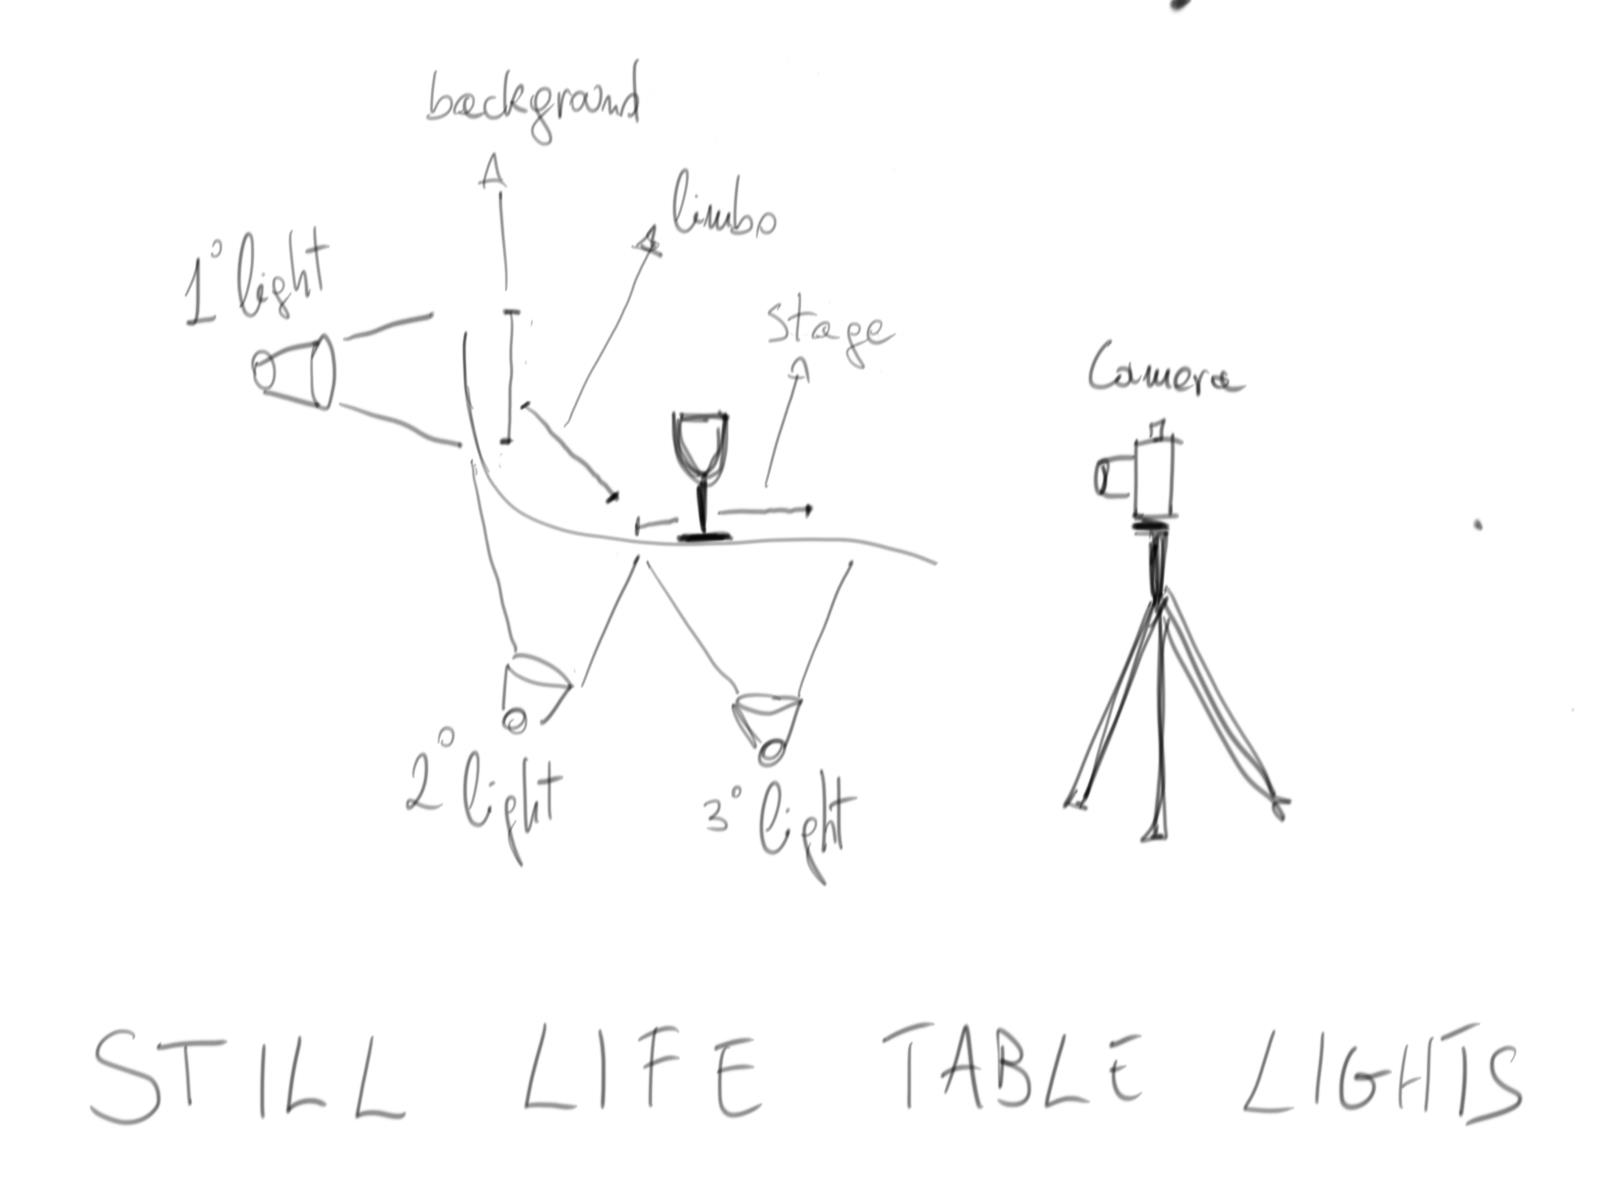
There are three basic lights you want to know how to use with a still life table, with which you can create the main and most useful effects. You don’t need to use all of them, in fact I am going to show you the effect that each one of the three create by its own, then coupled with one of the other, and lastly what happens when you use the three together. For simplicity I am not going to add any colored gels to the flashes, but off course it is something you can (and should, even if just for fun) use. Finally, as the subject for this tutorial, I decided to use a cocktail glass, because by being transparent it allows you to see through it, so it doesn’t cover the light effects in any way. Plus, its nice shapes are wonderfully captured on a still life table, so it serves its purpose fully.
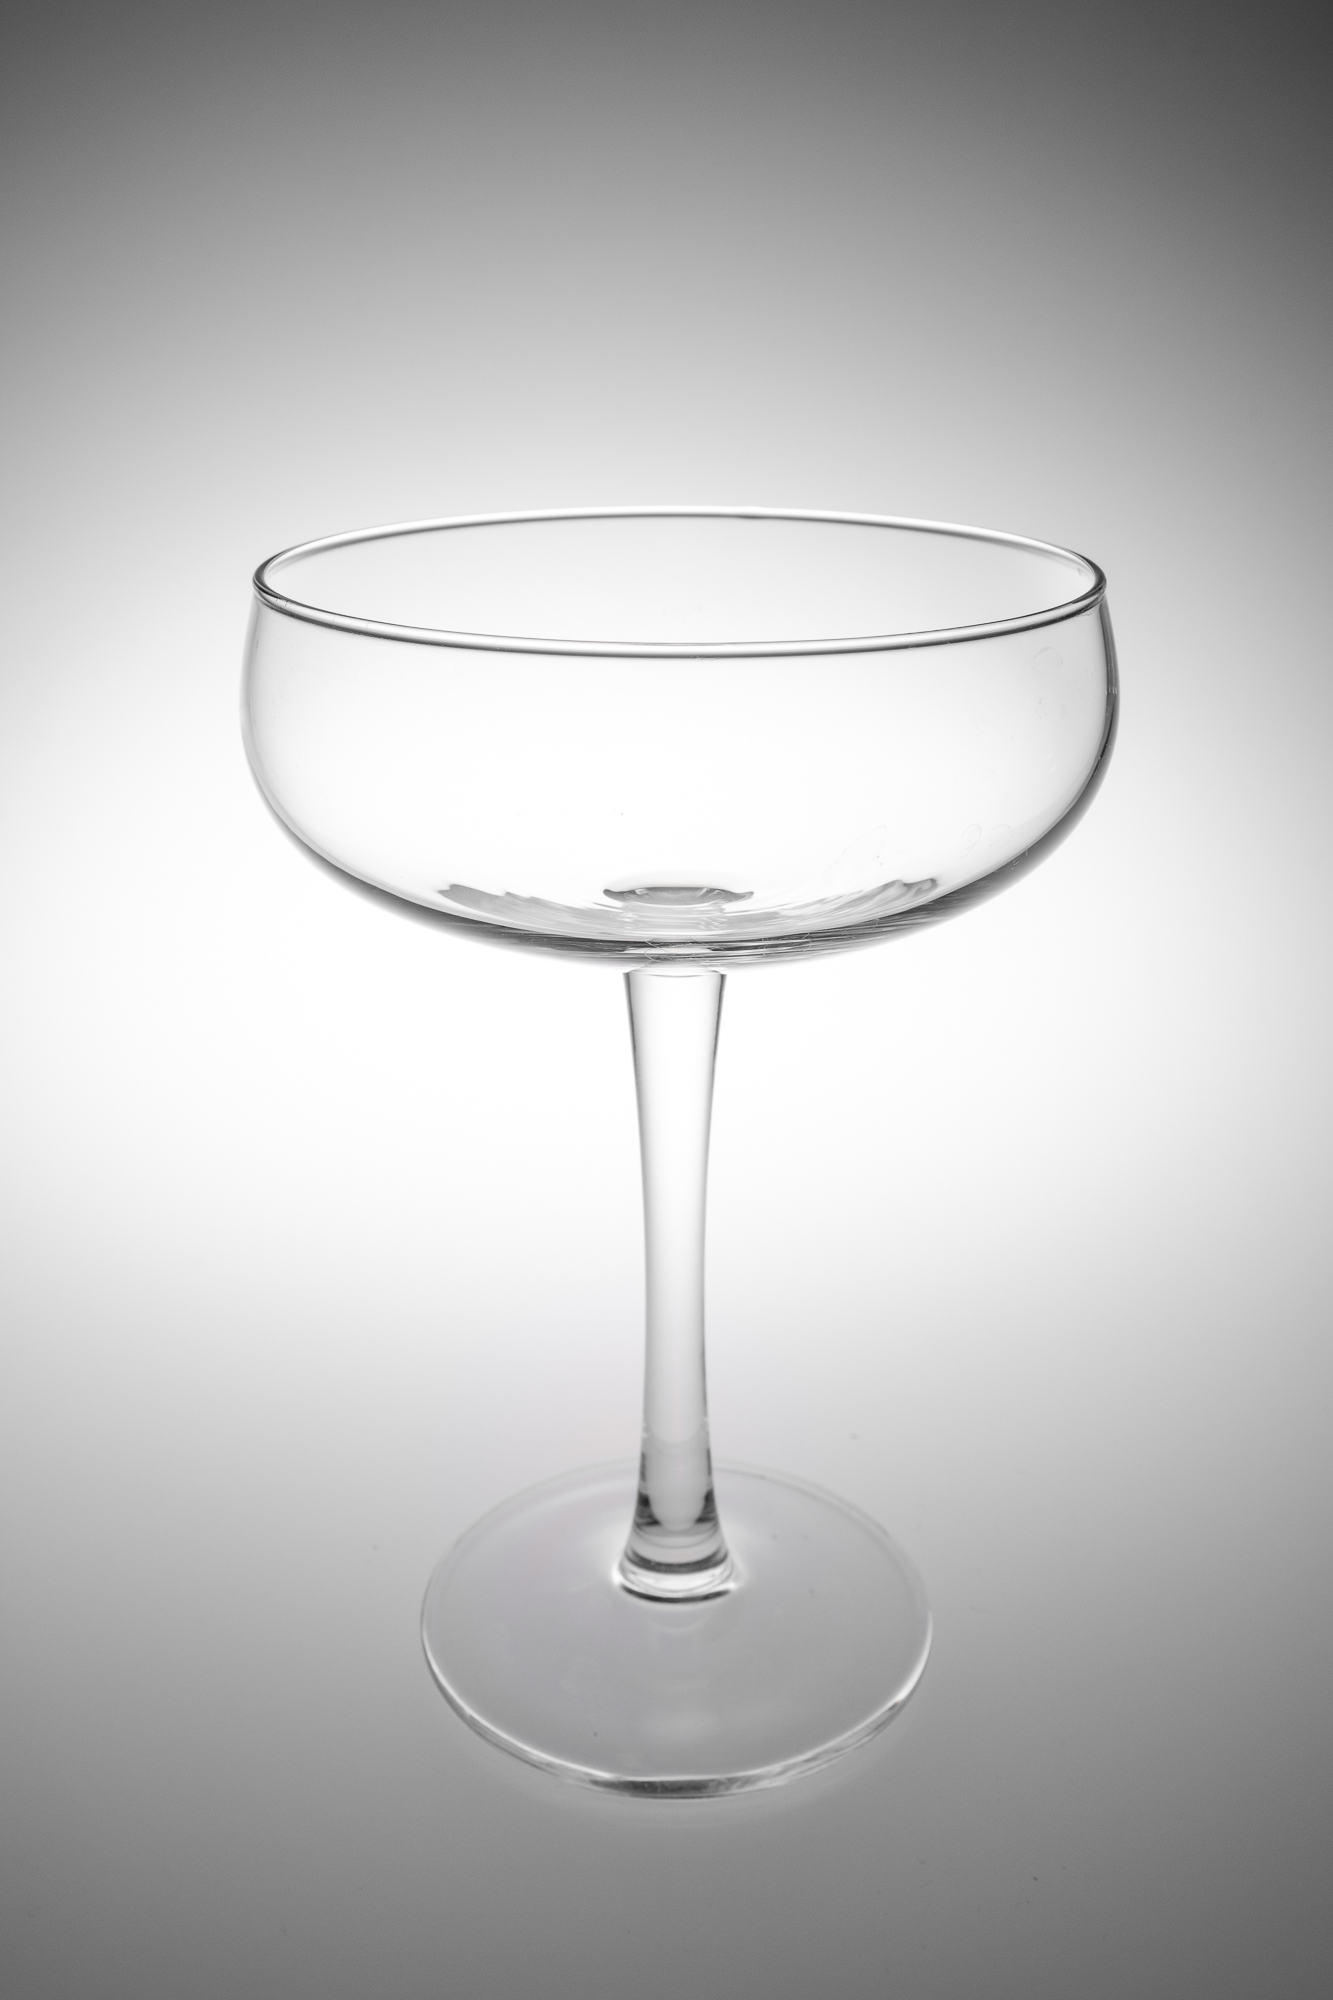
1st light alone. X-T2, f/13, 1/250th, ISO200, 35mm.
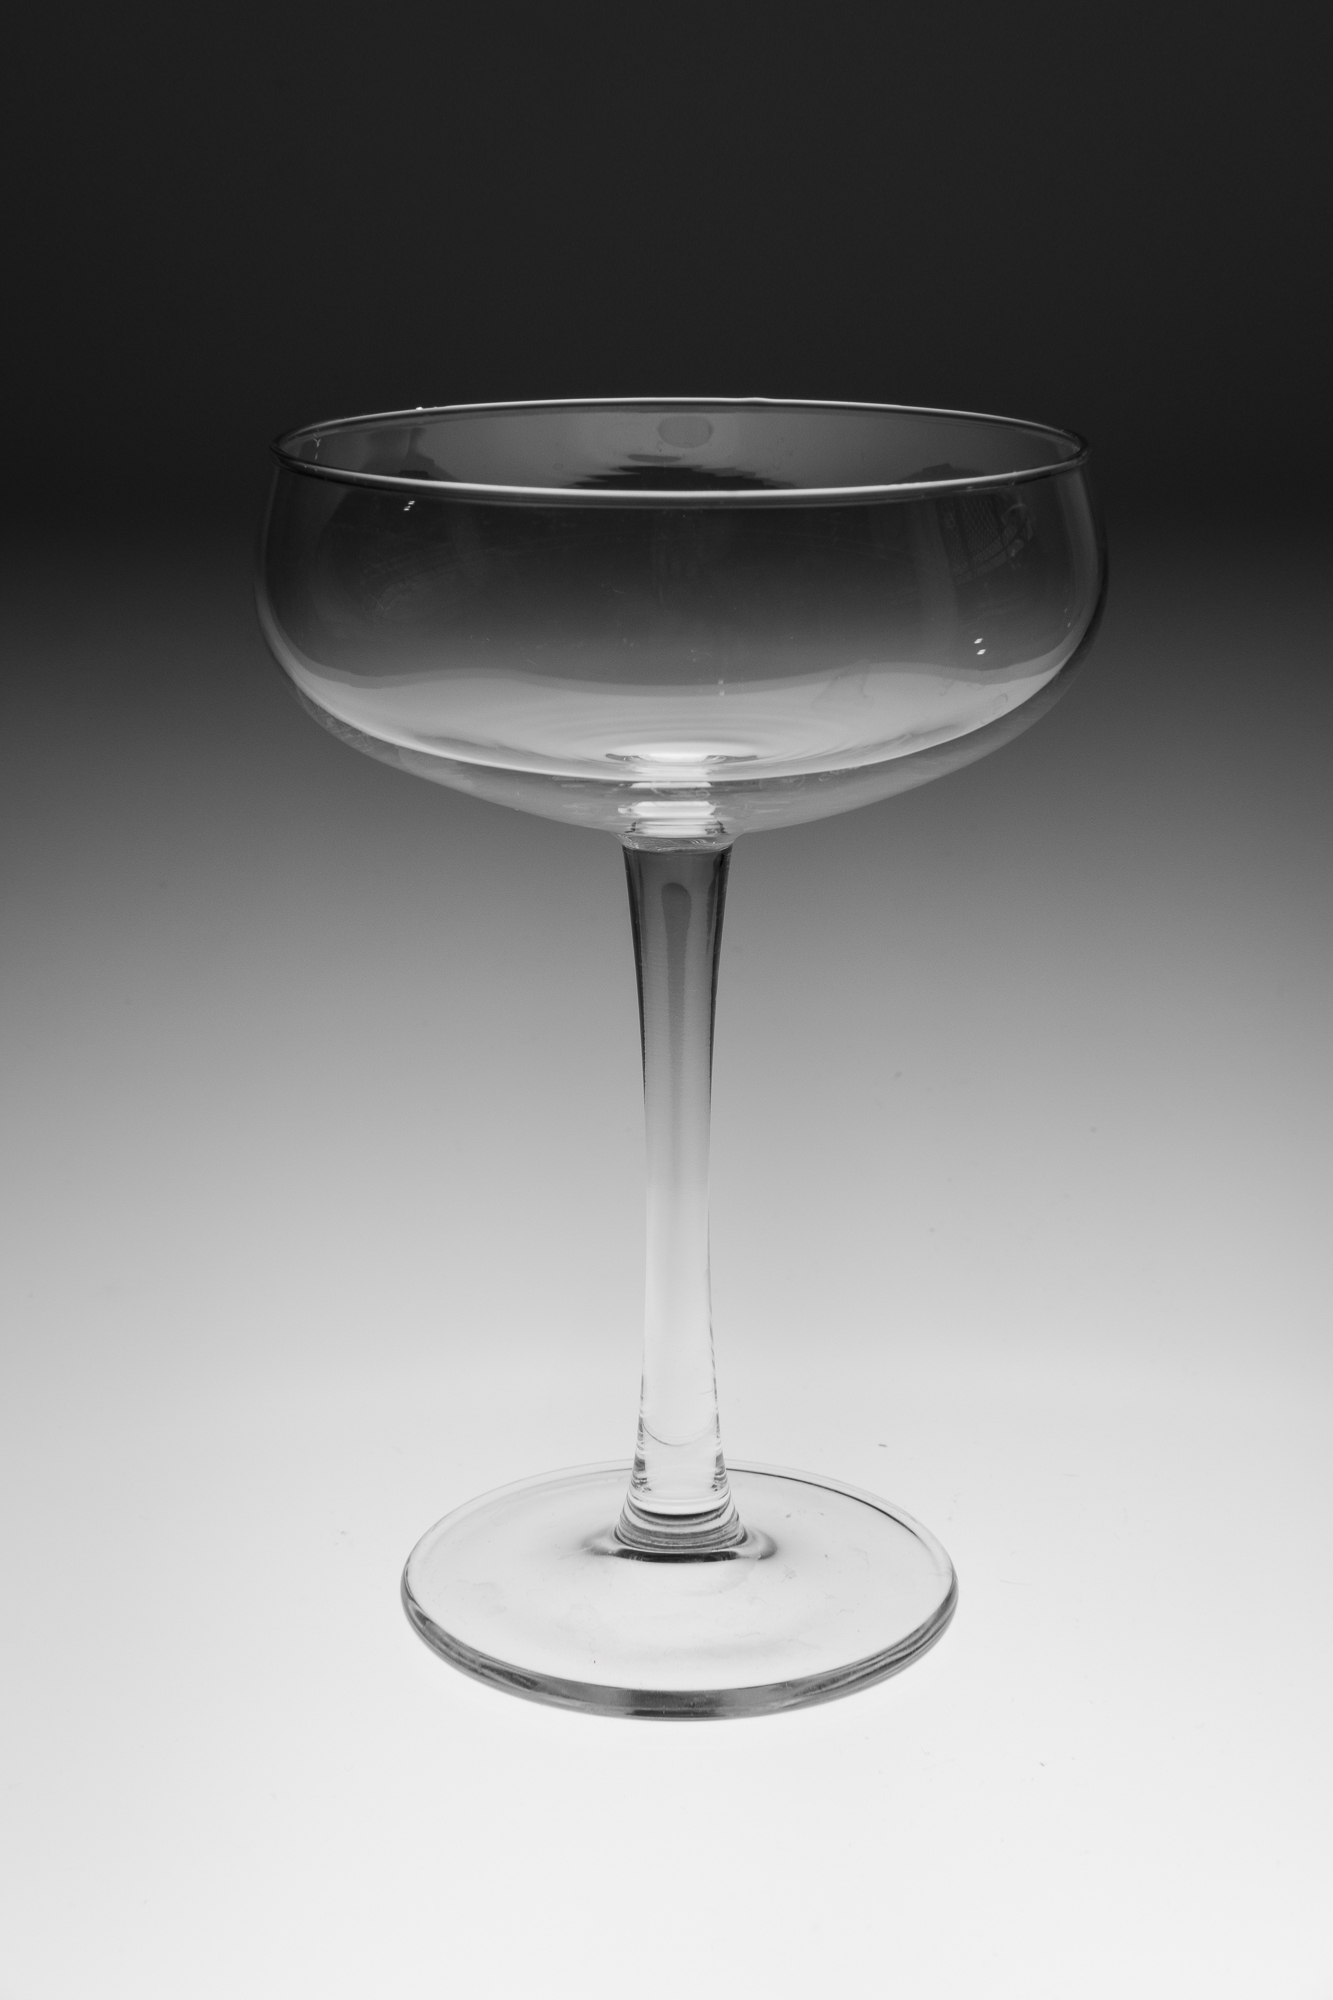
Let’s start from the first light, the one behind the table. This light hits the top part of the PVC sheet, and creates a white top background that evenly fades into a grey stage on which the glass is placed. By not adding any light under the table, this first light scheme is the one that creates the best “glass-effect” under the product, with nice reflections on the grey stage, evenly fading out of the frame. However, this light scheme works only with transparent or strongly opalescent products, because the light is coming only from behind. When dealing with opaque materials, you’ll have to add another light to directly hit the product. Just be careful not to hit too much of the stage if you want to keep the light effects as they were with only the first light.
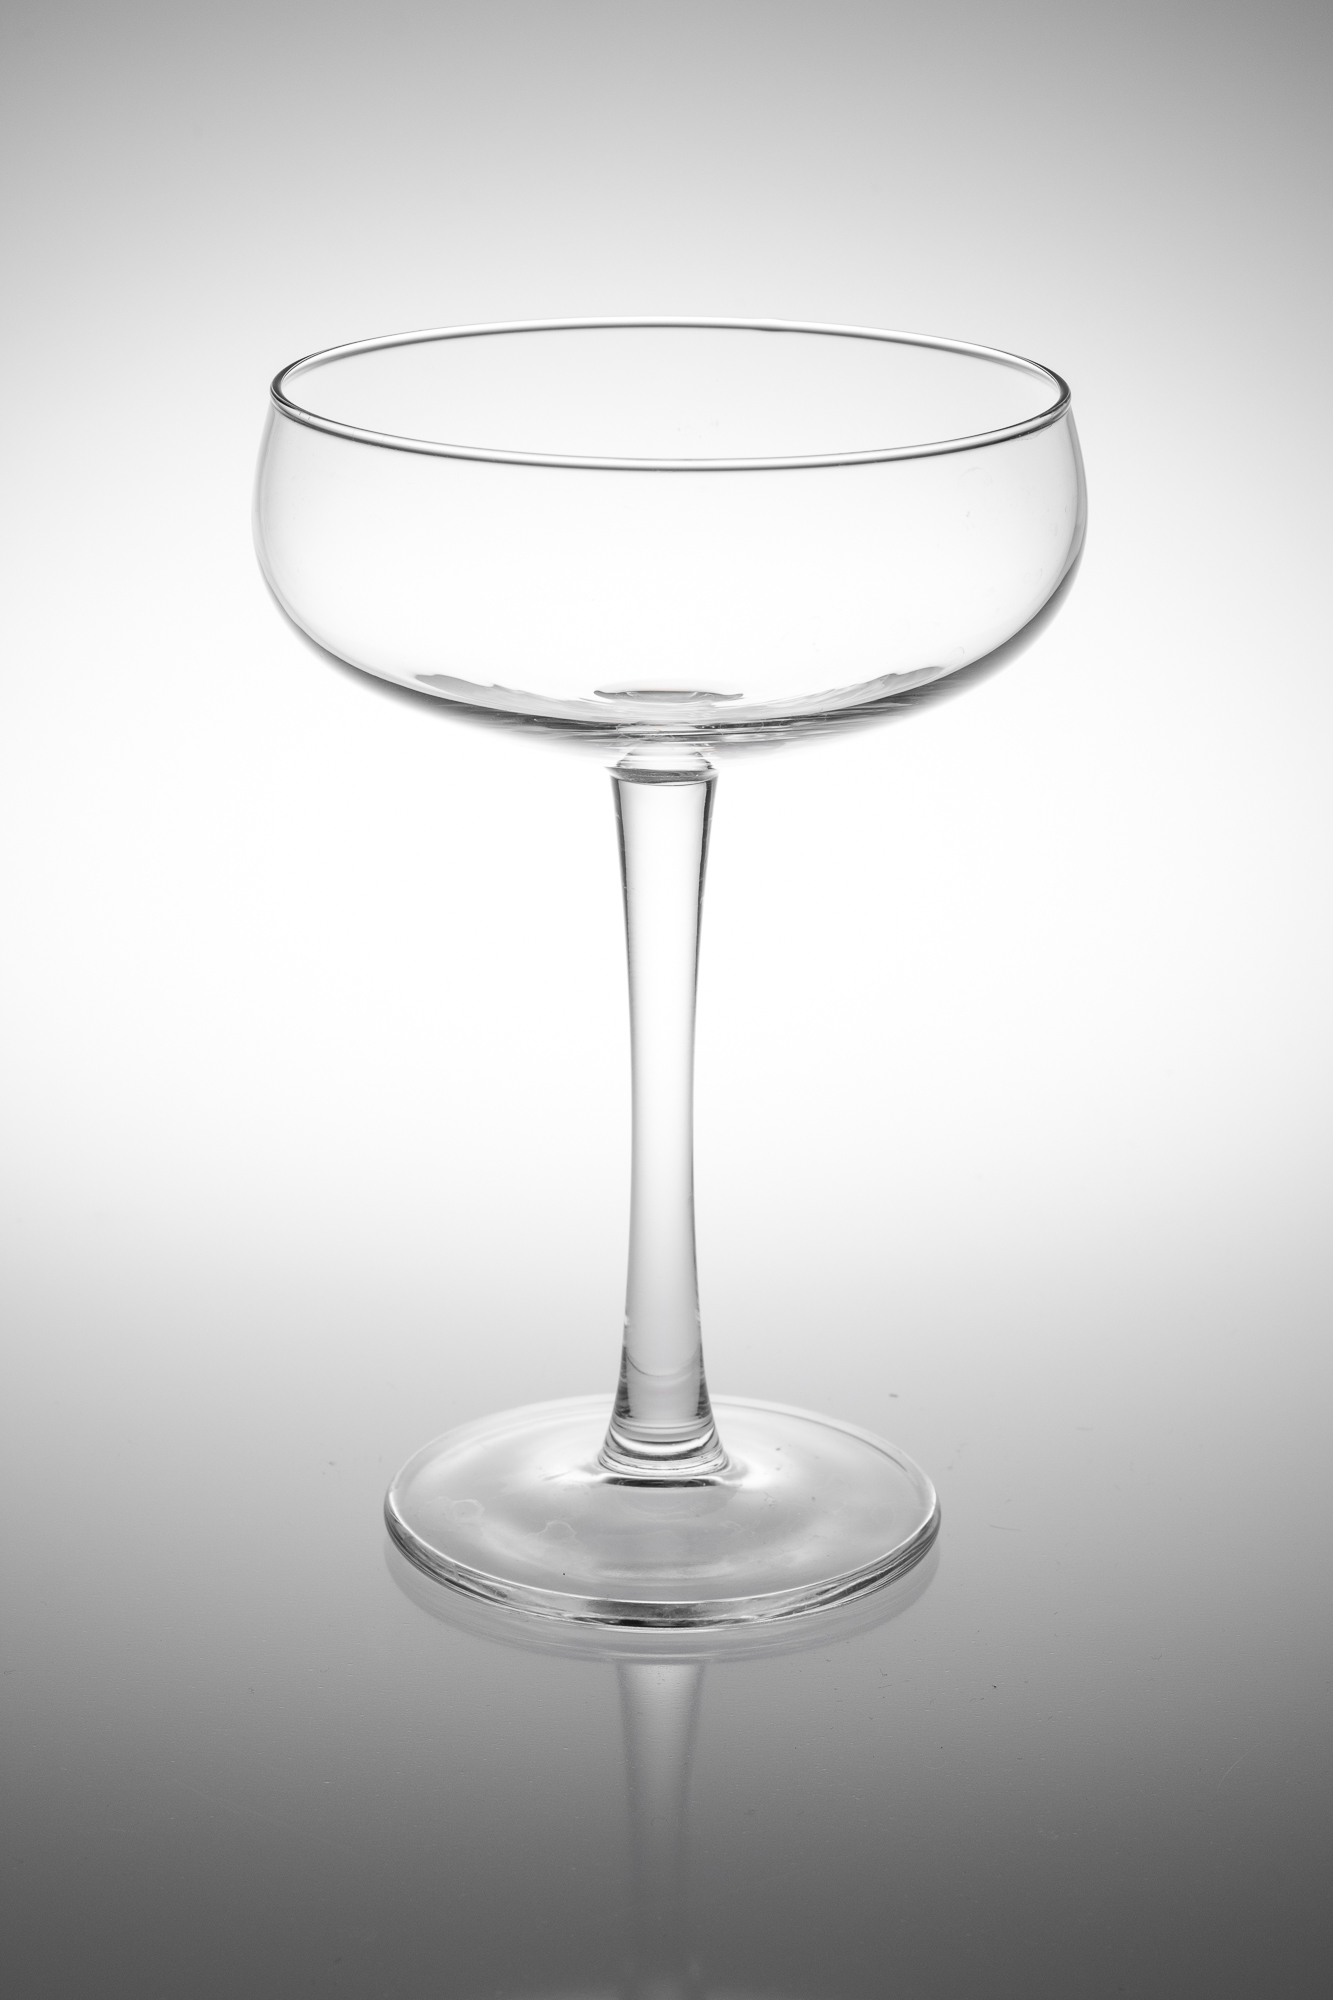
2st light alone. X-T2, f/13, 1/250th, ISO200, 35mm.
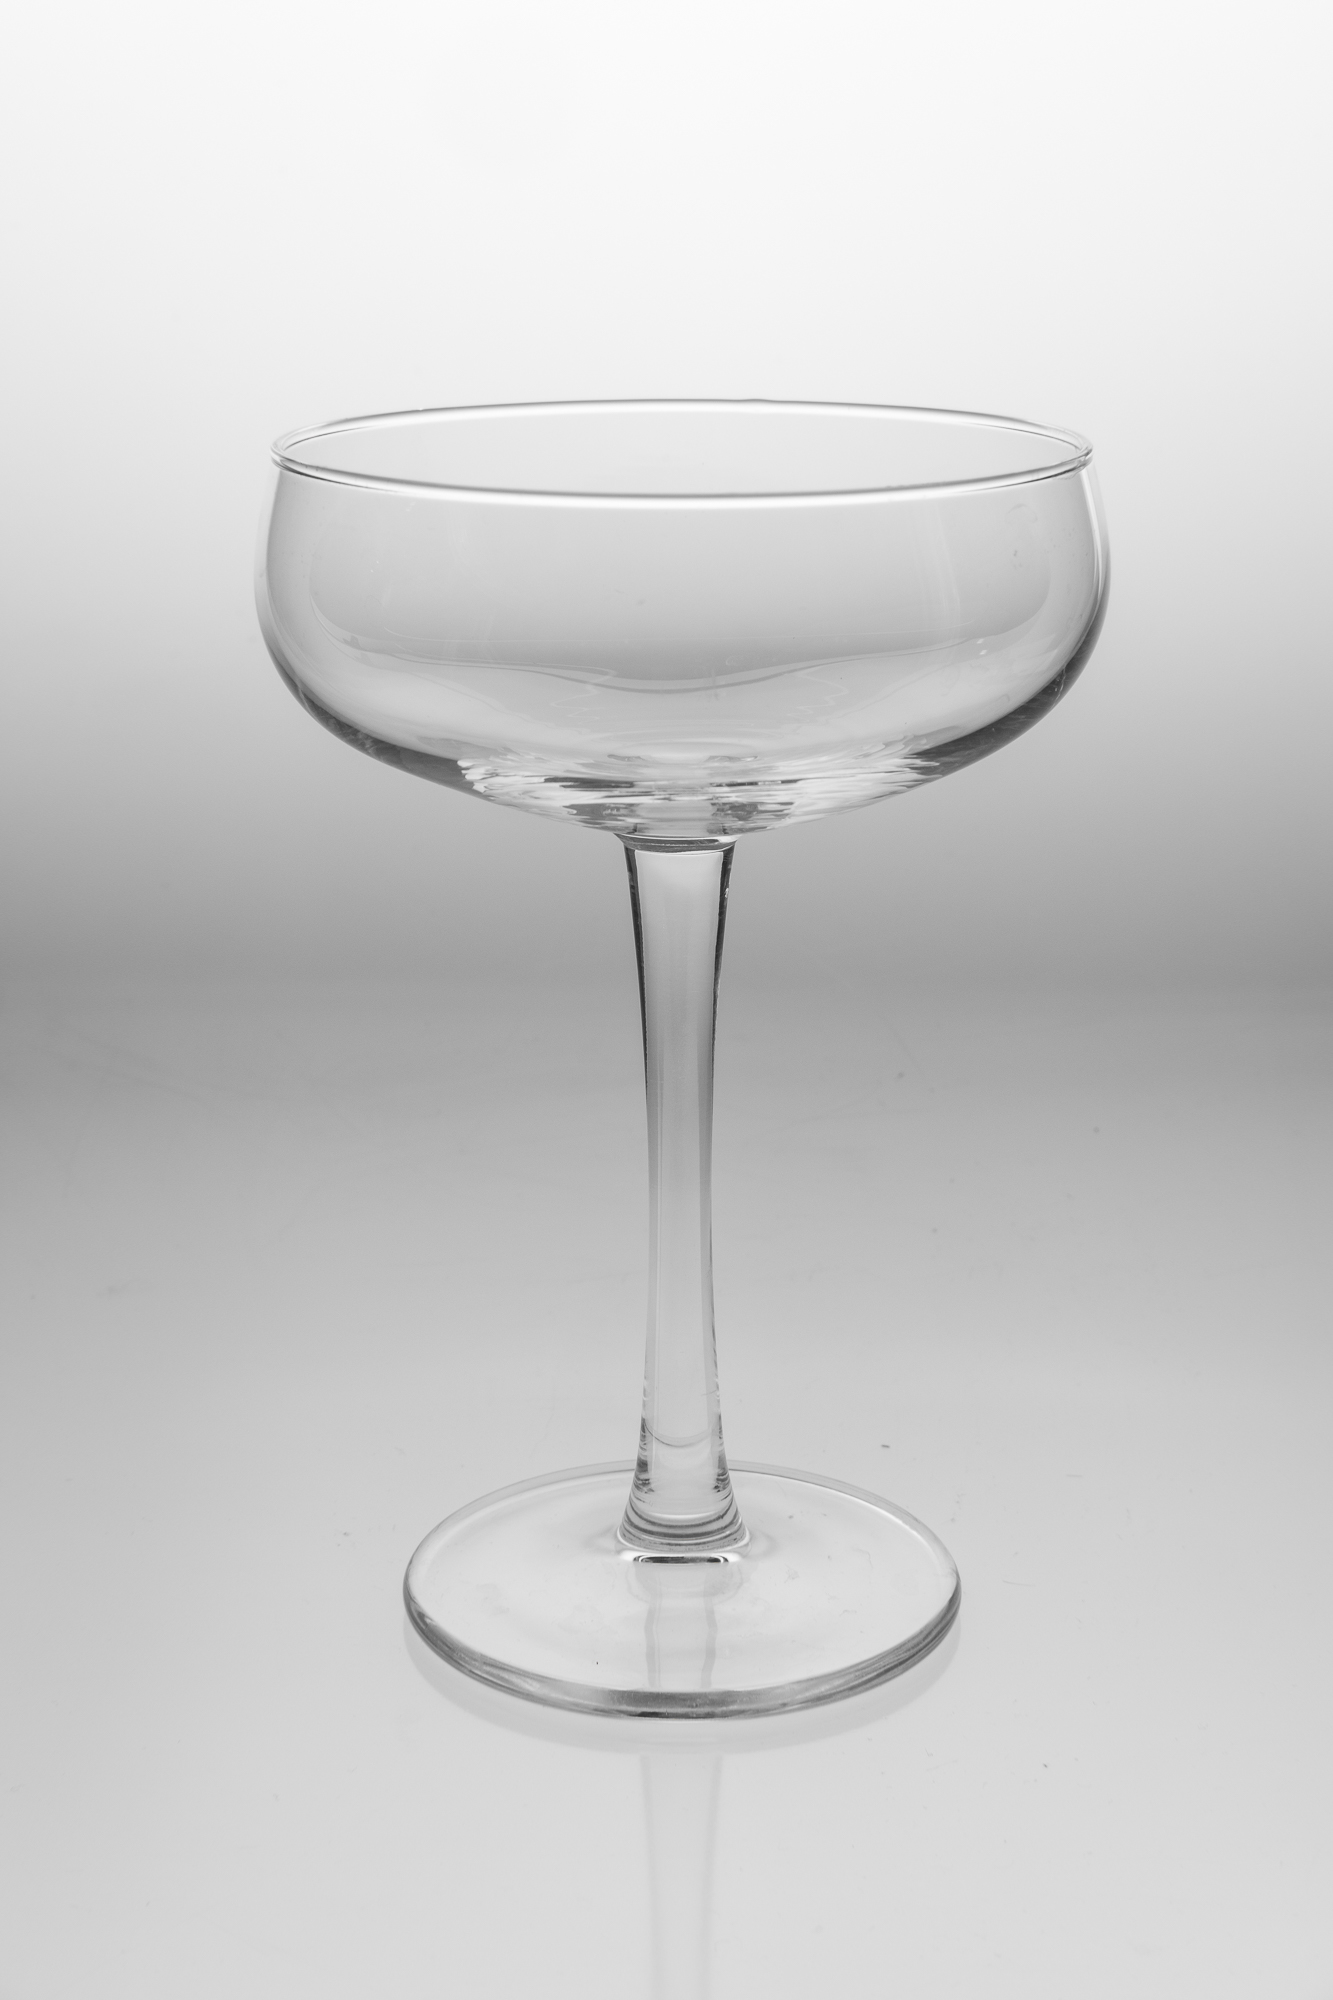
The second light is under the table, pointing up and hitting the PVC where it bends to create the limbo. This light creates a white luminous line just in the middle of the frame, fading it into grey both up the background and down the stage. Compared to the first scheme, this one hits a bit more of the subject, delivers a bit less of reflection under the product, and creates a more complex mood.
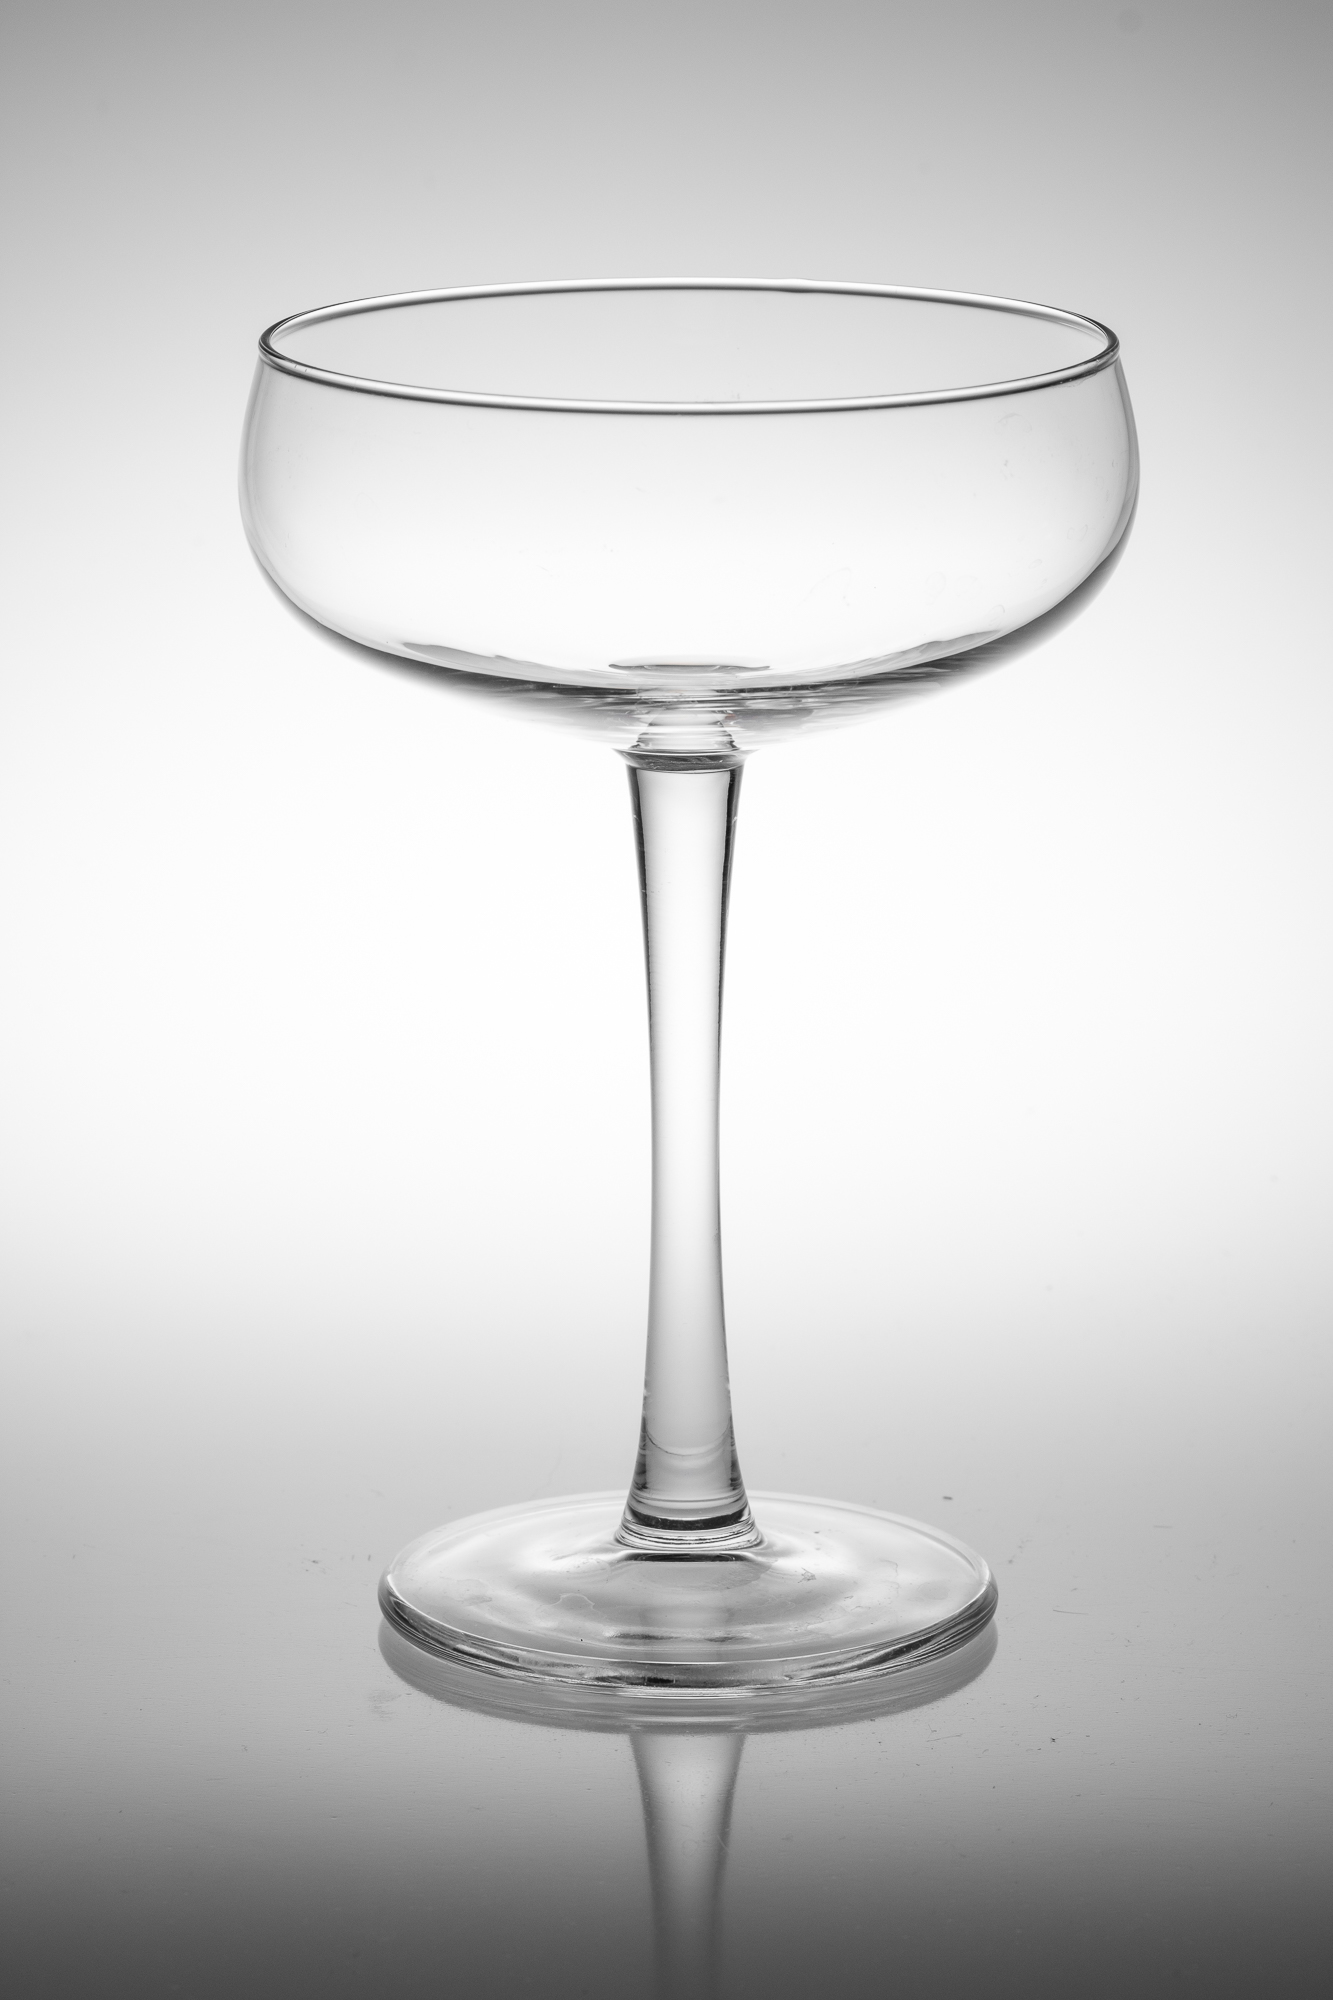
1st and 2nd light together. X-T2, f/13, 1/250th, ISO200, 35mm.
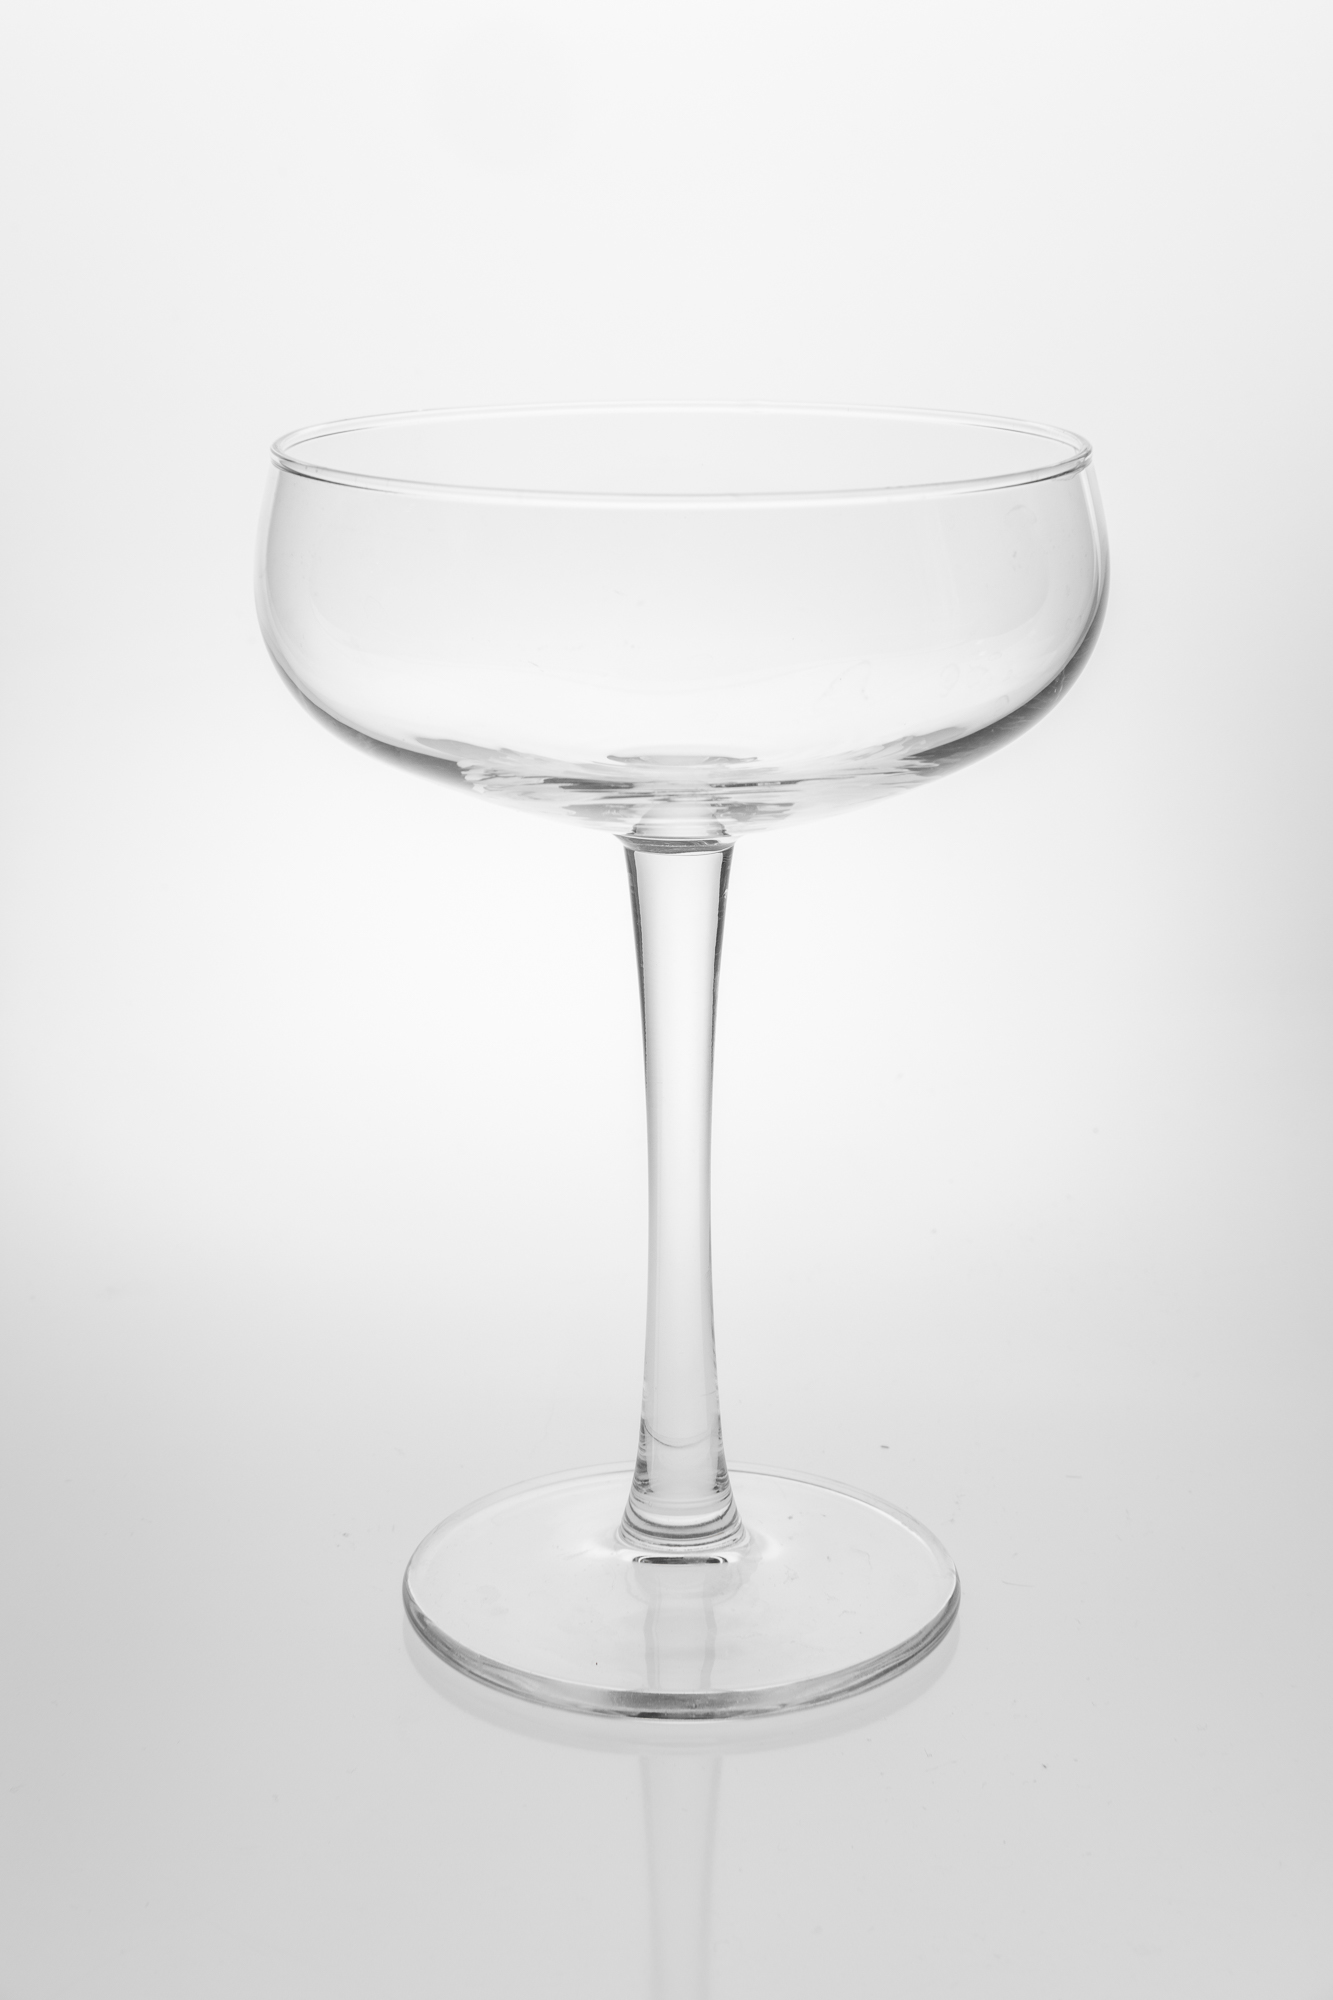
You can of course use the first and the second lights together. If you placed them properly, they will add up evenly, creating a smooth effect of a back light that starts fading only at the stage level, under the product. The reflections are still there.
3rd light alone. X-T2, f/13, 1/250th, ISO200, 35mm.
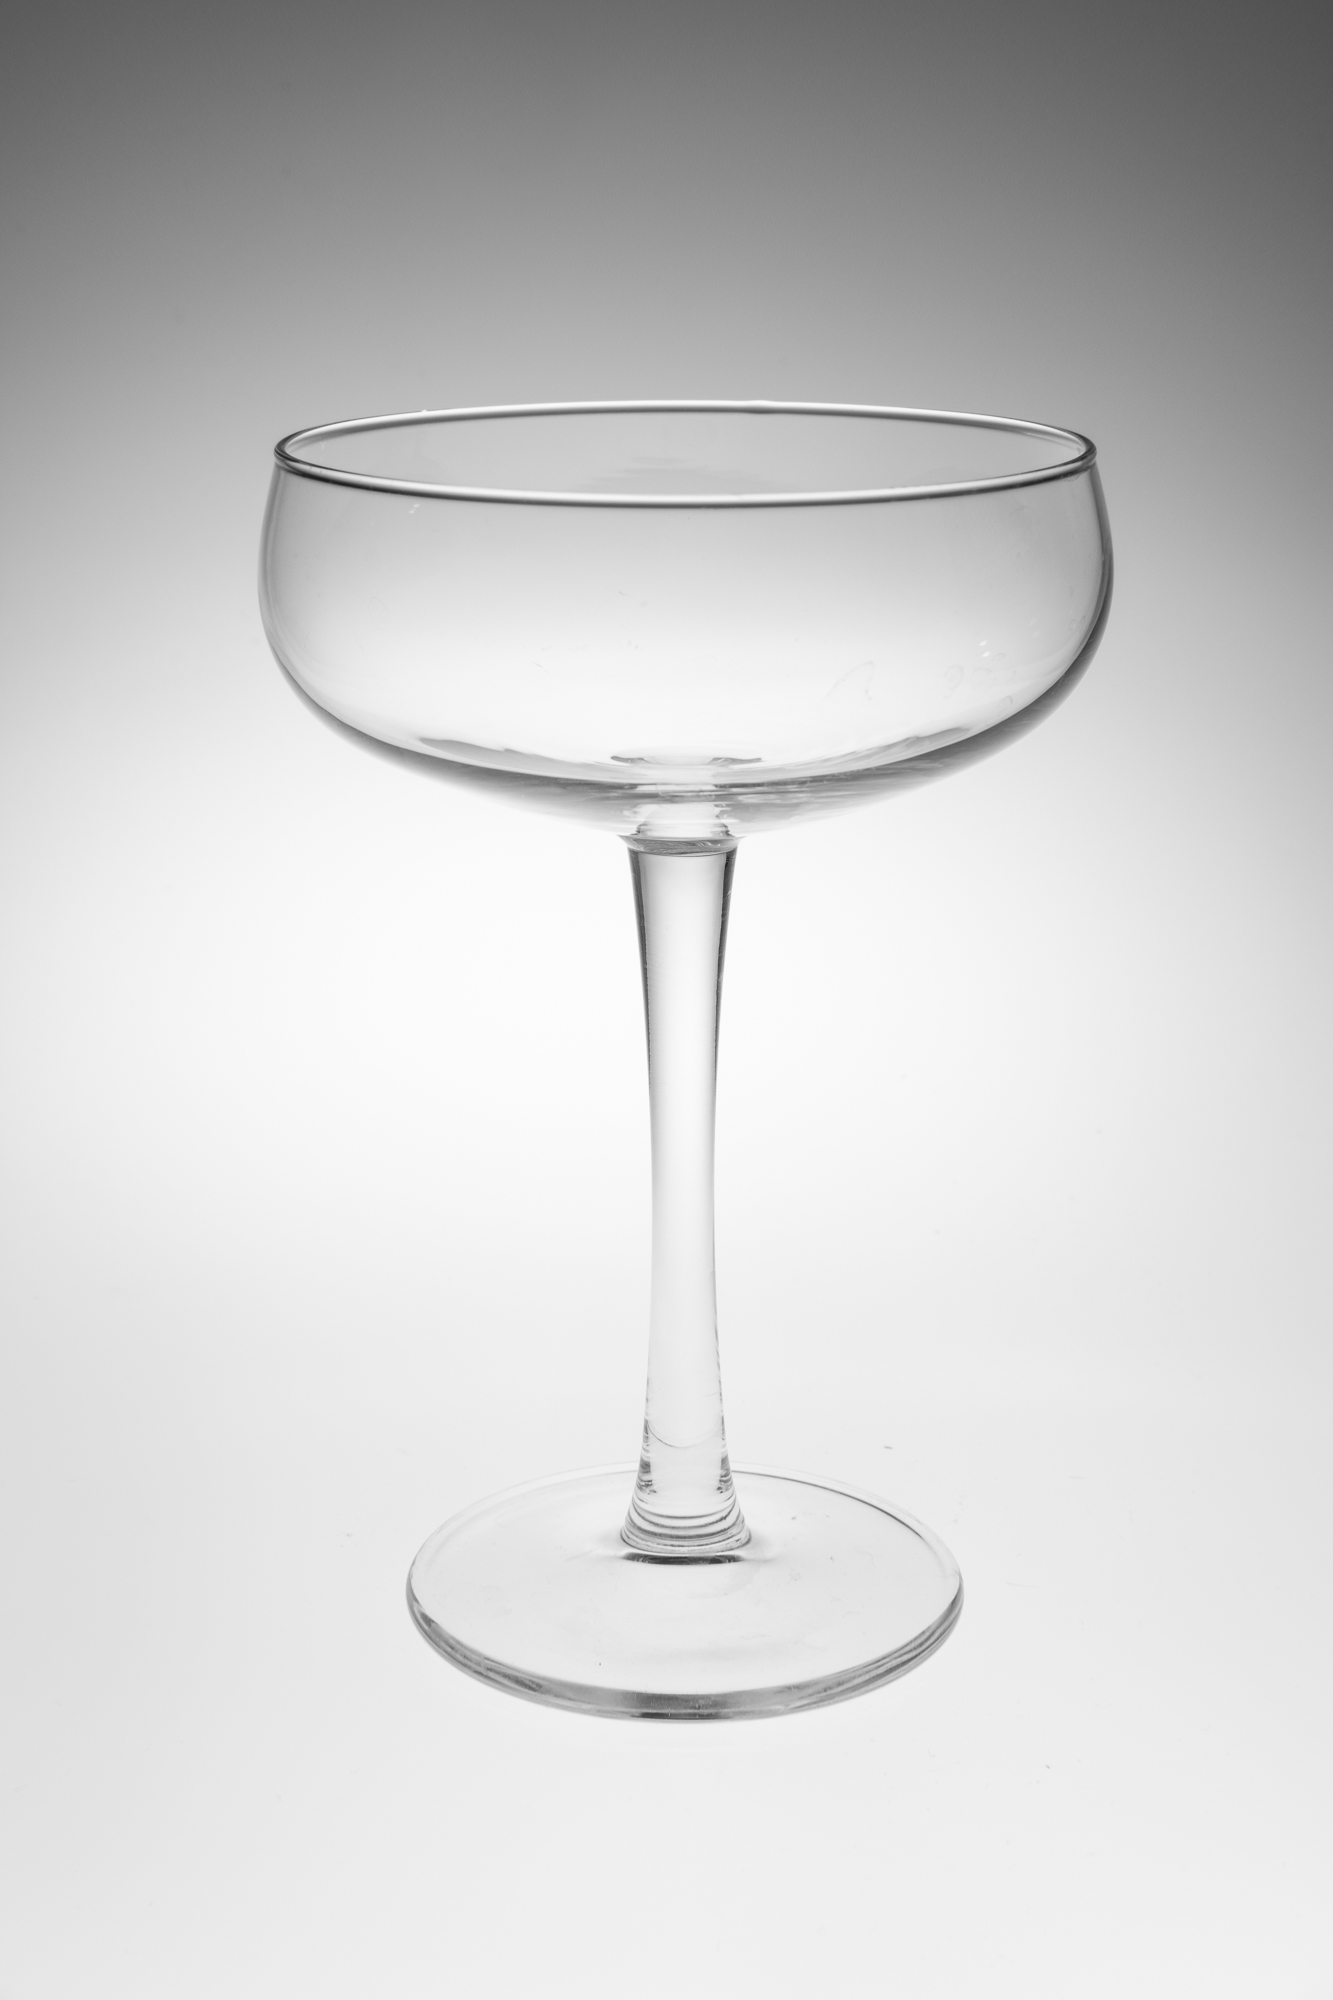
The third light is, again, under the table. Because this one is placed just in front of the product, it will light it up directly and, at the same time, it will destroy the reflections. The third light will hardly hit any of the background, so the white stage will fade into a grey limbo and, eventually, into a black top. It’s very moody, surely beautiful.
1st and 3rd light together. X-T2, f/13, 1/250th, ISO200, 35mm.
When you use only the first and the third light, you’ll basically get the inverse effect that with the second light alone: white top, white stage, both fading into a grey center (limbo). You might end up with some reflections due to the first light, if you need to avoid them just increase the power of the third light.
2nd and 3rd light together. X-T2, f13, 1/250th, ISO200, 35mm.
If you go with the second and the third lights, instead, you’ll get the opposite of when using first and second, with a white stage, white limbo, and a fading grey top.
1st, 2nd, and 3rd light together. X-T2, f1/3, 1/250th, ISO200, 35mm.
Go with all the three if you want a super-soft, dreamy stage-libo-background and even lights. If you reduce a bit the third light, as I did in the test, you can get some reflections too.
That’s for the three main lights you can use with a still life table. Try playing with their combinations, power levels, and colored gels, you’ll get tons of nice results. Before I close the article, however, let me talk about focal lengths just for a second.
23mm, X-T2, f/13, 1/250th, ISO200. 2nd light alone.
With a still life table, as with any product photography, the old “the longer the better” rule usually works. If you go wide, you’ll have two main issues: the first and obvious one is that the product will look deformed (you’ll go close-up to fill the frame with the product, and, by doing so, you’ll aggravate the perspective errors of the wide angle); the second one is that you’ll include a lot more of the still life table than with any longer focal lengths, and by doing so you’ll aggravate any discontinuity in the light effects.
35mm, X-T2, f/13, 1/250th, ISO200. 2nd light alone.
56mm, X-T2, f/13, 1/250th, ISO200. 2nd light alone.
90mm, X-T2, f/13, 1/250th, ISO200. 2nd light alone.
By increasing the focal lengths, the perspective becomes more and more “clear”, while at the same time the background becomes more and more even. I did the test with all of my primes, the 23mm, 35mm, 56mm, and 90mm. If you have a zoom lens, you’ll get the exact same results.
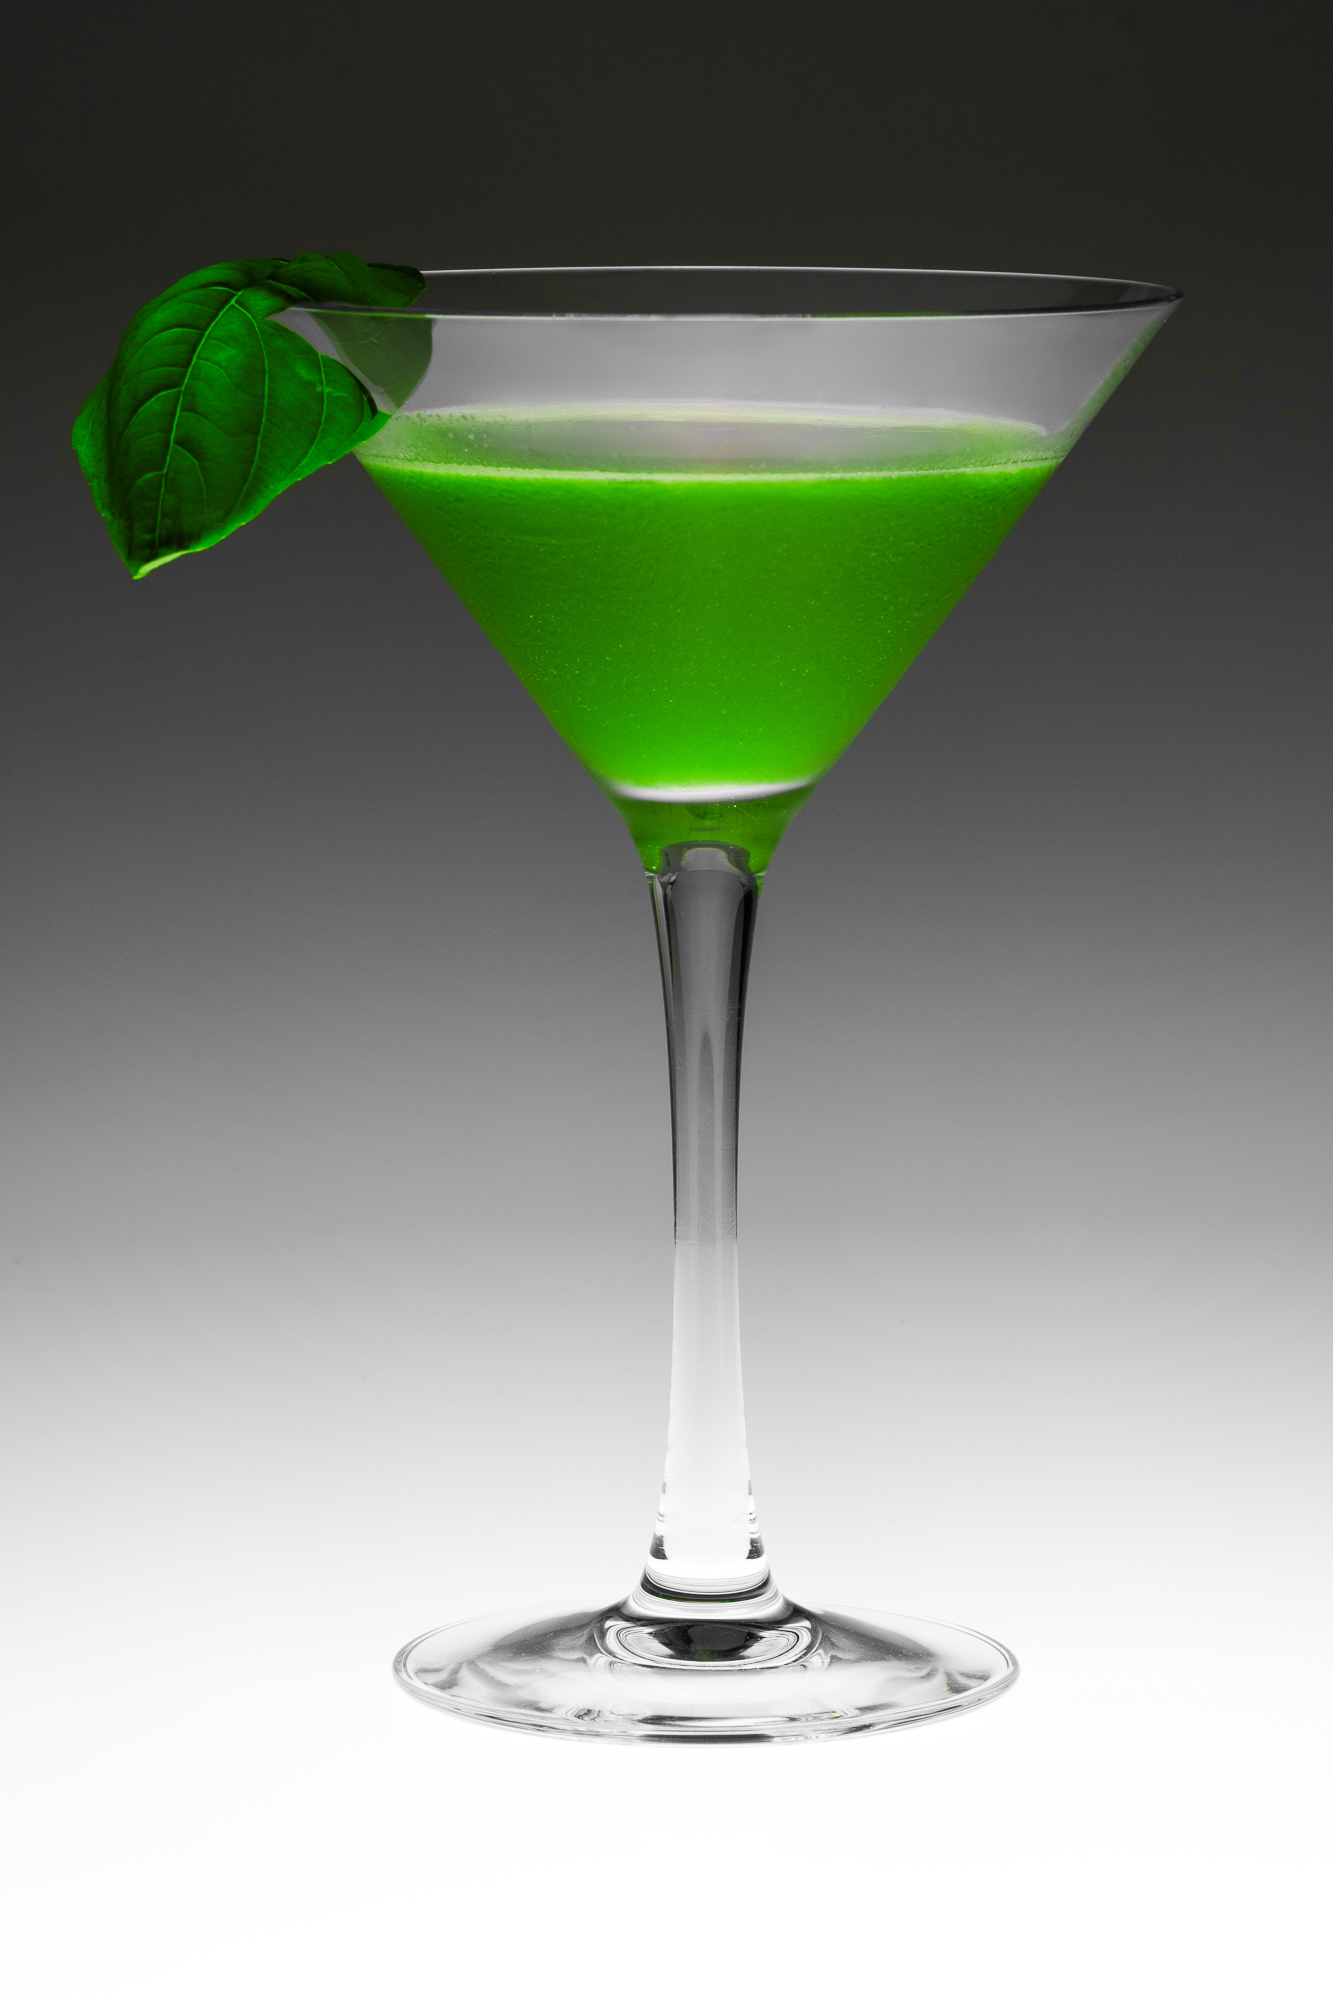
At the end of the day I found myself with a still life table set with all the proper lights, and an empty glass on it. So I went on and filled it (and many others) with some nice cocktails. A couple of friends stopped by and we called it a party. Here you can see some of the shots that came out. I hope you’ll enjoy them. If there’s any question or doubt, please feel free to ask me here on the comments section or by writing directly to me by email or Instagram. Have fun!
3rd light alone. X-T2, f/13, 1/250th, ISO200, 90mm.

1st and 3rd light (with some fill in from above). X-T2, f/13, 1/250th, ISO200, 90mm.

1st and 2nd light, with some fill in from above. X-T2, f/13, 1/250th, ISO200, 90mm.