Now we all know (or should do), that the Fuji X series cameras, particularly the ones with the larger APS-C sensors, are great at high ISO’s. However, there are still times, especially over 3,200 ISO, when some noise reduction could be beneficial. Up until now, I apply my noise reduction in post-production when editing my photos, using Lightroom. Lightroom does have a pretty good noise reduction adjustment facility built in. It is also very quick to use and can be applied very quickly to a number of similarly shot images. However, as with most noise reduction ‘engines’, things can start to look a bit plastic if used too heavily. There are a number of specialist programs, whose sole purpose in life is to apply a more sophisticated method of noise reduction.
Another such program was recently added to Macphun’s range of software and this is called, not unsurprisingly perhaps, Noiseless. It retails at £13.99 for the Standard version available on the Apple App Store and £36.99 for the Pro version, bought directly from the Macphun website – you can upgrade the Standard version to Pro later. The Pro version adds the ability to open raw files, brings extra detail controls and comes with plug-in versions for Photoshop, Lightroom, iPhoto and Aperture.
Noise reduction can be an extremely time-consuming and complex process. As I mentioned earlier, there are a number of dedicated noise-reduction plug-ins on the market already, as well as the noise reduction tools built into photo editing software such as Lightroom. You can soon waste a lot of time as you try to reduce noise while preserving fine detail, playing with a whole bunch of sliders and parameters and sometimes ending up worse off than when you started!
Noiseless takes a far simpler approach. It offers a number of preset noise reduction ‘recipes’, from ‘Lightest’ to ‘Extreme’.
Once you have downloaded the software, installation is both simple and fast. When you then open Noiseless for the first time, if you have purchased the Pro version, you will be greeted with a window that show you all the editing programs it has found on your system with which it is compatible. You then have the option to select one or more program for which you would like Noiseless to work as a plug-in.
You then need to exit Noiseless, unless you wish to continue using it as a stand-alone program. The next step is to open your editing program of choice – in my case Lightroom – and select the image you wish to work on. In Lightroom you then right-click and select Noiseless from the plug-in list that will then appear. You are then greeted with the usual Lightroom options of whether you wish to work on a copy of your image with Lightroom adjustments previously applied. (This is always my choice, as it will make a copy to work on and keep your original image intact.)

Your copied image will then be displayed in the Noiseless main window.
This offers different magnifications, from fit-to-screen through 50%, 100% and 200% – the 100% and 200% views are best for assessing the effect of your adjustments.
There’s a choice of viewing modes too. You can view the corrected image alone but, to judge the effect of the noise reduction applied, it’s best to compare the adjusted image with the original. This is to make sure you’ve got a useful reduction in noise without any loss of definition. For this, you can use a side-by side view or a split-screen view, with a ‘wipe’ bar you can drag across from left to right. It takes the software a couple of seconds to render the reduced-noise image, but once that’s done the ‘wipe’ bar works instantly in real time and frankly is a brilliant feature!
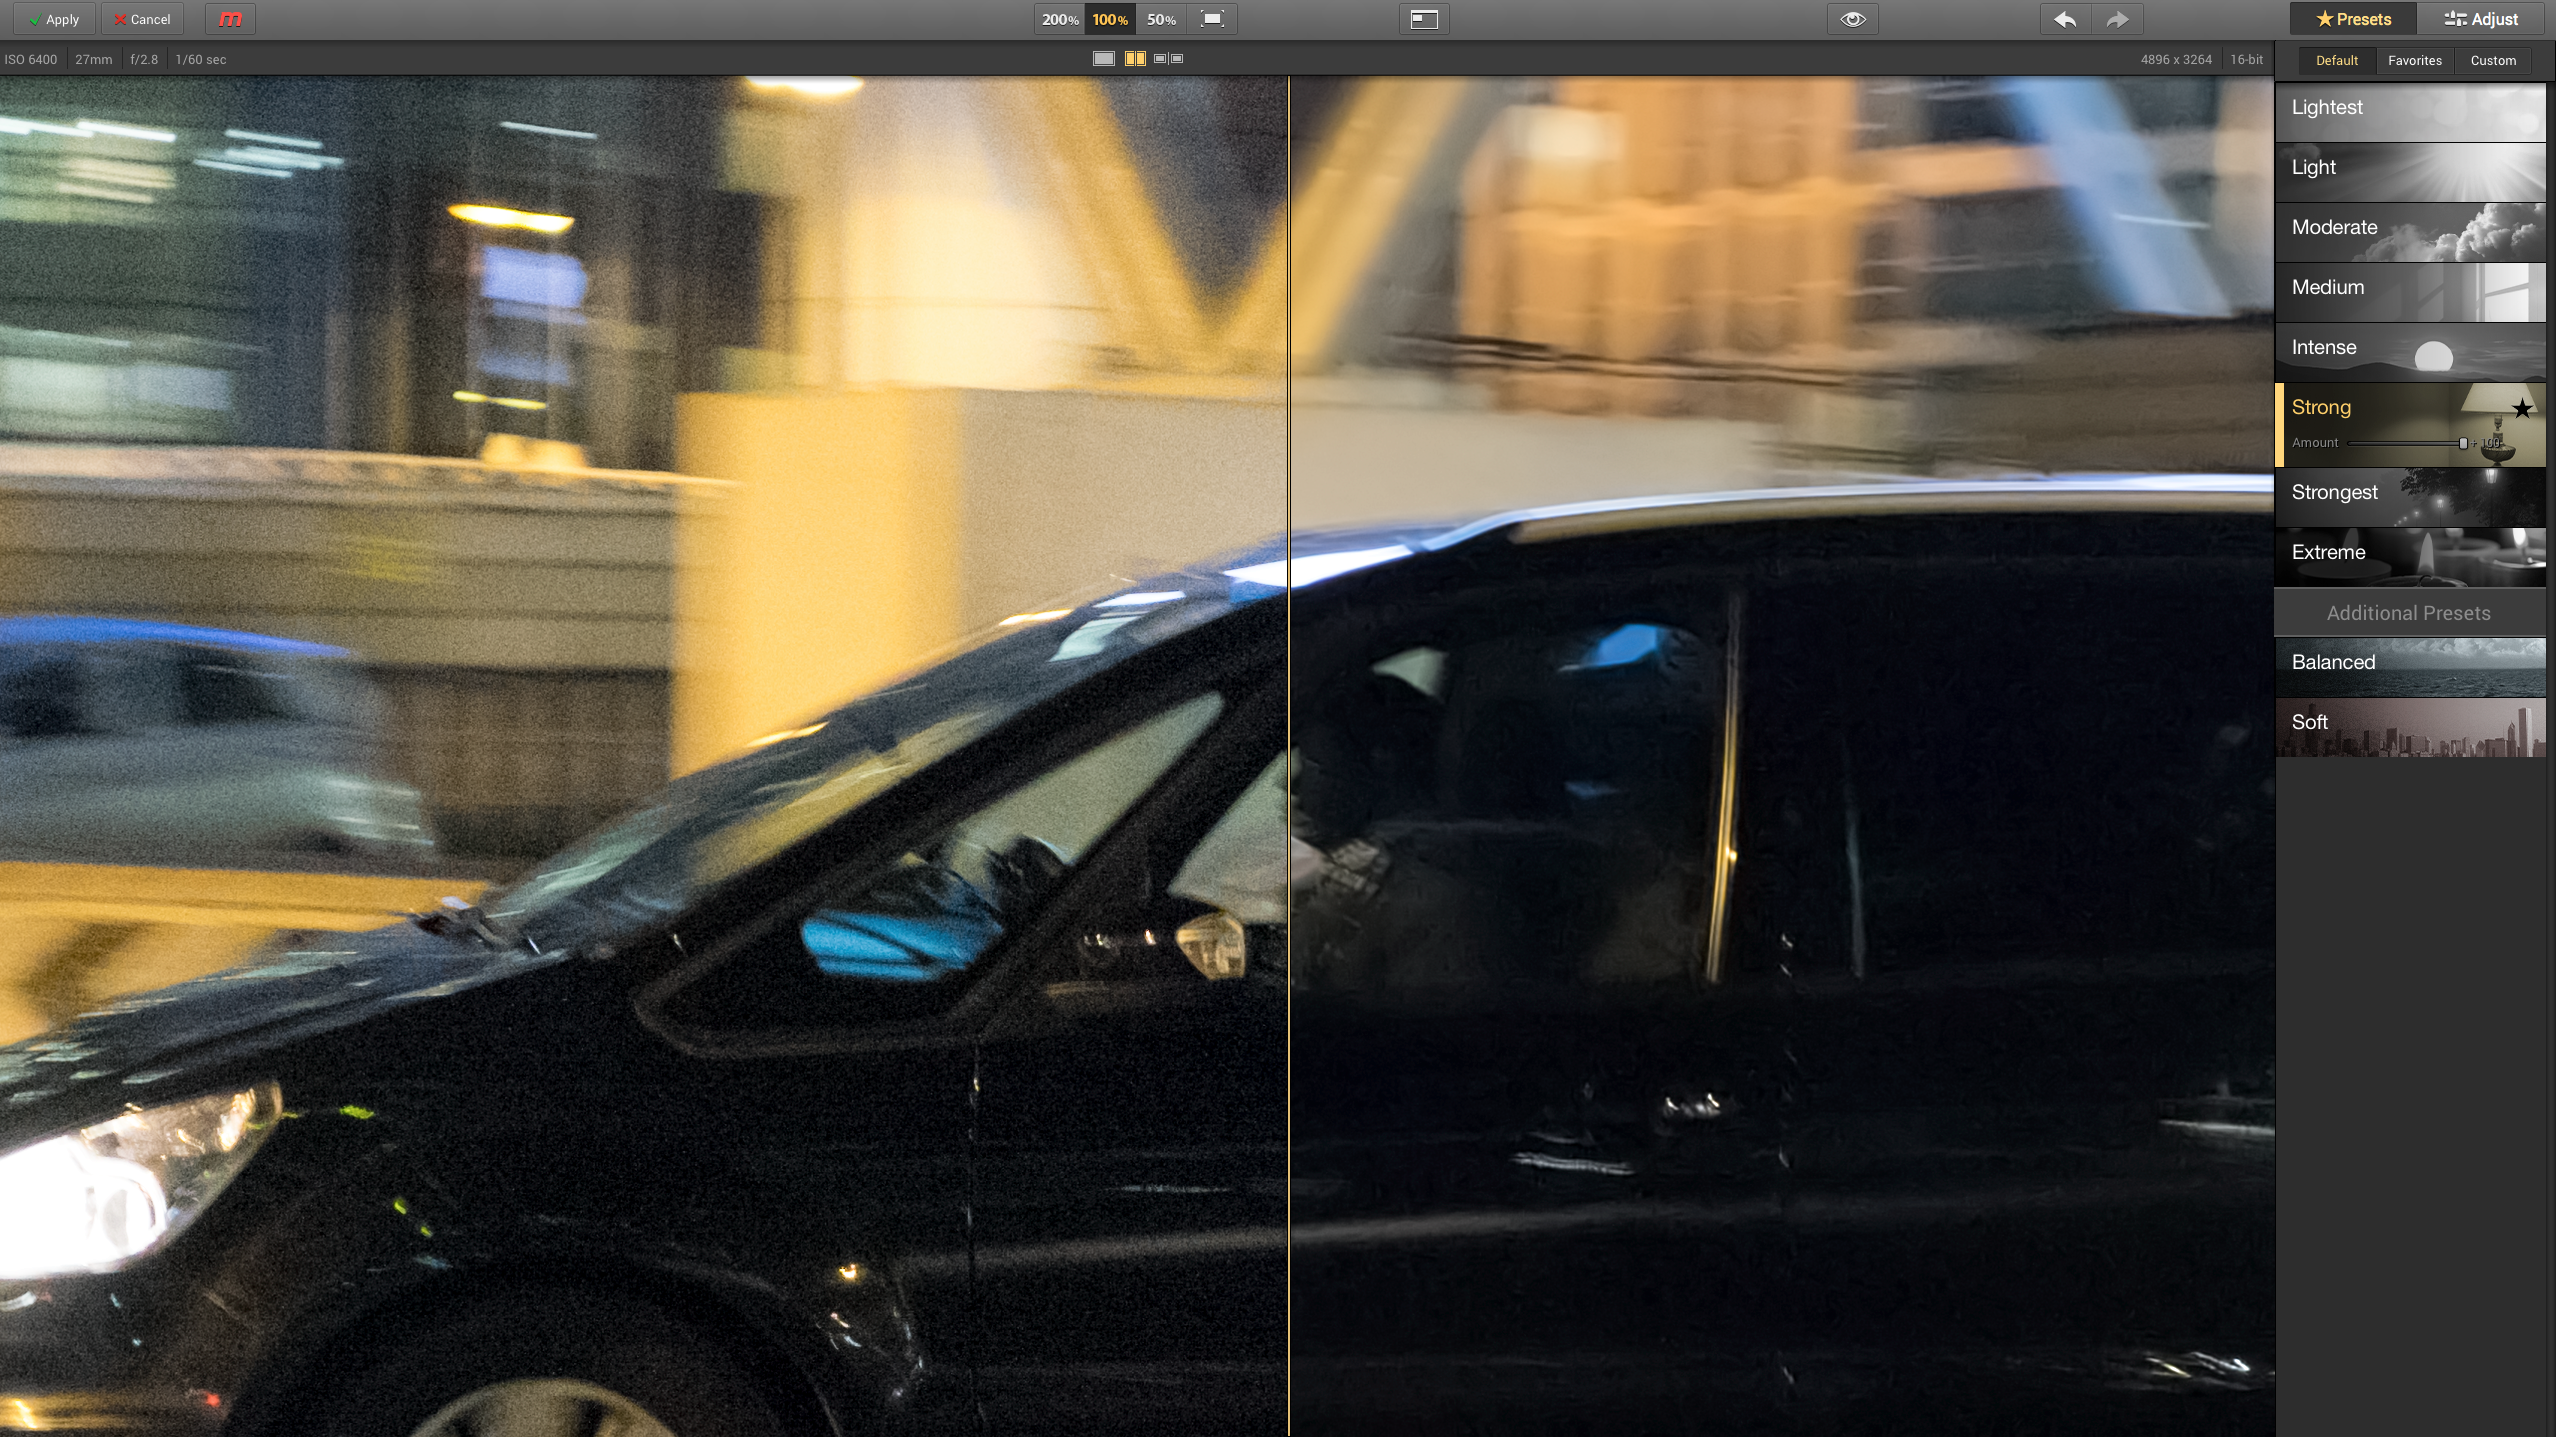
As mentioned earlier, on the right hand side of the display, you will see a panel of presets or ‘recipes’ that can be applied just with one simple click! These range from Lightest to Extreme. You can start from the Lightest setting and work up until you see the level of noise reduction you want: the lower settings can still leave some strange noise patterns behind, while the higher settings can produce an artificially smoothed-over plastic look. You just need to find the preset that suits your eye best.
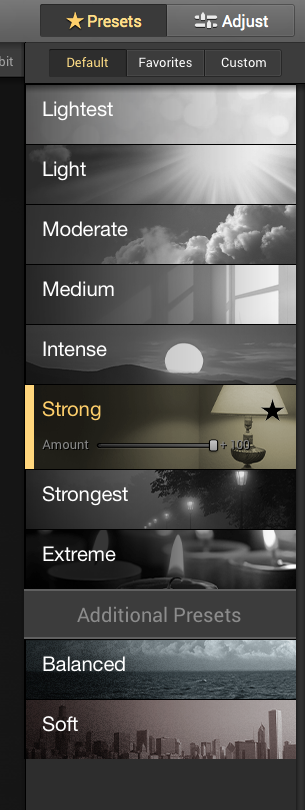
If you’ve found the best preset strength but the image still looks a little too smooth, you can reduce the strength of the effect using the ‘Amount’ slider on the preset button. Generally, high ISO images will look more realistic with just a faint noise pattern. This is because high ISOs tend to bring slightly softened image detail too, and a faint noise pattern helps to make them look just a little bit sharper.
If you find yourself using the same presets again and again, you can click the Favourites ‘star’ icon on the right: this adds them to the Favourites panel accessed at the top of the sidebar. Here, you’ll also see a Custom panel, and this is where Noiseless gets a whole lot more advanced.
For many users, the presets will be enough, but if you want to take full control you can swap to the Adjust mode and change all the noise reduction parameters manually. When you’re happy with the results, you can click the ‘Create’ button at the bottom of the Adjust panel to create a Custom noise reduction setting.
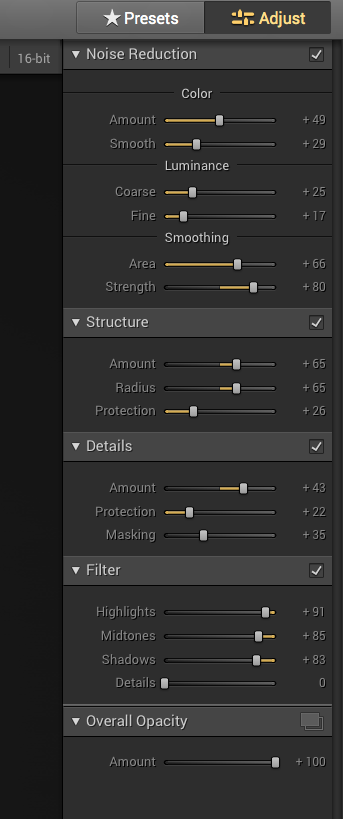
Whilst you can’t apply selective noise adjustments to specific areas of an image, you can adjust the strength separately for Highlights, Midtones, Shadows and Details. Noiseless is not designed for people who want to spend too much time in front of the computer, but for users who simply want good results fast.
Verdict and summary
Whilst Noiseless adds another process to the editing mix, its ease of use and simplicity are where it shines. As with any noise reduction tool, it’s a fine line between noise reduction and detail preservation, but here it’s really as simple as clicking a preset, dragging a slider and checking the before-and-after preview.
I found Noiseless a way of producing great results very quickly though, as with any noise reduction application, you need to test out different settings to find the one that gives you the most pleasing results.
System Requirements
- Mac OS 10.8 and above
- iMac/MacBook Pro/ MacBook Air/Mac Pro/Mac Mini late 2009 or later
- 4GB RAM and more
- 512 MB Graphic RAM and more
- Noiseless Pro can work as plug-in for Adobe Photoshop Lightroom 4, 5 or
later; Apple Aperture 3.2 or later
- Photoshop Elements 10 -12 (App Store version is not supported due to Apple
Sandboxing), Adobe Photoshop CS5, CS6 or CC(including Smart Object support).
File Support
- RAW (.NEF, .CR2, .DNG, .ORF etc.) images 8-bit, 16-bit
- TIFF
- PNG
- JPEG
- Noiseless Pro also supports .PSD