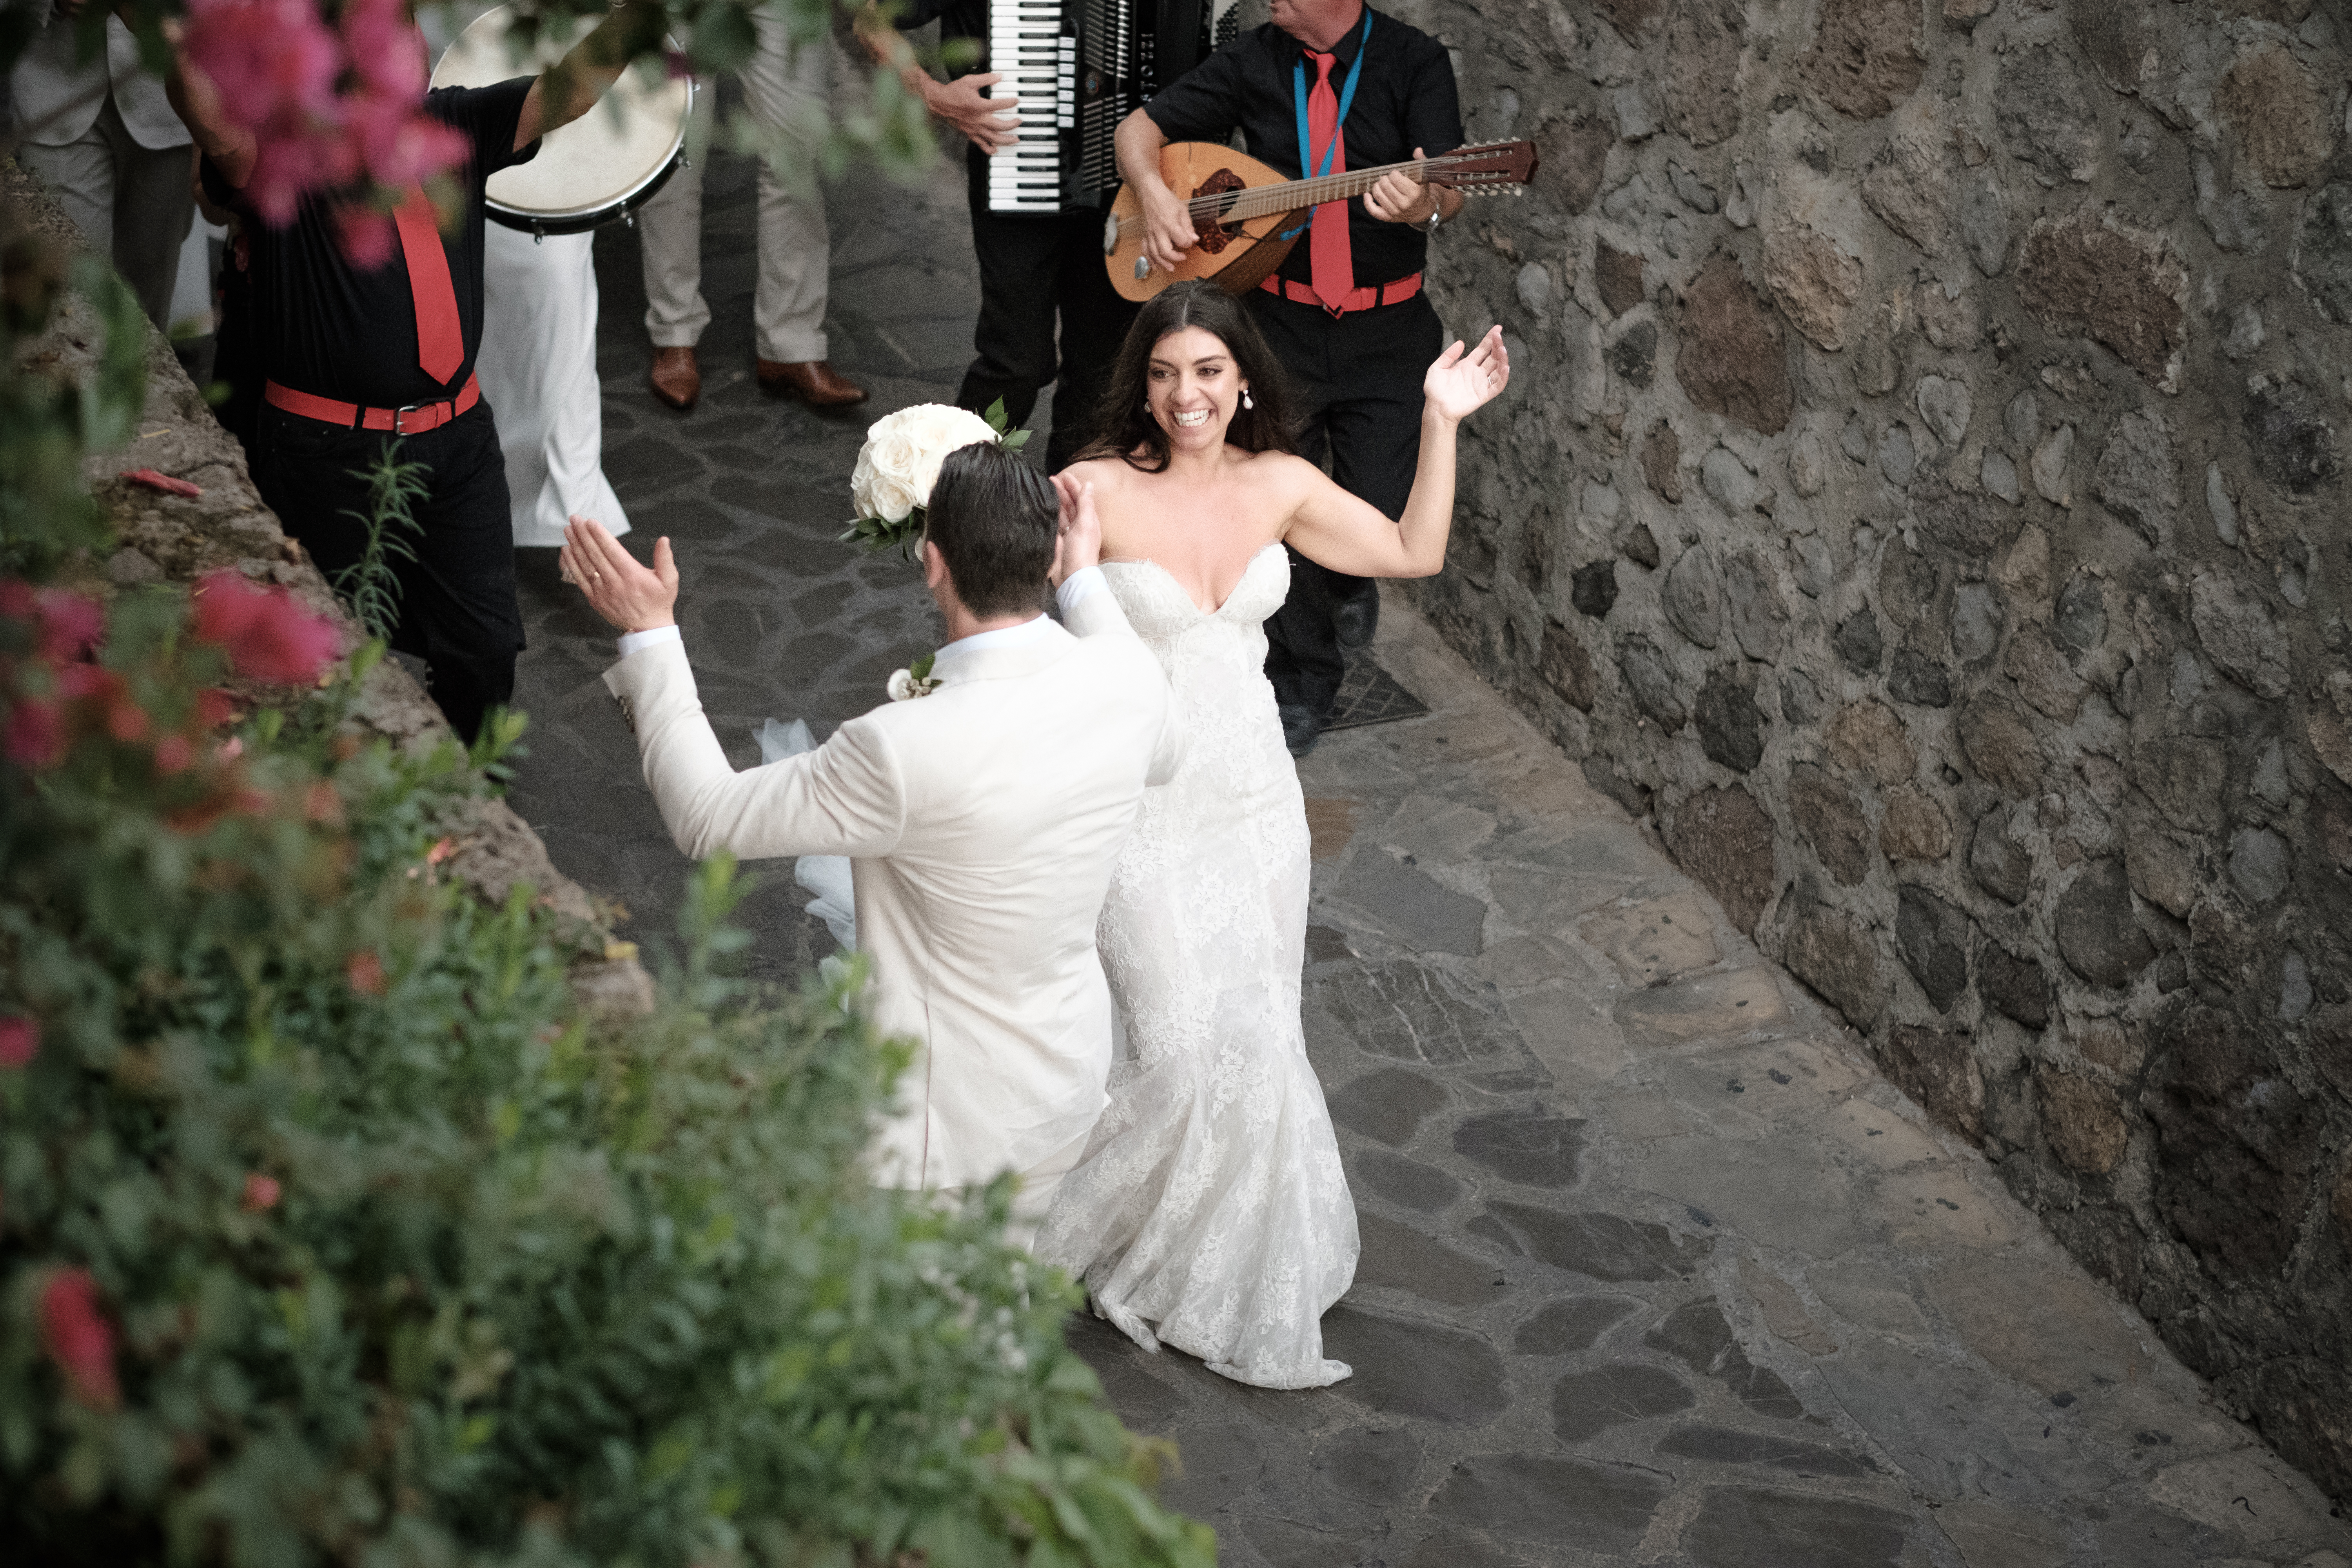
Let’s say you want to capture a walking subject while you walk backwards at the same time or a group of people walking down the alley dancing to the sound of Sicilian folk music while you sit on the back of an electric kart that goes randomly fast then slow on the uneven road (yeah, it’s what happened to me while taking the shots in this article!). The subject is moving at random speed, you’re moving at random speed, the camera is shaking and with normal camera settings this would be a nightmare of a situation. But you can survive it and actually master it, because your Fujifilm camera is full of resources.

Let’s see first how to set the camera to get sharp shots that are also properly exposed, then we’ll review a few tweaks and tools that you can add to help the autofocus and the chances to get a nice shot. You start by setting the shutter speed fast enough to freeze the subject despite their movement and your movement, then you set the aperture to control the depth of field you want. You set the proper exposure with the exposure compensation dial and finally you let the camera choose the proper ISO to get the correct exposure. Let’s see how this works.
First of all the shutter speed has to be fast, but how fast, exactly? Action sports are usually shot with shutter speeds between 1/500th and 1/1000th of a second. Better safe than sorry, so let’s set our shutter speed to 1/1000th of a second. To do this, just rotate your shutter speed dial and set it where it reads “1000”.
With the aperture, there are two possible configurations you could use, depending on what you want to get in terms of depth of field. If you know you need a deeper depth of field than what your lens gives you at the maximum aperture, you should set the aperture ring accordingly (i.e. an f/9 on the 23mm will give you basically everything in focus from three meters to infinity). Otherwise, if you want to reduce as much as possible the depth of field or you want to use all the possible light, then you should set the aperture ring on auto (A). This last setting is completely counter intuitive but to see why it works we first have to talk about the ISO settings. Right now remember this: either you close the aperture to have a certain depth of field or you leave it on auto to have it wide open all the (possible) time.
The auto ISO is a powerful tool but to have it working properly you need to program it first. Start by setting the ISO on auto (A), then press the menu button. If you have the old menu (like on the X-T1 / X-T10 / X100T, etc.), you’ll find the ISO in the first tab of the menu. If you have the new menu that comes with the newer cameras, you’ll have to scroll down to the camera settings (there’s a camera picture on the left), and then scroll down to “ISO AUTO SETTINGS”. From here the process is the same – you chose “AUTO1” and then set it like this:
DEFAULT SENSITIVITY 200
MAX SENSITIVITY 6400
MIN. SHUTTER SPEED 1/125
The latter is actually ineffective since you’ve already set 1/1000th on the shutter speed dial, but I suggest you set it this way as it makes for a good, all-purpose auto ISO program that will always come in handy.
Let’s recap. You have blocked the shutter speed, so that’s something the camera can’t change, but you’ve left both aperture and ISO on auto. The camera will always try to keep the ISO as low as possible, to minimize the noise, so it will (if it will at all) close the aperture only to prevent possible overexposure after reaching the combination of 1/1000th of a second and ISO 200, which might happen only when you’re shooting under a really bright with a very fast lens (f/2 or faster). So this setting will basically use the widest aperture (what you want) unless it’s too bright, then it will close the aperture to save the shot from overexposure (what you also want). I came up with this setting after I had a lot of shots overexposed because the subjects had suddenly walked under direct sunlight, making my max aperture setting to wide even for 1/1000th of a second at ISO200…

Now, about the tweaks and tools you can use to facilitate the autofocus, or the chance to get a nice shot out of an unpredictable moment. There are quite a few of them, so let’s review them.
Autofocus
To help the camera to autofocus faster on your moving subject, you can use the continuous autofocus mode (C). This way, when you half-press the shutter, the camera will keep on focusing on your subject, keeping it sharp even if it’s constantly changing its distance from you. On the newer Fujifilm cameras it is also possible to tweak the way the continuous autofocus works to make it better suited for our tracking purposes. Press menu and go to “AF-C CUSTOM SETTINGS” in the AF/MF tab, then set in on program number 5 “FOR ERRATICALLY MOVING 7 ACCELERATING / DECELERATING SUBJECT’’, which to me seems quite a good description of the situation, but feel free to play with the other programs and see if one works better for you. To boost the autofocus a little more, try to use the central focusing spot, or if you really have to change it, try to stay to the ones very close to it. Those points use the hybrid phase/contrast detection, and the phase detection works best at the very center. Just saying.

Face tracking
If your subject is human, you might want to try the face/eye tracking. This tool works really well when coupled with the continuous autofocus and will help you a lot in tracking your subjects while you are both moving at unpredictable speed. However, if your subject is closely surrounded by other people, and you don’t want to focus on them, then you might want to turn the face tracking off to prevent it from tracking the wrong subject. To avoid having to navigate the menu to switch this useful tool on an off, I would suggest you set one of you camera’s buttons to access the face tracking option. When I have it on, I always use the second setting: “FACE ON / EYE AUTO”.
Drive
Ok, so you have set the camera to optimally focus and shoot sharp photos of your moving subjects, regardless of whether you’re also moving while shooting. But how can you be sure you’re getting the proper moment/composition in such an unpredictable and “shaky” situation? You can “cheat” and set the drive to high-speed continuous shooting (CH). This way, when you see something nice, you just shoot a fast series of 5-10 photos and, by doing so, you maximize the chances of getting the moment. Just remember that shooting fast bursts of photos can quickly fill the buffer and slow down the next burst, so learn how your camera reacts (different Fujifilm cameras have different buffers) so that you don’t get suddenly slowed down by a burst too long to be quickly processed by your camera. Keep also in mind that during burst of shots the autofocus won’t work, so keeping the bursts short is also a way to keep the subject in focus.

I guess that’s it. I really love these settings because they allow me to follow my moving subjects very freely, almost as if I was shooting a video instead of photos. Having a subject moving helps the shot to look spontaneous, by adding something dynamic and by loosening up the composition a bit. Try it and let me know how it worked!