ISOless sensor technology has been available for several years. Still, many users know little about its benefits, as most camera makers shy away from actively exploiting and marketing such capabilities. This is about to change: Nikon has recently started to embrace ISOless photography with their D750 full-frame DSLR, which features dedicated highlight-priority metering and flat-curve image processing. Lucky for us, all Fujifilm X-series cameras are equipped with ISOless sensors, too, so let’s have a closer look at how to make them work for us.
Many modern cameras (except for Canon) work ISOless, meaning that that ISO amplification (= adjusting the image brightness) can happen either before or after the RAW data is generated. Both results will virtually look the same. There’s no significant quality difference.
Same Same, But Different
 The image on the left was taken with an X-E2 at ISO 800. Here, the signal amplification from base ISO 200 to ISO 800 was performed in the camera, and the RAW data contains an image file that has already been brightened (= amplified) two stops to ISO 800. This means that the amplification was burned into the RAW data, and any resulting overexposure cannot be undone.
 The image on the right was also taken at ISO 800 using the same exposure settings (aperture and shutter speed) as the other sample. However, this time the signal wasn’t amplified in the camera. Instead, the RAW file contains ISO 200 data which is two stops darker than required. The necessary brightness increase (amplification) was performed later during RAW conversion.
A direct comparison of both results reveals no significant (if any) difference in quality, making the X-E2 (and its sisters) an ISOless camera. This so-called ISO-invariance is important if you want to maximize the dynamic range of your camera, as it allows you to process your images using adaptive ISO: applying different amounts of ISO amplification to different parts of an image. For example, to increase the dynamic range of a shot, you can (under-)expose the image to the highlights, then push the shadows and midtones up again during RAW conversion while leaving the highlights as they were.
 At the Limit
Having the opportunity to perform ISO amplification (= raising the exposure level) at the RAW conversion stage is beneficial, since it allows us to perform this amplification selectively. Instead of amplifying (brightening) the entire image and possibly destroying critical highlights during this process, we can limit the RAW converter’s amplification to dark areas and midtones, while leaving the bright parts of the image intact. Adobe Lightroom, which is probably the most popular RAW converter, offers five different exposure sliders to perform this job: there’s a general exposure slider plus four additional sliders to independently handle whites, highlights, shadows and blacks. This is a great bonus: While the camera’s ISO amplification always affects the entire image, your RAW converter’s amplification can be limited to affect only certain areas or tonalities. By doing so, we can practically increase the dynamic range of the camera. All we have to do is increase the exposure of dark shadows and midtones, but not of the highlights of an image.
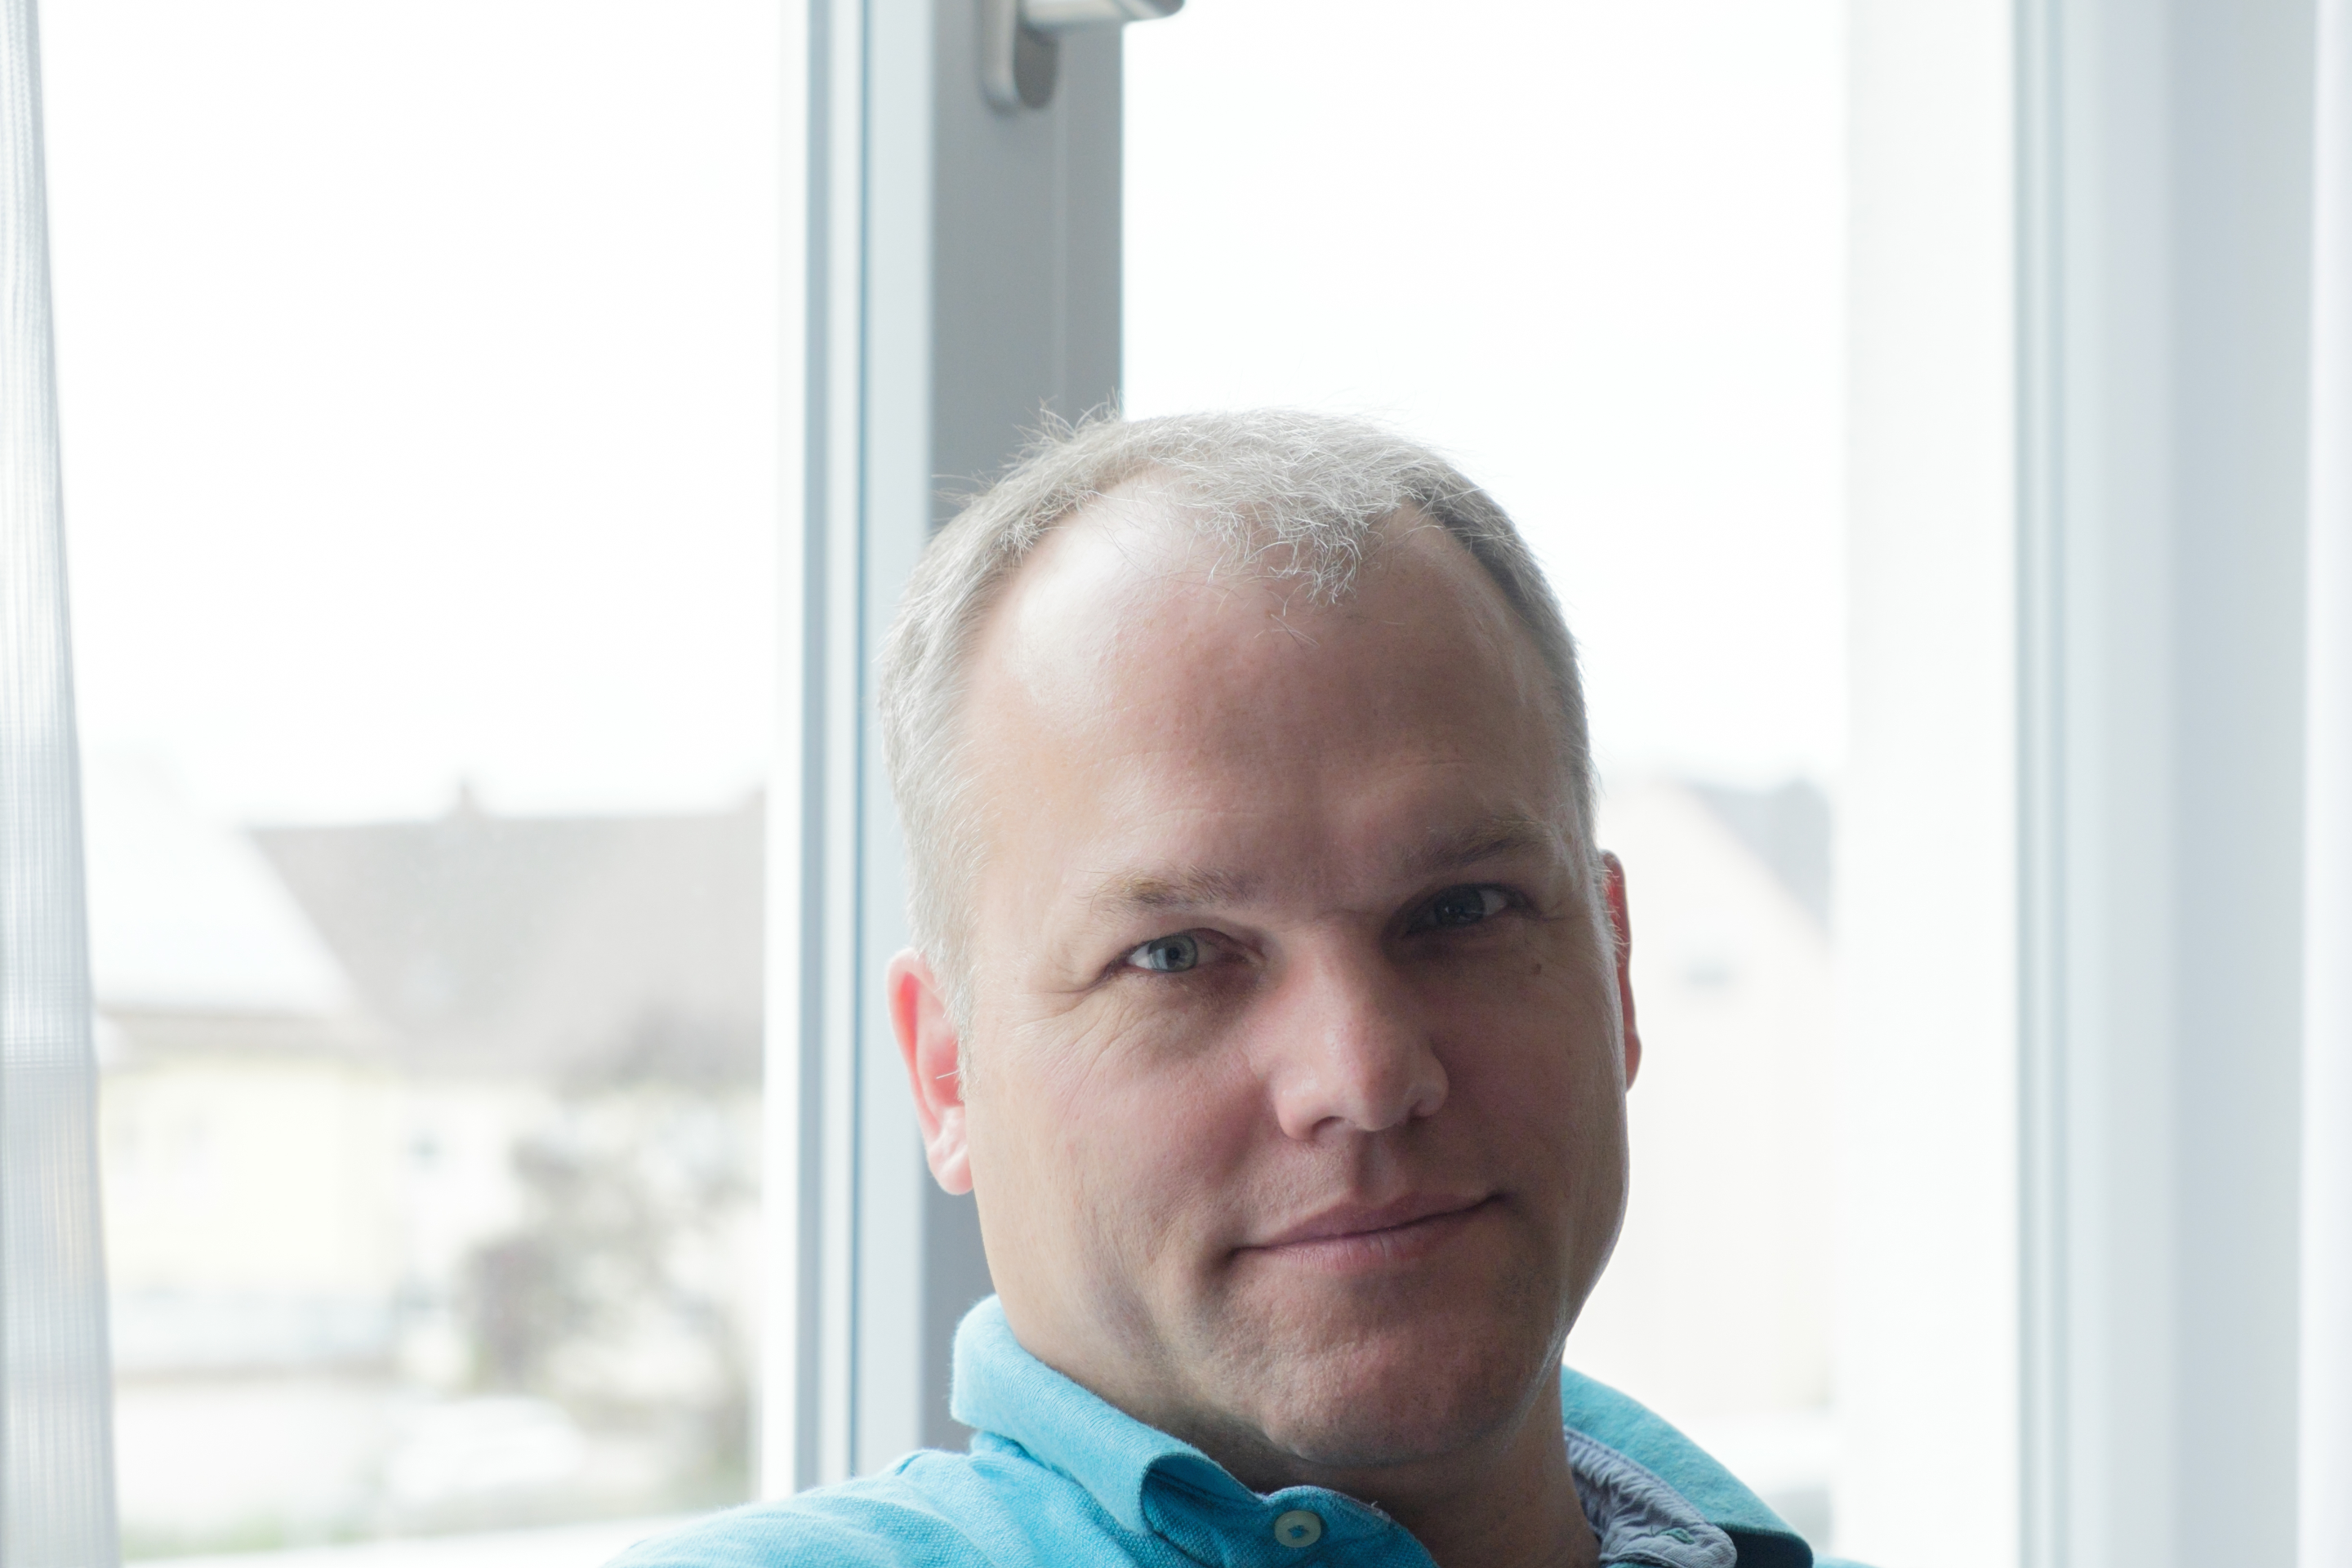
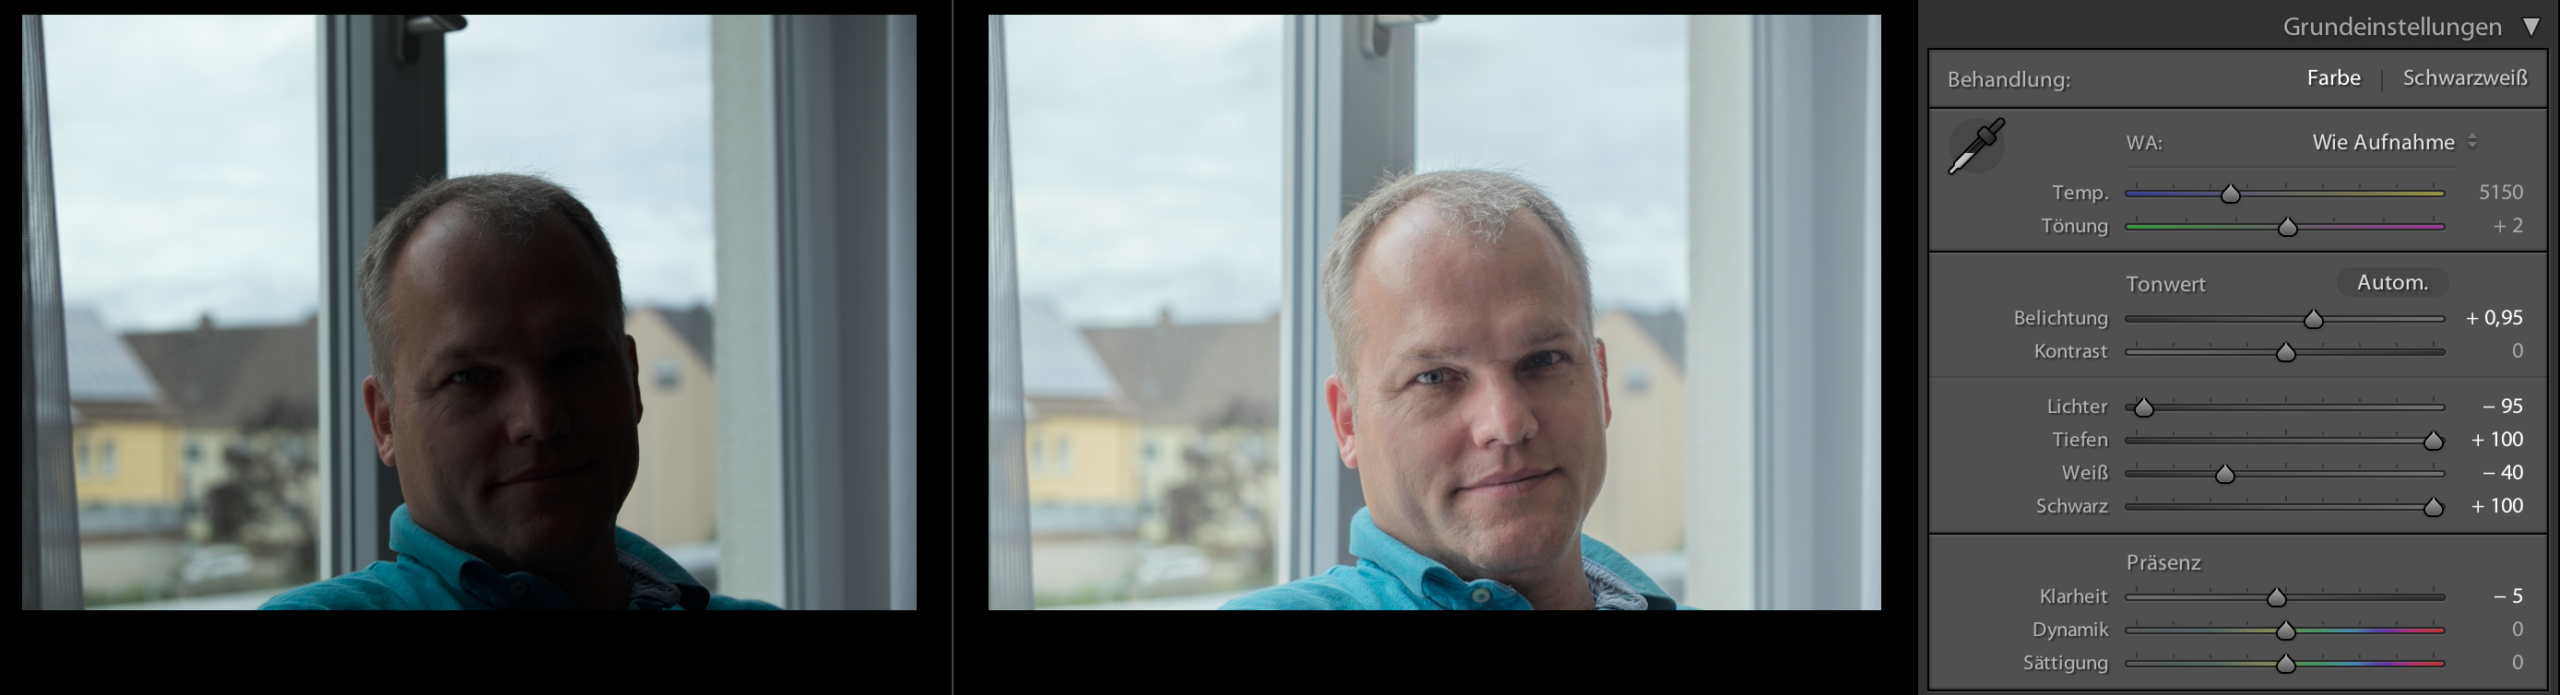
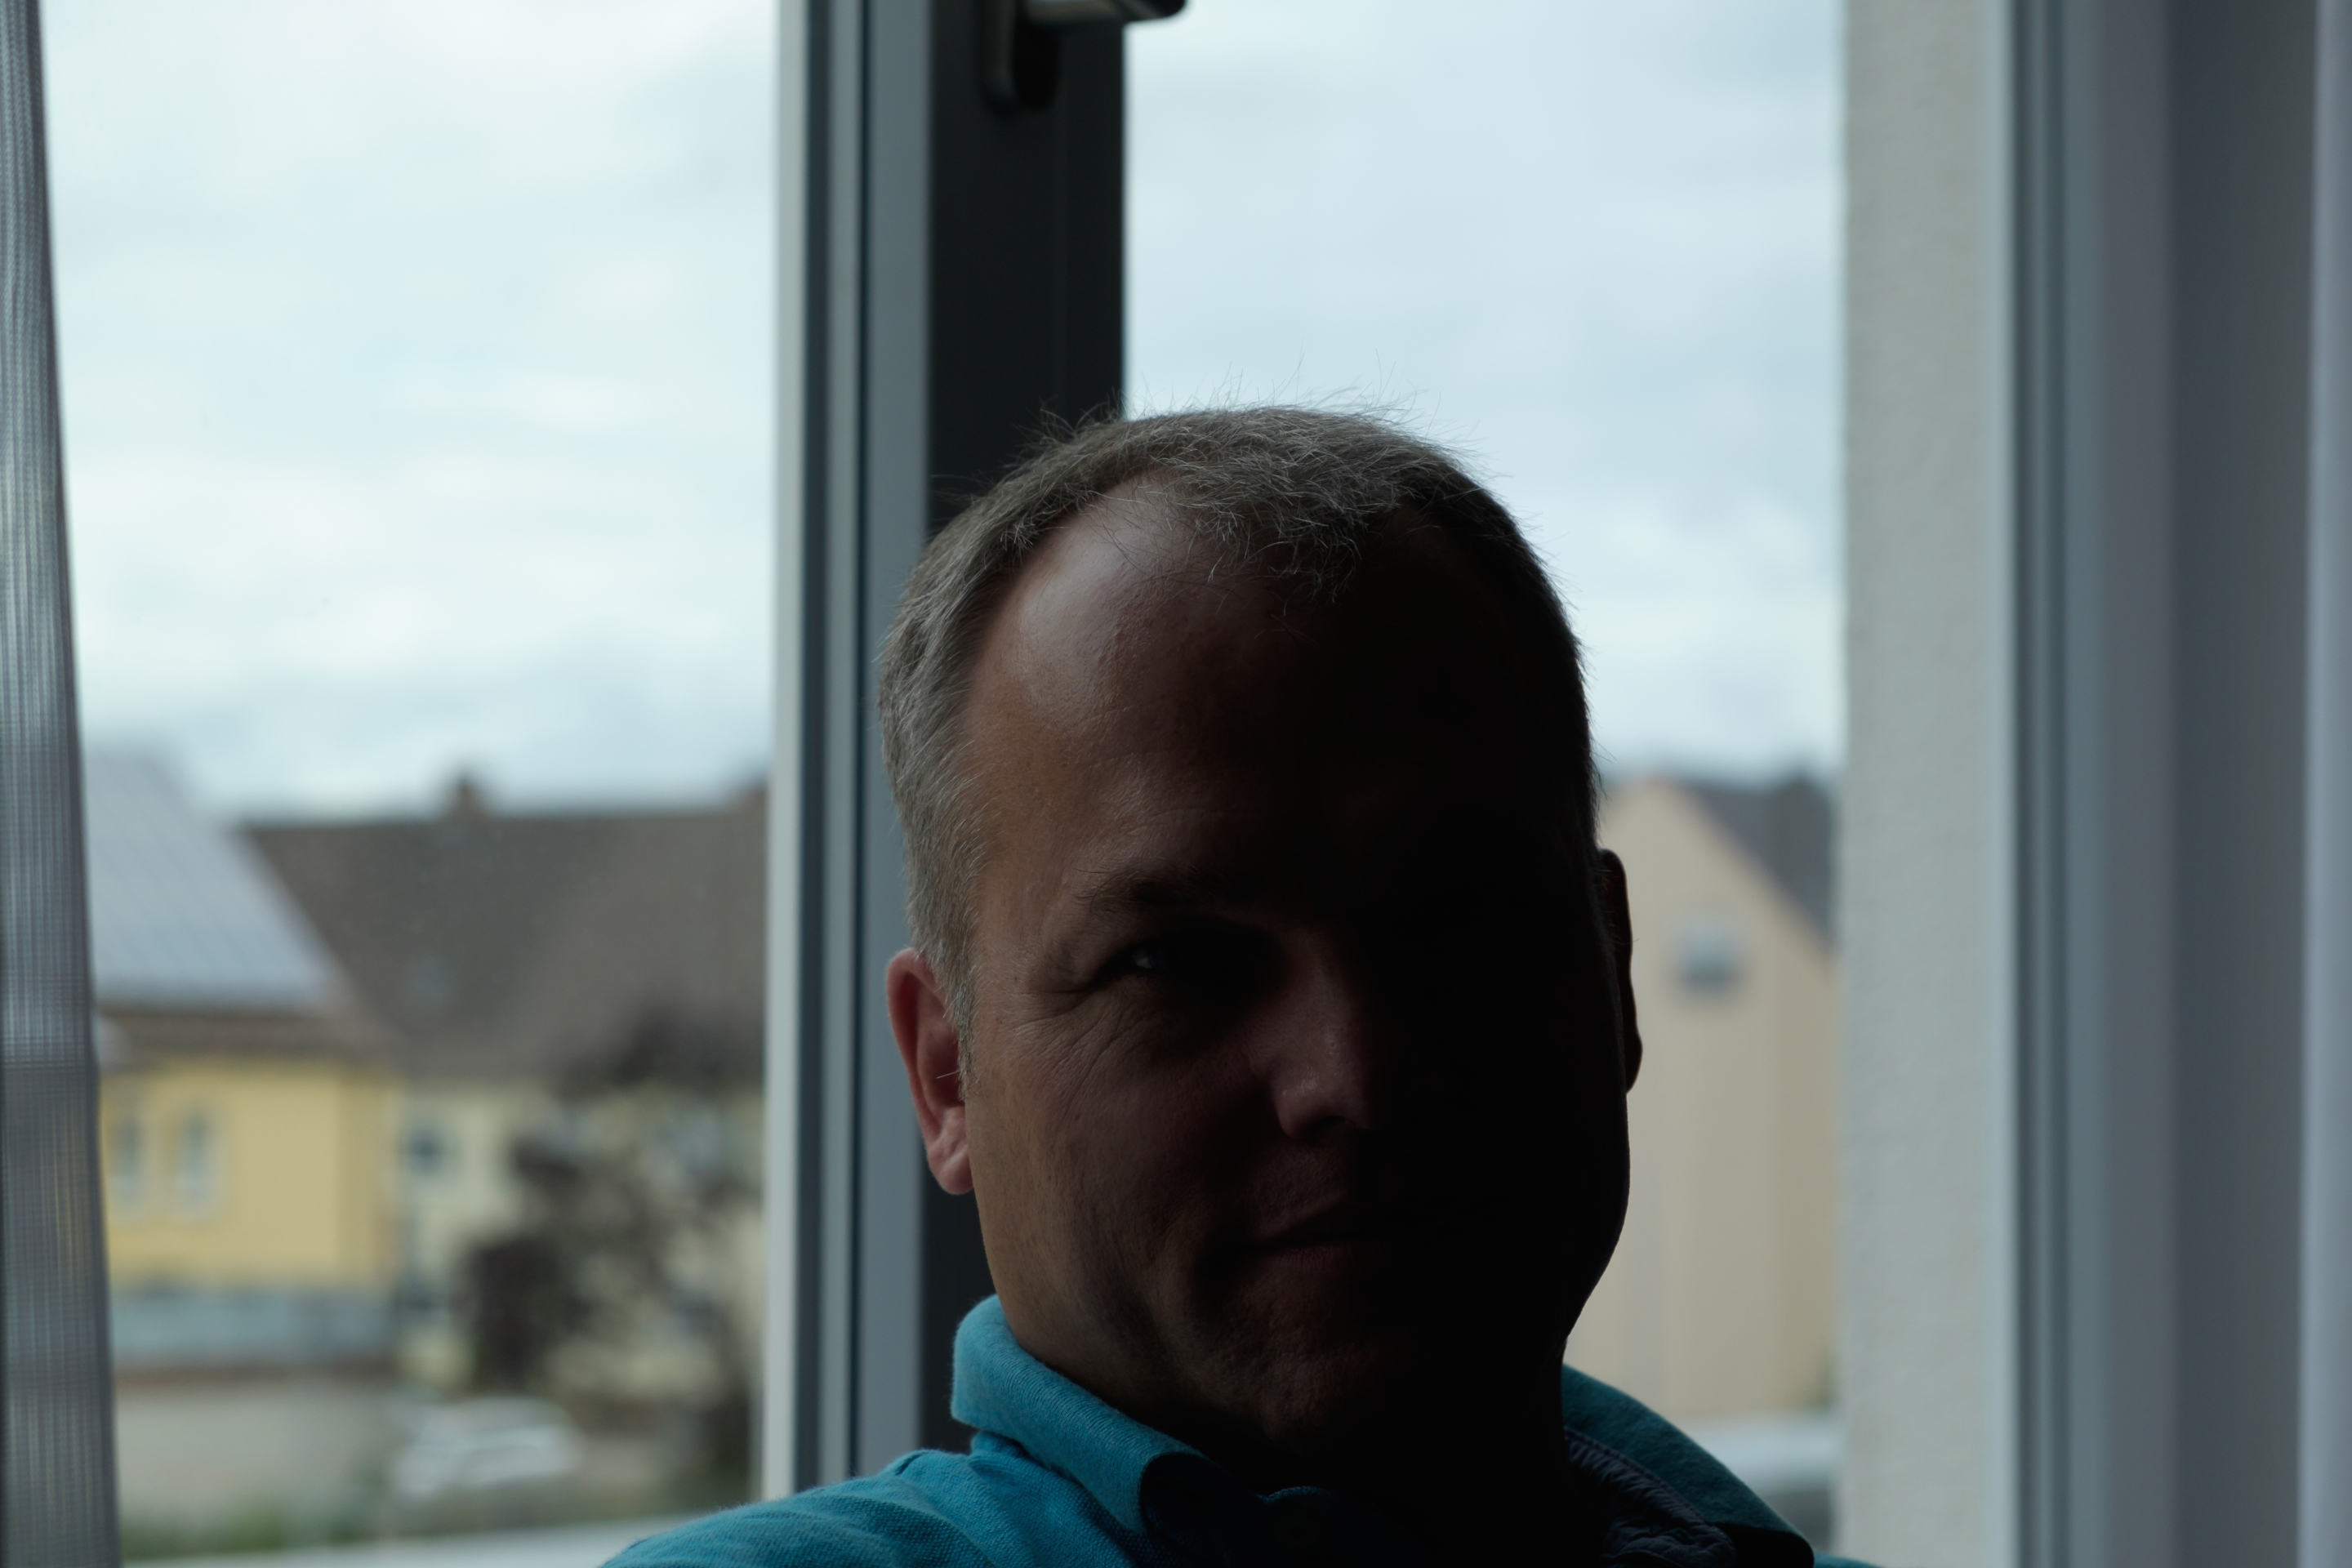 Let’s have a look at an extreme example. I took this snapshot of one of my workshop delegates in a room without artificial lighting right in front of a bright window. The exposure difference between the delegate and the background on the outside comprises about four stops. This is a tough (if not impossible) situation for any digital camera: No matter what exposure we choose here, the face either be too dark (image on the right), or the sky will turn out too bright (image on the left). Here’s how we can solve this dilemma…
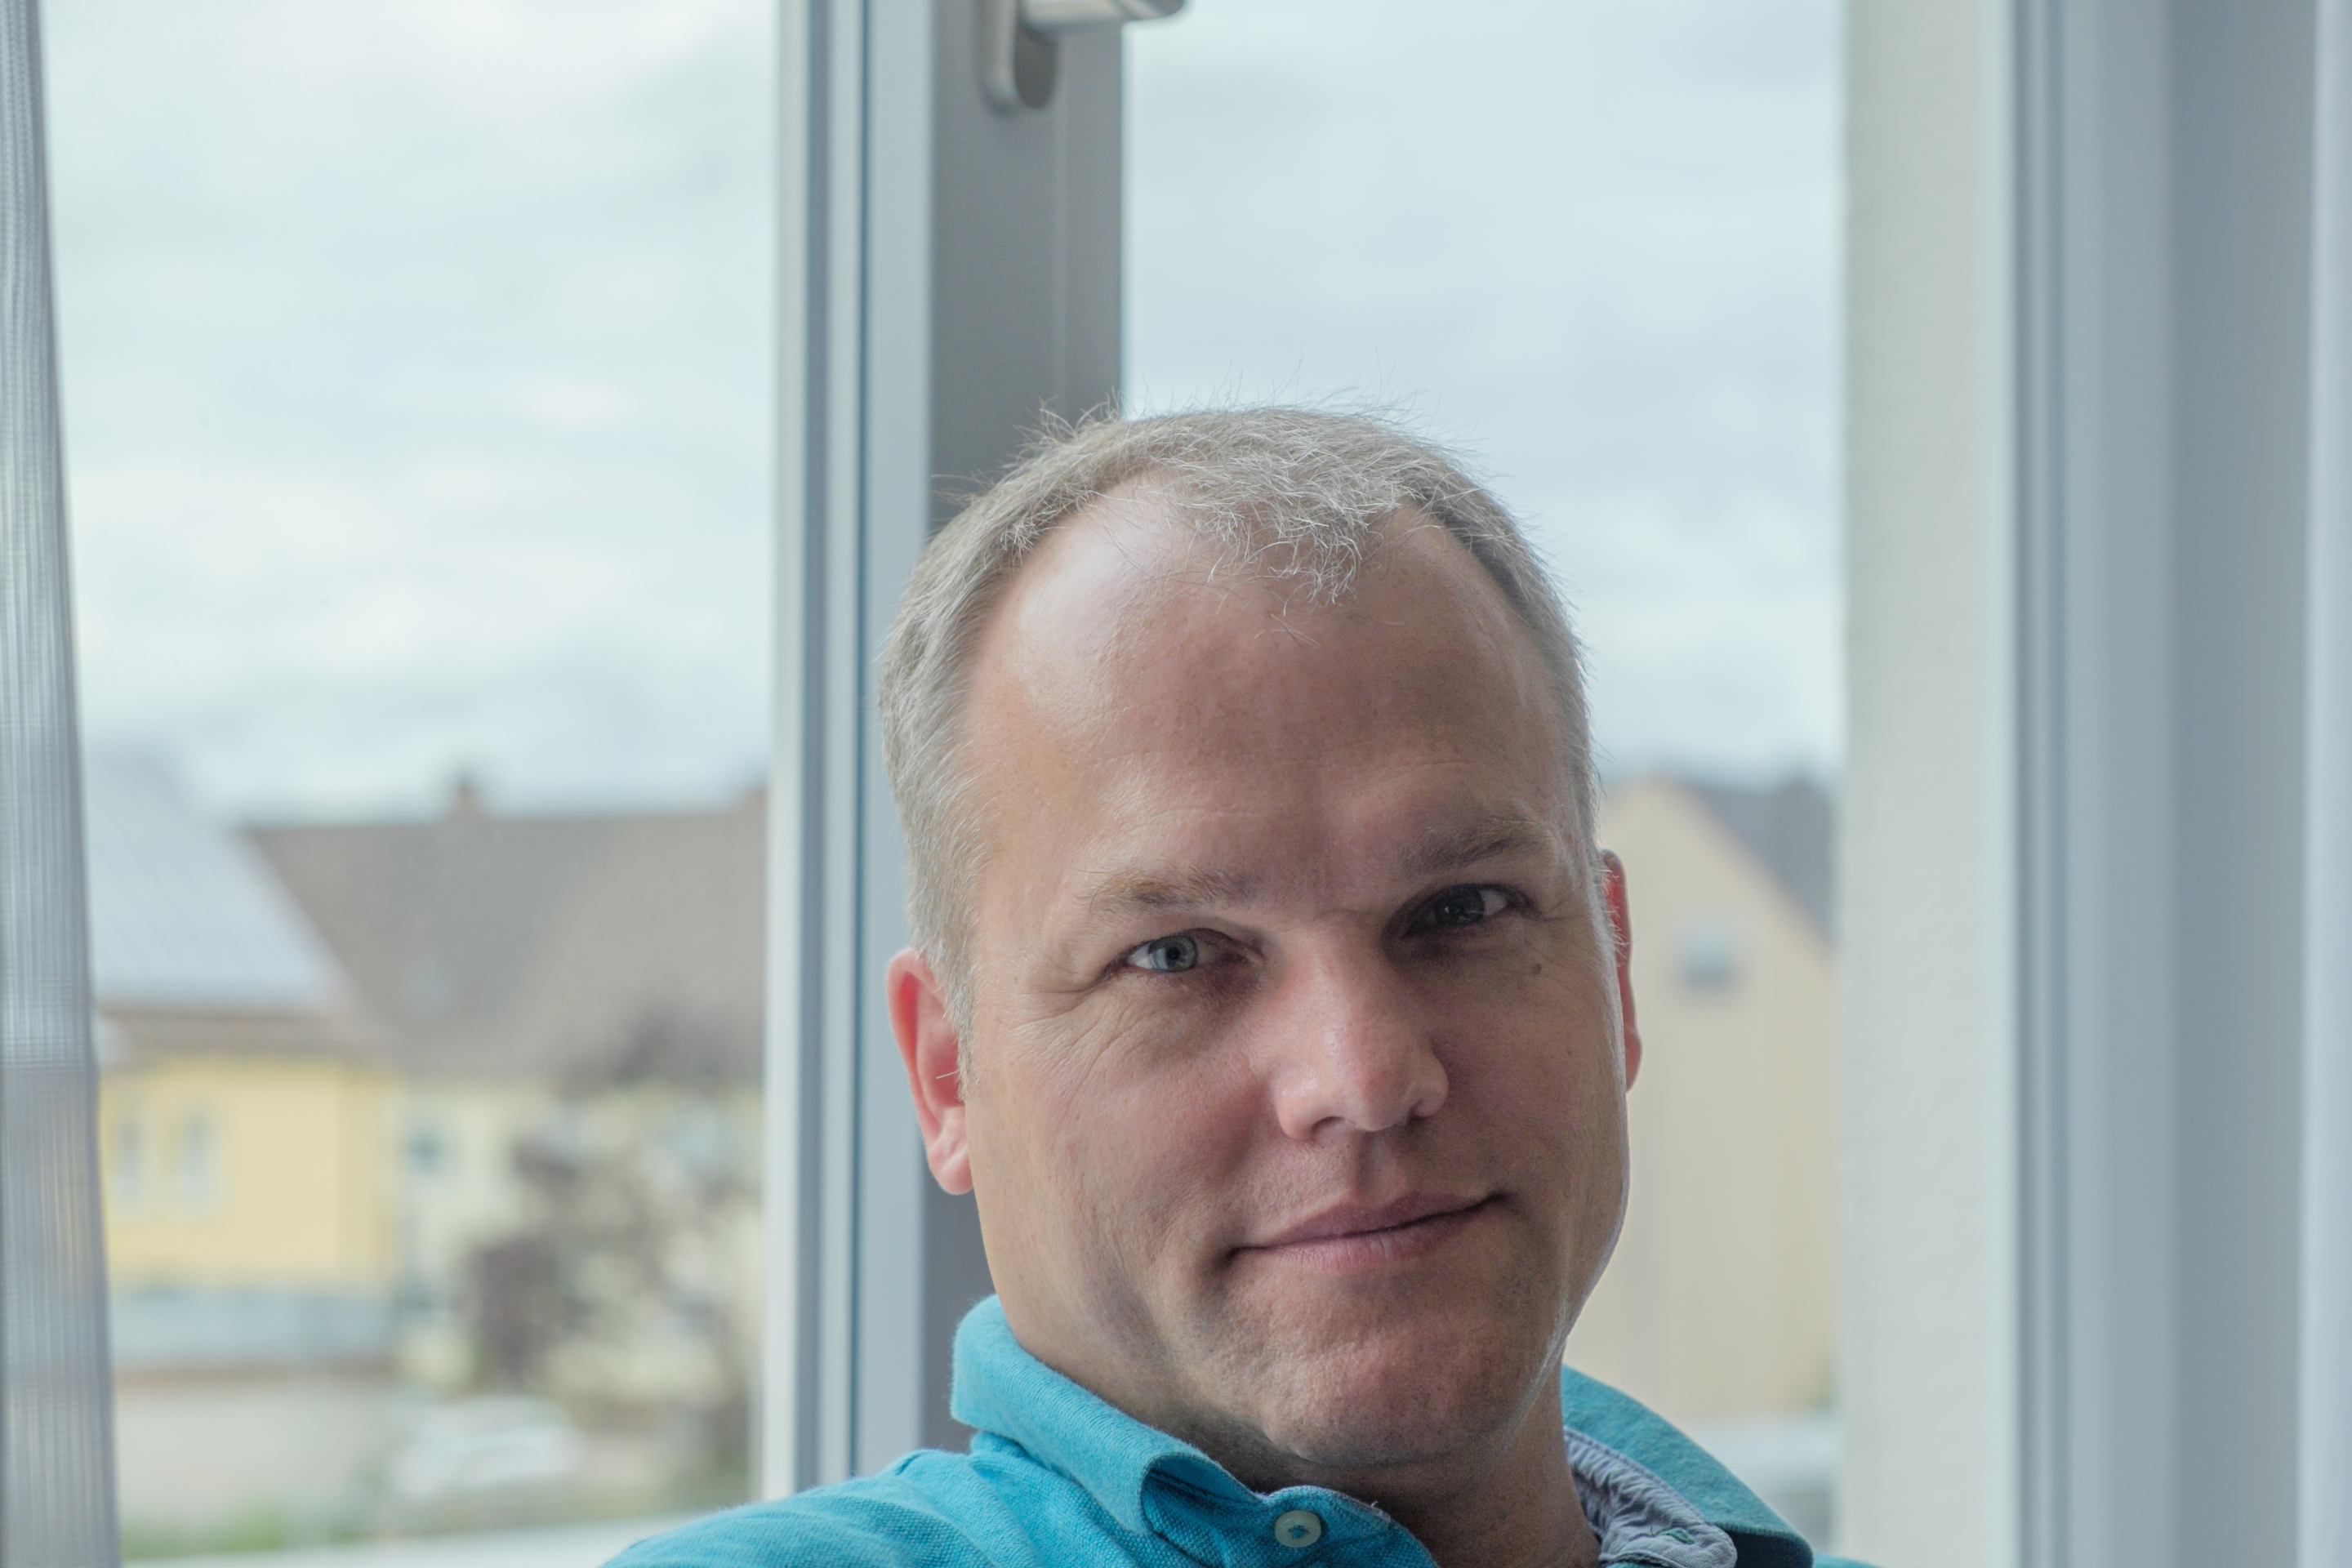 There is no magic exposure setting (aka combination of aperture, shutter speed and ISO) in the camera that would correctly exposure the face and the sky in the background at the same time. That’s why cameras with ISOless sensors are so useful, because they allow us to apply different ISO settings to different parts of the image during post-processing. In this example, the bright sky was left at base ISO 200, while the darkest parts of the image were pushed to ISO 6400 in Adobe Lightroom. Of course, such an extreme bandwidth of adaptive ISO processing takes the Sony-built sensor in the Fujifilm X-E2 right to its limits. Obviously, the parts that have been pushed to ISO 6400 exhibit more noise than those that were left at ISO 200. However, since the camera is ISOless, the noise isn’t different from a normal ISO 6400 shot.
Hard Contrasts
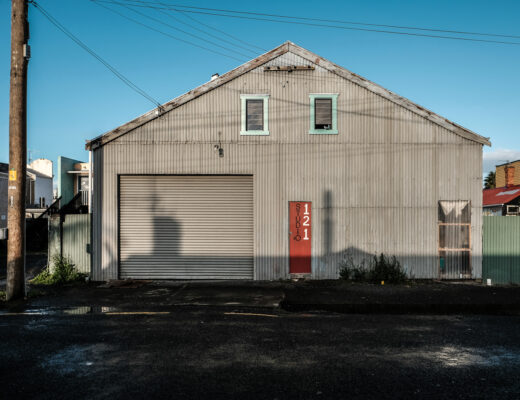
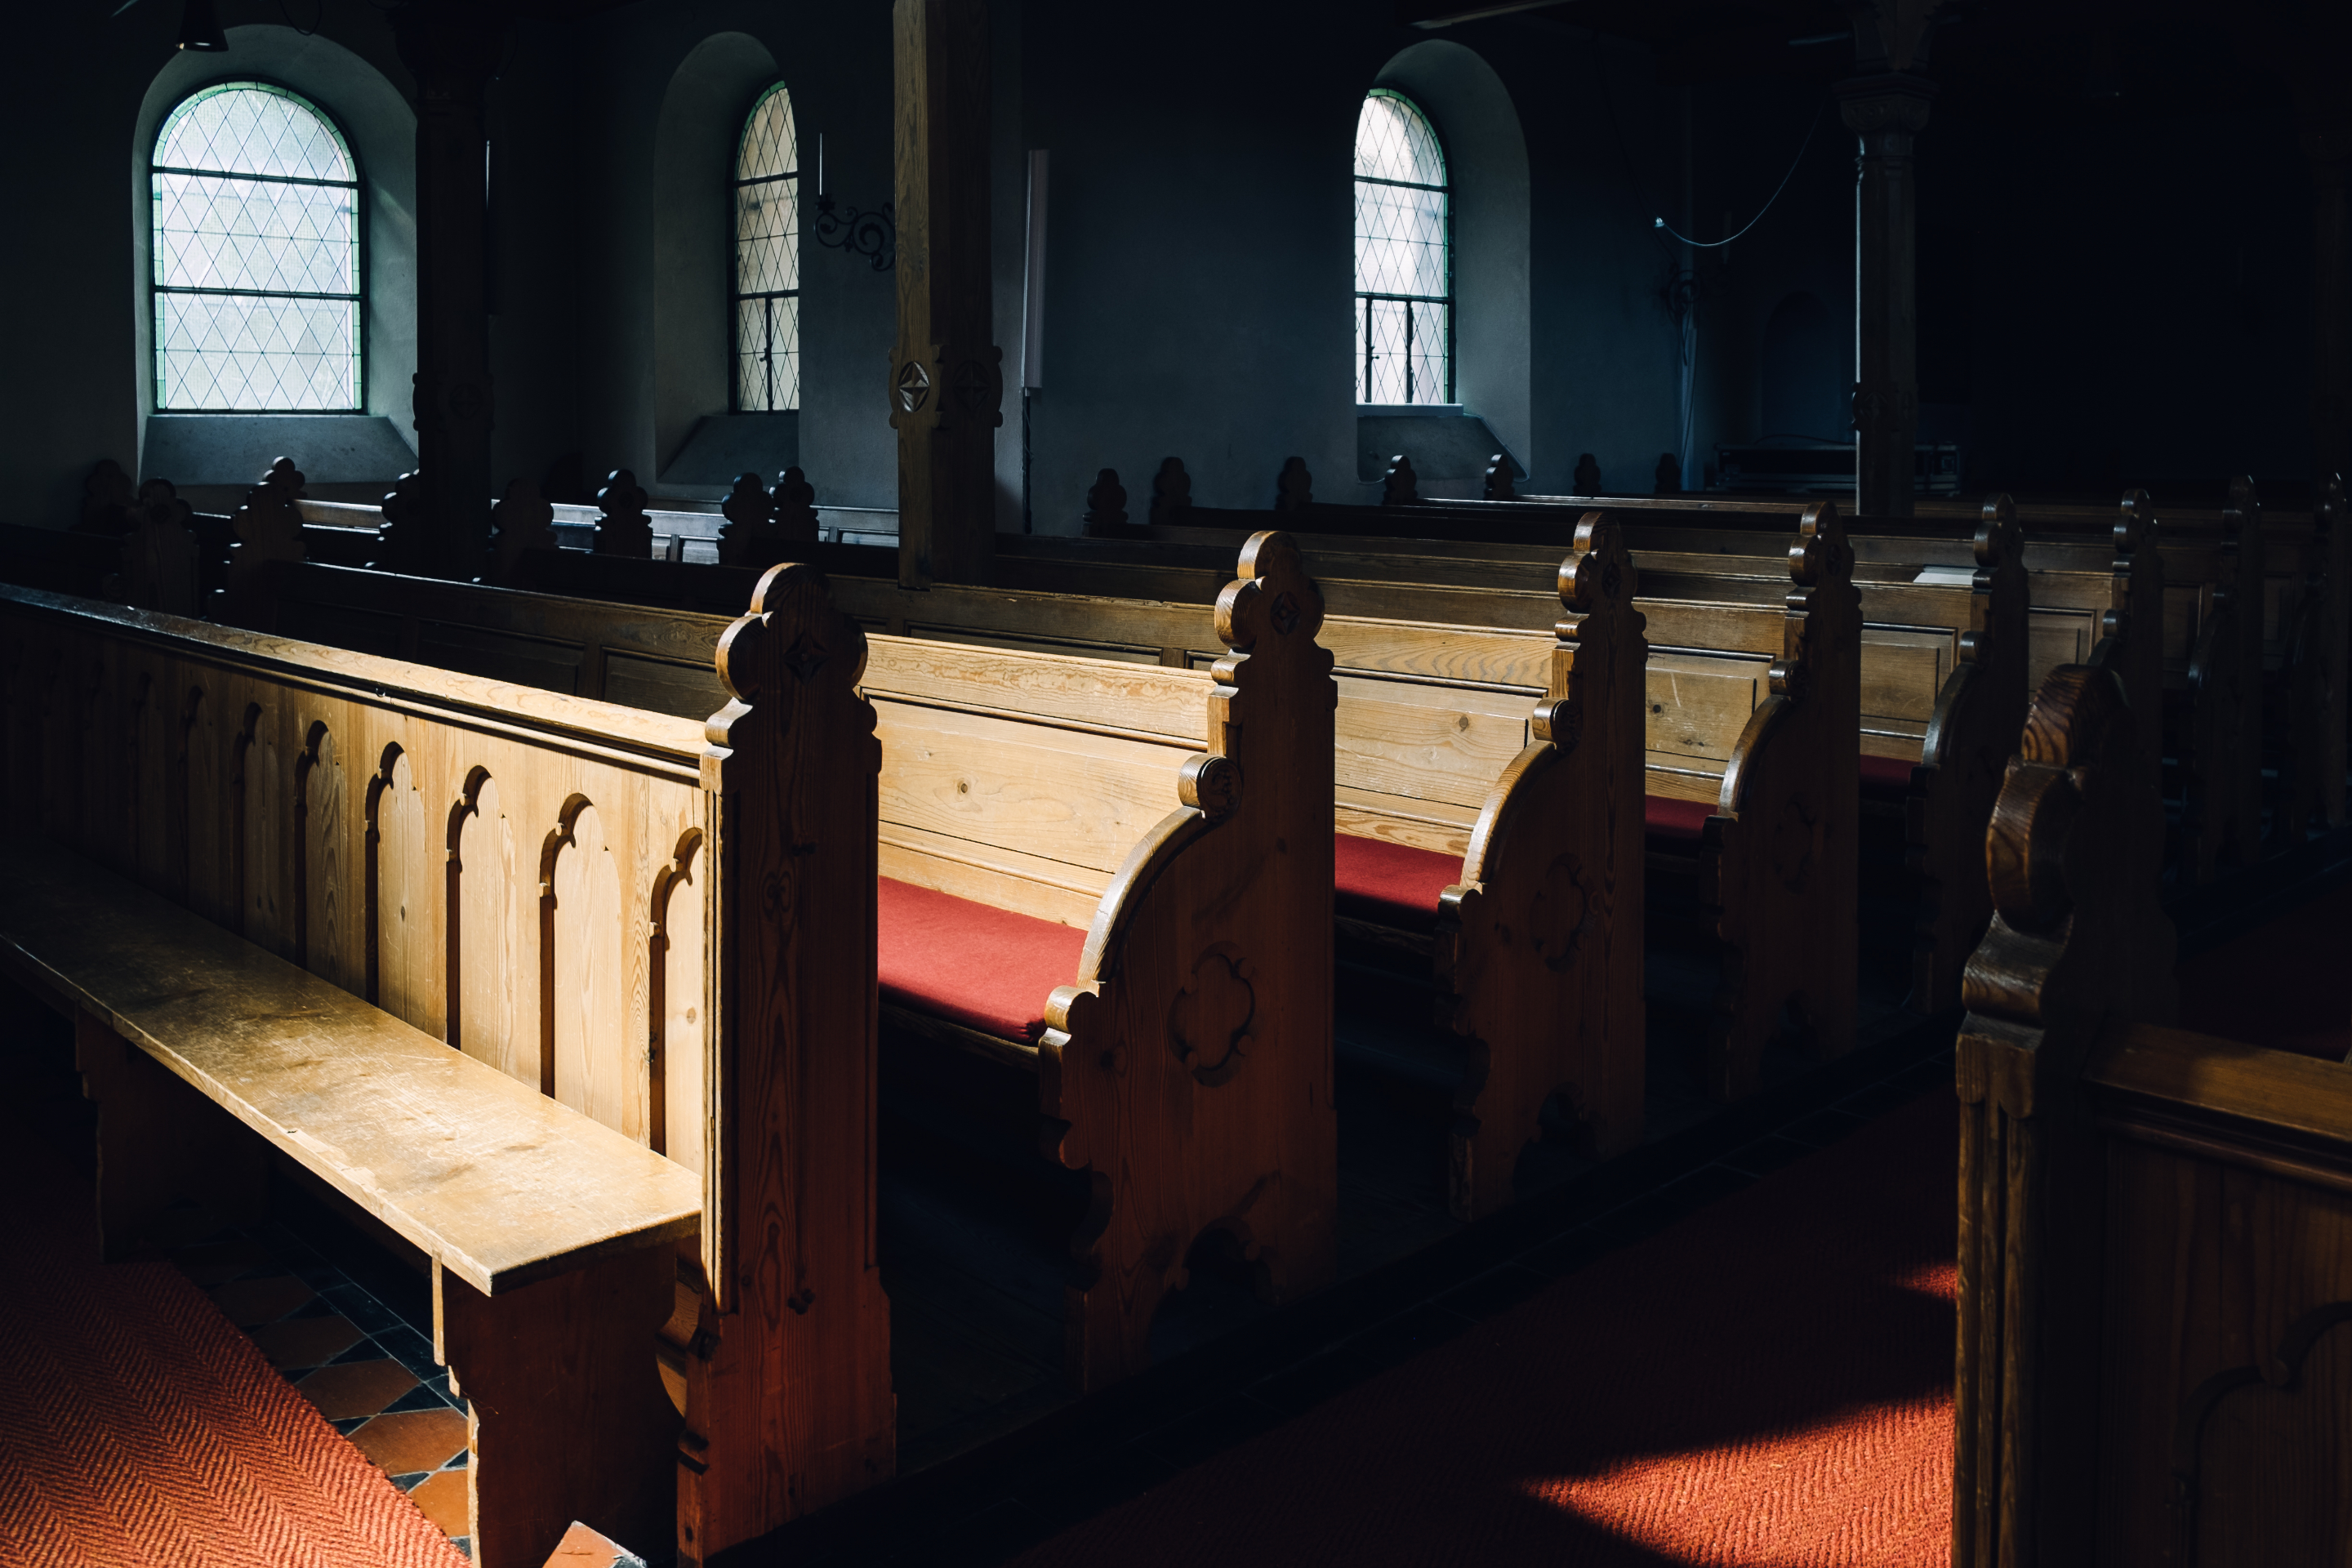 In our daily photography, we often encounter subjects that exceed the dynamic range of our camera. Practically, this means that no matter what exposure we choose, parts of the image will either appear too dark (blocked) or too bright (blown) both in the live view and straight-out-of-camera JPEGs. This doesn’t have to be a bad thing, because sometimes, strong contrasts with dark or even blocked shadows can be just what we are looking for. For example, the scene that’s pictured on the right looked very unspectacular to the human eye. However, by exposing it to the highlights, the camera’s contrast curve turned the scene into something more dramatic. In this case, expanding the dynamic range (DR) would have been counterproductive. Instead, the dramatic lighting was achieved by decreasing the DR.
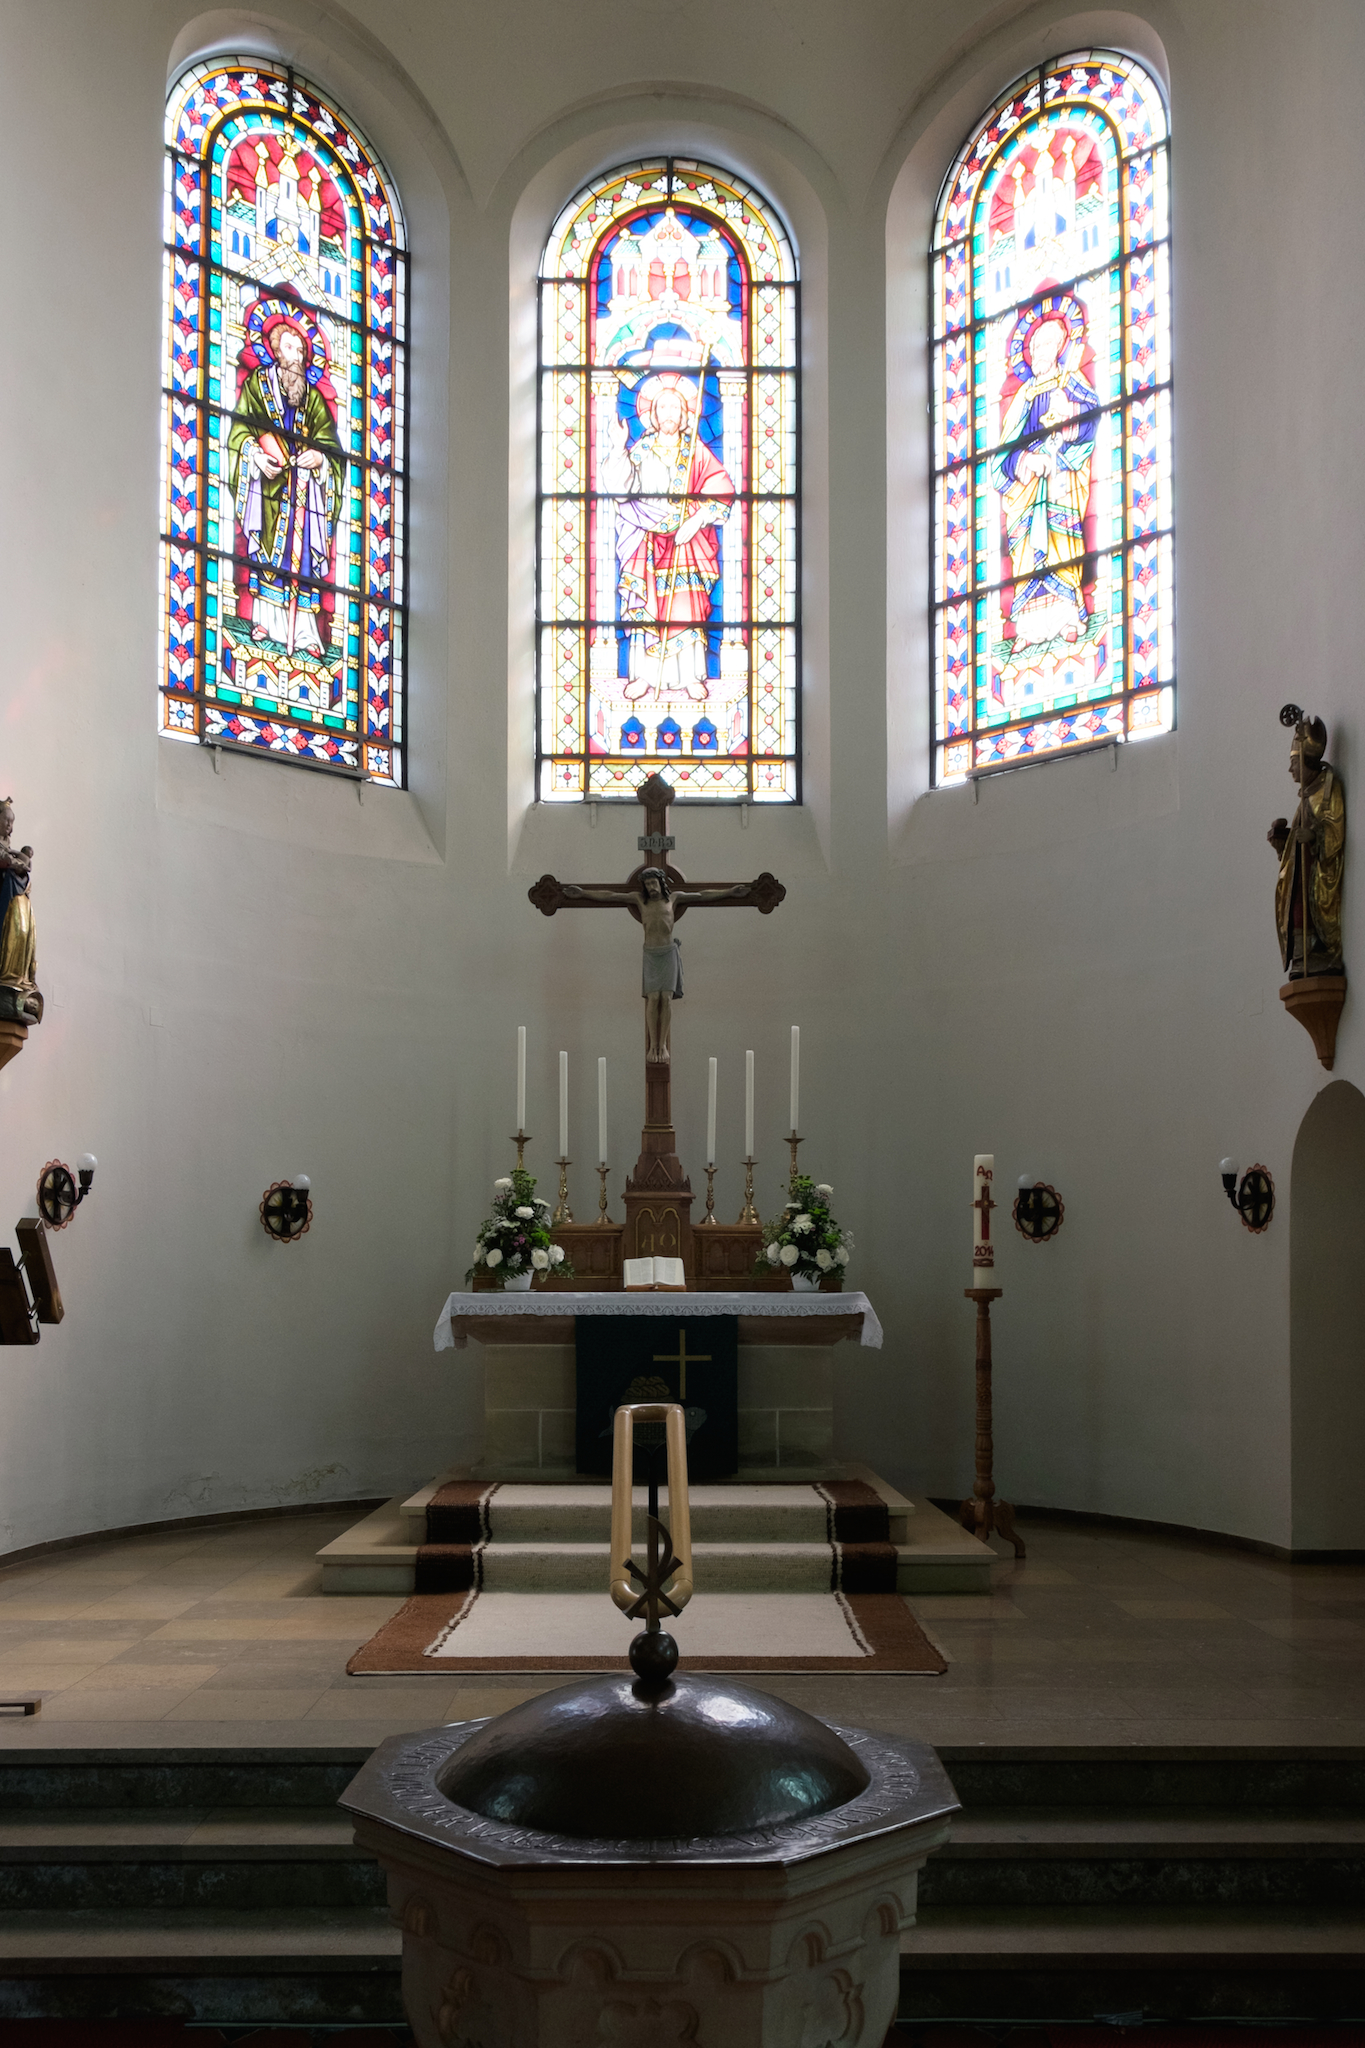
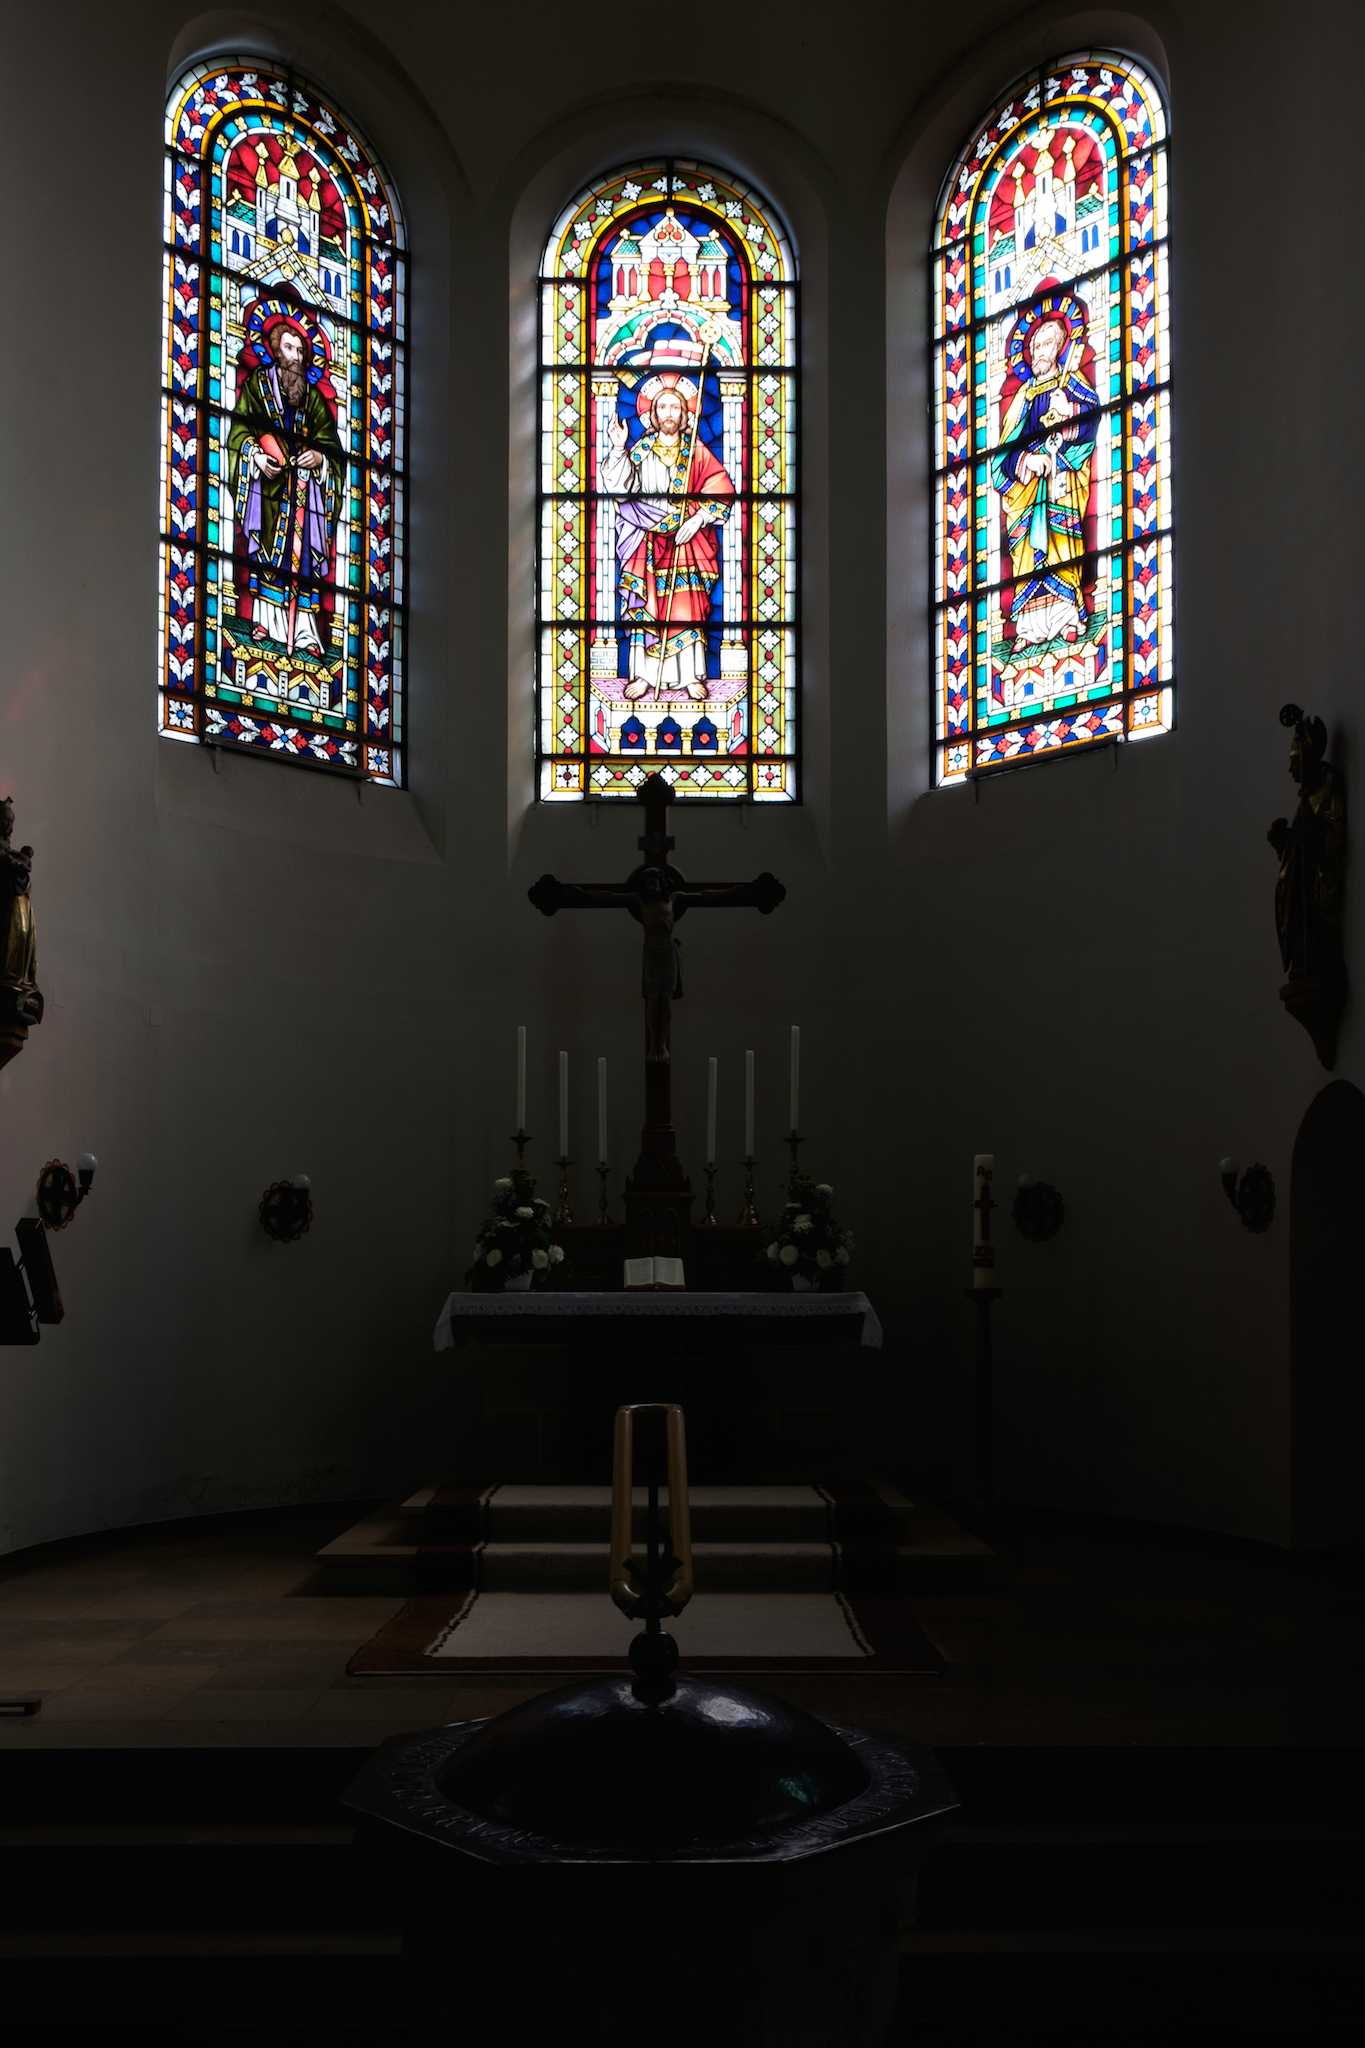 It’s a different situation when we try to capture the altar room of the same church along with the brightly lit colored windows. Using the camera’s regular contrast curve, either the interior of the church will turn out too dark (right), or the colored windows will be blown (left), depending on our exposure settings. Both versions aren’t satisfactory, but since our Fuji cameras feature ISOless sensors, it’s easy to apply adaptive ISO to the version that is pictured on the right. Using Lightroom to process the corresponding RAW file, we only push the dark interior parts and leave the bright windows alone.
 The “correct” exposure of this scene requires exposing to the windows. Then, we selectively amplify the underexposed parts by about two stops (EV) without affecting the windows which are already well exposed. Using Lightroom and its five different exposure sliders, this is an easy task, but you can just as well use other converters such as Iridient Developer, Photo Ninja or Capture One Pro. Just make sure that your converter is capable of balancing the differences in exposure of your scene. The resulting image out of Lightroom (featuring amplification of the shadows and midtones only) is pictured on the right.
Using mirrorless cameras with WYSIWYG live view displays can lead to practical issues, though: By exposing to the highlights, the live view image may turn so dark that it becomes difficult to actually compose a scene using the electronic viewfinder or the LCD display. The photographer is literally left in the dark.
In such cases, the DR function of your X-series camera can be quite helpful, as it amplifies (brightens) the live view image by one (DR200%) or two stops (DR400%) without affecting the RAW data (which will remain underexposed to allow adaptive ISO postprocessing during RAW conversion). This means that we can still process the RAW in Lightroom like we did before, but the live view will display a brighter imager that is easier to use. Even better, the camera will also try to produce a JPEG file that automatically encompasses adaptive ISO amplification: shadows and midtones are selectively pushed, so the highlights remain intact. Hence, the resulting JPEG features one (DR200%) or two stops (DR400%) more highlight dynamic range than a regular JPEG that is shot at DR100%. This is great for JPEG shooter who aren’t interested in processing their RAWs in Lightroom or any external RAW converter.
Eye vs. Camera
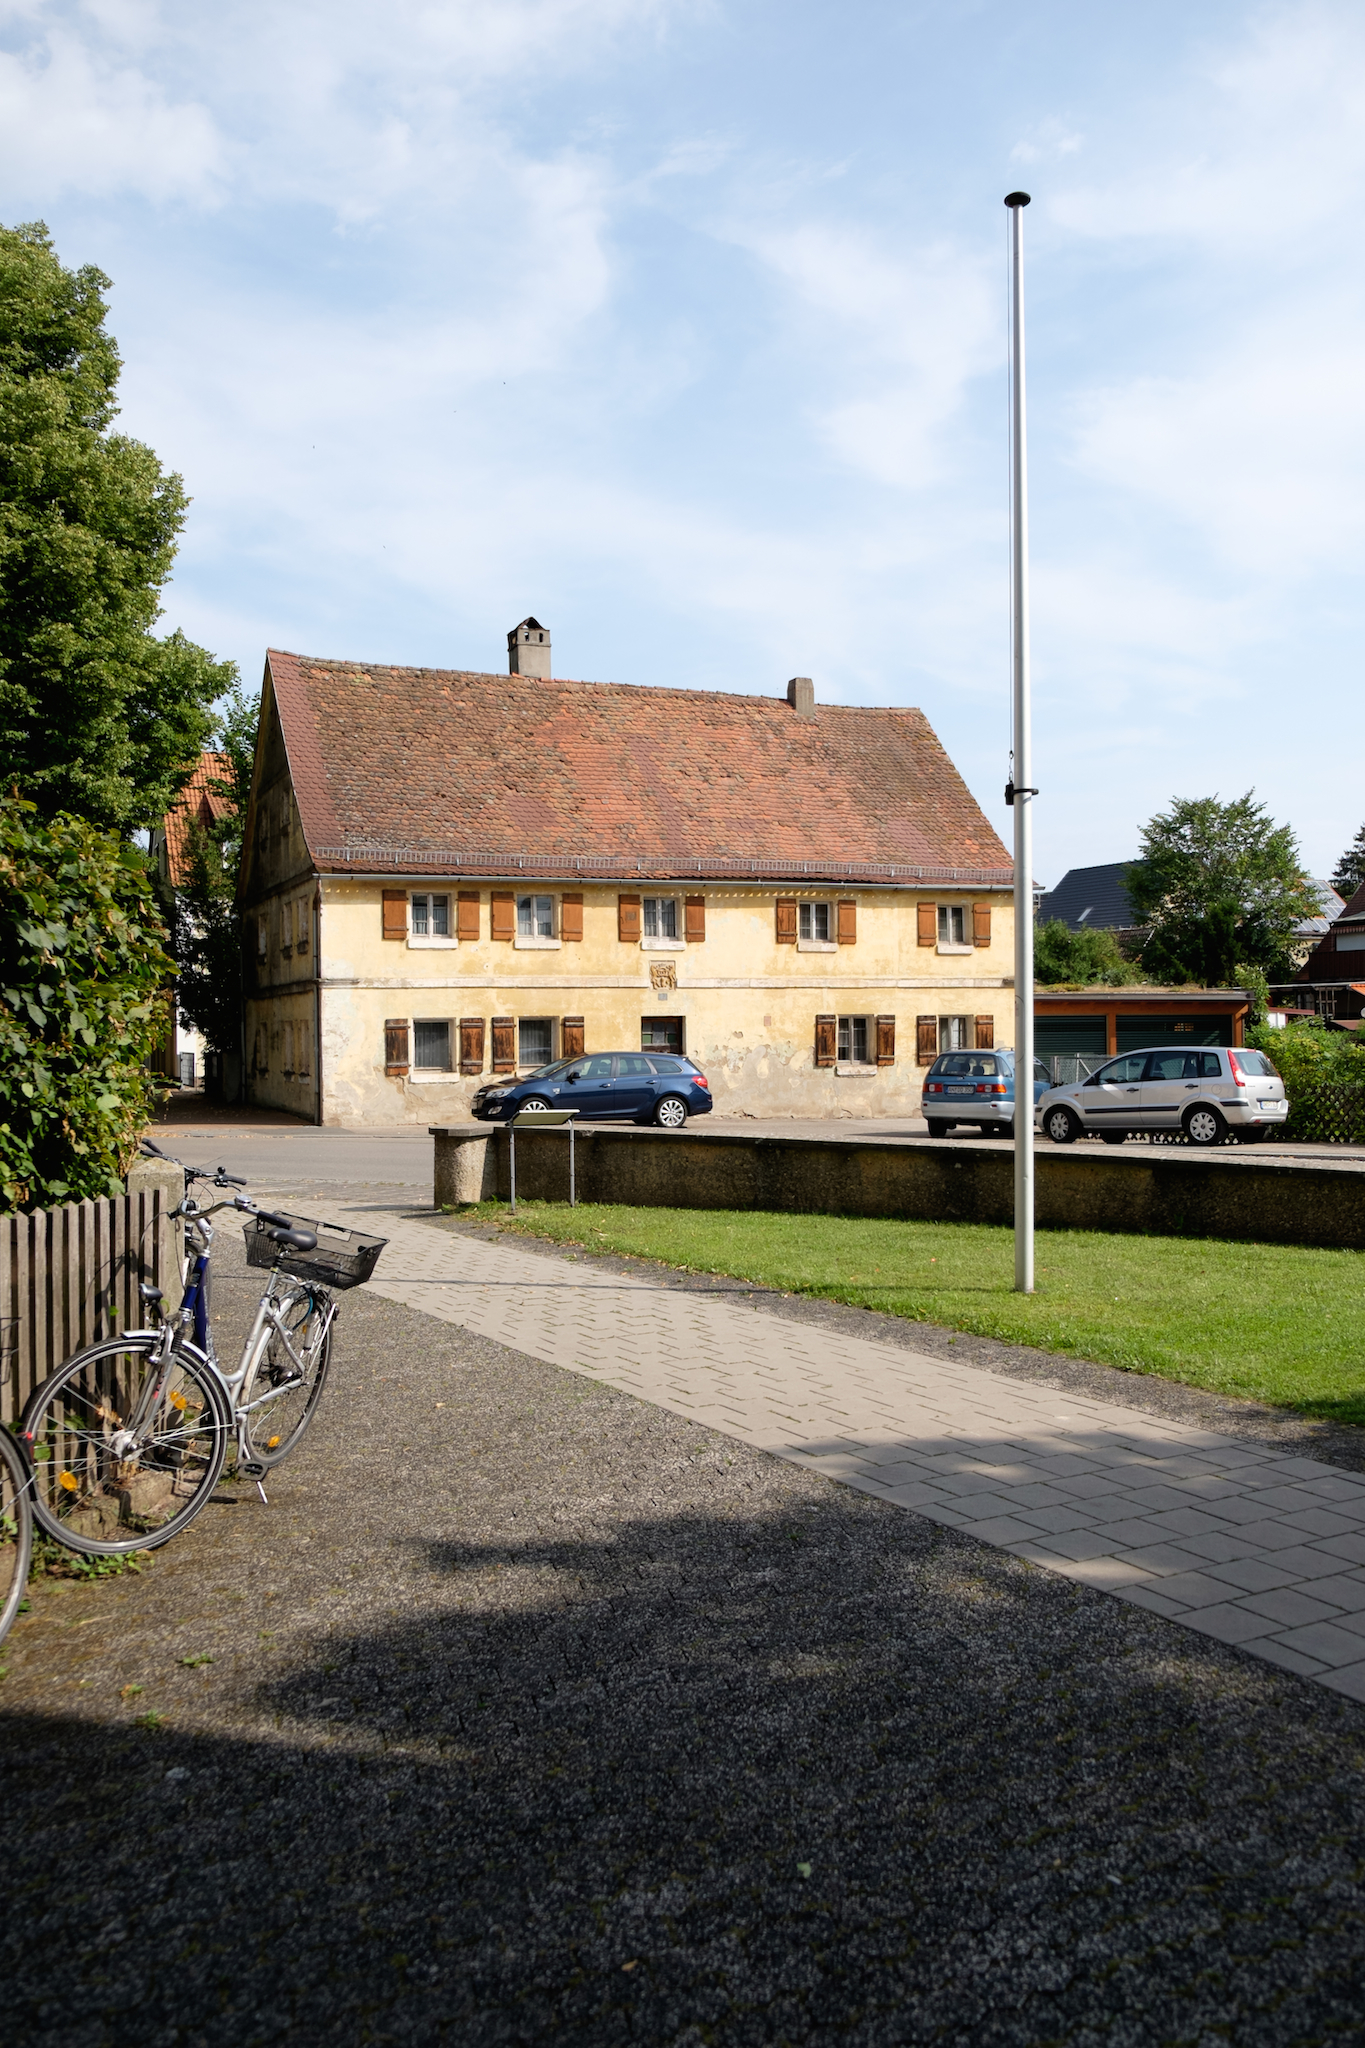
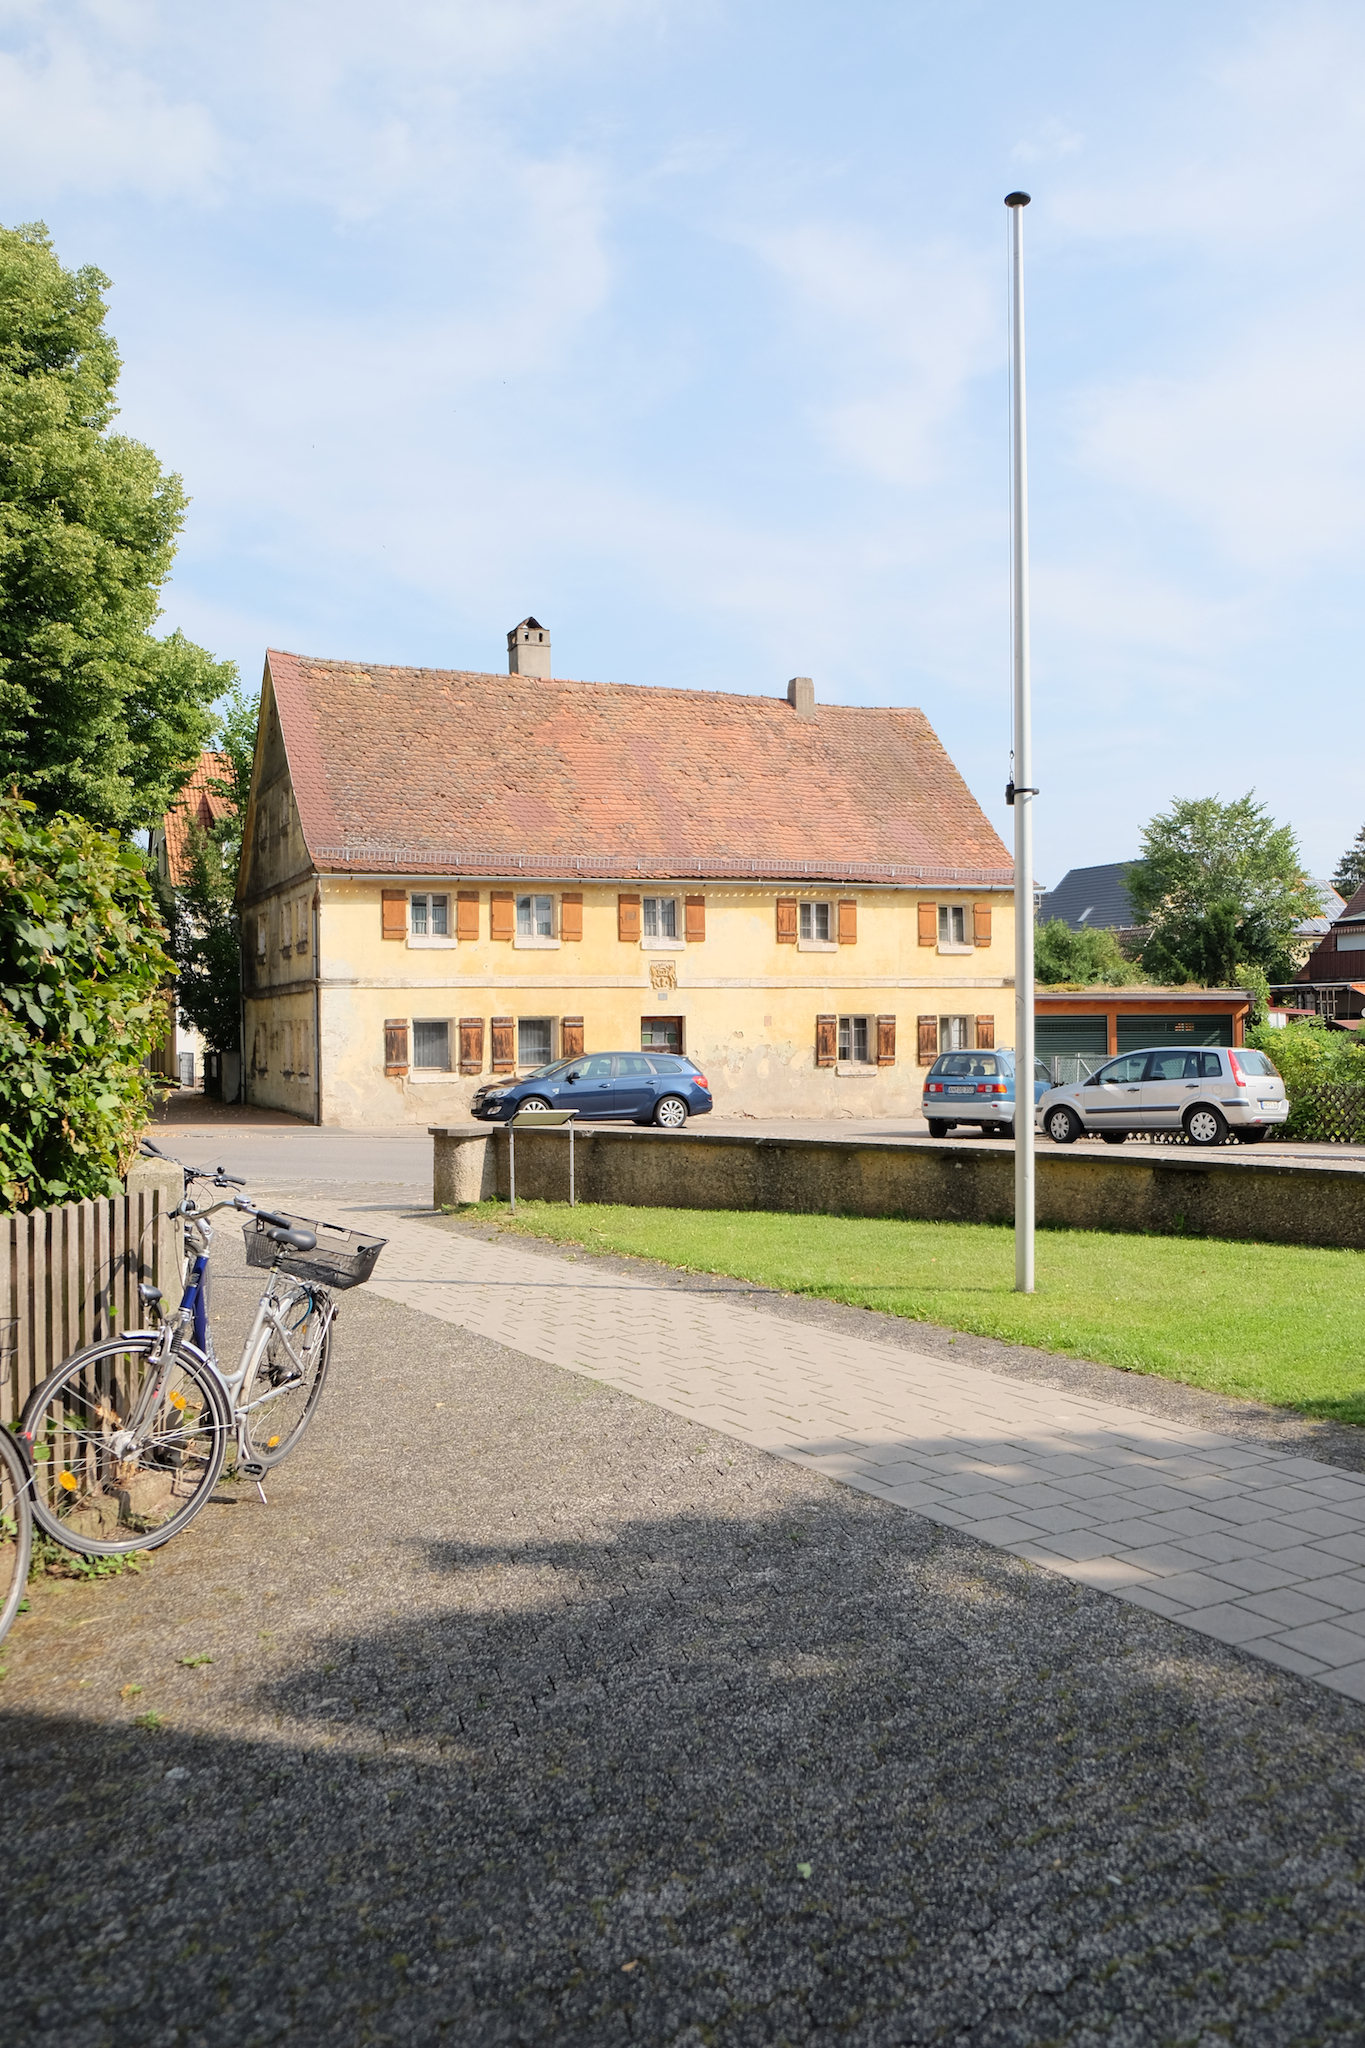
 Let’s look at another example. In front the church entrance, our workshop encountered a typical situation: a scene that consists partly of shadows and partly of brightly lit elements. In such cases, the camera will “see” the scene quite differently from our human eye. While our brain automatically uses some kind of “high dynamic range processing” to lift the shadows, the camera’s contrast curve makes the shadows appear darker than we actually see them (left image). However, if we change the exposure in the camera so that the shadows appear just as bright as our eye is seeing them, the brightly lit parts of the scene look way too overexposed (right image). In this case, the exposure difference between correctly exposed shadows and correctly exposed bright parts is about two stops. We can measure the exact difference by counting the clicks on the exposure compensation dial that lie between the two exposure settings that are perfect for the shadows and for the highlights. Each click amounts to 1/3 EV (one third of a stop), so three clicks mean that there’s a difference of one stop between the two exposures.

 To make the dark and the bright parts of this scene look like our eye is seeing them, we have to expose the image to the highlights and then selectively amplify the shadows and midtones during RAW conversions. The result of such a process (performed in Lightroom) is displayed in the image on the left. Alternatively, we can assign this task to the DR function in our camera. Besides its DR100% standard setting, every X-series camera also offers at least two additional dynamic range settings: DR200% and DR400%. DR200% extends the highlight dynamic range by one stop, DR400% extends it by two stops. By counting the number of clicks on the exposure compensation dial that lie between a correct exposure on the highlights and a correct exposure on the shadows of our scene, we can easily determine which DR setting is best (make sure that your camera is set to DR100% while you are measuring a scene and counting clicks): If the exposure difference is 1 to 3 clicks, DR200% will suffice. More than 3 clicks requires DR400%. And more than 6 clicks means that even DR400% won’t capture the highlights and the shadows of a scene in the resulting JPEG image. The sample image on the right displays a straight-out-of-camera DR400% rendering of our scene that was exposed to the shadows.
Thanks to the additional two stops of highlight dynamic range of DR400%, the bright areas in the scene aren’t blown. The camera’s JPEG engine only amplified the shadows and midtones during RAW conversion. In other words: With DR400%, the camera saved a RAW files that was two stops underexposed (like ISO 200 instead of ISO 800). It then pushed the shadows and midtones back to ISO 800 during RAW conversion while leaving the highlights intact at ISO 200. That’s why for Fujifilm APS-C cameras with a base ISO of 200, DR400% requires a minimum ISO setting of 800, and DR200% requires a minimum ISO setting of 400.
Protecting Against Overexposure
We can also use the DR function as a protection against accidental overexposure. If a scene requires us to use ISO 400 or 800, anyway, it’s not unreasonable to set the DR to DR200% or DR400%, respectively. By doing so, we delay the ISO amplification of the last stop (DR200%) or the last two stops (DR400%) till the RAW conversion stage. The RAW file in the camera is underexposed one or two stops, so an accidental overexposure isn’t permanently burned into the RAW file. We can always take back one or two stops of exposure in the RAW converter, simply by moving the exposure slider to the left.

 Most RAW converters (such as Lightroom, Silkypix, Aperture, Capture One or Iridient Developer) automatically recognize RAWs that have been shot with DR200% or DR400% by looking at the metadata. To compensate for this underexposure, they automatically apply an appropriate digital ISO push on import. This means that an image taken at ISO 800 / DR100% and one taken at ISO 800 / DR400% will look the same when you import the RAWs into Lightroom. However, there is a huge difference when you pull back the exposure slider to recover highlights or compensate for accidental overexposure: The DR400% RAW offers two stops of additional highlight dynamic range, since it’s actually an ISO 200 RAW that was digitally pushed to ISO 800 during its import to Lightroom. Of course, a digital push can always be taken back. This is illustrated by the DR400% sample images in this paragraph. The image on the left displays the uncorrected version that looks overexposed. On the right, you can see the corrected version. All I had to do was moving the exposure slider to the left.
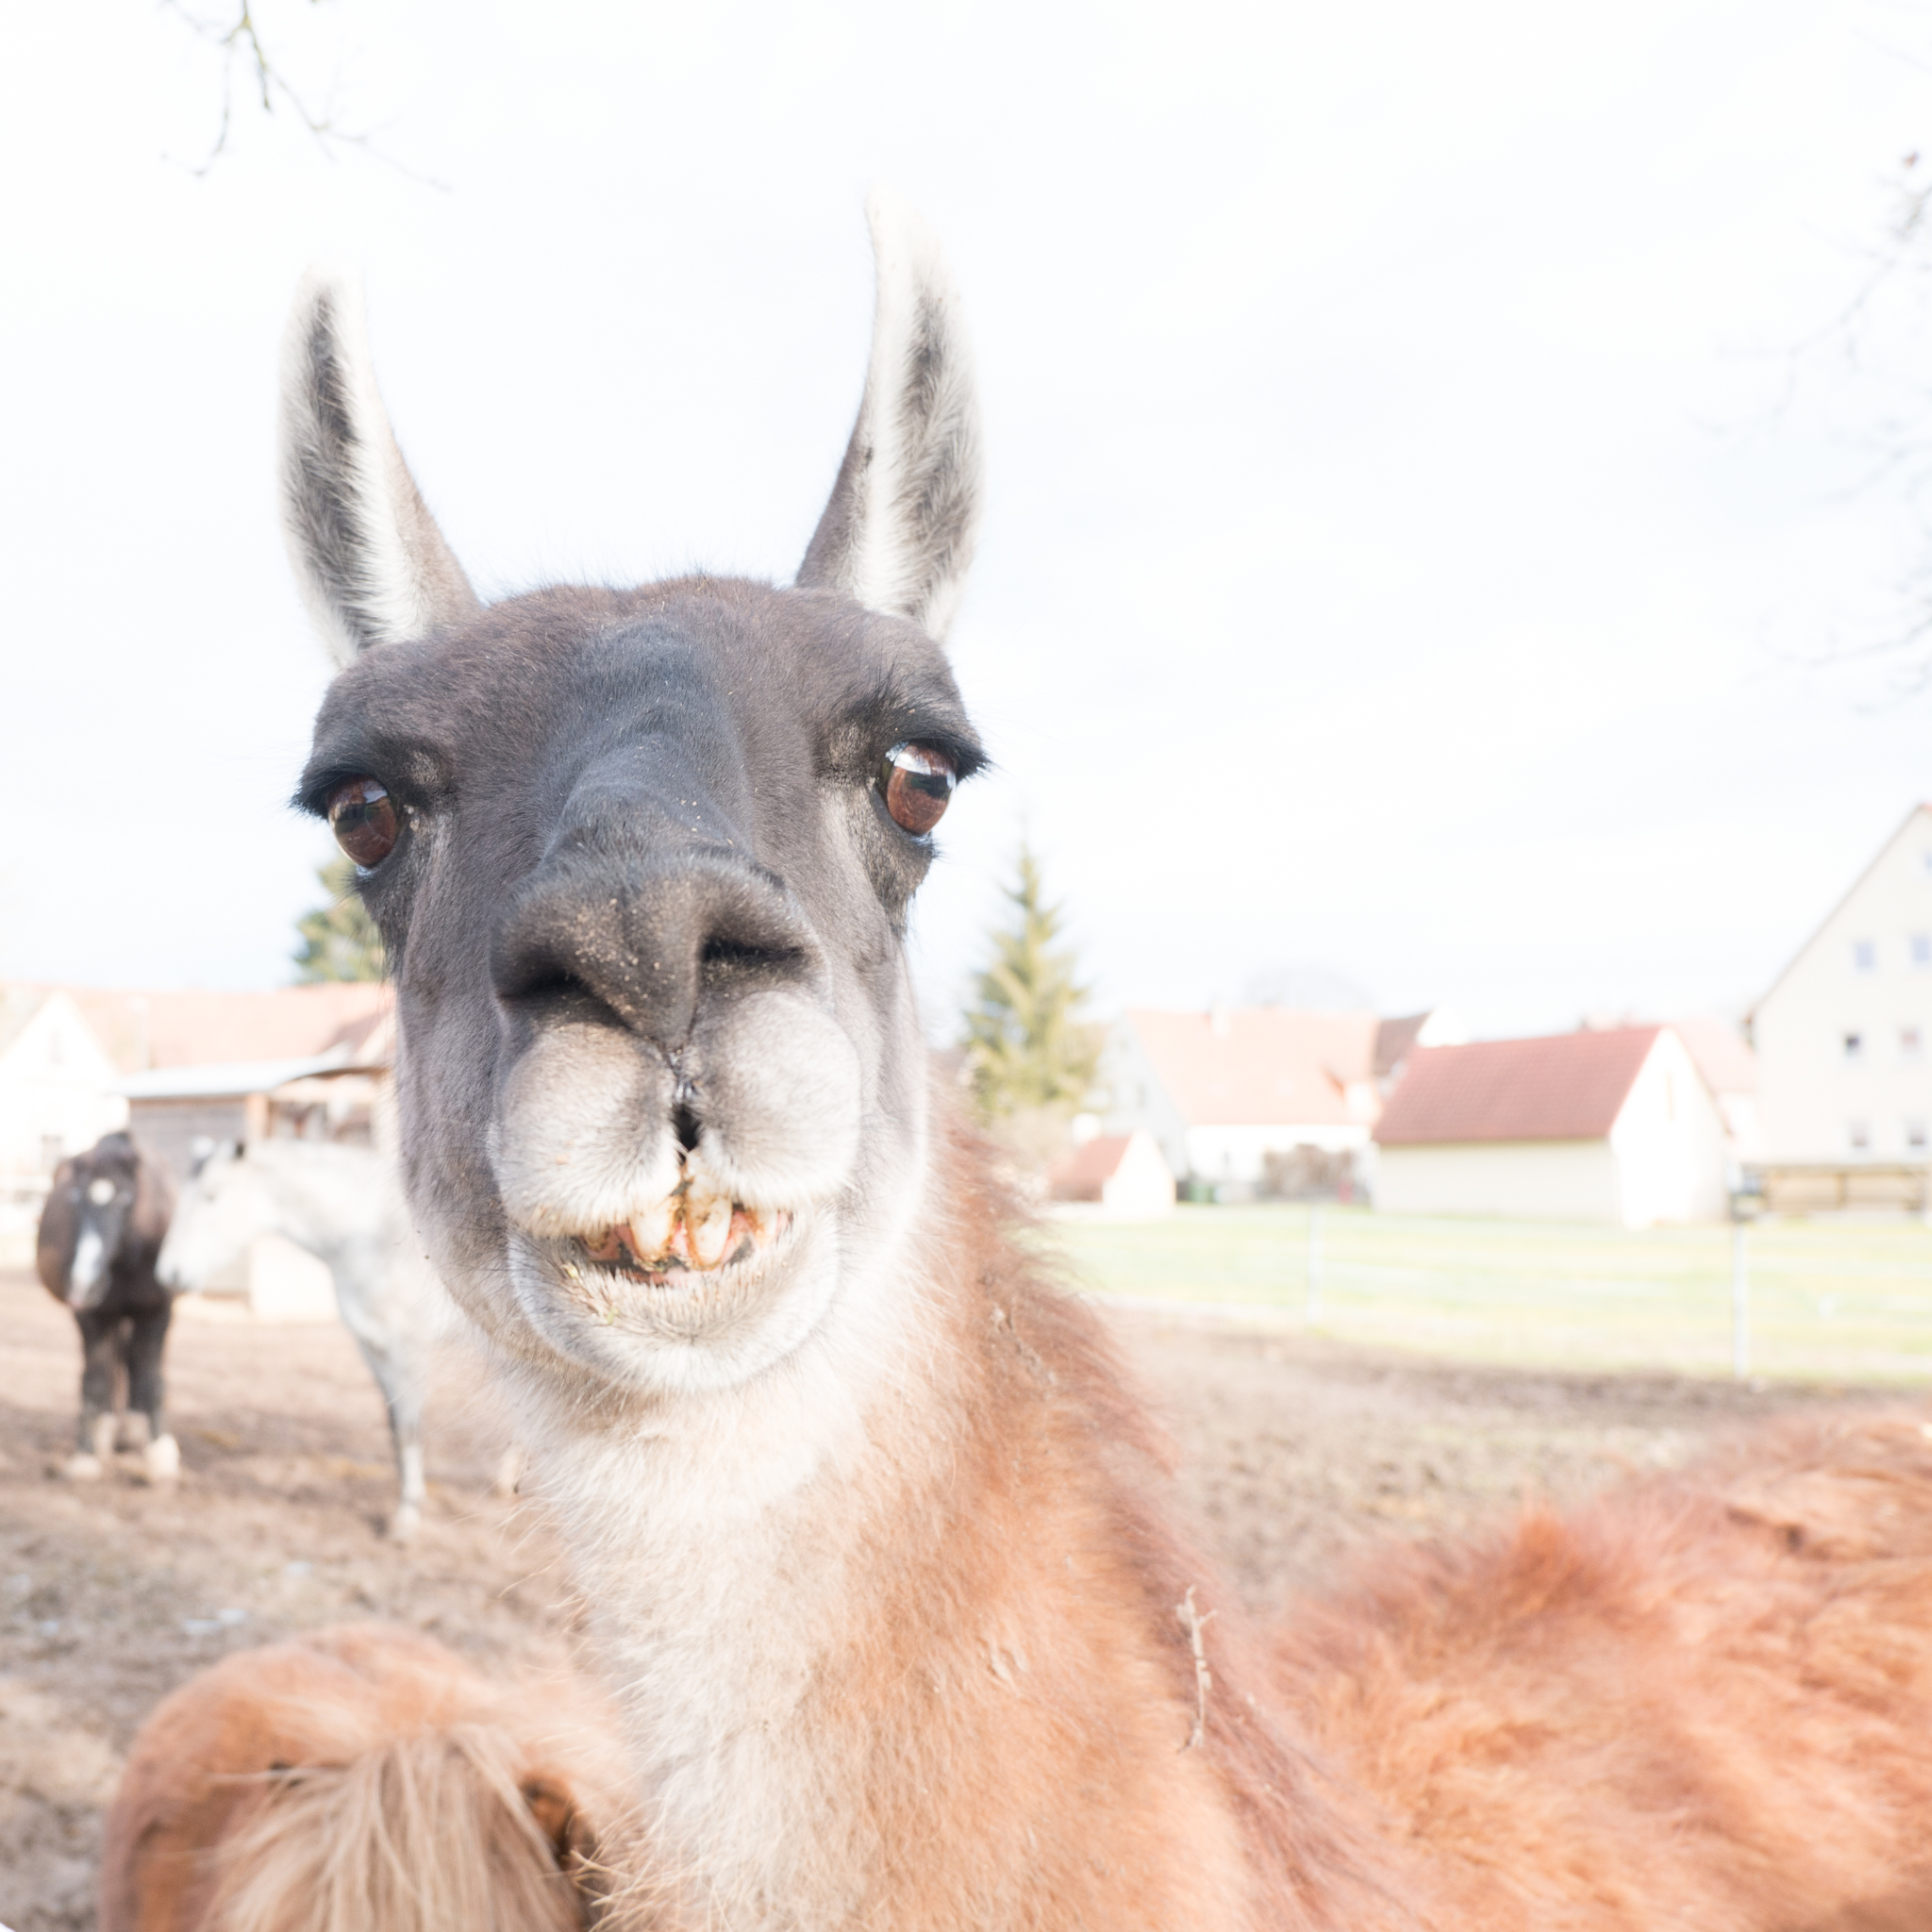
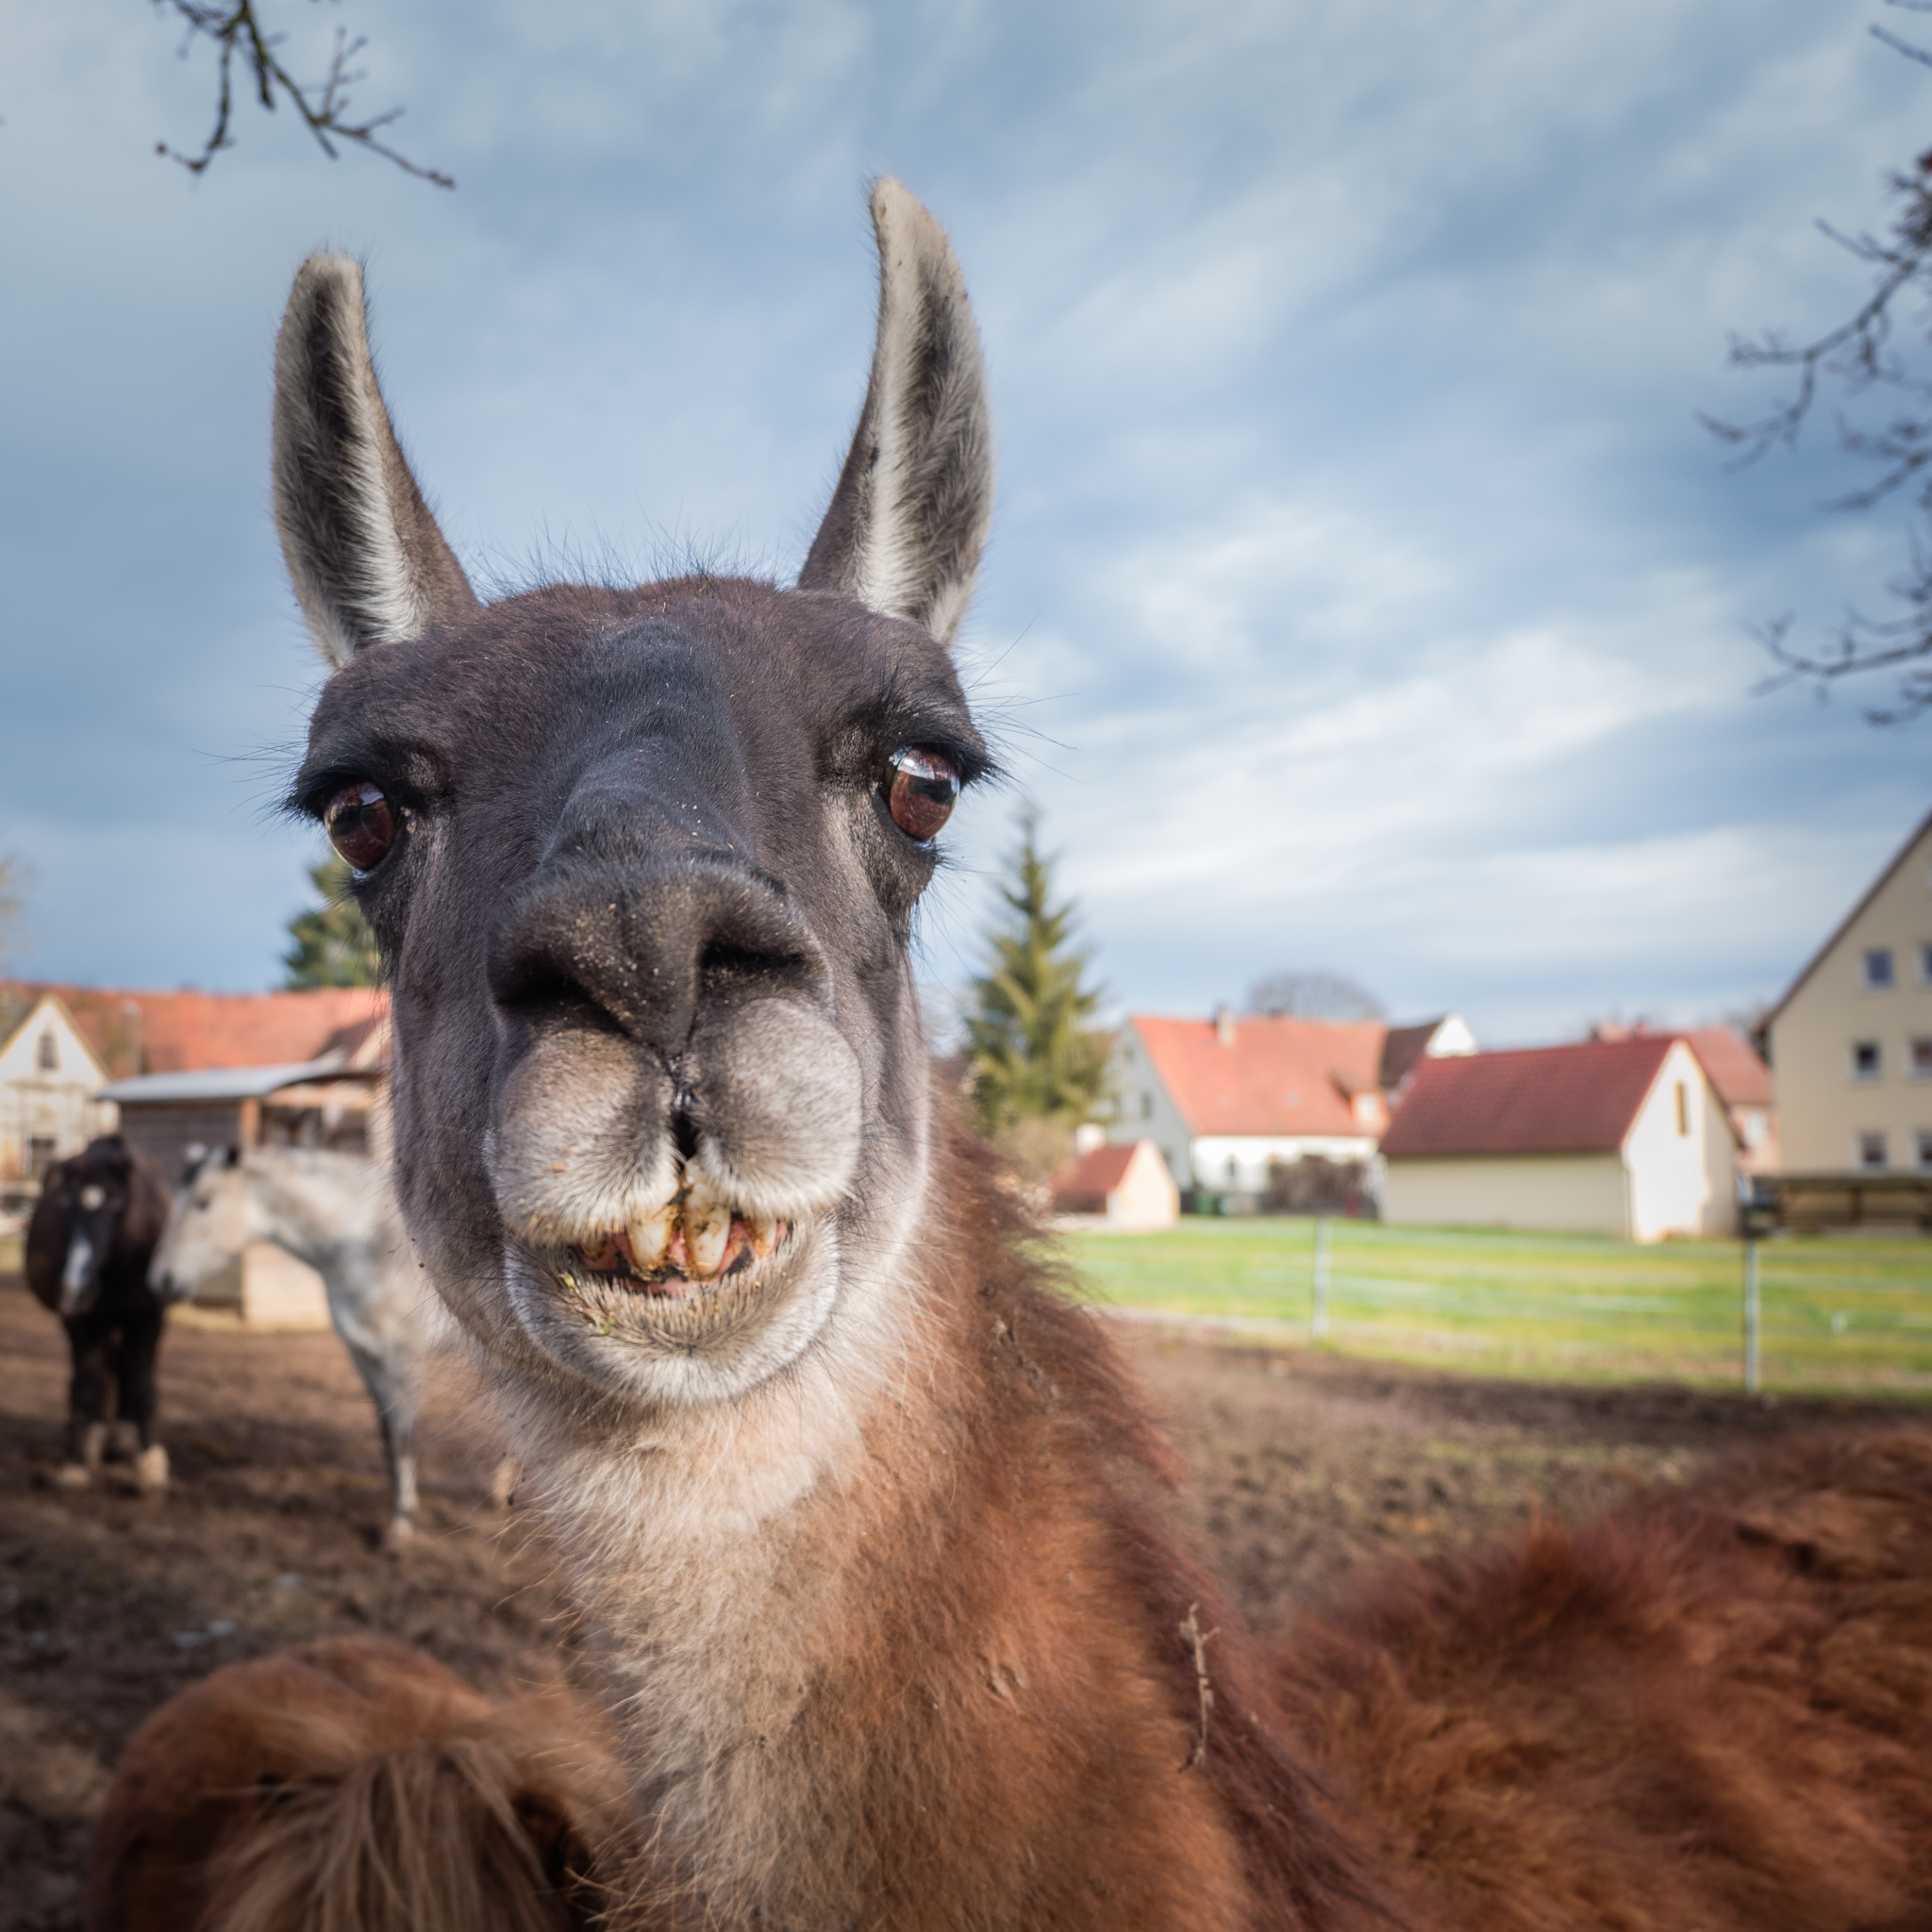 Overexposure protection using the DR function also works with the camera’s built-in RAW converter, but only to a degree of one stop, since the built-in converter only allows digital pull operations up to –1 EV. However, this is sufficient most of the time, as it allows us to correct an accidental overexposure that doesn’t exceed one stop (as long as DR200% was used to take the shot). The images in this paragraph illustrate how even newbies can benefit from this. In this example, a beginner was using an X-A1 to shoot a llama, but she unknowingly changed the metering from multi to spot mode. As you would expect, the image turned out grossly overexposed. Luckily, Auto-ISO and Auto-DR was active, and the camera selected DR200% for this shot. This allowed me to rescue it by simply lowering the exposure in the RAW converter. The sample shows the original (overexposed) image on the left and my corrected Lightroom version on the right.
A fixed DR200% is also popular with street photographers who like to manually preset aperture (to control the focus zone) and shutter speed (to control motion blur) in concert with Auto-ISO (to automatically control the exposure). With the exception of the X30 and X100T, the exposure compensation dial isn’t effective in this configuration, so how can we shoot very quickly and still protect the shot against accidental overexposure? Easy: Set DR200% and adjust the perfect exposure later at the RAW conversion stage (using either the built-in or an external converter). The only drawback of this “trick” is that the camera will shoot with a minimum ISO of 400, so there may be a slight loss of image quality in situations where base ISO 200 would have done the job. That said, street photographers often prefer a more gritty black-and-white look, anyway. It’s all about capturing the decisive moment. Not having to worry about the “perfect” exposure when you press the shutter button helps. You can focus on the scene and worry about the exposure later during RAW conversion, either in-camera or in Lightroom.
High-key and the DR Function
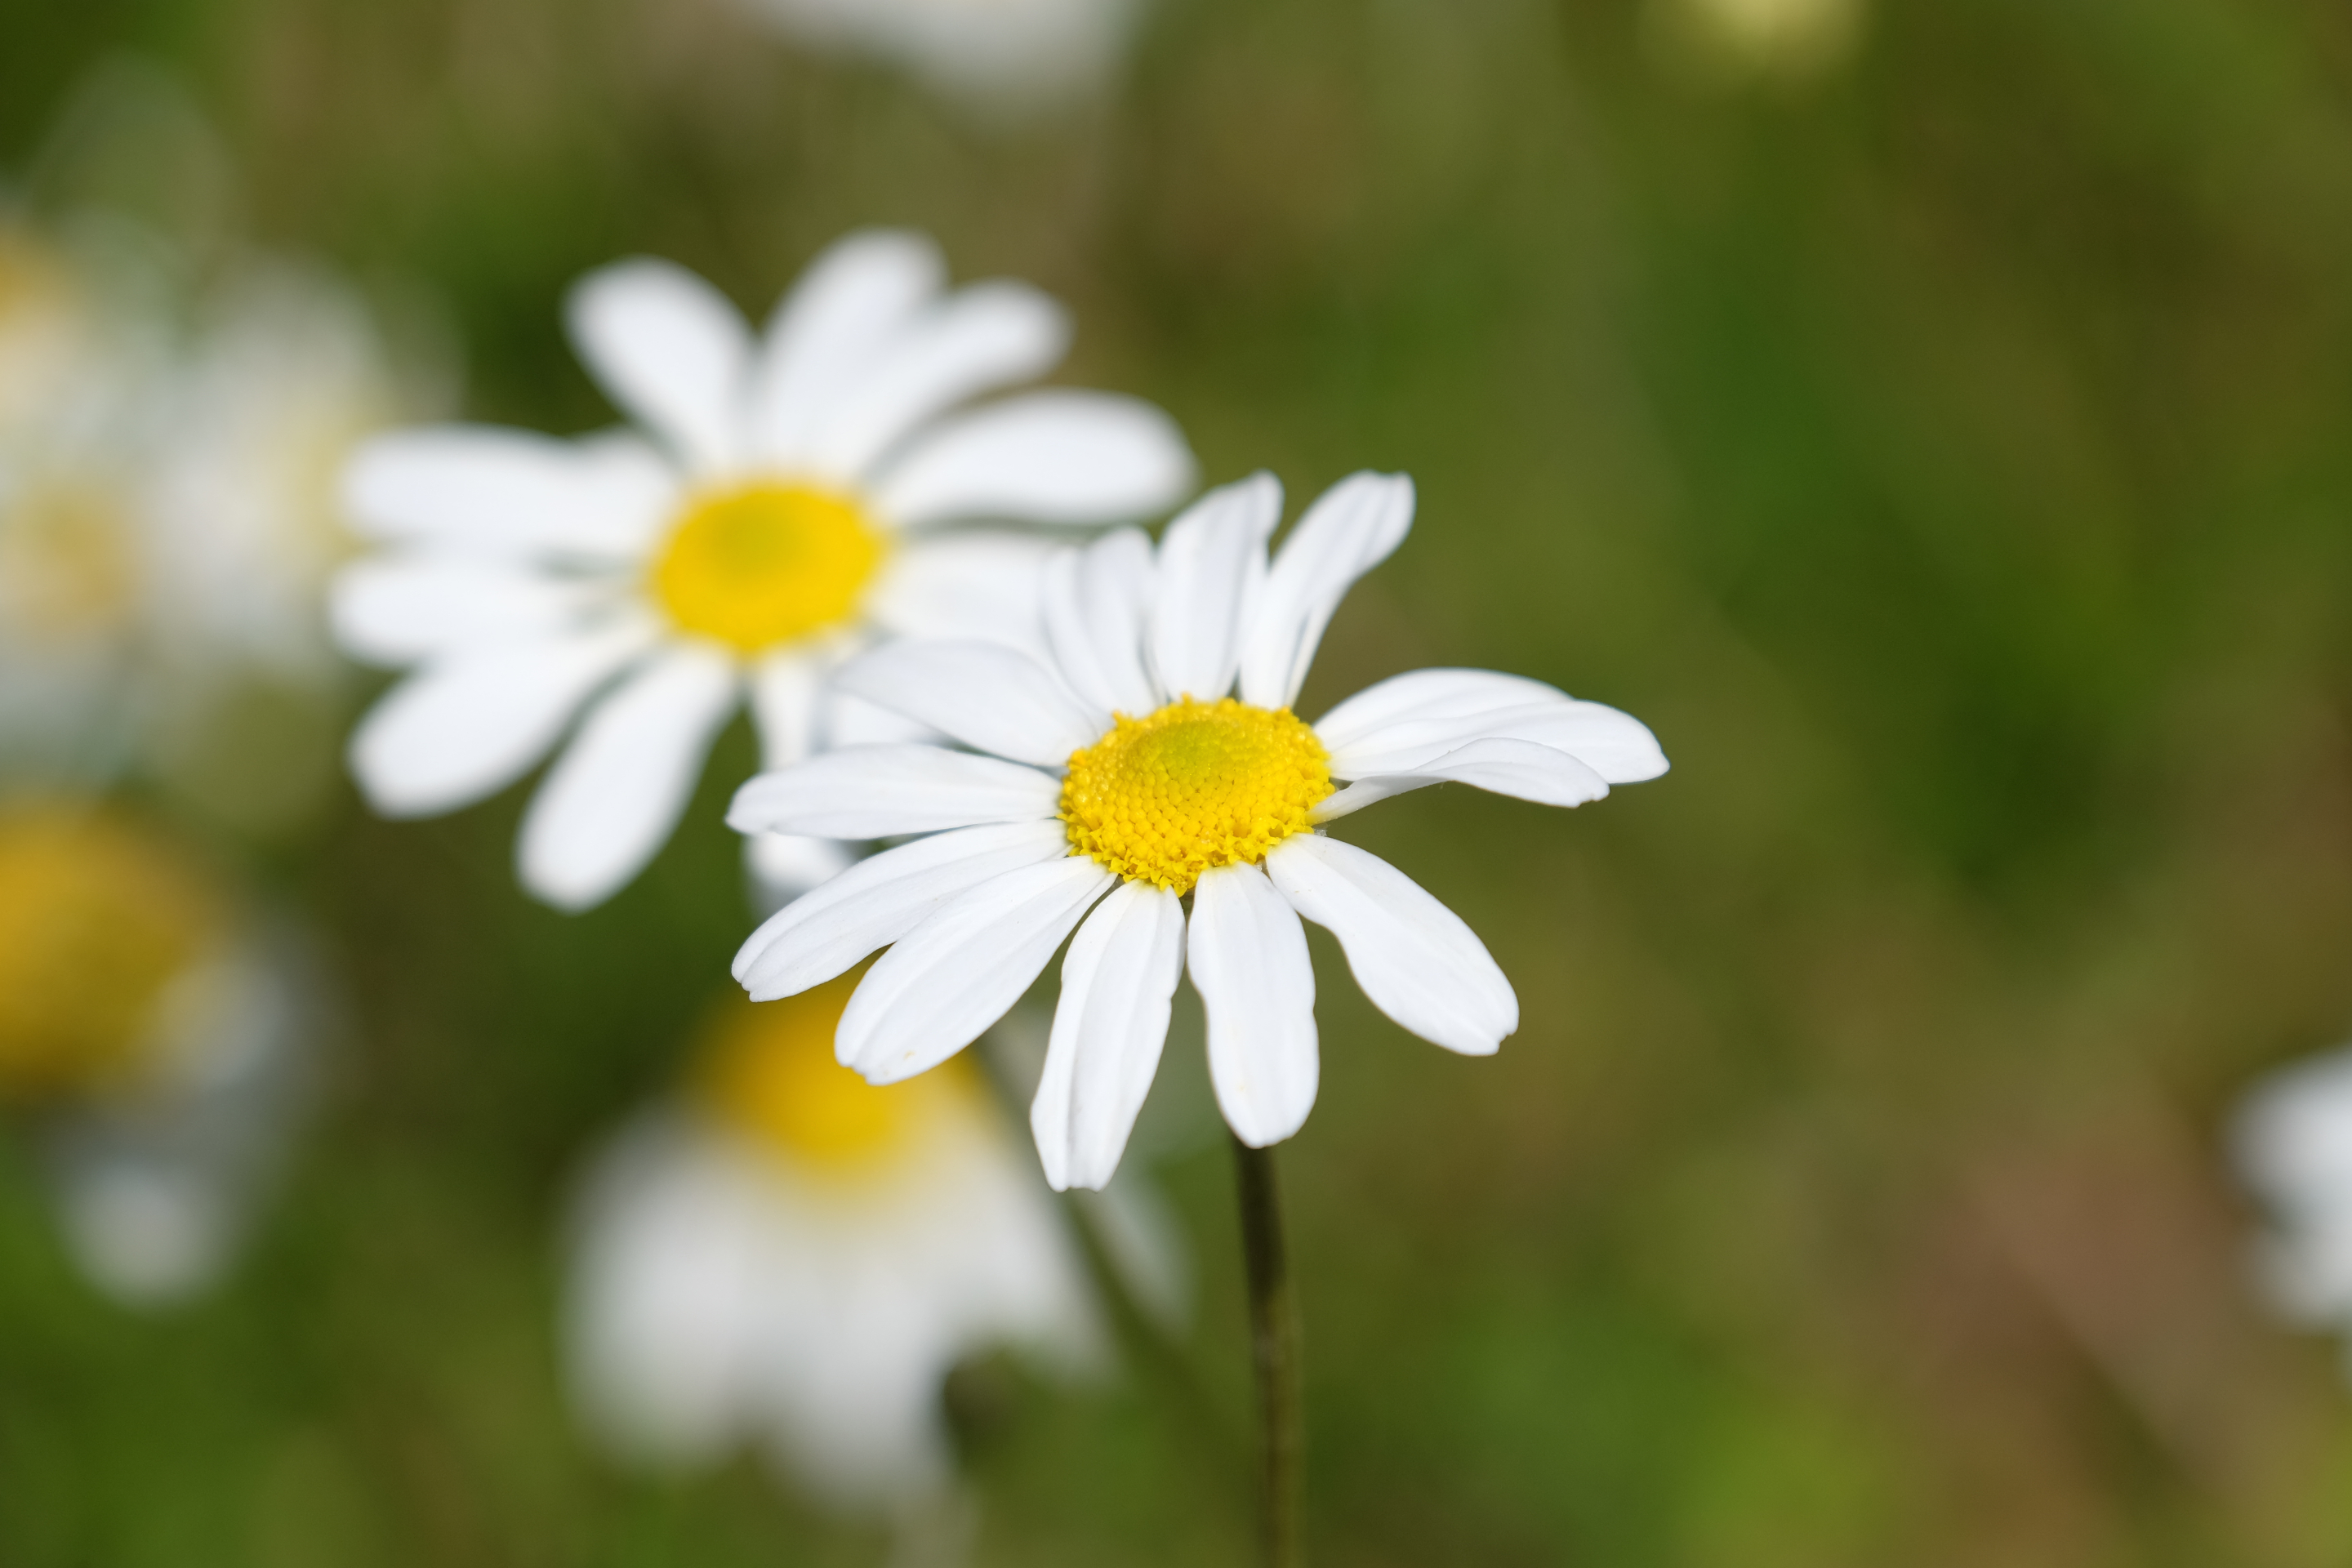
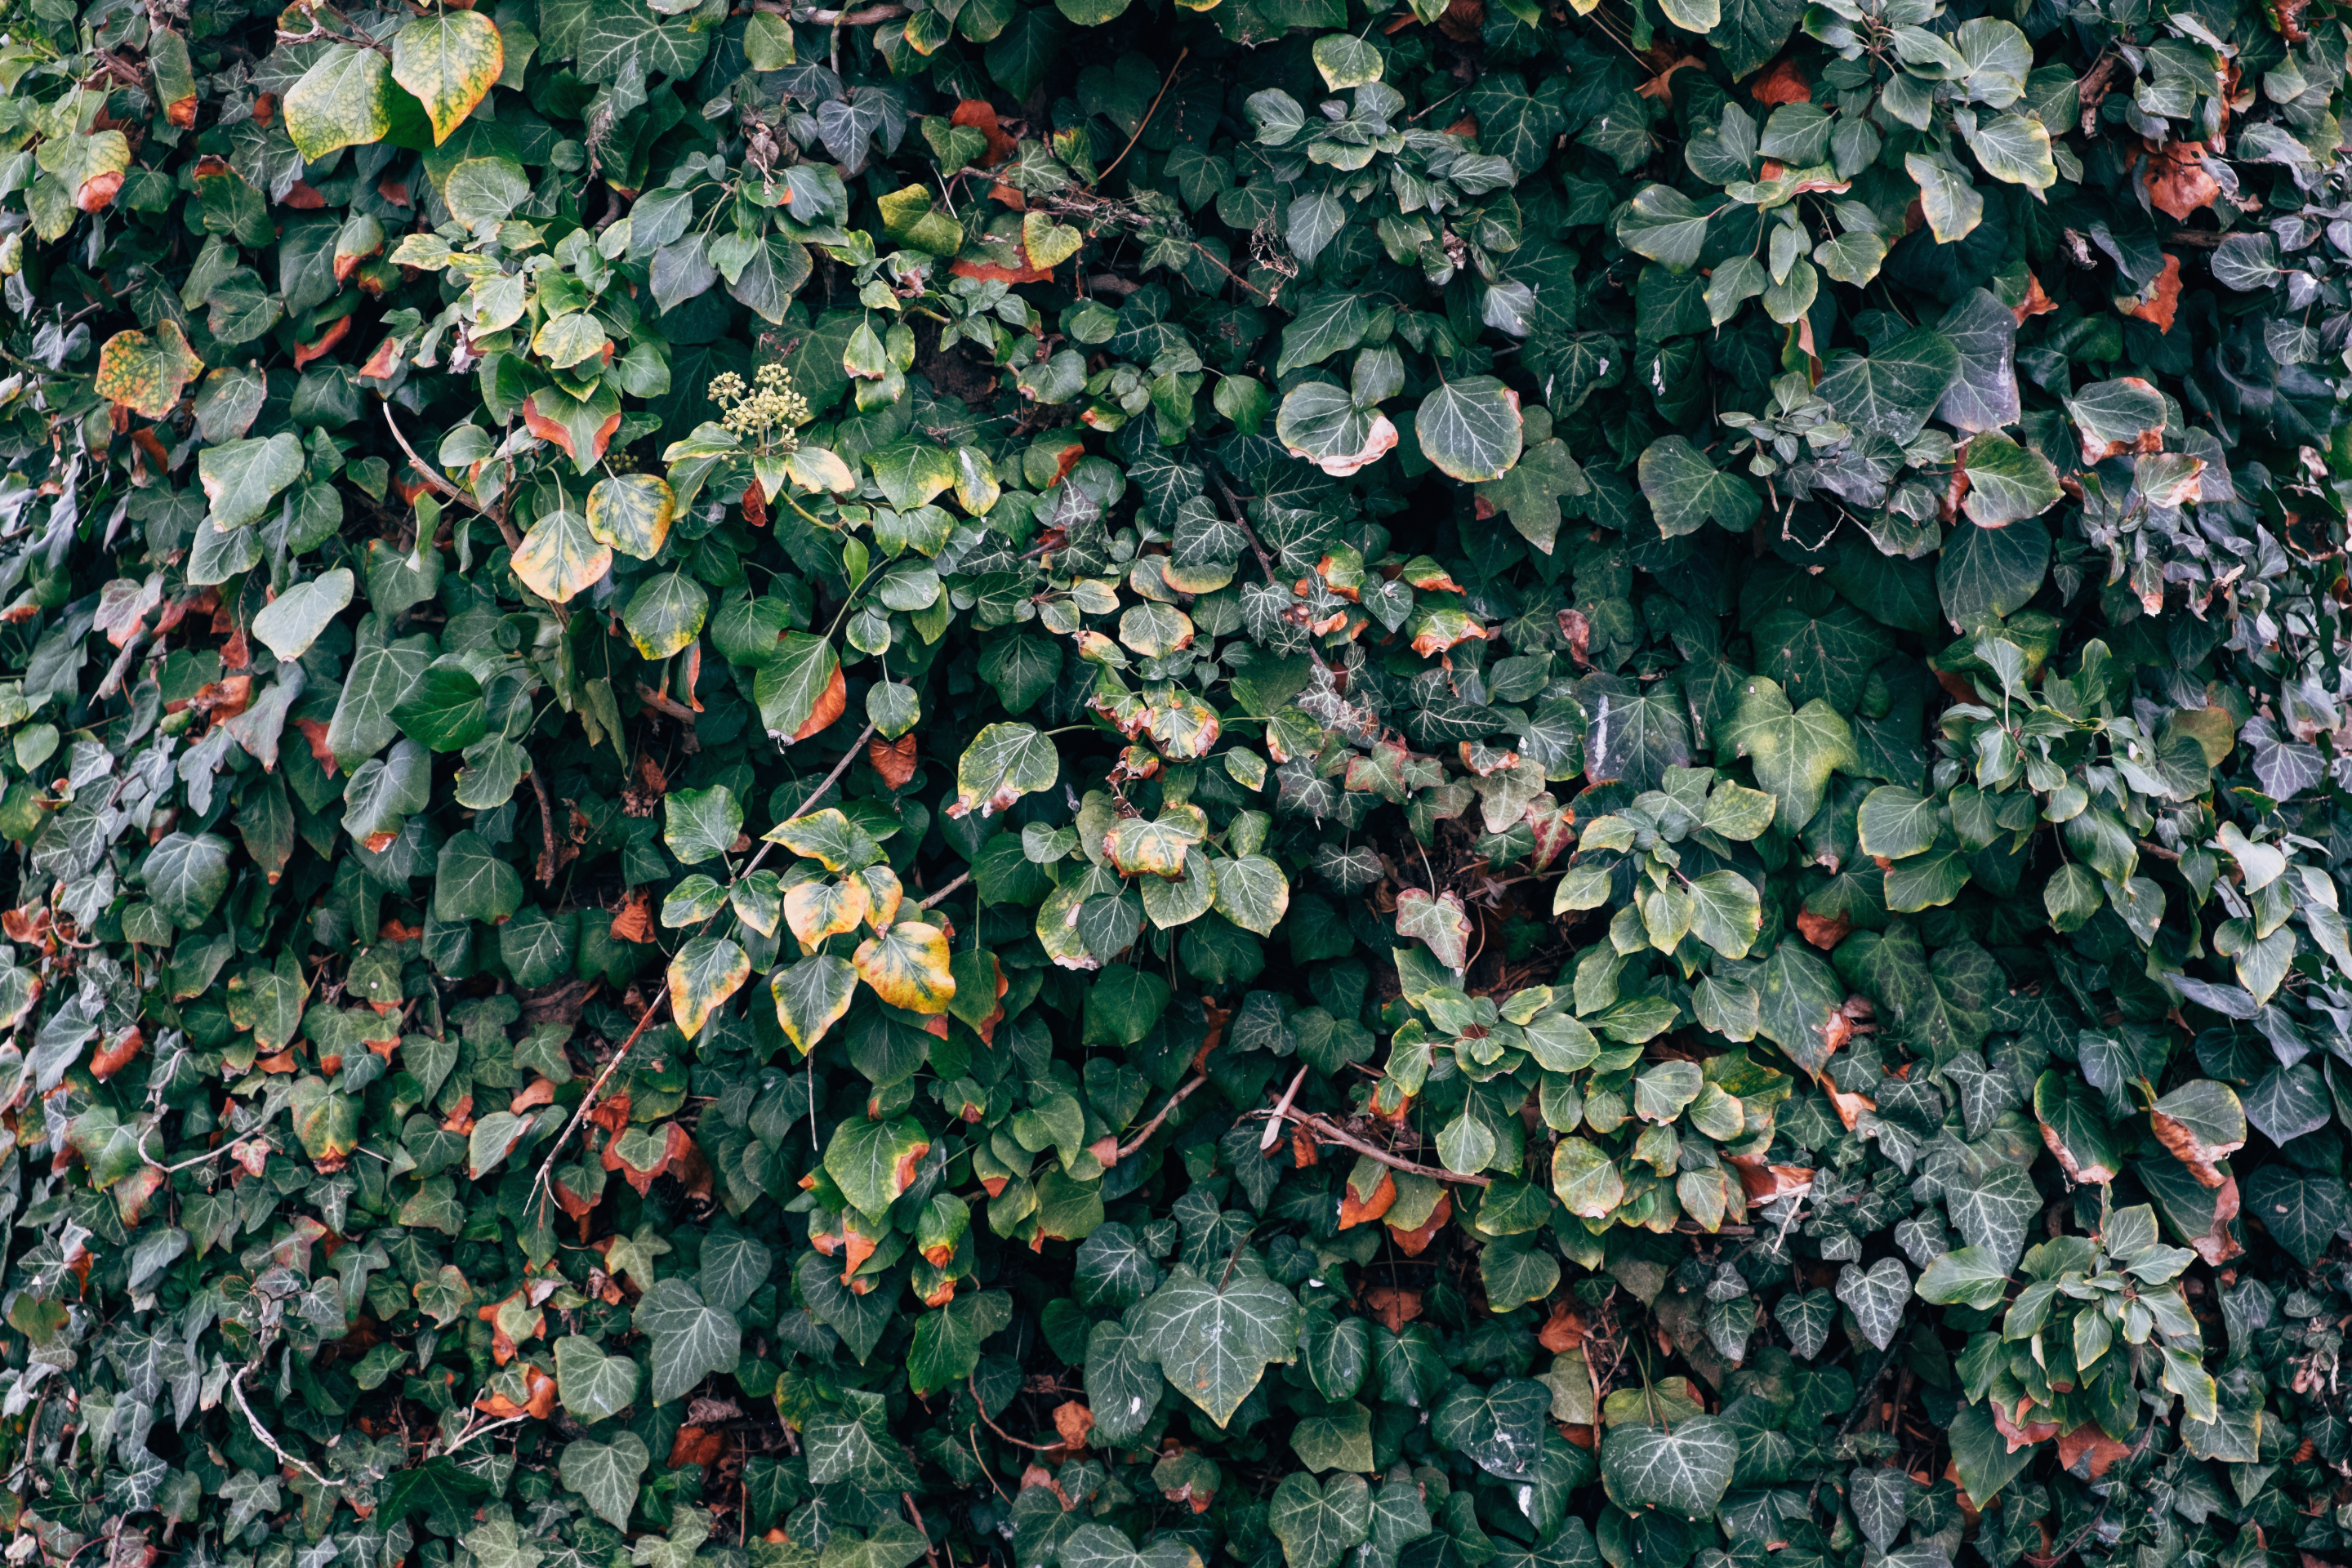
 Normally, adaptive ISO (= the DR function) is used to capture scenes with high dynamic range. However, there are several other applications that we cover in our Fuji X Secrets workshops. One application involves scenes that would easily fit into the camera’s “normal” dynamic range, but are supposed to be captured in a high-key look. High-key is basically a compression of dynamic range towards the highlights: Everything is supposed to look bright and fresh, but without blowing critical highlights. Let’s illustrate this with an example. The image on the left displays a standard tonal rendering taken at 1/1000s, f/5.6 and ISO 200 /DR100% (the camera’s base ISO setting). There are no blown highlights or blocked shadows in this shot. Everything looks normal, so there’s no need to expand the dynamic range. To achieve a high-key look based on this shot, we could import the RAW file into Lightroom and selectively push the shadows and midtones while leaving the bright highlights as they were. Been there, done that. However, there’s another, even simpler way: Use the DR function! The image on the right displays the same scene as before, but this time shot at 1/1000s, f/5.6 and ISO 400 / DR200% (instead of ISO 200 / DR100%). The resulting JPEG exhibits shadows and midtones that have been pushed to ISO 400, while the bright highlights have remained at ISO 200. This is the high-key look that we were after, and we got it straight out of the camera without any external post-processing. We simply had to use the same exposure parameters in concert with a higher ISO and DR setting.
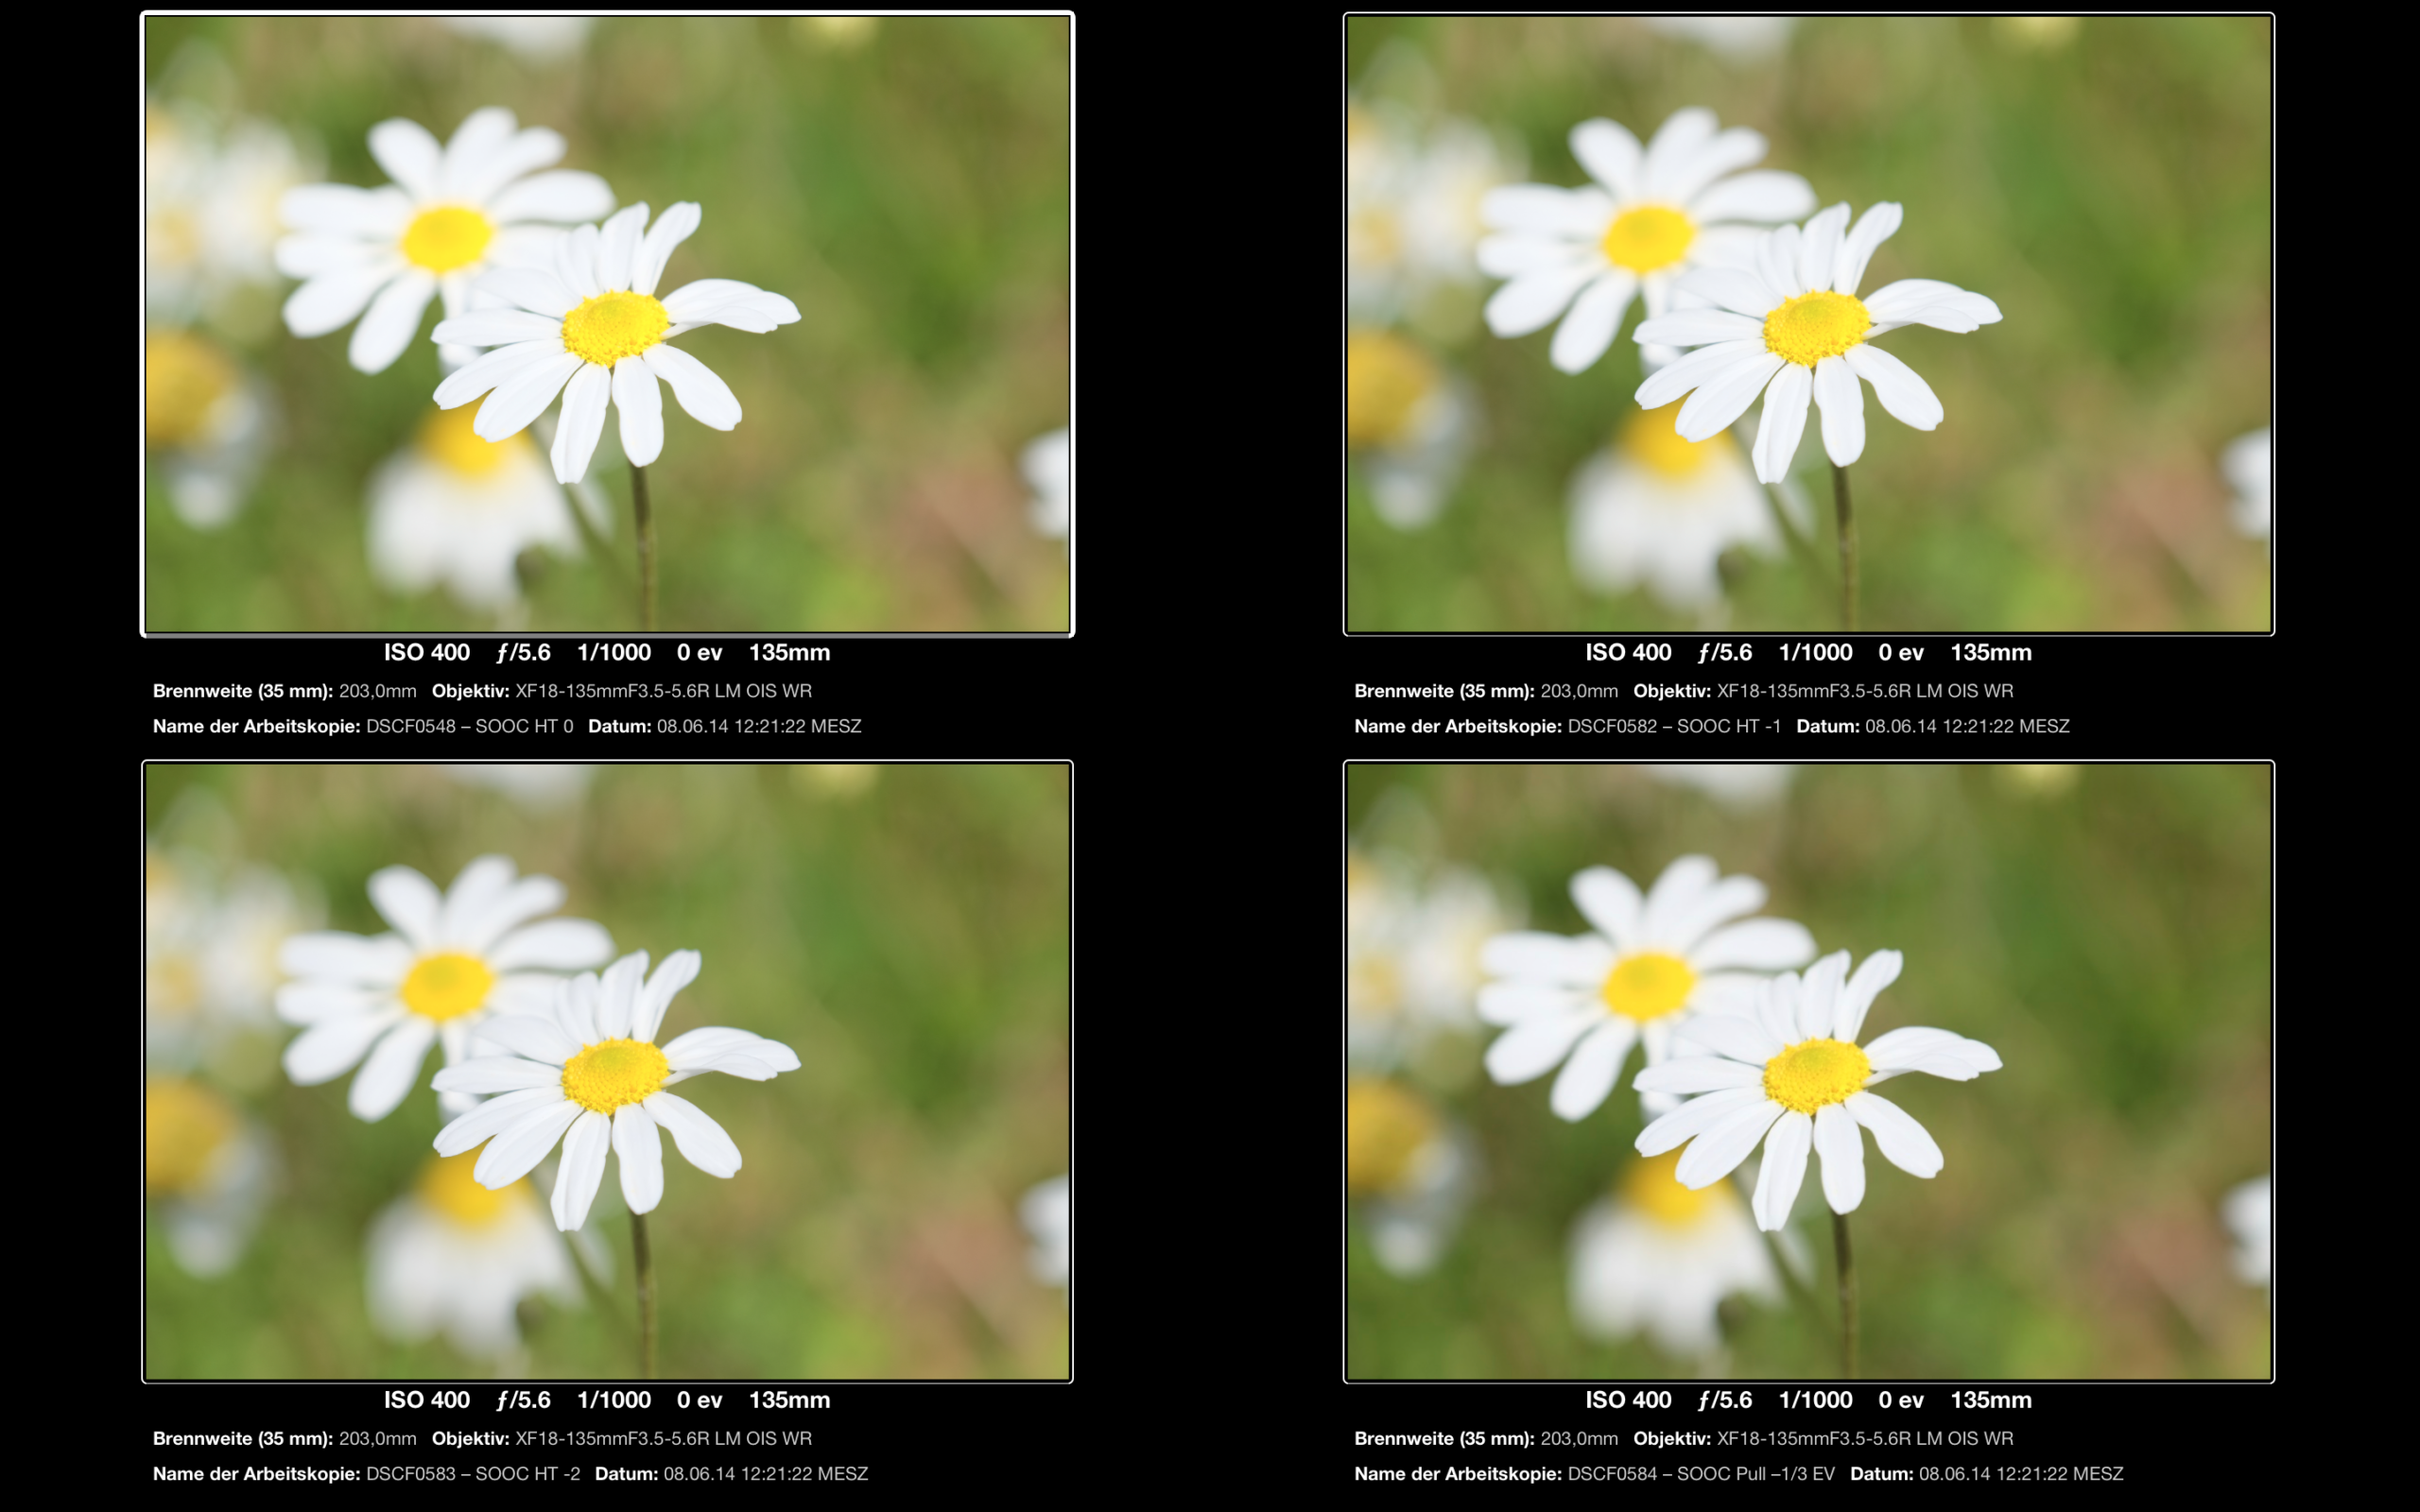 We can fine-tune the result using the camera’s built-in RAW converter. Since we shoot in FINE+RAW mode, there’s always a RAW file that we can adjust. Even if you are a passionate JPEG shooter, the built-in RAW converter offers you all the camera’s JPEG settings. Use these settings after the fact to generate better JPEGs of your shots with fine-tuned settings. In our example, we can adjust the Highlight Tone setting to –1 or –2 to lower the brightness of the white and yellow flower parts. Alternatively, we can pull the entire image down by –1/3 EV.
 Rico Pfirstinger studied communications and has been working as journalist, publicist, and photographer since the mid-80s. He has written a number of books on topics as diverse as Adobe PageMaker and sled dogs, and produced a beautiful book of photographs titled Huskies in Action. He has spent time working as the head of a department with the German Burda Publishing Company and served as chief editor for a winter sports website.
After eight years as a freelance film critic in Los Angeles, Rico now lives in Germany and devotes his time to digital photography and compact camera systems. He writes the popular X-PERT CORNER blog, offers Fuji X Secrets workshops and is the author of a number of books covering Fujifilm X-series cameras. Use code FUJLOVE to receive a 40% discount on eBooks.