

With much of the world in lockdown now and travel restrictions in place all over, I decided to go over the destinations I’ve traveled in the last 12 months or so an offer some simple tips and tricks for making photographs while traveling with your Fujifilm camera. Hopefully, this will tide us all over until things improve and we’re able to travel again.
Expose for the Highlights
Yangon is one of my favourite cities in the world and whenever I visit, I always pay at least one visit to the beautiful Yangon Railway Station in the early morning. Because Yangon is an extremely spread out city with a lot of low-rise buildings, (very) early morning light rakes between the gaps in buildings and highlights portions of the city. It truly is a playground for photography if you know how to use this type of light.
If you read any guide on beginning photography, you’ll come across the idea of exposing for the highlights at some point. Basically, what this “rule” is suggesting you do is to not allow any highlights to reach saturation (completely render as white with no detail recorded). I would argue that we should alter the wording slightly to say “expose for the important highlights.” Here, patches of the man’s shirt are completely blown out, but they’re small and insignificant to the overall mood. So, how was this exposure achieved?
The camera here is my trusty X100F. Both ISO and Shutter Speed are set to automatic here and I set my aperture at f/5.6 to ensure the entire frame was sharp. From there, I underexposed the scene by -1/3 using my exposure compensation dial. Anyone who has used the X100F knows that the viewfinder can’t really be trusted for fine tuning exposure and contrast, so I had my Histogram turned on (SET UP → SCREEN SET-UP → DISP. CUSTOM SETTING → EVF/LCD → HISTOGRAM) so I could ensure there was no spike on the far right-hand-side of the graph. Then it was just a case of waiting for the right subject and making a few frames (don’t be shy to make a lot of images – no baby seals are harmed if you fill your memory card).
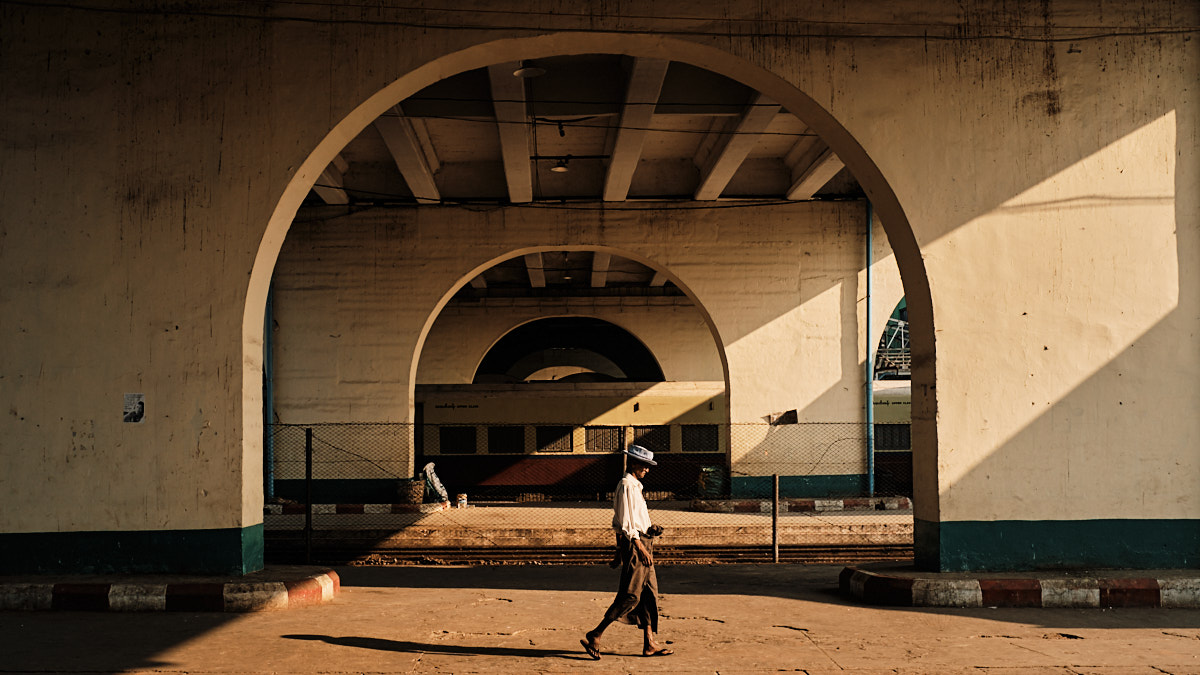
X100F, 1/250, f/5.6, ISO 320 (AUTO)
Lock Exposure and do the Dance
The process of getting to this image at Lan Co Lagoon in Vietnam was very similar to the above. Early morning light (in this case, pre-sunrise) is gorgeous in this area as well. With the brightness of the scene changing rapidly, letting the camera drive when it comes to ISO and Shutter Speed is a great way to focus on the moment rather than the camera. Setting your minimum shutter speed in the Auto ISO Settings (SHOOTING SETTING → ISO AUTO SETTING) will also mean you don’t have to worry about camera shake.
Once I’ve set my aperture (in this case, f/1.4 as I wanted a softness to the sky), I’ll use AE Lock to set my exposure for a series of frames. My good friend, Etienne Bossot of Pics of Asia got me on to this method during one of our tours. The goal here is to lock your exposure, but not your focus. That way you can move around a scene while recomposing and focusing on different objects, but maintain the same exposure. You can achieve this by setting one of your function buttons to AE LOCK ONLY (SET UP → BUTTON/DIAL SETTING → FUNCTION (Fn) SETTING).
By looking at the scene through my EVF, I saw that there was good tonality in the sky and the subjects were rendered as silhouettes. Then, I held the exposure lock button to set that exposure for a series of frames but since my focus wasn’t locked, I could move around the scene and refocus while my exposure stayed the same. If you plan to use this feature often and don’t want a sore thumb from holding in a button for long periods, you can set your AE/AF-LOCK MODE to SWITCH.

X-T3 + XF 23mm f/1.4, 1/210, f/1.4, ISO 200 (AUTO)
Compose and Wait
When it comes to an iconic building like the Taj Mahal that has been photographed by millions, if not billions, of people, it can be difficult to make a photograph that is unique to your experience. The key to that is to consider your experience. During this visit to the Taj Mahal, I had a rather soft, almost gloomy day and I wanted to express that. A sombre black-and-white image seemed to fit the mood well.
There were plenty of birds flying around that morning and I knew I wanted to include some of them in the frame. I also wanted any birds that flew close to the camera to be rendered with a little motion blur. So, I set my X-T3 to base ISO (160) and dialled my aperture until I got a shutter speed that would allow for that (I guessed somewhere between 1/125 and 1/200 would offer a little blur without turning the birds into a streaky mess). After framing my scene and setting the focus, I waited for birds to fly through an made several frames until I got something that expressed this feeling.
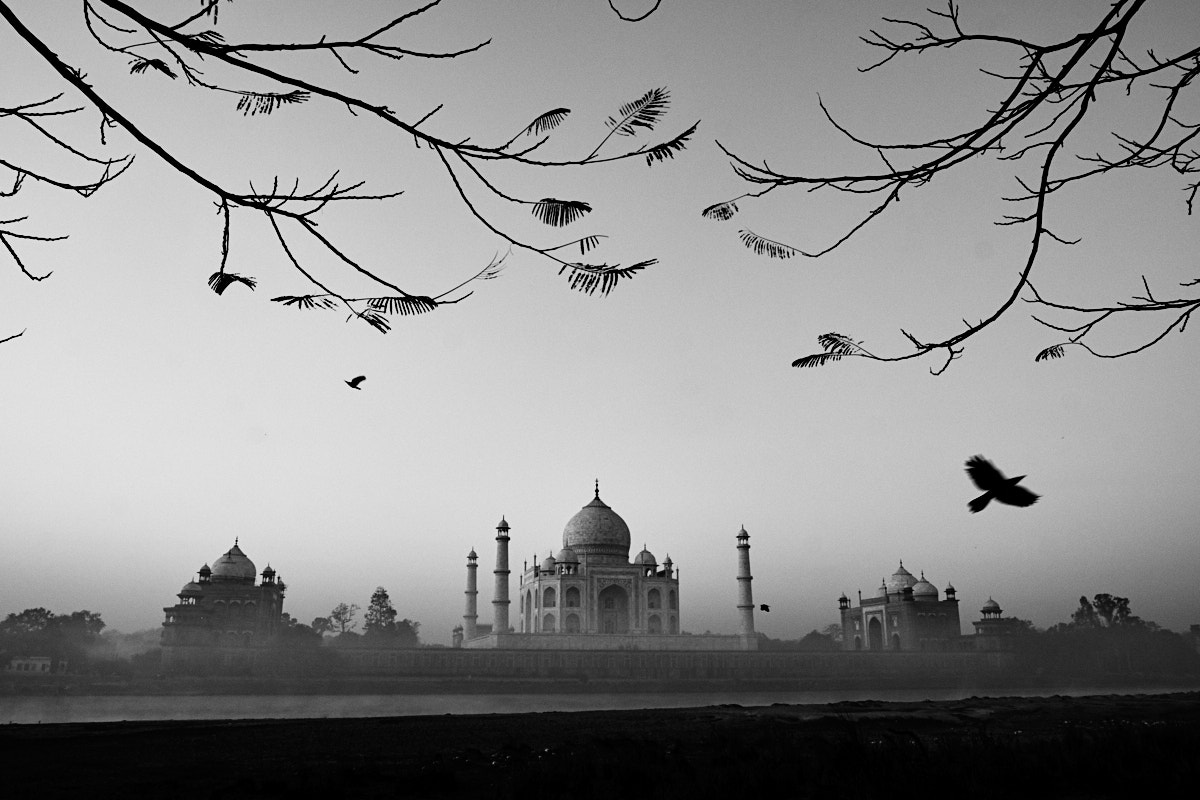
X-T3 + XF 18-55mm f/2.8-4, 1/150, f/10, ISO 160
Embrace Imperfections
As with the image of the Taj Mahal above, this image was about creating a mood. I love to use flare in my images to create a mood. By embracing these sorts of “imperfections,” interesting images can be created.
Visible flare is most often caused when bright light enters the lens from extreme angles. In this case, the sun is at about a 45 degree angle from the lens and creates this nice bloom you see here. Of course, how flare renders depends heavily on the lens, your aperture value, the angle of the light, and if you’re using your lens hood or not. Experimenting is the key to making images with flare.

GFX 50R + GF 110mm f/2, 1/420, f/5, ISO 100
Be Ready for Moments
While in Taipei in September, I spent a few minutes at one of the Instagram hot-spots of the city to grab a quick frame. I had actually planned to photograph this as a long exposure with the tail-lights of a motorcycle going down the street. I had my shutter speed on Auto, my aperture at f/11, and my ISO at 200. This was giving me exposures of around 4-8 seconds as the sky got darker.
However, I noticed while I was waiting for the right motorcycle that there were passers-by that could make interesting images as well. So, I made use of how quick it is to change multiple settings on Fujifilm cameras and began to bounce between long and short exposures. The image below was captured by quickly dialing the aperture with my left hand and switching the ISO back to Auto with my right hand. My exposure would remain consistent this way as I hadn’t changed moved into full manual mode. Being ready for situations like this and knowing how a couple of quick setting changes can make a completely different image allowed me to get multiple options from the same scene.

X100F, 1/140, f/2.8, ISO 6400 (AUTO)


