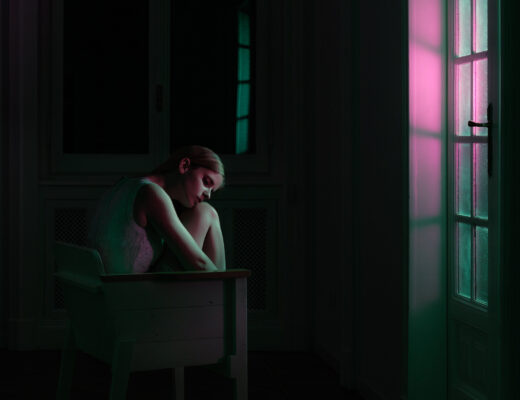
As I am writing this I am still on the corona virus lockdown in Los Angeles, that has impacted all of us. So I wanted to show how to capture great portraits around your home. You’re on Fujilove so I’m guessing you are a Fuji enthusiast like myself. But what happens after you have your camera in your hands, then what? Well, let me show you my approach to lighting portraits. Time to put your cameras to work and capture your loved ones.
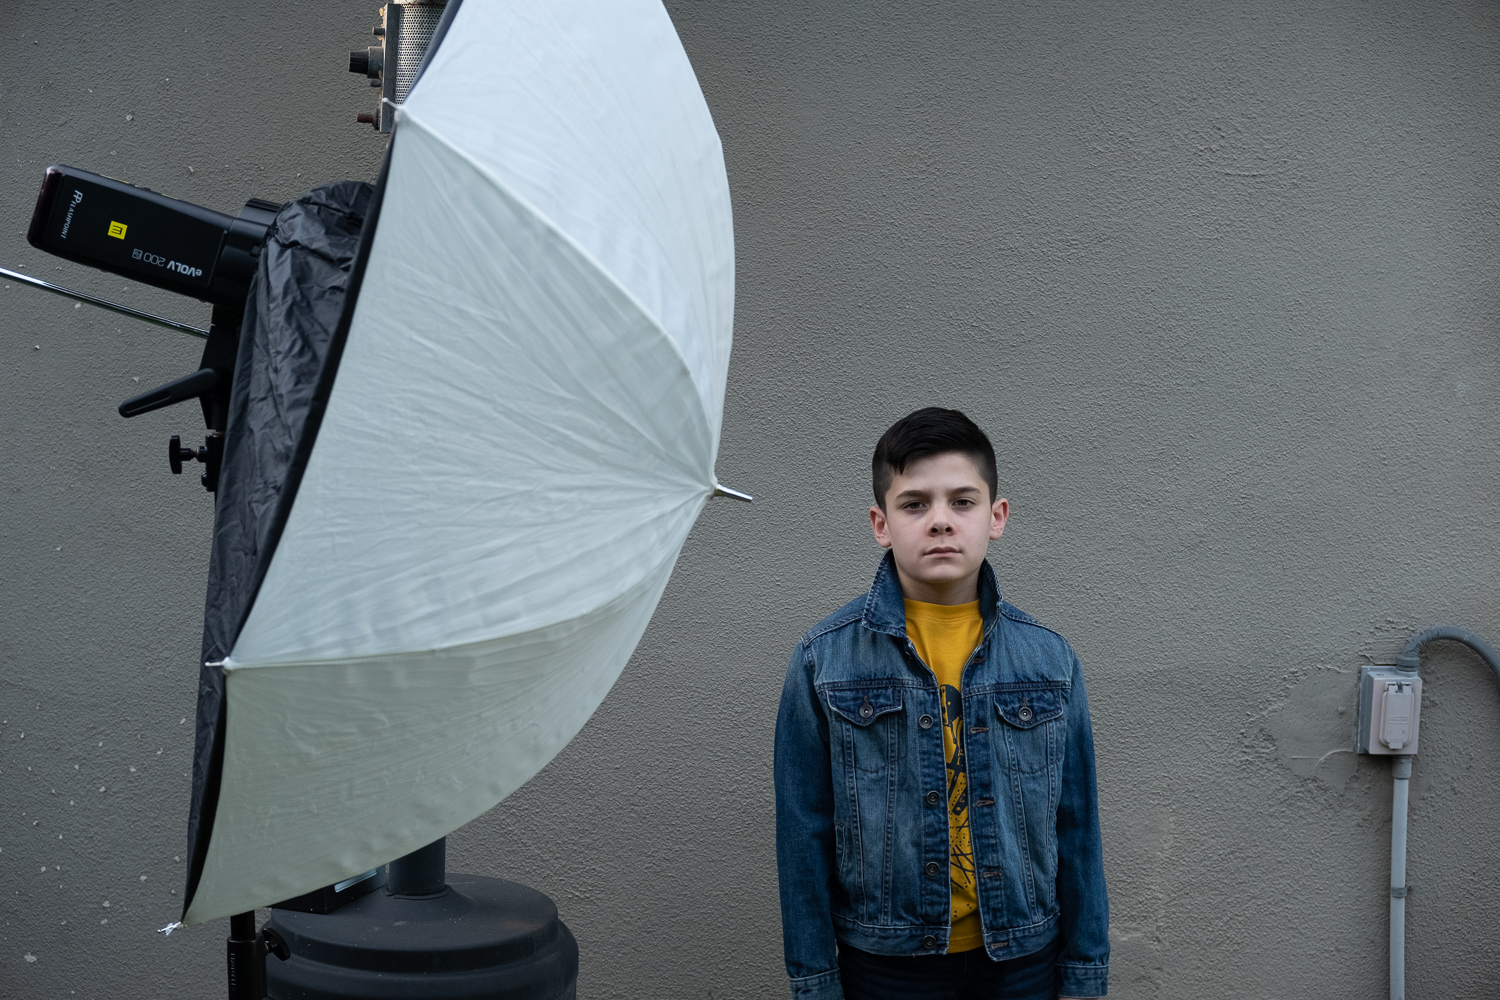
I have all kinds of modifiers, but the brolly box is my go to. It is basically an umbrella with a backing which makes it more efficient and prevents light from spilling everywhere. Not too mention, they are inexpensive, easy to pack, and work with all lights.
Shoot 1 – Gear
- Fujifilm X100F
- Fujifilm TCL-100 V1
- Brolly Box
- Godox AD200 (2)
- Godox AD-B2
- Godox XproF Trigger
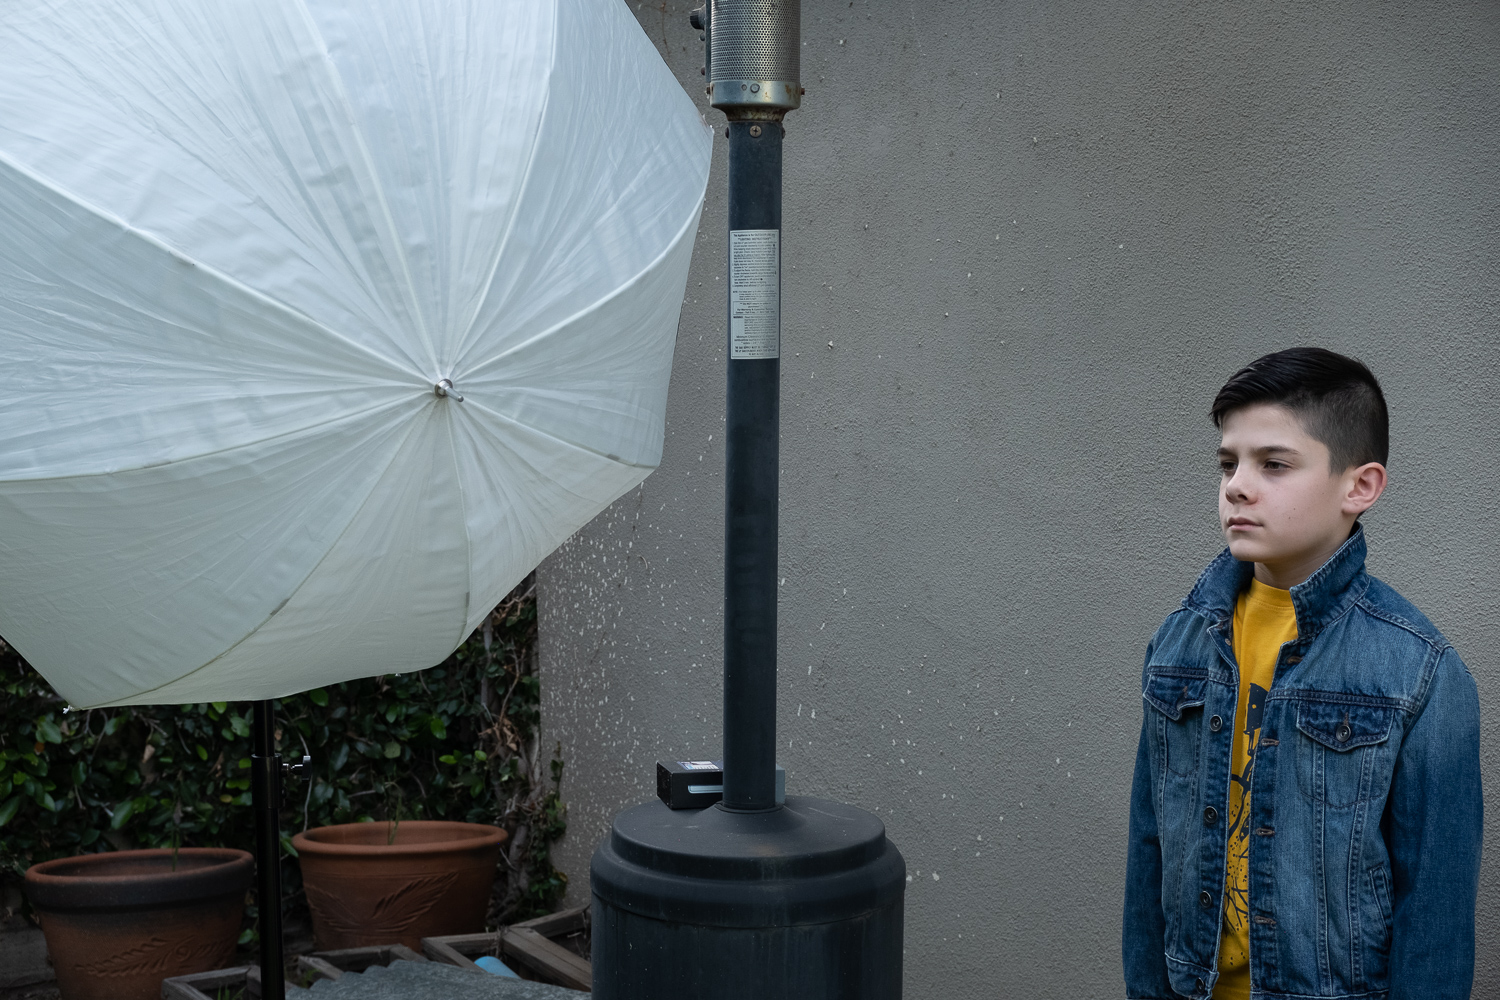
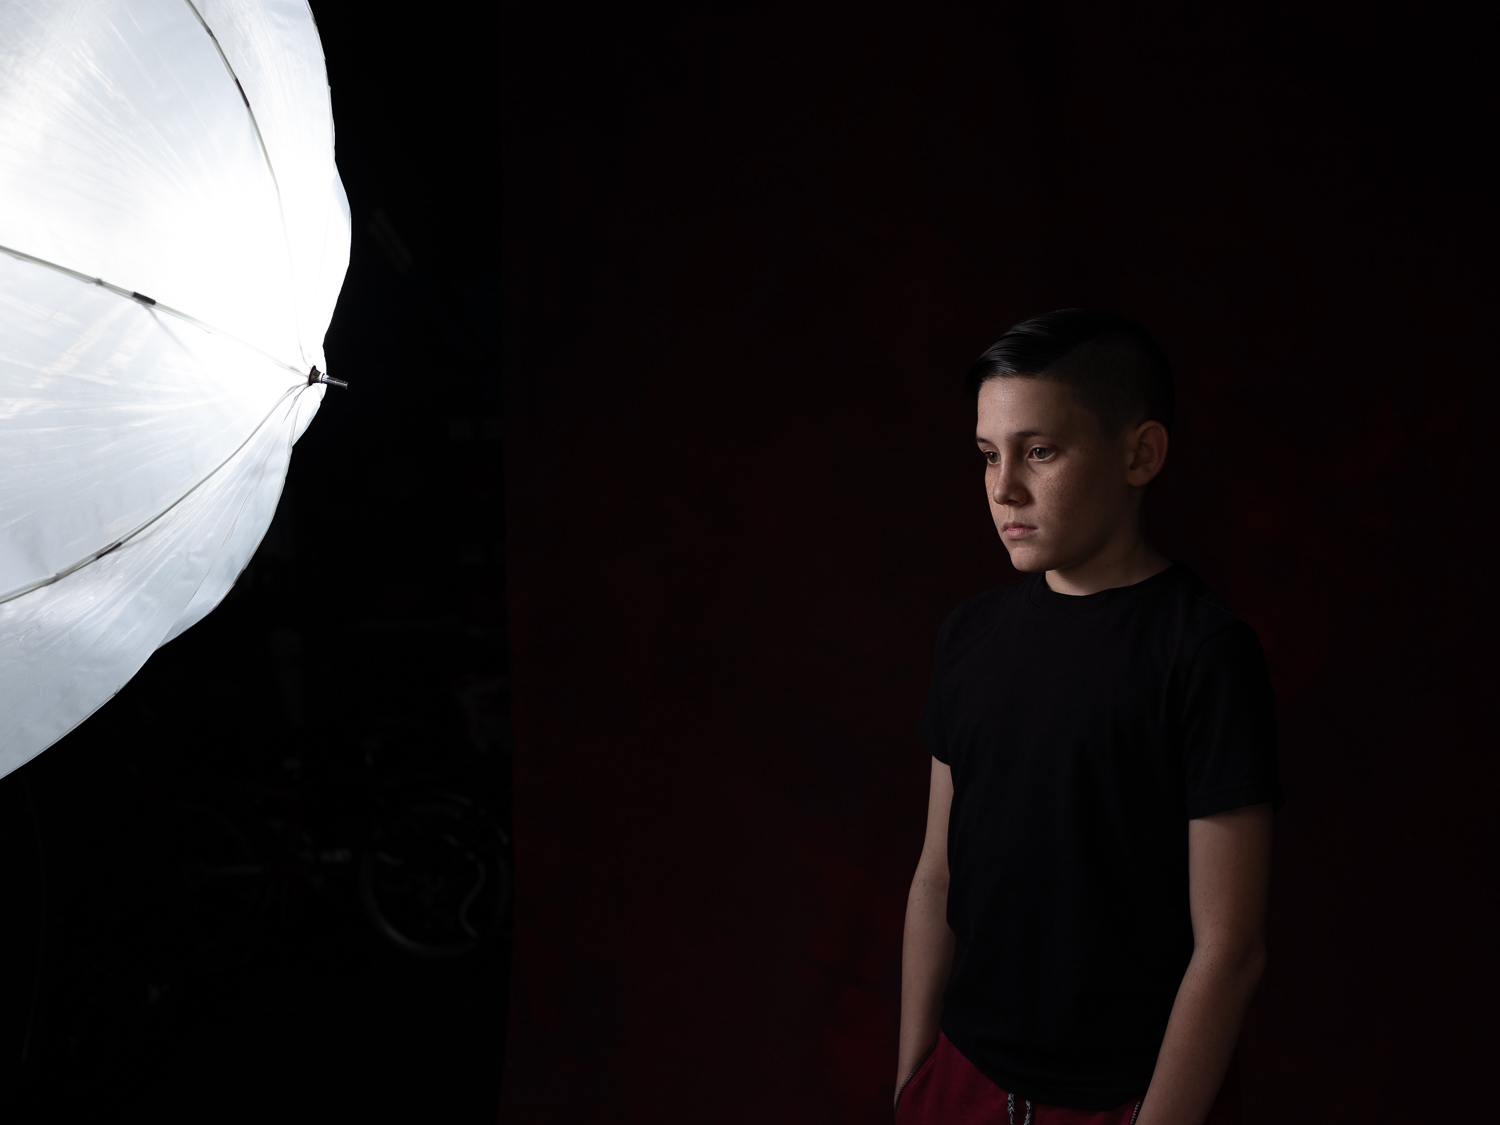
For this picture of my son Teddy, I wanted to keep it simple with the Fujifilm X100F and one light. Since it was a portrait I did put on the TCL-X100 tele adapter for a 50mm equivalent lens. The wall I used was the back of my garage. For lighting I used the (2) Godox AD200 in the AD-B2 adapter with a brolly box. Essentially this puts two AD200’s together to create one light. However, the real reason I used it in this scenario was for recycle time. It was hot and he would only give me few minutes to take his picture. The extra power was an added bonus if needed. Here you can see it was a fairly boring scene with flat natural light on both the background and subject.
Fuji X100F / 50mm equiv. / ISO 200 / F8 / 1/1000 sec. / no strobe
Here you can see just how far I placed the light in front of him. Part of the umbrella is exposing on the background the way I want and wrapping around his face at the same time. Essentially, one light doing the job of two. This sometimes takes a little bit of experimenting but can save needing a 2 light setup.
Fuji X100F / 50mm equiv. / ISO 200 / F8 / 1/1000 sec. / no strobe
This is where you’ll want to change your camera to not show you the proper exposure through your EVF because everything will be too dark to see. I have shortcuts for this on all my Fuji’s so I don’t have to dig through menus. The next thing I did is put the ISO to 200 to give me the cleanest file. Then I set the camera to raw knowing I was going to edit the file. I set the aperture to F8 because I wanted him tack sharp. For shutter speed I set it to 1000 to underexpose the the ambient lighting. I wanted my strobe in total control of the lighting. Without the strobe the frame would be underexposed a couple of stops and look like this.
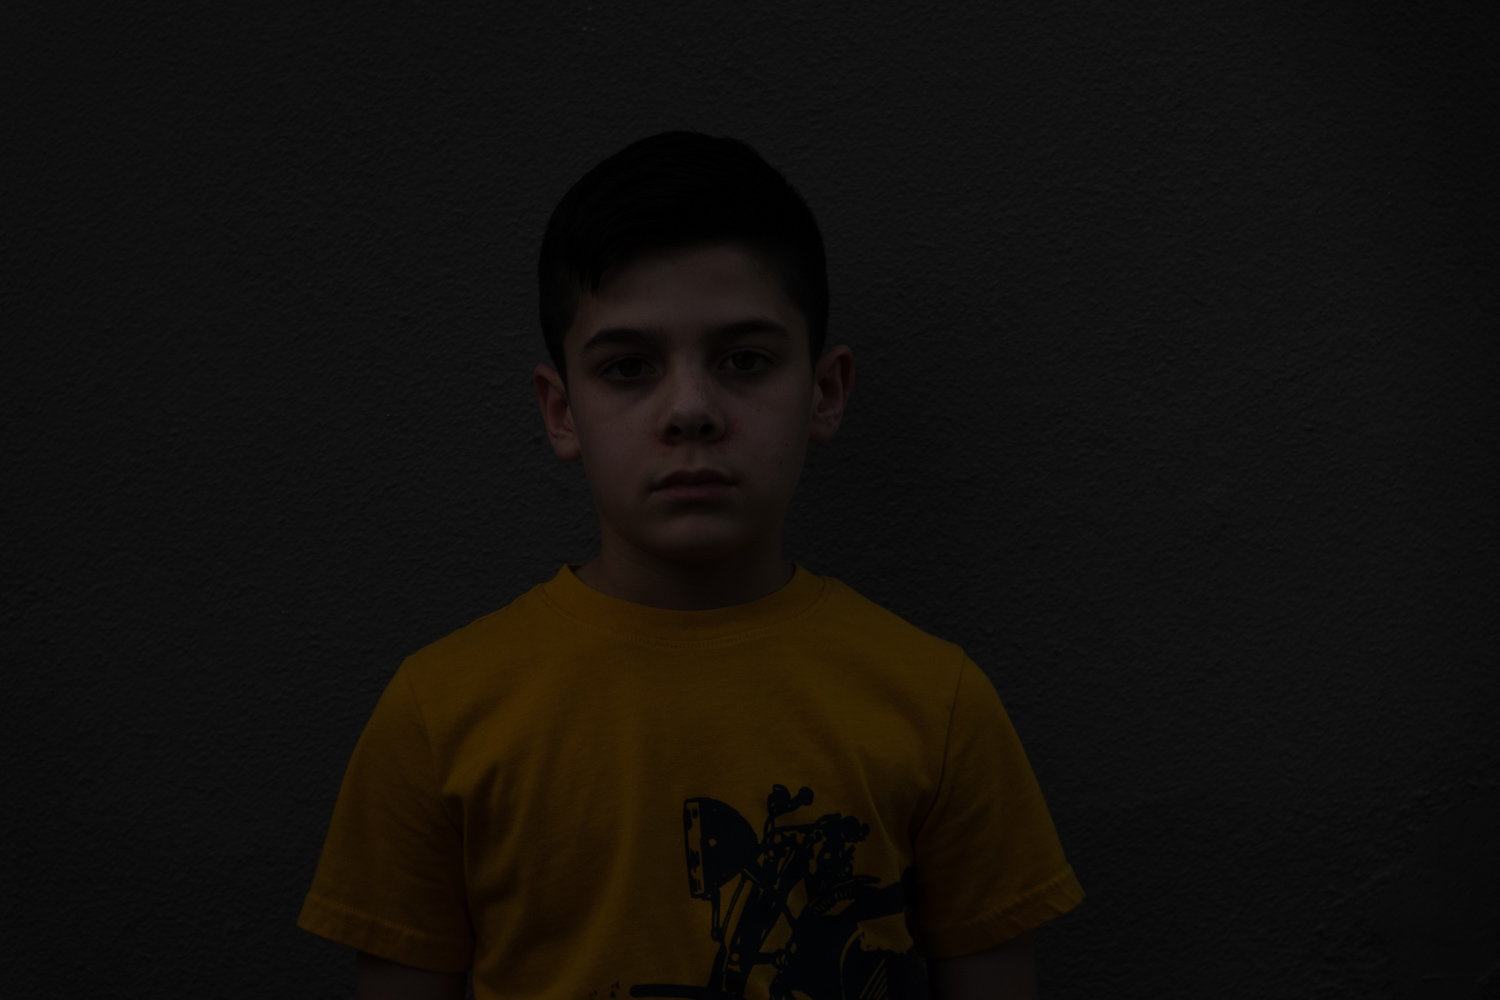
Fuji X100F / 50mm equiv. /ISO 200 / F8 / 1/1000 sec. / no strobe
Next you’ll adjust the power on the strobes accordingly. Without a light meter I take a picture of my hand to get me an approximate exposure setting. For these shots the 2 AD200 were both at 1/16 +7 power.

Fuji X100F / 50mm equiv. / ISO 200 / F8 / 1/1000 sec. / AD200 1/16 +7
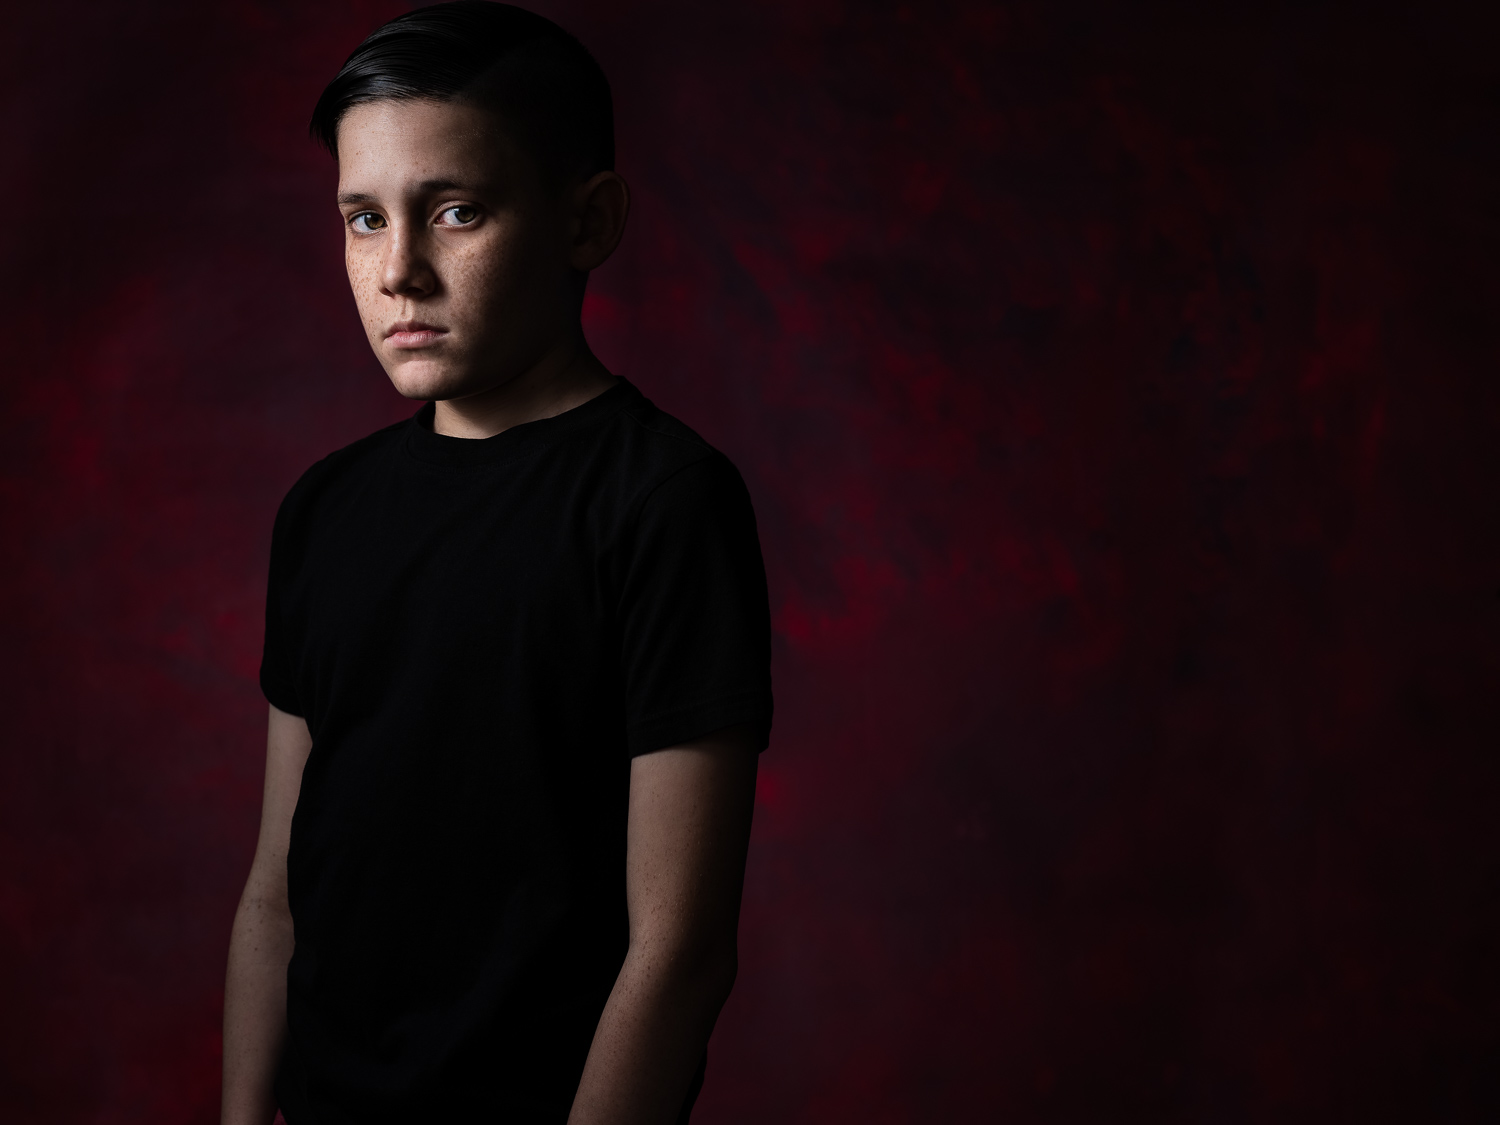
After loading the shots I liked this image best and gave it a couple of simple tweaks in Lightroom & Photoshop. I like the shadow on his face and the overall quality of light, especially compared to the natural light shot above. It makes a big difference.
Shoot 2 – Gear
- Fujifilm GFX 50R
- Fujifilm GF63mm
- Fujifilm GF110mm
- Brolly Box
- Godox AD200
- Godox V350F
- Godox XproF Trigger
For this image I shot in my garage against a canvas background I made with my sons. Here is a picture of my son Elijah in front of the background with an ambient only exposure. This will be our starting point.
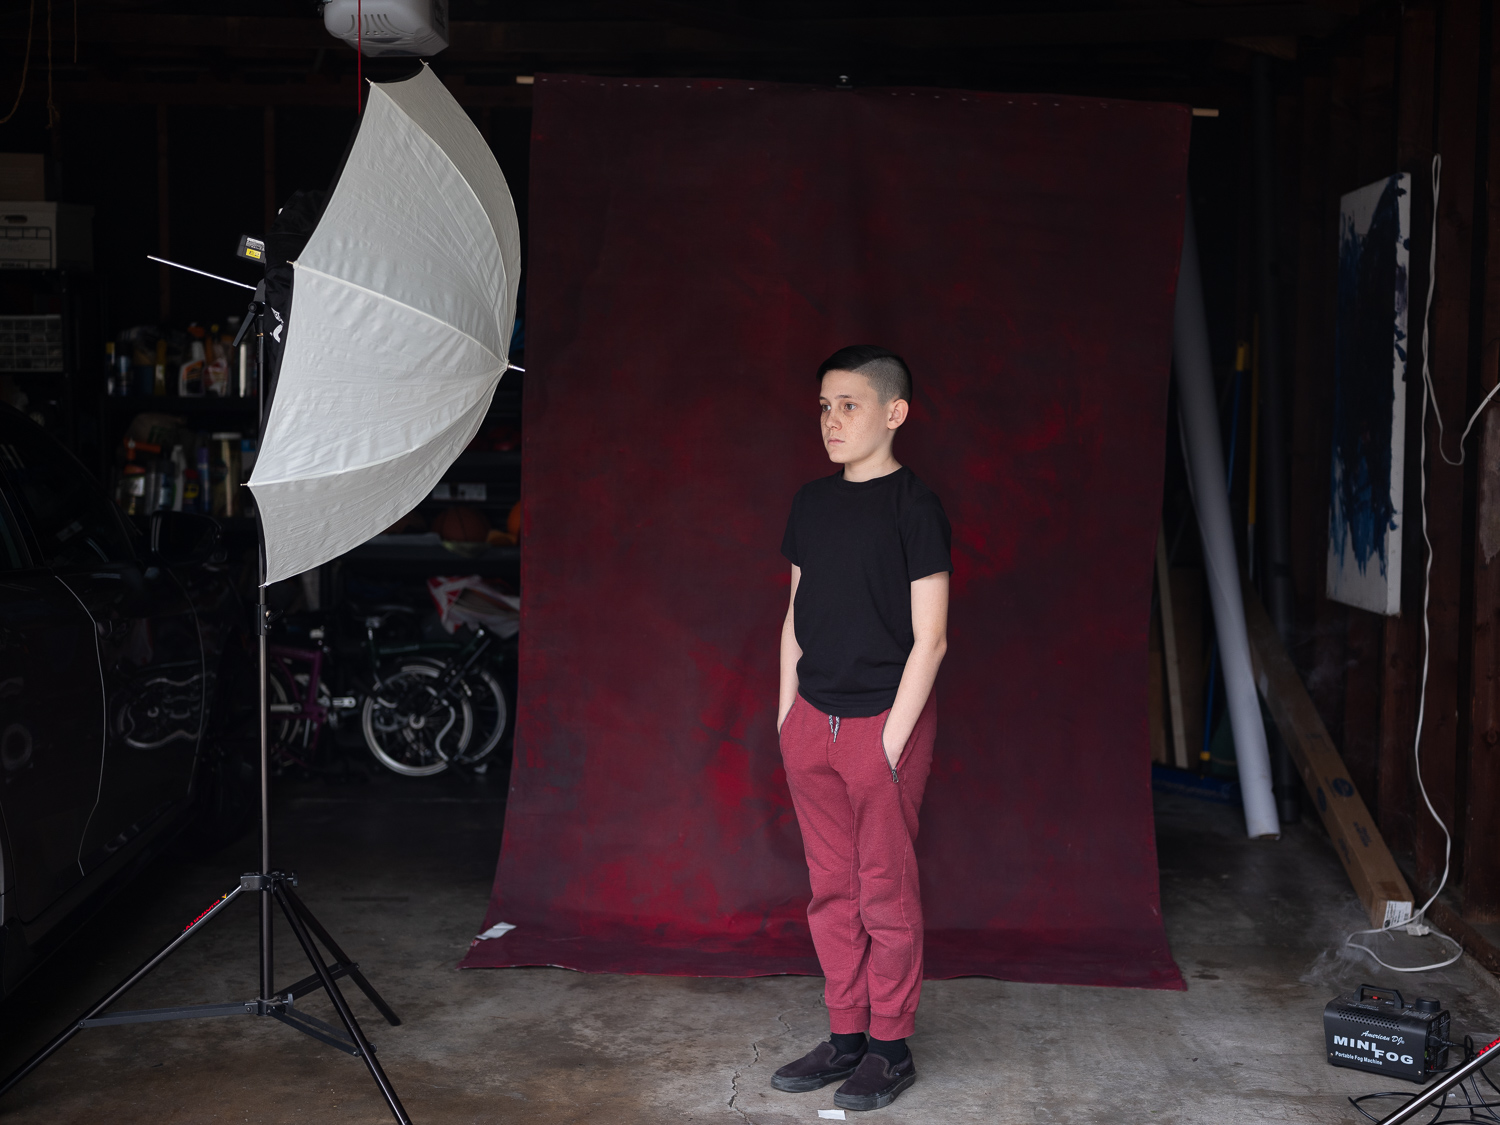
Fuji GFX 50R / 63mm / raw / ISO 500 / F2.8 / 1/125 sec. / no strobe
To get things a little bit more dramatic lets drop our ambient light down by lowering my ISO to 100 and going to F4. Remember to set your EVF to ignore your exposure. It should look way too dark without flash at this point, which is what we want.
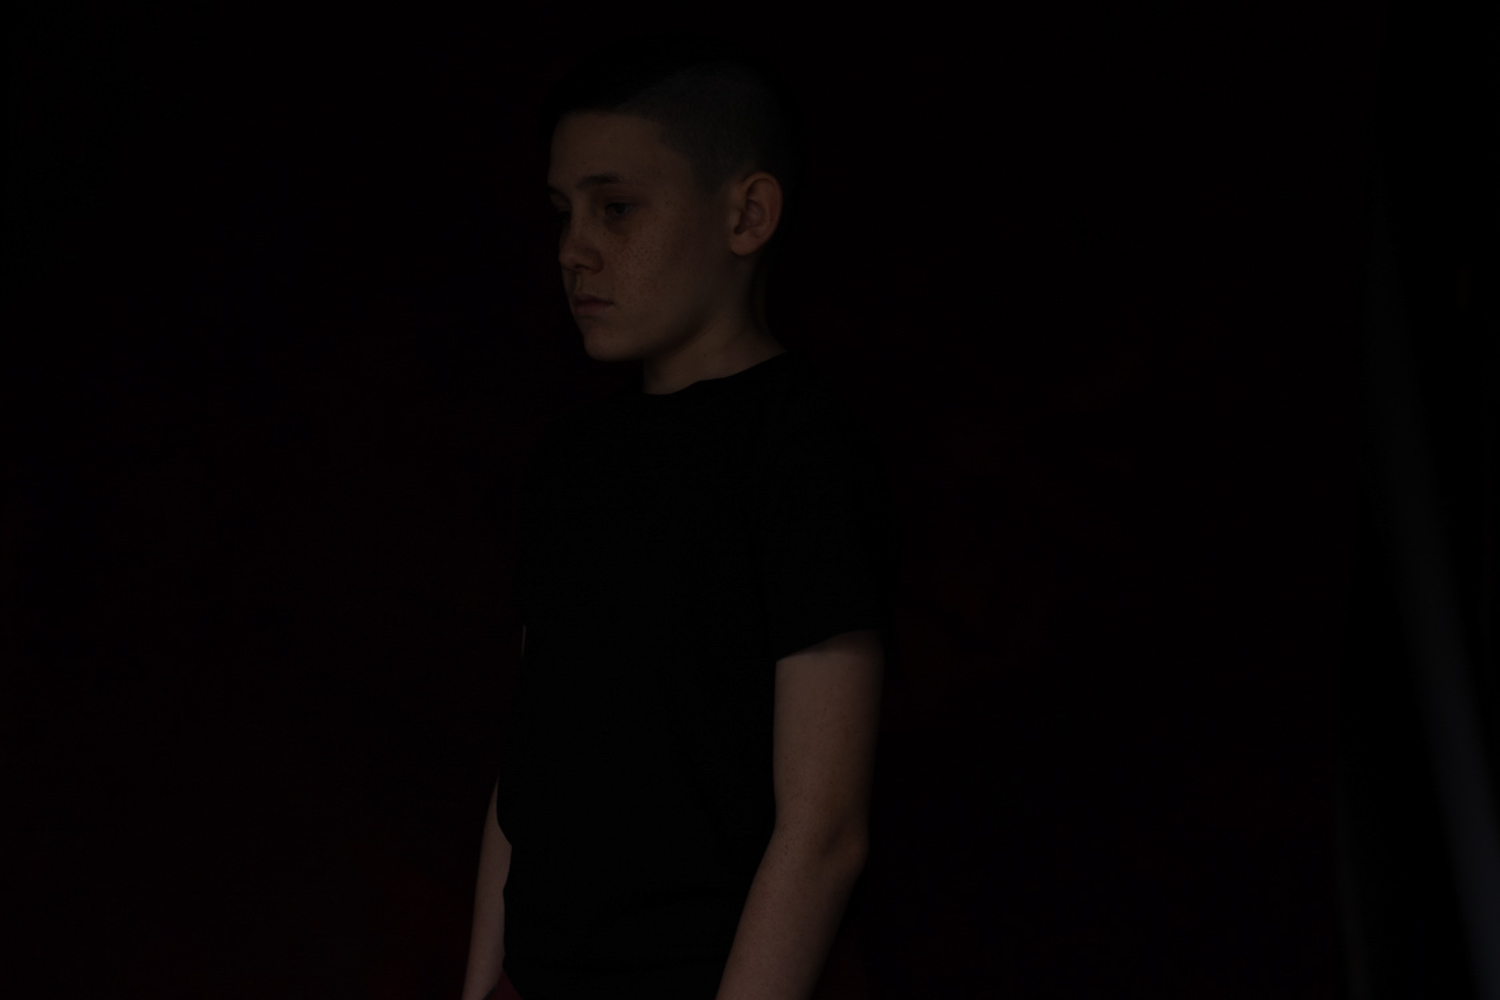
Fuji GFX 50R / 63mm / raw / ISO 100 / F4 / 1/125 sec. / no strobe
Next, I add one strobe light (camera left) to him with the brolly box feathered away from the background since we will light it separately. The single AD200 was around 1/32 power. I fine-tuned to F5.6 to balance the light.
Fuji GFX 50R / 63mm / raw / ISO 100 / F5.6 / 1/125 sec. / AD200 1/32
Once I got the exposure and quality of light I liked on his face I moved on to the background. I added a small flash with a dome diffuser directly behind his back on a stand. The dome is to distribute the light on the backdrop a bit more evenly. It’s also eating up about 1 stop of light. At this time I put on the 110mm lens and adjusted accordingly.

Fuji GFX 50R / 110mm / ISO 100 / F6.4 / 1/125 sec. / AD200 1/32 / V350F 1/2
From here it’s just a matter of taste on how bright you want the background compared to the subject. I wanted to go for a more painterly feel so I wanted it more subdued. The V350 is a tiny flash with a diffuser so I fluctuated between 1/4 to 1/2 power. Here it is with adding the second light behind him.

Fuji GFX 50R / 63mm / ISO 100 / F5.6 / 1/125 sec. / AD200 1/32 / V350F 1/2
Once I had the lighting & settings down I was able to get in position and talk him through where to look etc. The whole shoot lasted about 8 minutes. This was my favorite so I did a few minor tweaks in Lightroom and Photoshop.
Fuji GFX 50R / 110mm / ISO 100 / F6.4 / 1/125 sec. / AD200 1/32 +7 / V350F 1/4
I encourage you to walk around your house and plan a mini shoot with someone you live with or even a self-portrait. I always learn something new doing these types of shoots. Start simple and add light to taste. And don’t forget to print your favorites!