Like many photographers I love black and white images and although most editing programs have methods to convert an image to black and white, usually the amount of control is quite simplistic. It’s because of this that a small number of specialist programs or plug-in’s have been developed (if you pardon the pun!). One such program is Tonality Pro by Macphun Software. This is available in two versions one aimed more at beginners and the pro version as the name suggests for more experienced photographers.
A note from Tomasz: Hey FujiLovers, before you jump into Gary’s review, let me just let you know, that I have been a satisfied user of Macphun Software apps for a couple of months now. As I already wrote here before, my idea of Fuji Love reviews is to write about software and hardware, which adds to our great experience with our Fuji X cameras. I asked Gary to write about Tonality Pro, as I find it works beautifully with Fujifilm’s X-Trans sensor files and I have been really enjoying using it as a part of my black and white fine art photography workflow.
Here’s a comparison of features:
Tonality for everyone who takes pictures
- Native RAW processing with 16-bit support
- 160 one-click presets
- 5 layers
- Adaptive Exposure, Smart Contrast, Shadow Recovery
- Powerful Clarity & Structure controls
- Color Filters that operate on both Luminance & Saturation
- Glow, Lens Blur, Vignette, customizable Textures & Photo Frames
- Versatile Analog-style Grain engine
- Export to TIFF, PSD, JPG and a host of other formats
- Sharing to social networks
Tonality Pro for experienced photographers
- All the features of the standard version plus
- Plug-in support for Adobe PS, Lightroom, Apple Aperture.
- Advanced Layers functionality with Blend Modes
- The ability to use the source color from the original image
- 8 layers for enhanced creativity
- Upgraded Vignette with Centering & Luminosity control
- Zone System to “balance” gray shades for superior contrast
- Support of additional shortcuts for faster workflow
- Histograms with tonal range clipping and pixel saturation
- Smart Object (Photoshop plug-in)
The basic version retails for £14.99 and the Pro version for £49.99. Both versions are Mac only software.
For this article I will be reviewing the Pro version. Firstly once you have downloaded the software, installation as with any Mac app is very simple and you will be up and running in minutes.
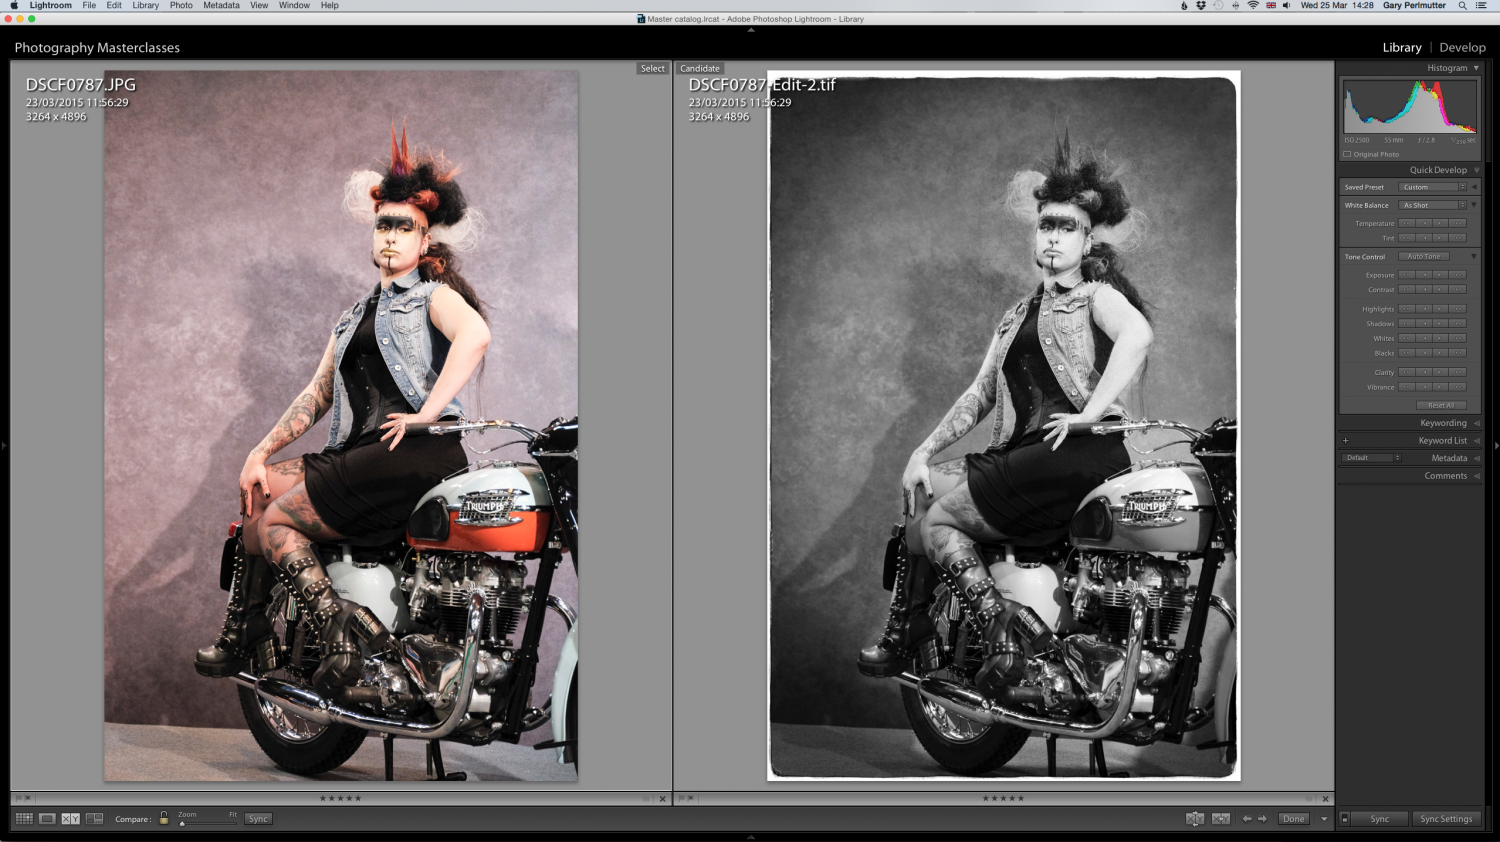
As my normal workflow is to import my photos firstly into Lightroom, I’ll be using this program as a plug-in. So the first step once you have got your images into Lightroom is to decide which one you wish to import into Tonality Pro and convert to black and white. Initially I will just do basic exposure corrections and any cropping using Lightroom’s own tools. Then as with any plug-in you right click on your selected image and from the dropdown menu select Tonality Pro. Up will then come the usual options when using plug-ins, like do you wish to edit a copy with your Lightroom adjustments (the first option). This is the one I select as it leaves your original image untouched and produces a tiff duplicate file. This then opens up in the Tonality program that then fills the screen.
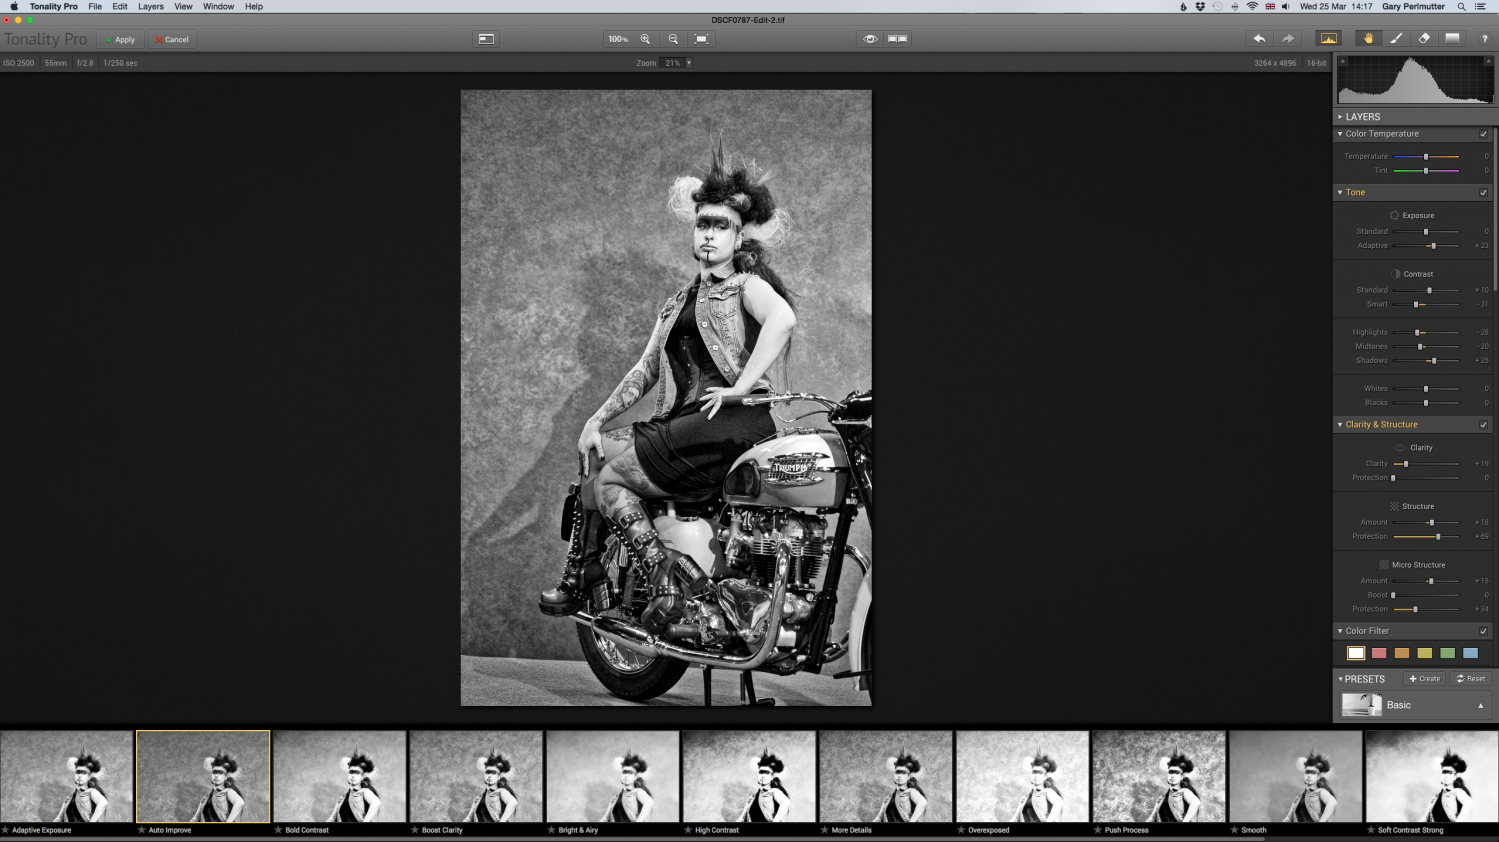
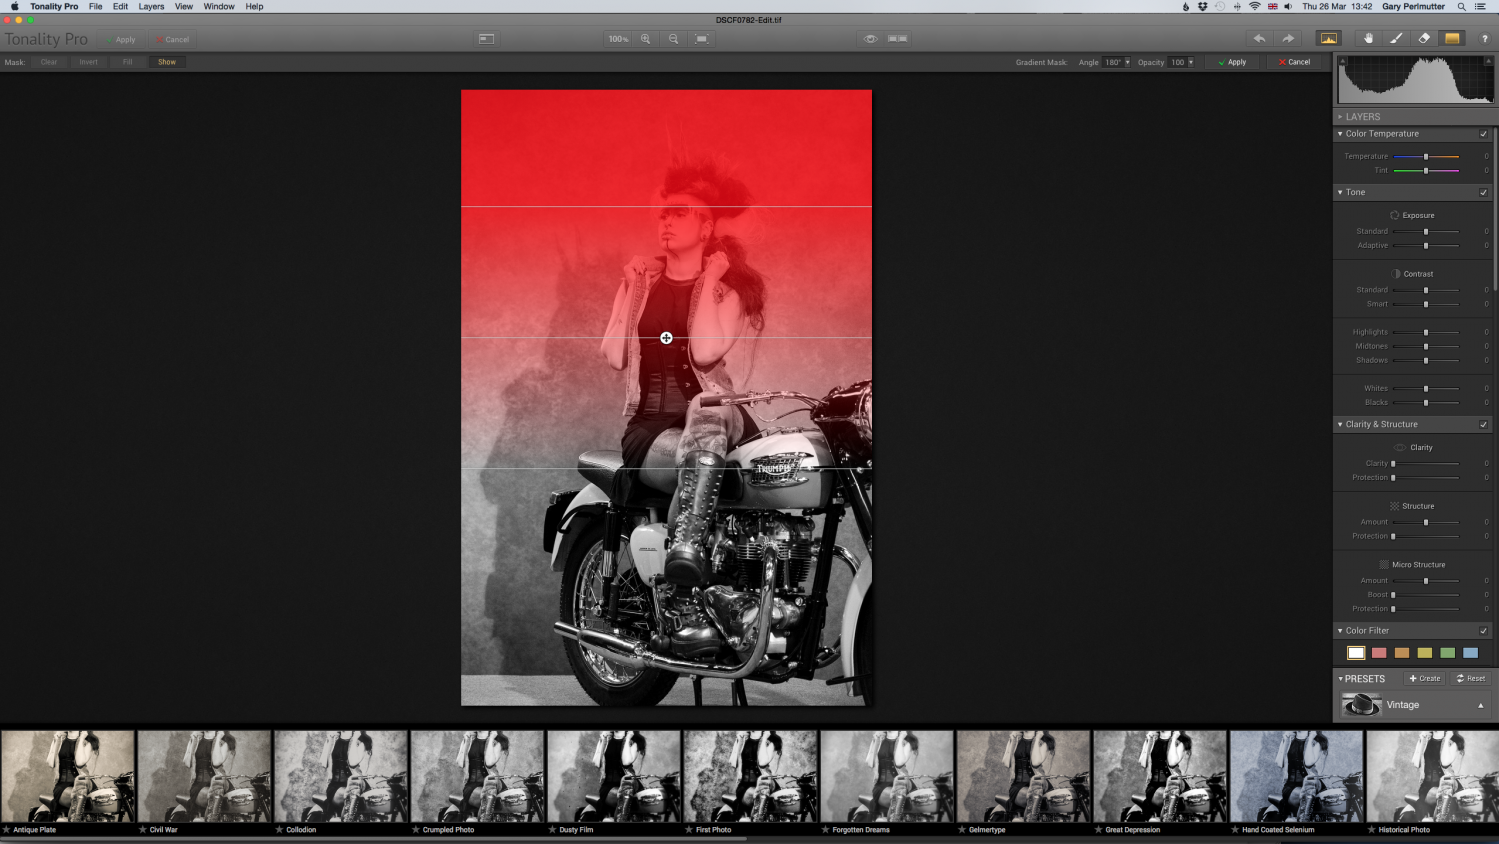
The user interface is nicely laid out – if you use Lightroom or one of the other Macphun apps, you’ll feel right at home. You have a main work area with all the adjustment panels on the right, and across the bottom you’ll see samples of your image with one the current preset group presets applied. Along the top are common tools such as crop, resize, and layer tools. Below that is a context sensitive bar with options for the currently selected tool.
Tonality Pro supports a number of file formats including JPG, TIFF, PSD, and many RAW formats. Regardless of the image type or size, the app is very fast. Once the image is loaded, there is no waiting to have an adjustment applied, it just happens. The preview thumbnails for presets, updates with the current adjustments, showing how they would look on top of your current adjustments.
You will see that you are already presented with an initial black and white conversion of your image, from the first preset. If you like this version, then there is nothing to stop you clicking Apply, which will then close the program and take you back into Lightroom, where you will see your image now converted to black and white. However to do that would be missing out on all the wonderful presets (160 in all) and tools that are at your fingertips and disposal in Tonality Pro!

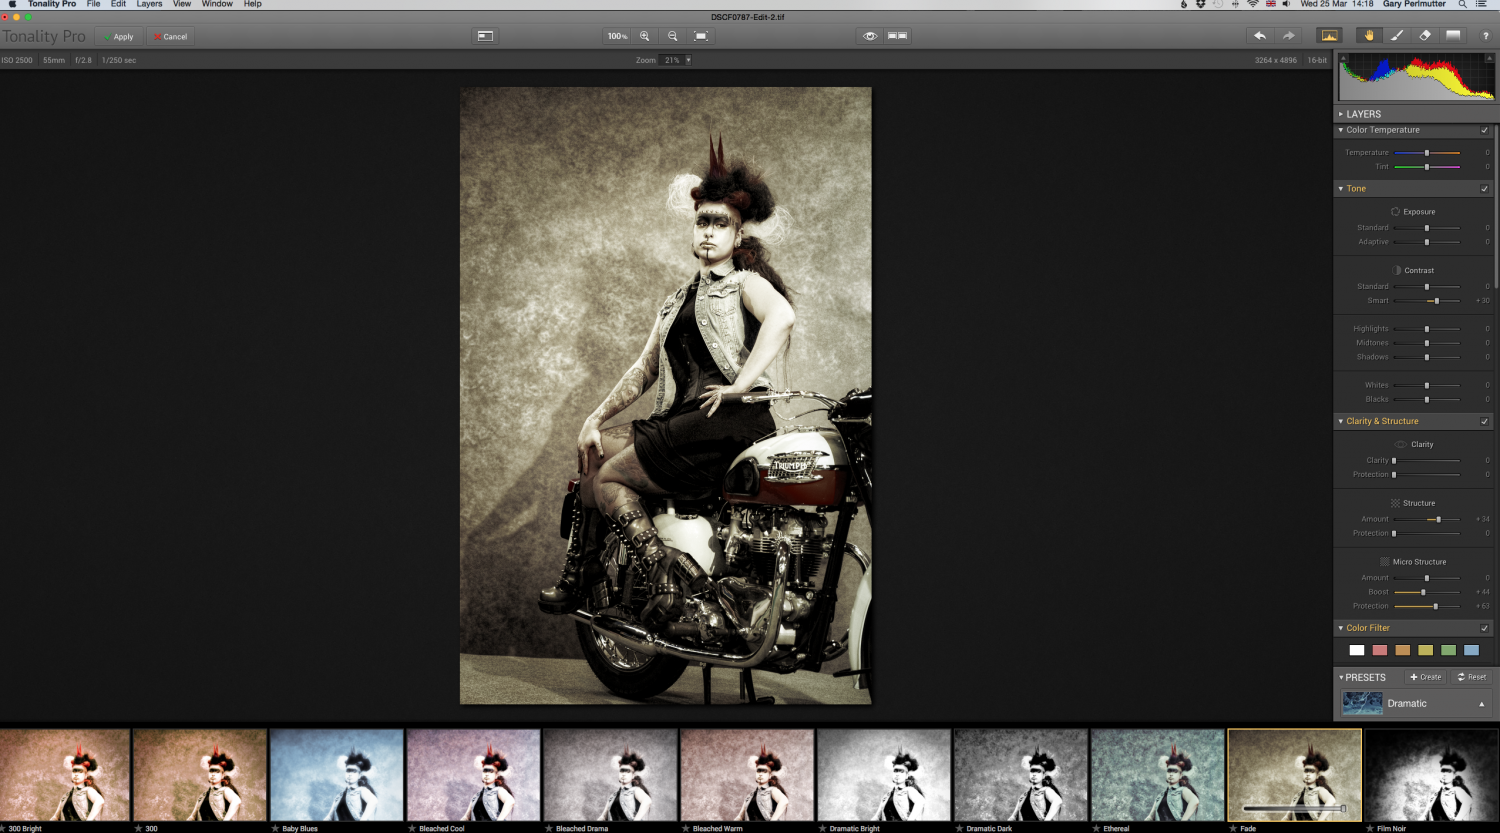
There are options to use the various presets with eight categories of predefined areas like toning, vintage, and film emulation, as well as saving presets as favourites or you can create your own. All the presets can be modified as much as you like. Most of the supplied presets are great starting points, which you can then personalise and save rather than starting from scratch.

A good place to start is the Auto Improve preset, which is found in the Basic category. This does a good job of analysing the image and making adjustments to enhance contrast and detail. You can then fine-tune this with the various adjustment panels, or globally adjust the strength of the adjustment by using the slider that is displayed in the preset when you move the mouse over the thumbnail.
Adjustment panels on the right of the work area, are available for adjusting colour temperature, tone, clarity, colour filters, split toning, lens blur and others. There is also a tone curve adjustment panel that works similar to the one found in Photoshop. Working with most of these adjustments, you can view your image at 100%. With the navigation tool, it’s easy to move around your image while viewing a zoomed in version for editing.
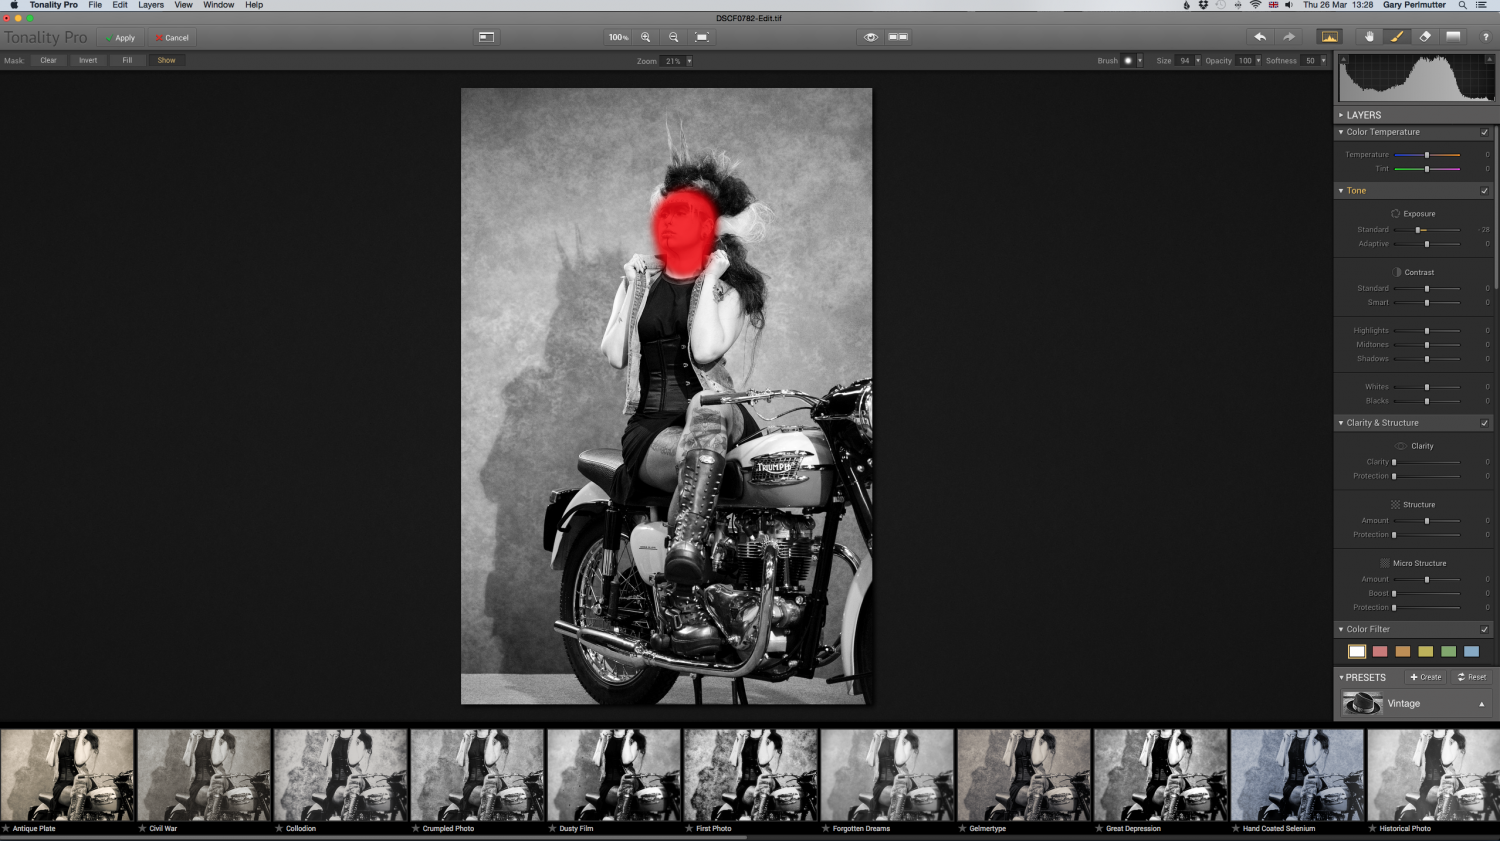
If you just want a simple dodge or burn to a specific area, then you can use the adjustment brush. This is variable in size and you can then simply brush in your adjustment, for example to lighten or darken an area. You can click on show mask and you will see the red mask you are painting on. If you over do it, you can simply switch to the eraser tool.
There is also a superb gradient tool, which works just like the one in Lightroom. This is perfect for darkening skies in landscapes or lightening foregrounds.
An even better method when using the above tools, is to use another really great feature, which is the ability to work in layers. The Pro version supports up to eight layers, and adjustments can be applied to the entire layer or only specific areas through the use of masks. You can choose to show the mask for fine-tuning or just the subsequent effect. The layers are a much better way for applying adjustments to just a selected area of your image rather than a global adjustment. This is because you are only affecting the layer you can work on. Furthermore, just like in Photoshop you can choose to show the layer or hide it.

When you’re all done with the main adjustments, there are more great features to come! There are panels with various textures that can be applied to your image for that grungy, distressed look. Also a number of attractive frame options that can be applied to the image, before exporting or returning to Lightroom.

If you’re opening the file from within Lightroom or Aperture, the easiest way to save is by choosing Apply. This will export the file with your Tonality adjustments back to your catalogue in whatever file format you selected originally (I usually work with Tiff’s).
If you’re using the standalone version of Tonality, you’ll need to choose Export to image from the File menu to apply changes to a file that can be used in other applications or on the web. There are also options to open the file in other applications, such as Photoshop or Macphun’s other apps like Intensify and Photo Studio FX.
Tonality also includes a nice option to share your creations directly to Facebook, Flickr, Twitter, email, and messaging etc.
Conclusion
Tonality Pro is right up there with other black and white conversion tools. For basic use, the standard version at $15 is a bargain. If you use Lightroom or Photoshop, or have more advanced needs with layers, Tonality Pro at $70 still represents really good value for money. It’s great that when used as a plug-in it brings the advantage of layers to Lightroom users. The only real downside is that the software is only available to Mac users.
So to sum up, I found it fun to use and it’s inspired me to be more creative. So much so, that I can see Tonality Pro becoming my first choice, for producing black and white work from my digital images!
System requirements and supported formats
- Mac OS 10.8 and above.
- iMac/MacBook Pro/ MacBook Air/Mac Pro/Mac Mini late 2009 or later.
- 512 MB Graphic RAM and more.
- Plug-in support (Tonality Pro only) for Adobe Photoshop Lightroom 4, 5 or later; Apple Aperture 3.2 or later, Photoshop Elements 10 -12 (App Store version is not supported due to Apple Sandboxing), Adobe Photoshop CS5, CS6 or CC (including Smart Object support)
- Native RAW processor with support for both 8-bit and 16-bit.
- Other supported formats: TIFF, PNG, JPEG, PSD (Tonality Pro only).