When I started writing last month’s article, it was going to be about the process of shooting black and white. Then the backstory ran away and discovered a life of its own. I’d mentioned in passing that I shoot in the black and white film simulation so there’s no color in the electronic viewfinder. This month, I’m going to expand on that – how I set my camera up for this purpose.
The X-Pro2
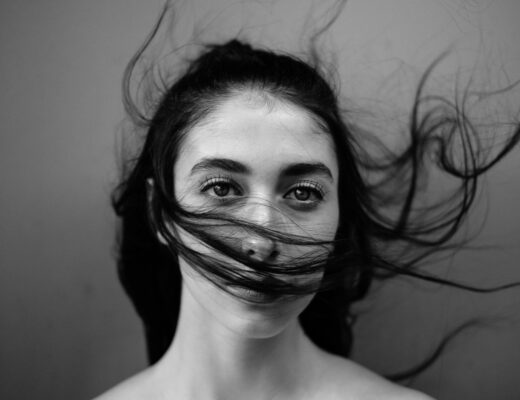
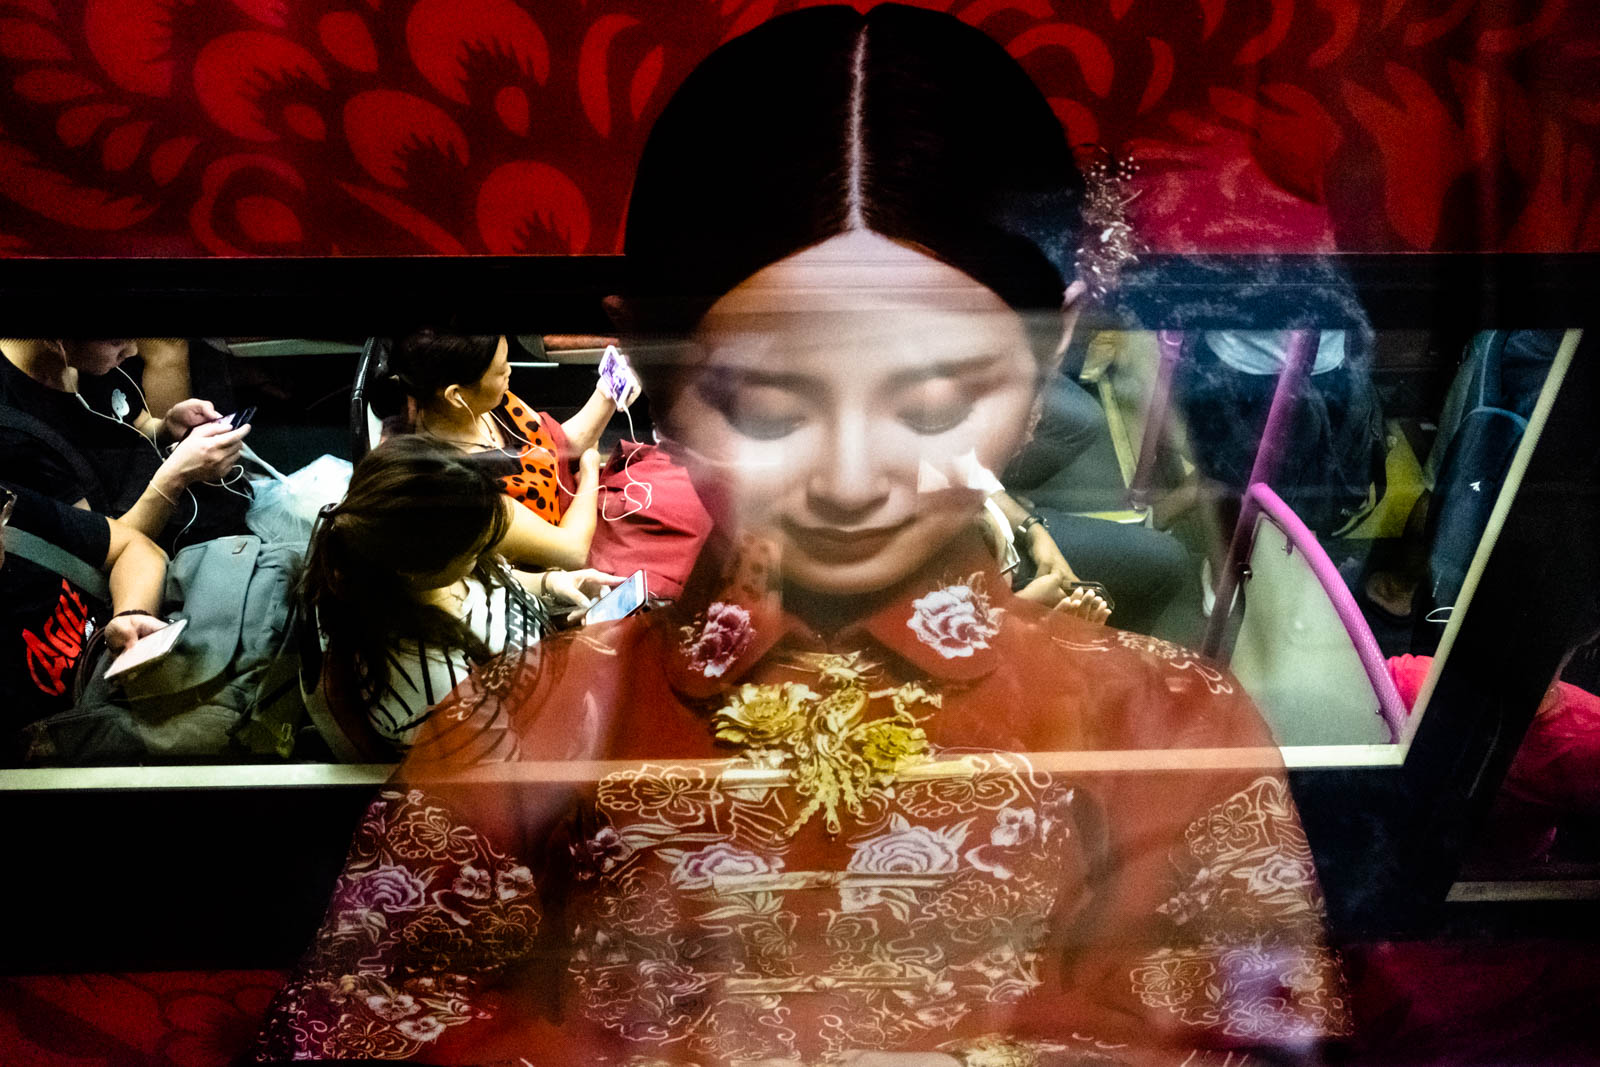
Singapore, 2018. X-Pro2, XF35mmF1.4
Like most of us, I use my gear in a manner specific to me. My habits stem more from quirk than any great technical necessity, but that’s one of the things I love so much about my gear: that I can do this.
I’m an X-Pro series fan. The X-Pro1 found its way into my bag in 2012, and schooled thoroughly to its idiosyncrasies, I happily never recovered. There was a dalliance with an X-T1 for a brief period, but that lovin’ feeling just wasn’t there, you know what I mean? The X-E series is tiny, feature packed and too easy to throw in a bag and go, but it isn’t an X-Pro.
These days, I work mainly with the X-Pro2, which I’ve had for a couple of years now and still derive a great deal of pleasure from using. There are several features of this camera that are are a big part of my creative process.
1. A great electronic viewfinder (EVF)
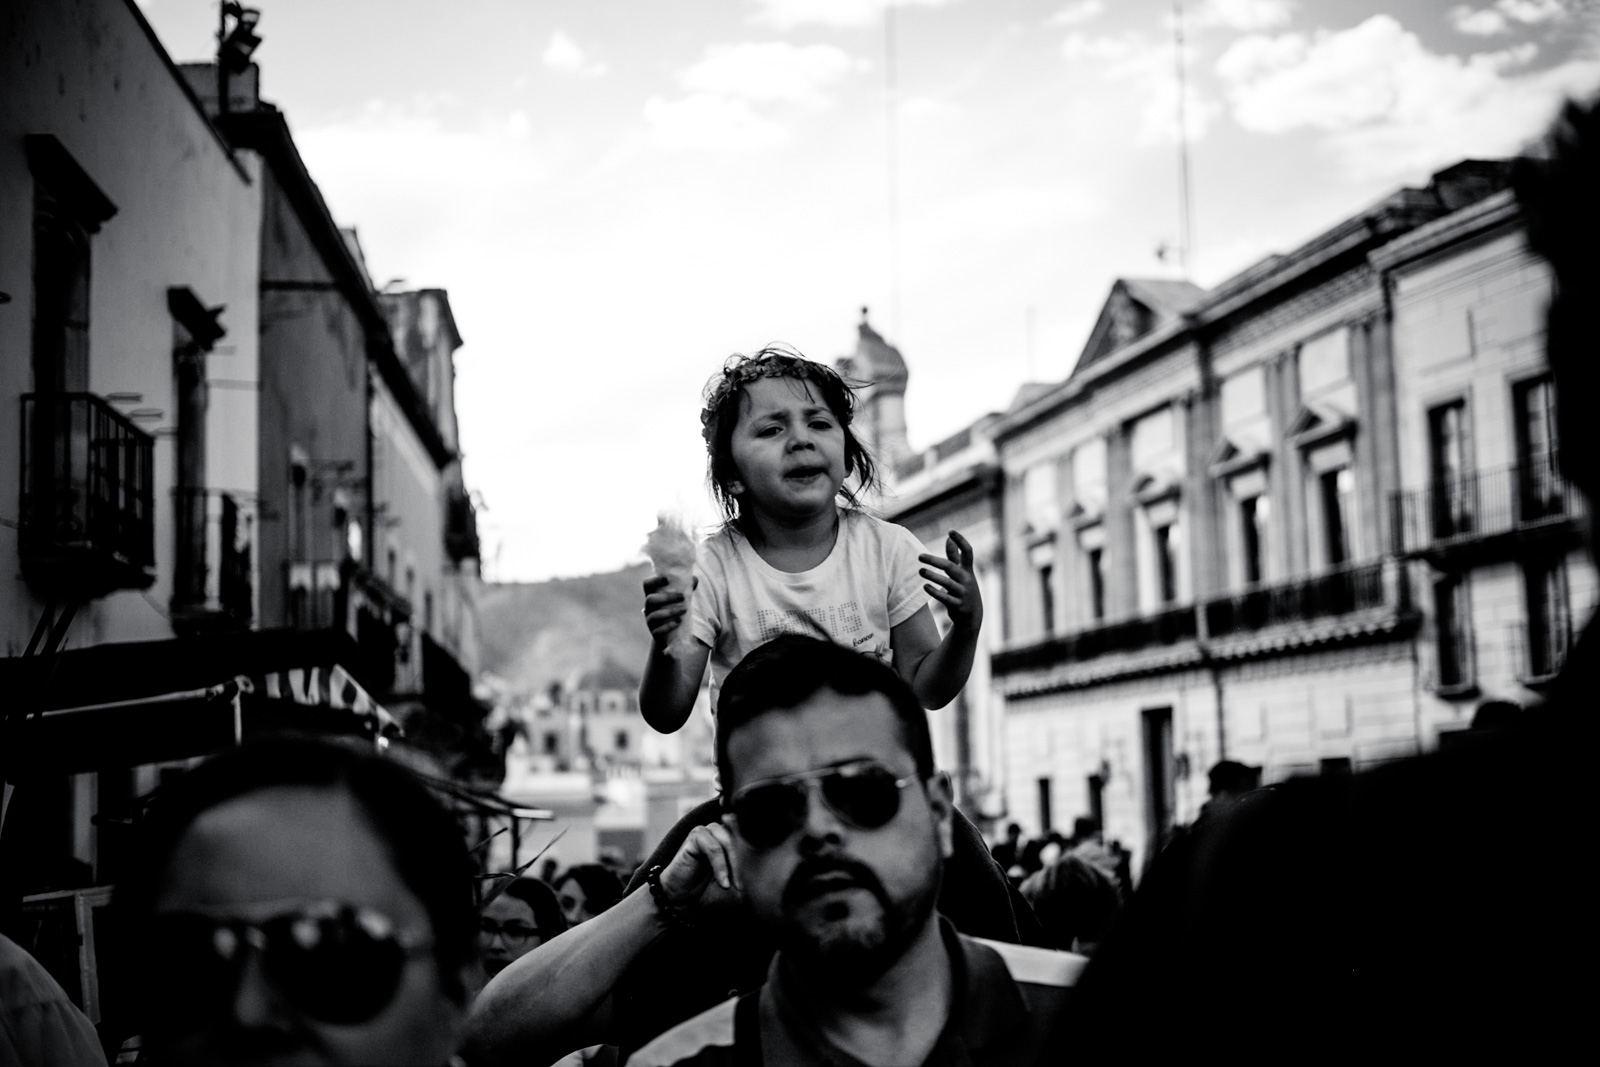
Guanajuato, Mexico, 2016. X-Pro2, XF35mmF2
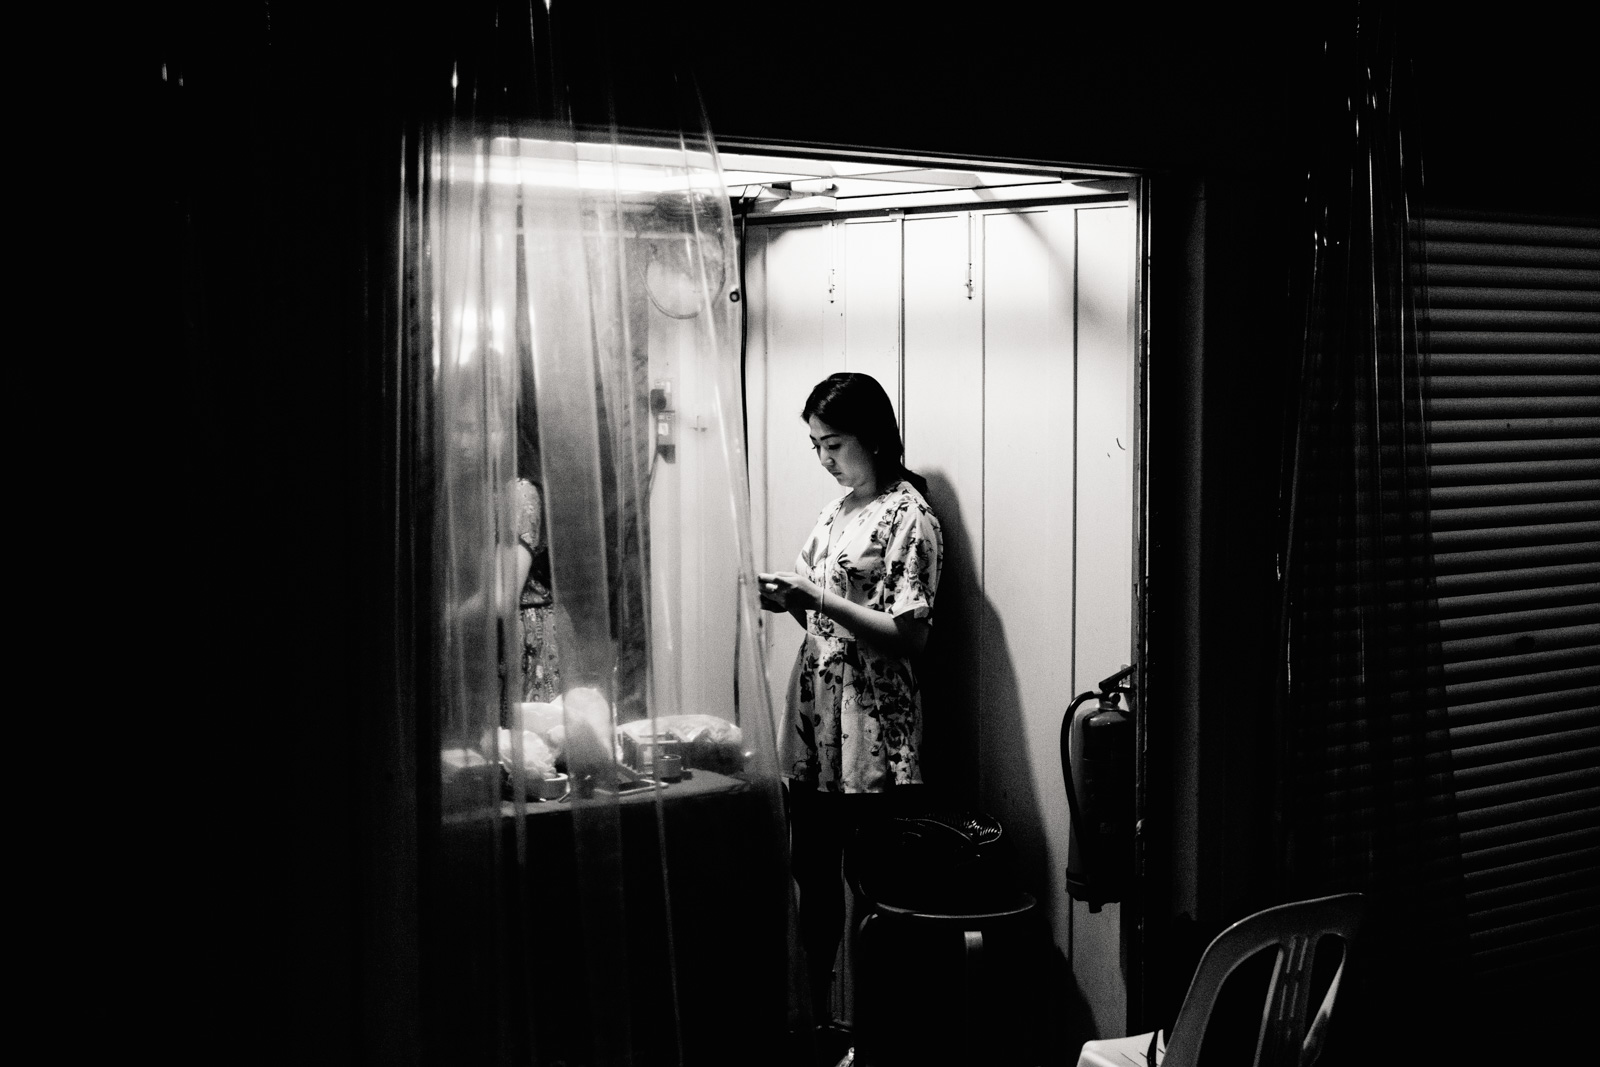
With excellent refresh rate and beautiful rendering, the EVF is a thing of beauty. Shooting at night is where it really shines – it sees more in the dark than the eyes do, which is nothing to complain about!
While deliberately making black and white pictures is a recent phenomenon, I’ve been shooting with my EVF on black and white for some years longer. I love that the film simulations in Fujifilm cameras are reflected in their viewfinders, so mine is always on the standard B&W setting.
You could say that I’ve been unconsciously building up to my current black and white project, by re-orienting perspective over time. Colour is a major distraction, and not having any in the viewfinder helps, especially at the start. That continuous feedback meant that I learned much quicker, what various surfaces looked like in different light conditions, before even taking the shot. It’s a remarkably effective tool for instinct honing. And also, the world just looks cool in high contrast monochrome.
2. An optical viewfinder (OVF)

Colombo, Sri Lanka, November 2015. Pre-production X-Pro2, XF27mmF2.8
It gets easier to see for black and white as time goes on, without the assistance of the adjusted EVF. I use the OVF a lot when shooting street, as being able to see outside the frame lines, in real time, is incomparable. That hybrid overlay of indicators like histogram and level are not strictly necessary, but that luxury allows me to work with greater accuracy… and also feel a bit like Geordi LaForge.
3. An exposure compensation dial (EV dial)
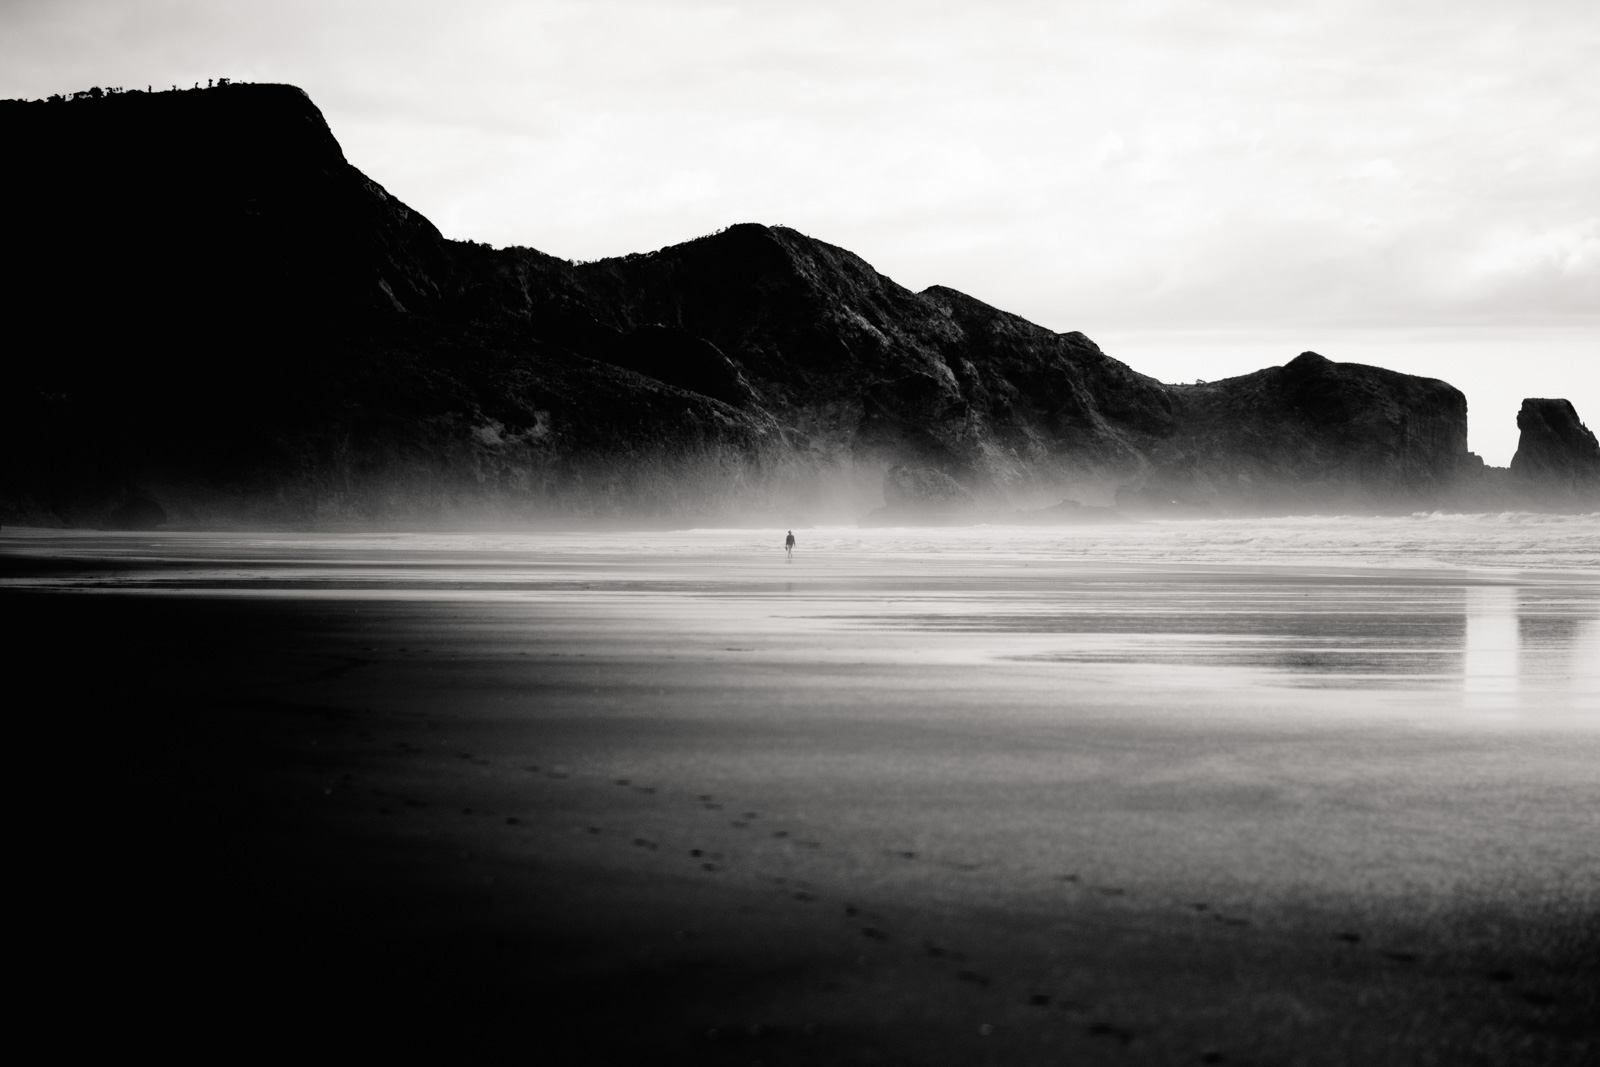
Te Henga (Bethells Beach), New Zealand, 2017. X-Pro2, XF56mmF1.2
I shoot on aperture priority most of the time, and control exposure with that handy little dial that sits right where it should – under the pad of my thumb.
Mostly though, what I appreciate about the X-Pro2, is this: it’s a sophisticated beast of a machine, that allows me to use it like a 5 year old. I play more with the X-Pro than I do with the X-Es and lone X-T that have crossed my path to date. And I don’t only mean addressing discomfort, like I am still trying to do with the X-E3 (read about it here), but trying out new ideas in general. It was an X-Pro2 I started exploring landscape shooting with, and I also do a lot of filming with the X-Pro2, with this piece being one of my many projects in progress.
The X-Pro2 is not the camera I would choose for video production – the X-T2 or new X-H1 are miles ahead in this regard. But it’s perfect for personal work, whether video or stills, as it’s the one I always have on me.
In-camera B&W settings
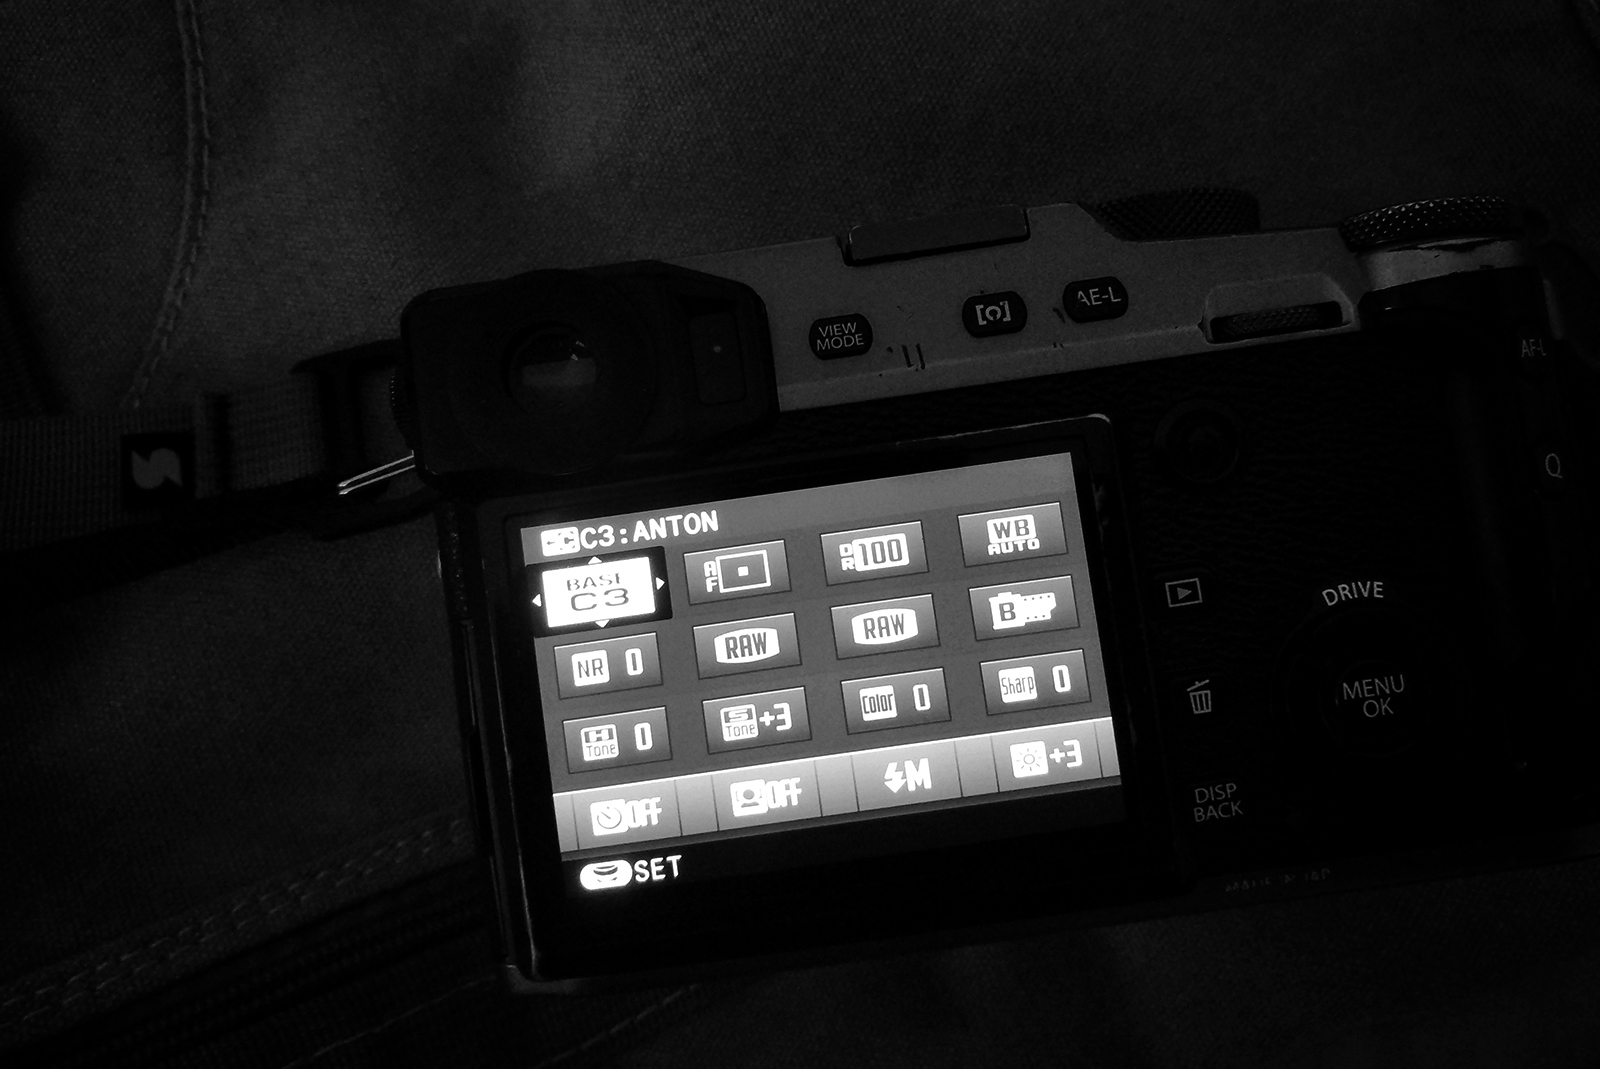
I shoot in RAW, so settings in camera are more an indication of the picture I’m intending to make, rather than the final output.
When I first started doing this black and white thing, I had both highlight and shadow settings at +4, which turned the world into a series of shapely splotches. That was fun. I’ve since dialed my highlight setting back down, as being able to see highlights is somewhat useful, so current camera settings look like this:
- Simulation: standard B&W (I like the crispness of this simulation)
- Shadows: +3
- Highlights: 0
One of the things the above setting does, is reduce the scene to a Rorschach-like impression in the viewfinder. Depending on where I’m shooting and how strong the available light is, a perfectly unremarkable street scene can turn into an a set of abstract impressions. It’s a kick. When faced with a scene I look at a bunch of times everyday, this works as a great perspective refresher.
Post-processing
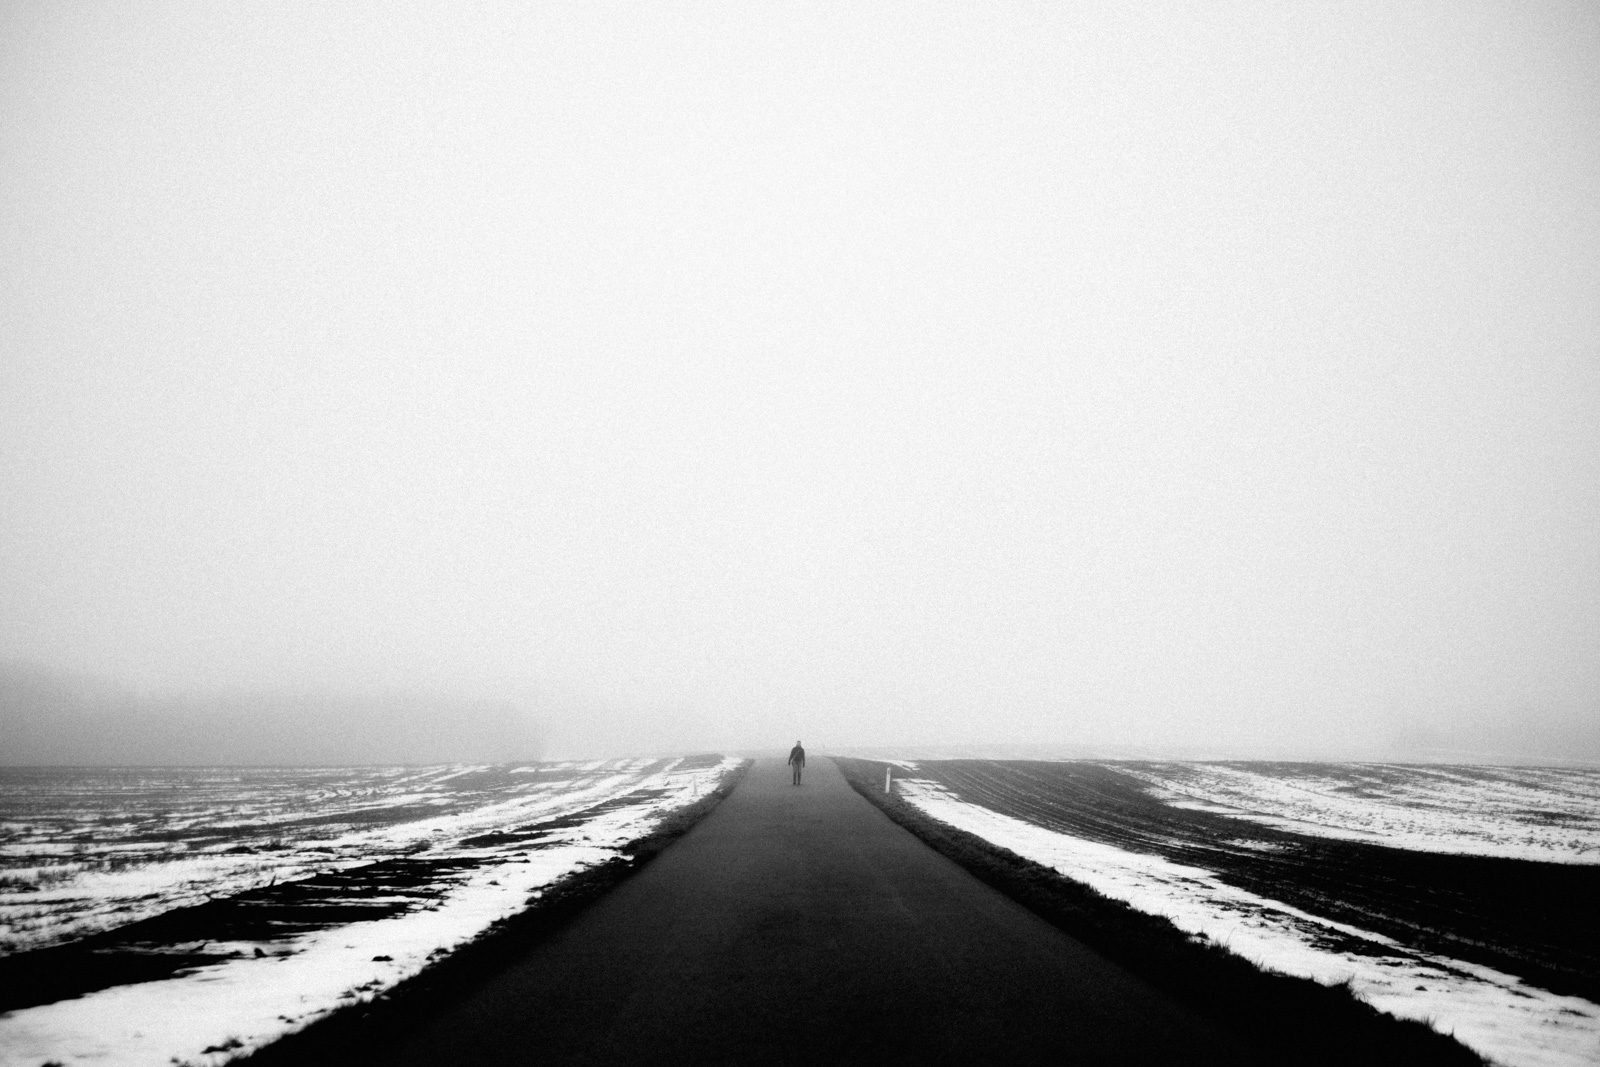
Farsø, Denmark, 2018. X-Pro2, XF35mmF1.4
I use Lightroom for 99% of my work, and my entire collection of presets has been developed for the way I shoot, which for black and white basically involves:
- Crushing blacks
- Sometimes blowing highlights
- Bumping contrast
These is what my Lightroom development panel typically looks like:
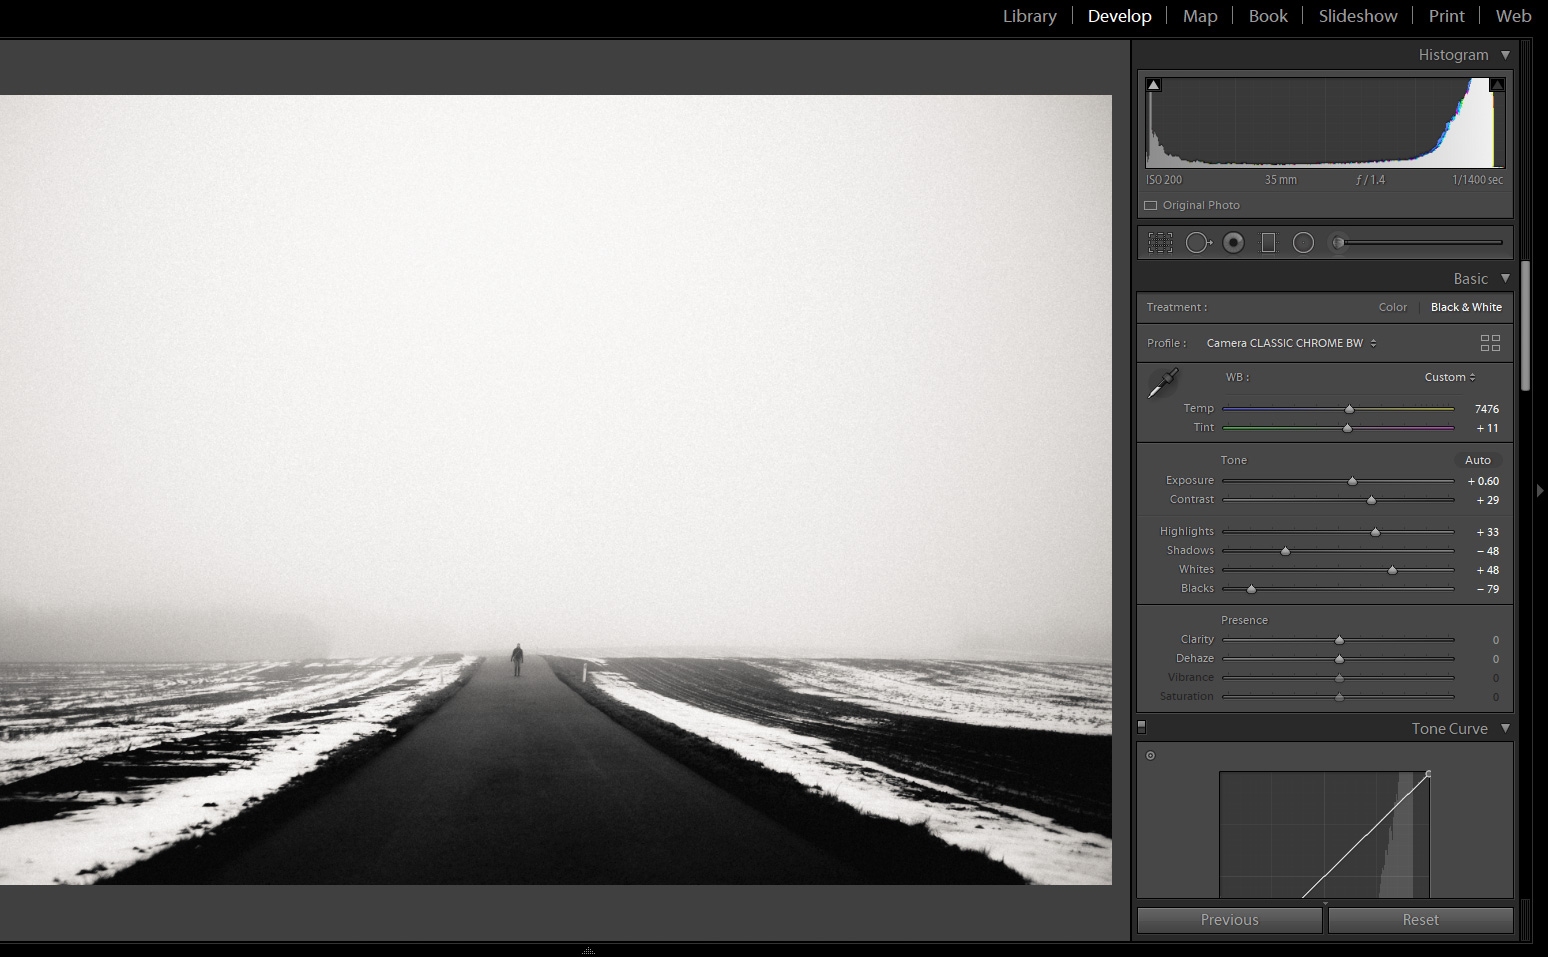
I normally start by applying one of 3 or 4 different presets to my picture, which takes care of the black and white conversion. I always develop with a color profile so that the black and white mix is available for greater control:
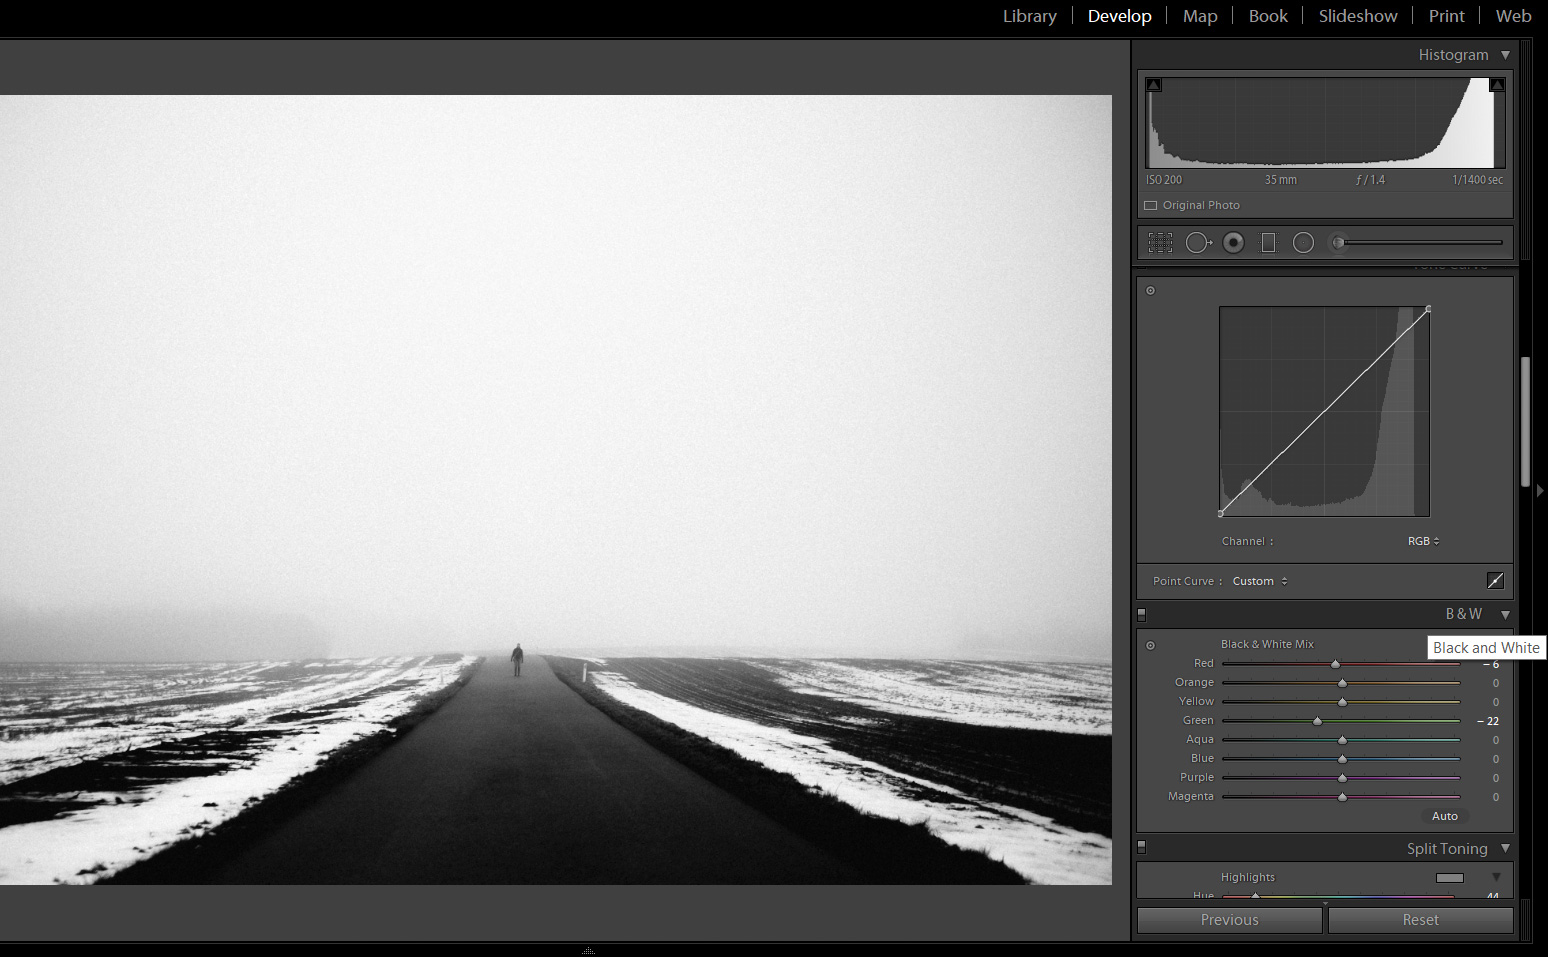
Once the preset is applied, it’s a question of tweaking the image to its desired end point. I don’t normally do much other than adjust sliders in the Basic and B&W panels in Lightroom, and sometimes work the Tone Curve to some variation of a slight S-curve.
For busy scenes, I’ll often use various spot adjustment tools to better control specific parts of the frame.
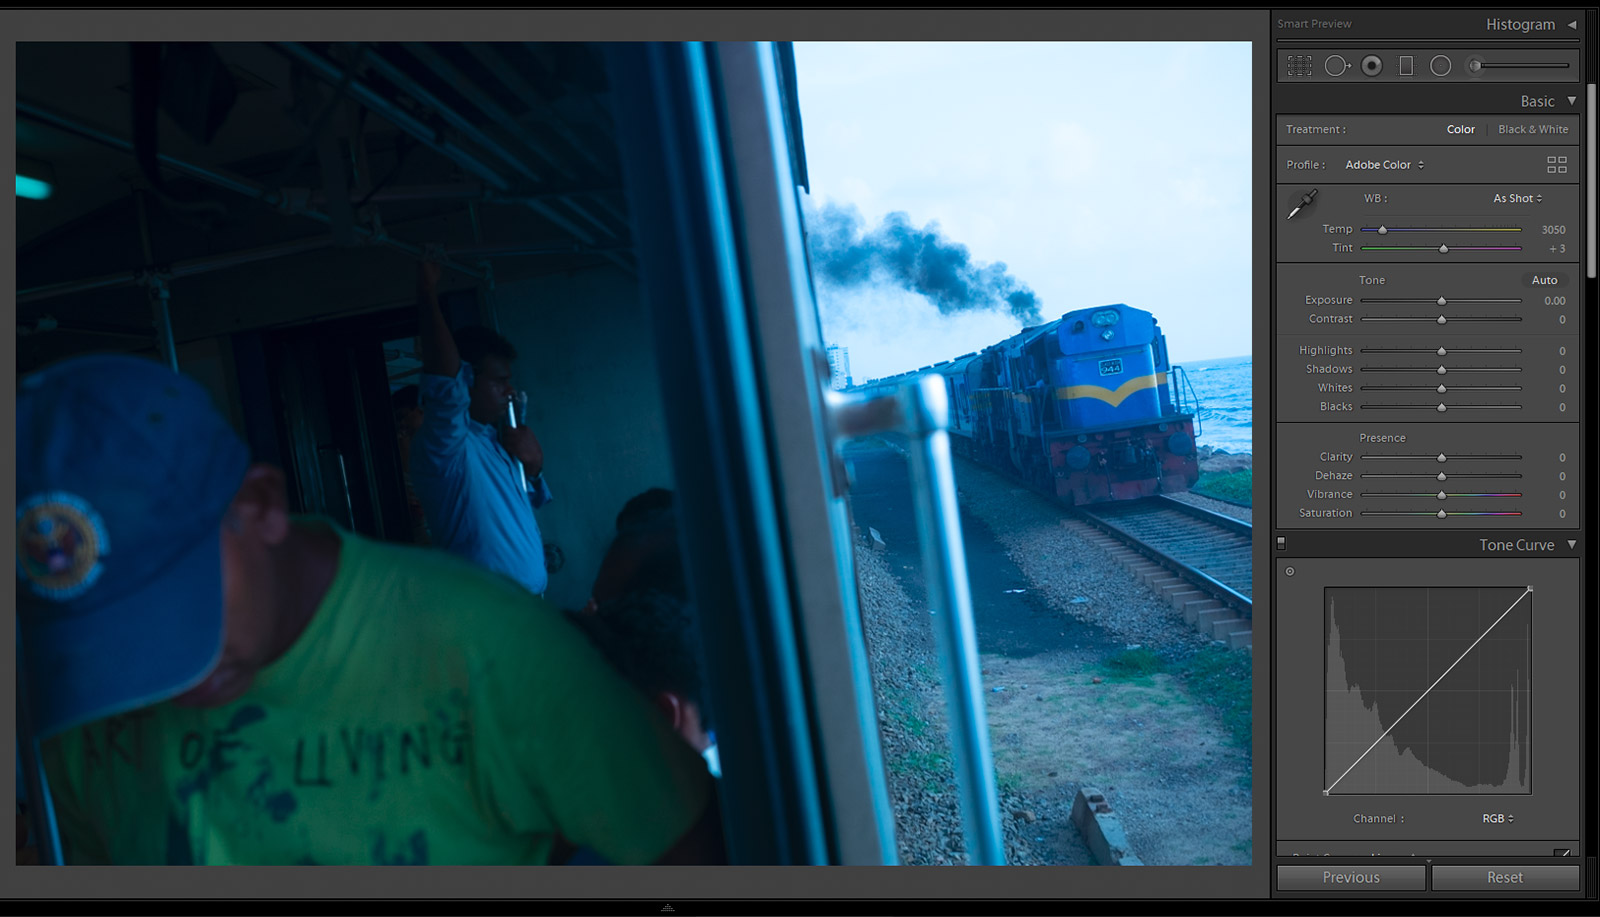
An example below is a picture from 2015 out of the X-Pro2. I made this standing by the open door of a train carriage in Colombo, the capital of Sri Lanka. The file from the camera was very cool on the white balance, and being exposed for highlights, many of the elements inside the train carriage were underexposed:
A quick conversion to black and white, with exposure and contrast adjustments to get the interior of the carriage looking roughly how I wanted it:
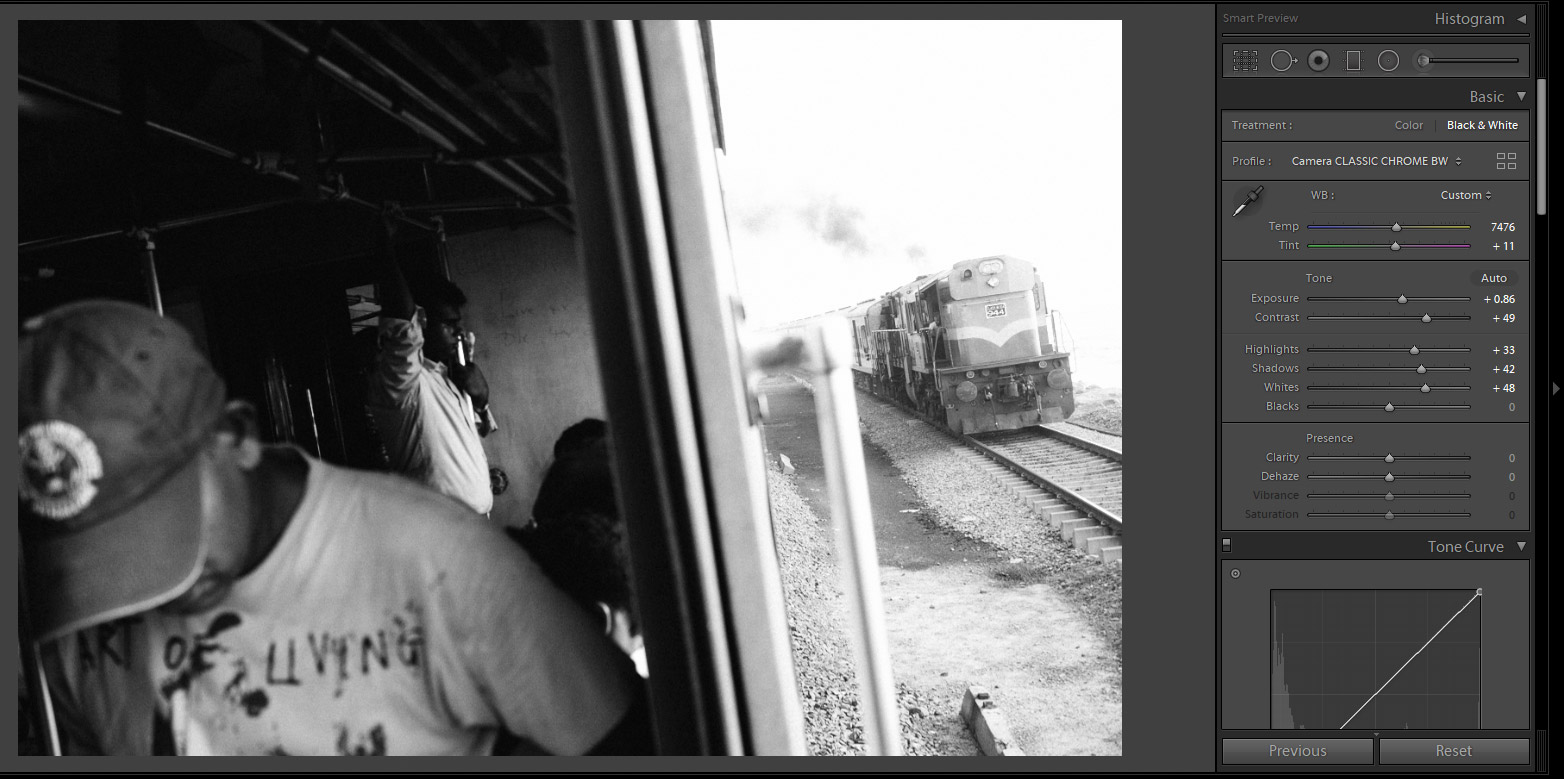
I chose to adjust the exposure of the whole photo for the interior of the carriage, for efficiency. It was going to be more work to spot-correct the interior than exterior, with its heavier contrast and uneven light fall all over.
All the outside of the train required was a graduated filter to correct the overexposure, and clarity for definition: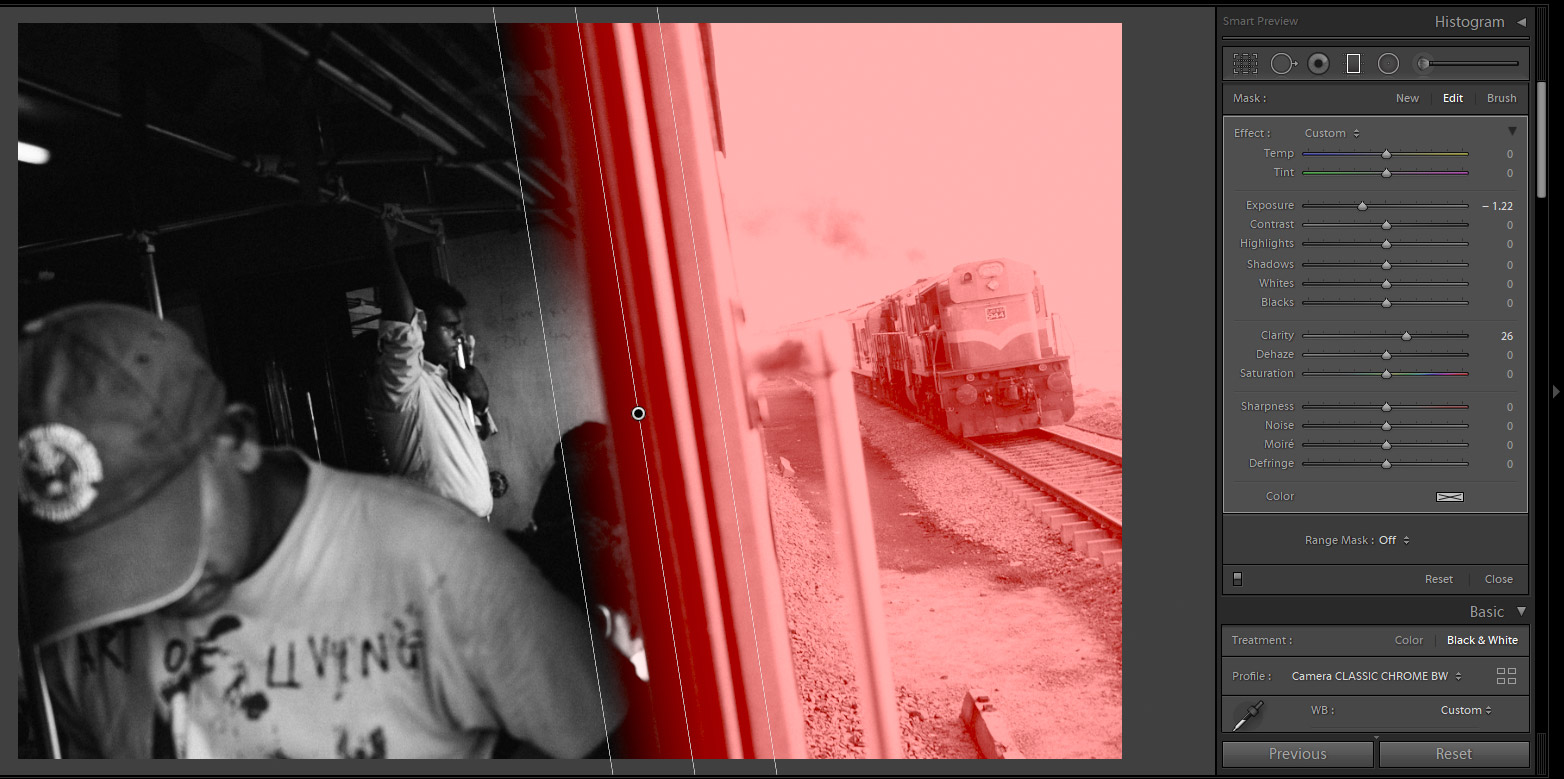
Doing it this way meant I only had to make light exposure tweaks with the Adjustment Brush to bring out certain parts of the train’s interior:
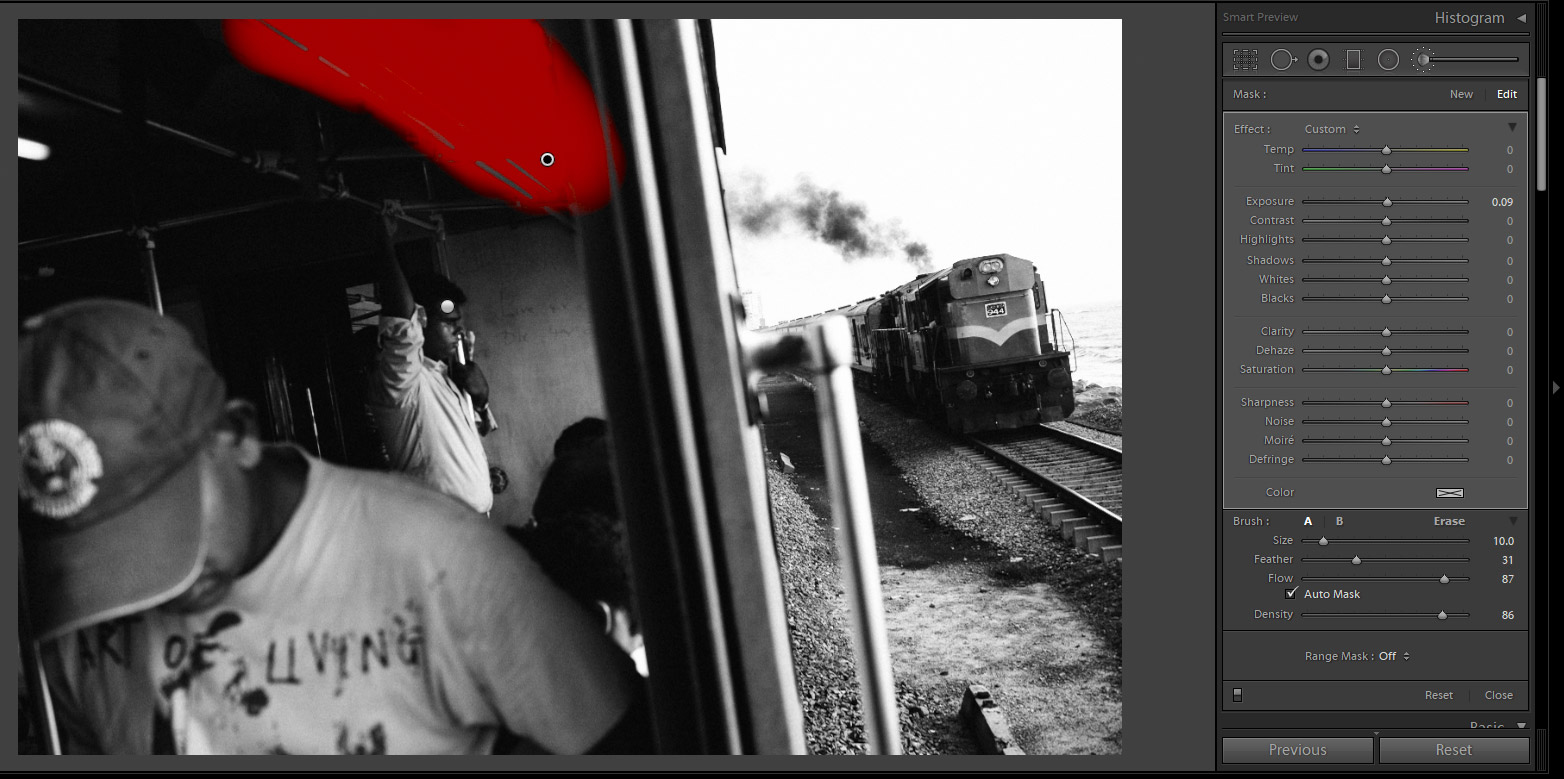
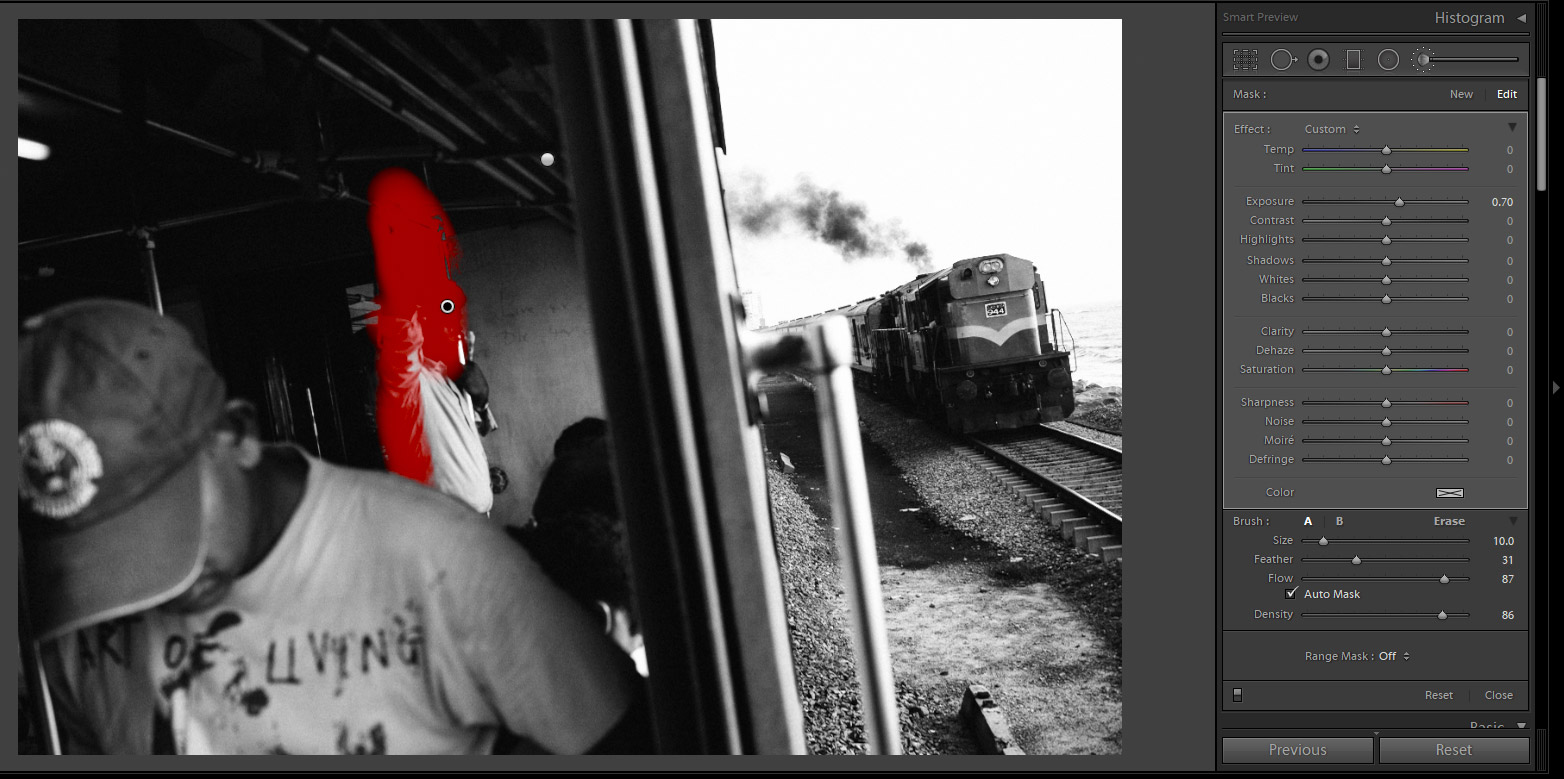
A final touch, was getting rid of the end of the florescent tube just sticking into the frame, because it was driving me nuts.

And this was the final product:
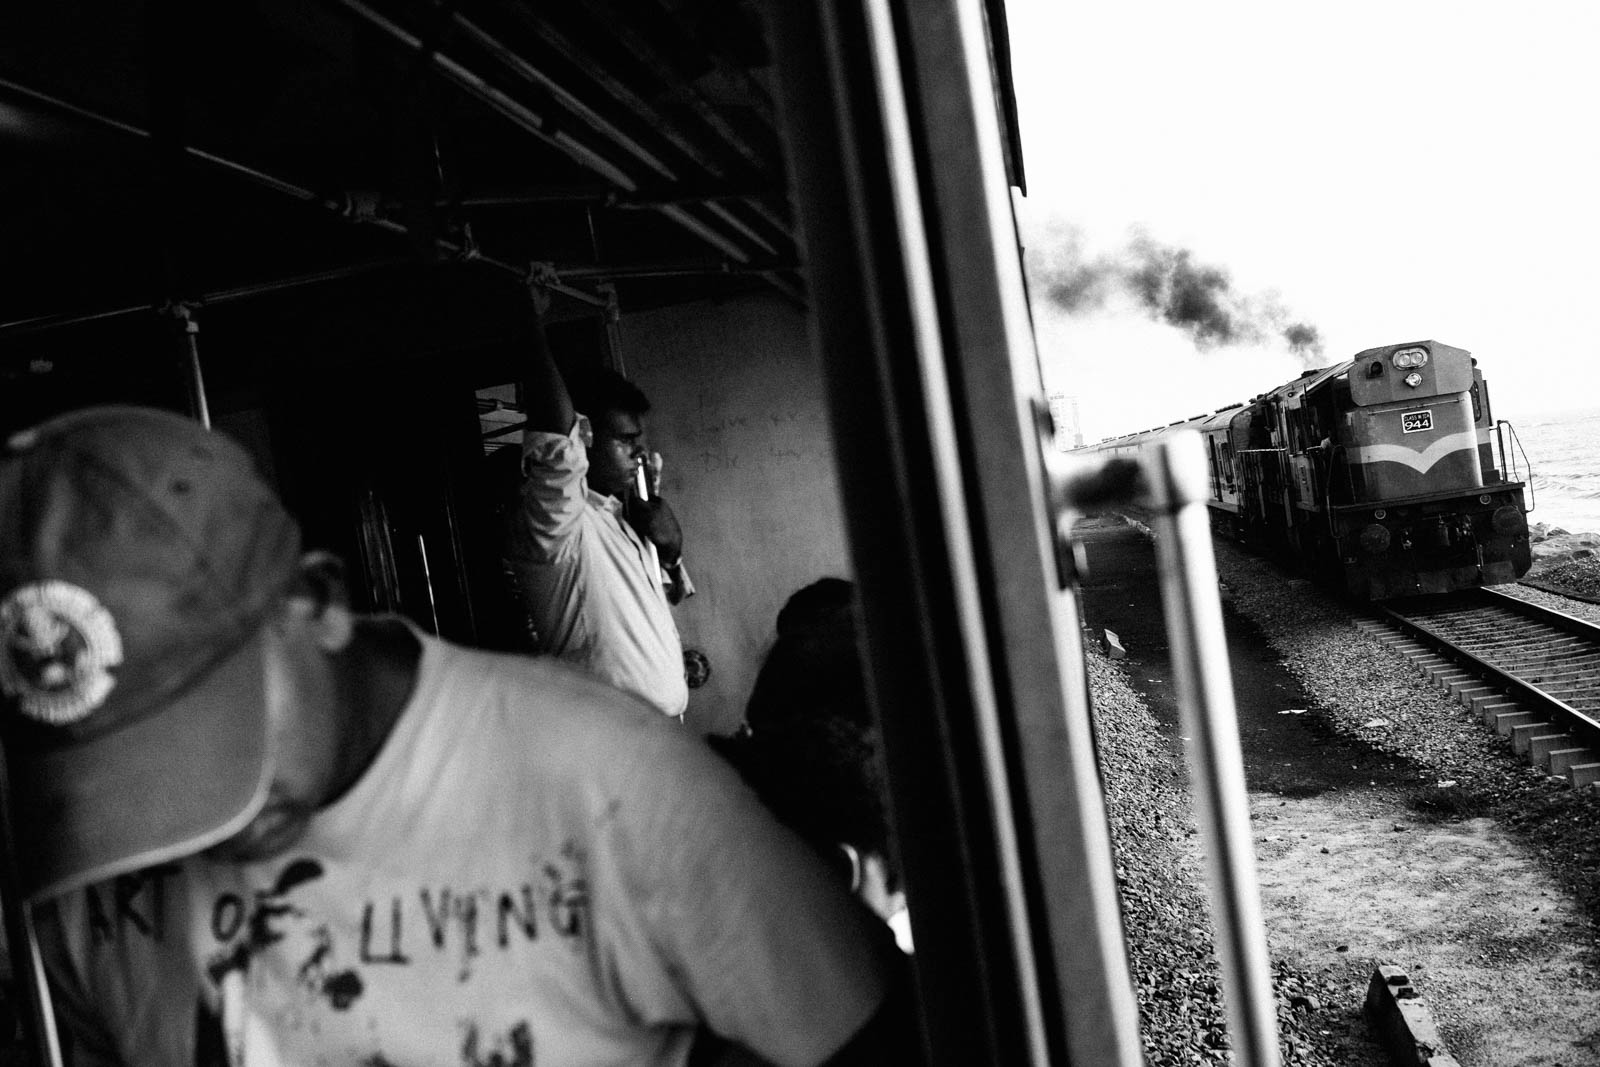
Sri Lanka, 2015. Pre-production X-Pro2, XF27mmF2.8
It was probably a 3 to 5 minute job in total, although this will not be the last iteration of this image. I tend to come back to certain pictures after letting them fallow for a time. The train image above has been through 3 rounds of tweaking. Once for printing, and twice more because my sensibilities with black and white change over time. For web purposes, processing is a very quick, straightforward affair, as clarity is emphasized above all else. A large percentage of web audiences look at images on mobile devices, small screens where tonal nuance is mostly lost. Processing for print takes longer, as – among other things – print needs to be tested.
Some time ago I realized that if I had to sit at a computer and wonder what I should do with an image, it was a strong indication that I had not thought enough about why I hit the shutter in the first place. Not all unplanned frames are discards, but with a more deliberate approach, the accidents have a higher rate of “happiness” factor.
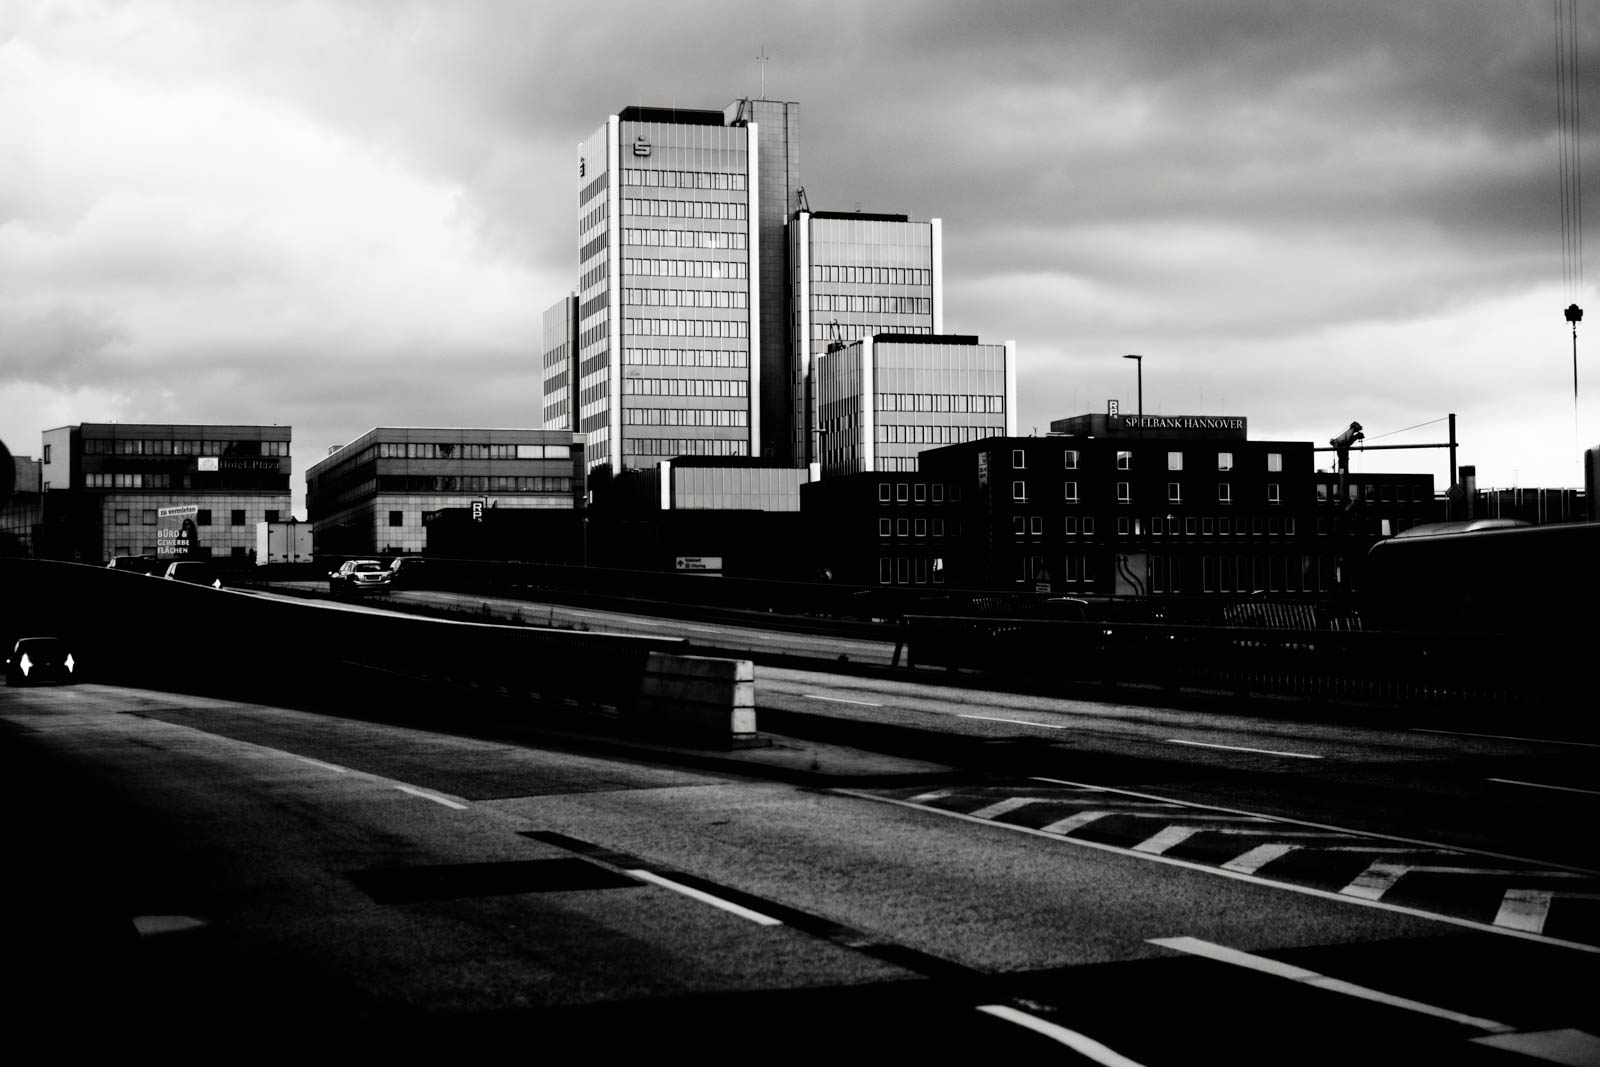
Hannover, Germany, 2017. X-Pro2, XF35mmF1.4
The black and white journey continues to be one of reduction. I came across a quote some time ago, that described painting as an art of inclusion, and photography as the art of exclusion (can’t remember which photographer said it though), which I thought encapsulated the challenges of each extremely well. This focus on exclusion is a main pillar of the black and white journey for me. Visually, discarding concern for color and reducing focus to light play on form, and technically, adjusting the process to suit this narrow focus.
Once in a while, I am faced with a conundrum: an image that works in both monochrome
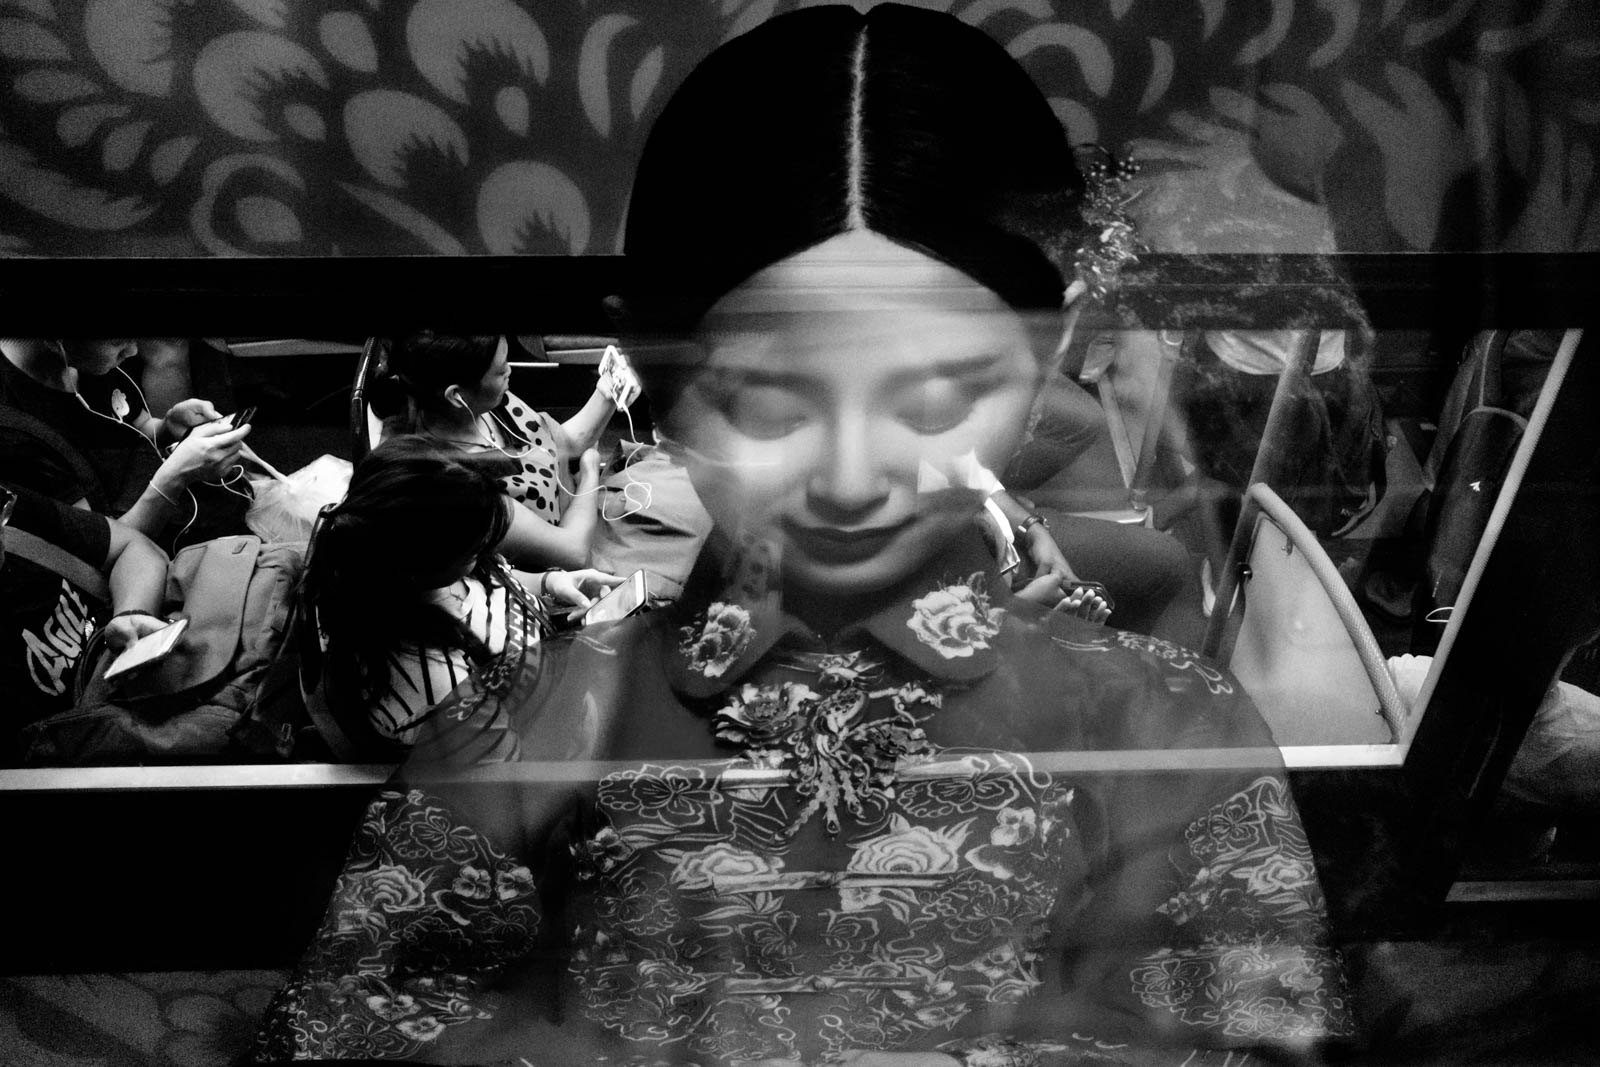
Bus, Singapore, 2017.
… and color:
But that’s a post for another day.