

I never paid much attention to the in-camera RAW conversion capabilities of the Fujifilm X series cameras. I’ve always known the feature is there waiting in the menus ready to be used, but I could not see how to integrate it into my workflow. On the other hand I love the colours coming from Fujifilm’s JPEGs, especially the unique film simulations. If I want a variety of looks, I would use the Film Simulation Bracketing feature. Why would I bother shooting RAW? Perhaps if I was shooting in tricky lighting or was on a commercial shoot, I would shoot both RAW and JPEG as extra insurance. In general when shooting Fujifilm cameras, I stuck with JPEGs. However, I recently ran into a problem. While reviewing the pre-production X-Pro 2 there was no RAW support at the time. How would I prepare my review without being able to at least take a quick peek at the RAW files? I contacted Fujifilm Canada and they made a humble suggestion: ‘Why don’t you just use the in-camera RAW conversion?’ I thought about it for a second, and then another second. Then I had a revelation.
There is one major reason why those who love Fuji’s film simulations should shoot RAW: You can apply film simulation profiles after you take the picture! Until I was forced to do it, I did not think about the advantage of shooting this way. I always reserved one custom function button to adjust film simulations, thinking it the fastest way to change my ‘film’ while shooting mid-roll. To be even more ‘efficient’ I started to use film simulation bracketing for every image, imagining I was simultaneously shooting 3 rolls of film at one time. Amazing!
However, I often struggled to choose only 3 of my 4 favourite film profiles (Provia, Astia, Classic Chrome and Pro Neg. Hi). I would have to think about what I was shooting and then constantly change which 3 simulations I would use. Another issue was creating 3 high resolution images every time I took a single shoot. I ended up deleting 3 at a time during editing, or storing 3 images every time. This was an inefficient use of time and memory space.
By utilizing the in-camera RAW Conversion feature by shooting RAW initially and then selectively choosing my most effective film simulations afterwards, I was able to free myself from the burden of choosing my film choice ahead of time (imagine being able to do this while shooting real film?) Another major advantage of in-camera RAW processing is the ability to adjust white balance after taking the image, which includes my own custom WB settings (3 settings), color temperature adjustment and WB shift. I can also adjust dynamic range, highlight and shadow tones, sharpness, noise reduction and even apply push-pull process after I take the image. Here is the list of all in-camera RAW conversion adjustment features:
- Reflect Shooting Condition
- Push/Pull Processing
- Dynamic Range
- Film Simulation
- Grain Effect
- White Balance
- WB Shift
- Hightlight Tone
- Shadow Tone
- Color
- Sharpness
- Noise Reduction
- Lens Modulation Optimizer
- Color Space
*It would have been nice to be able to apply image size, aspect ratio and image crop as well, but these adjustments can easily be applied later on a computer.
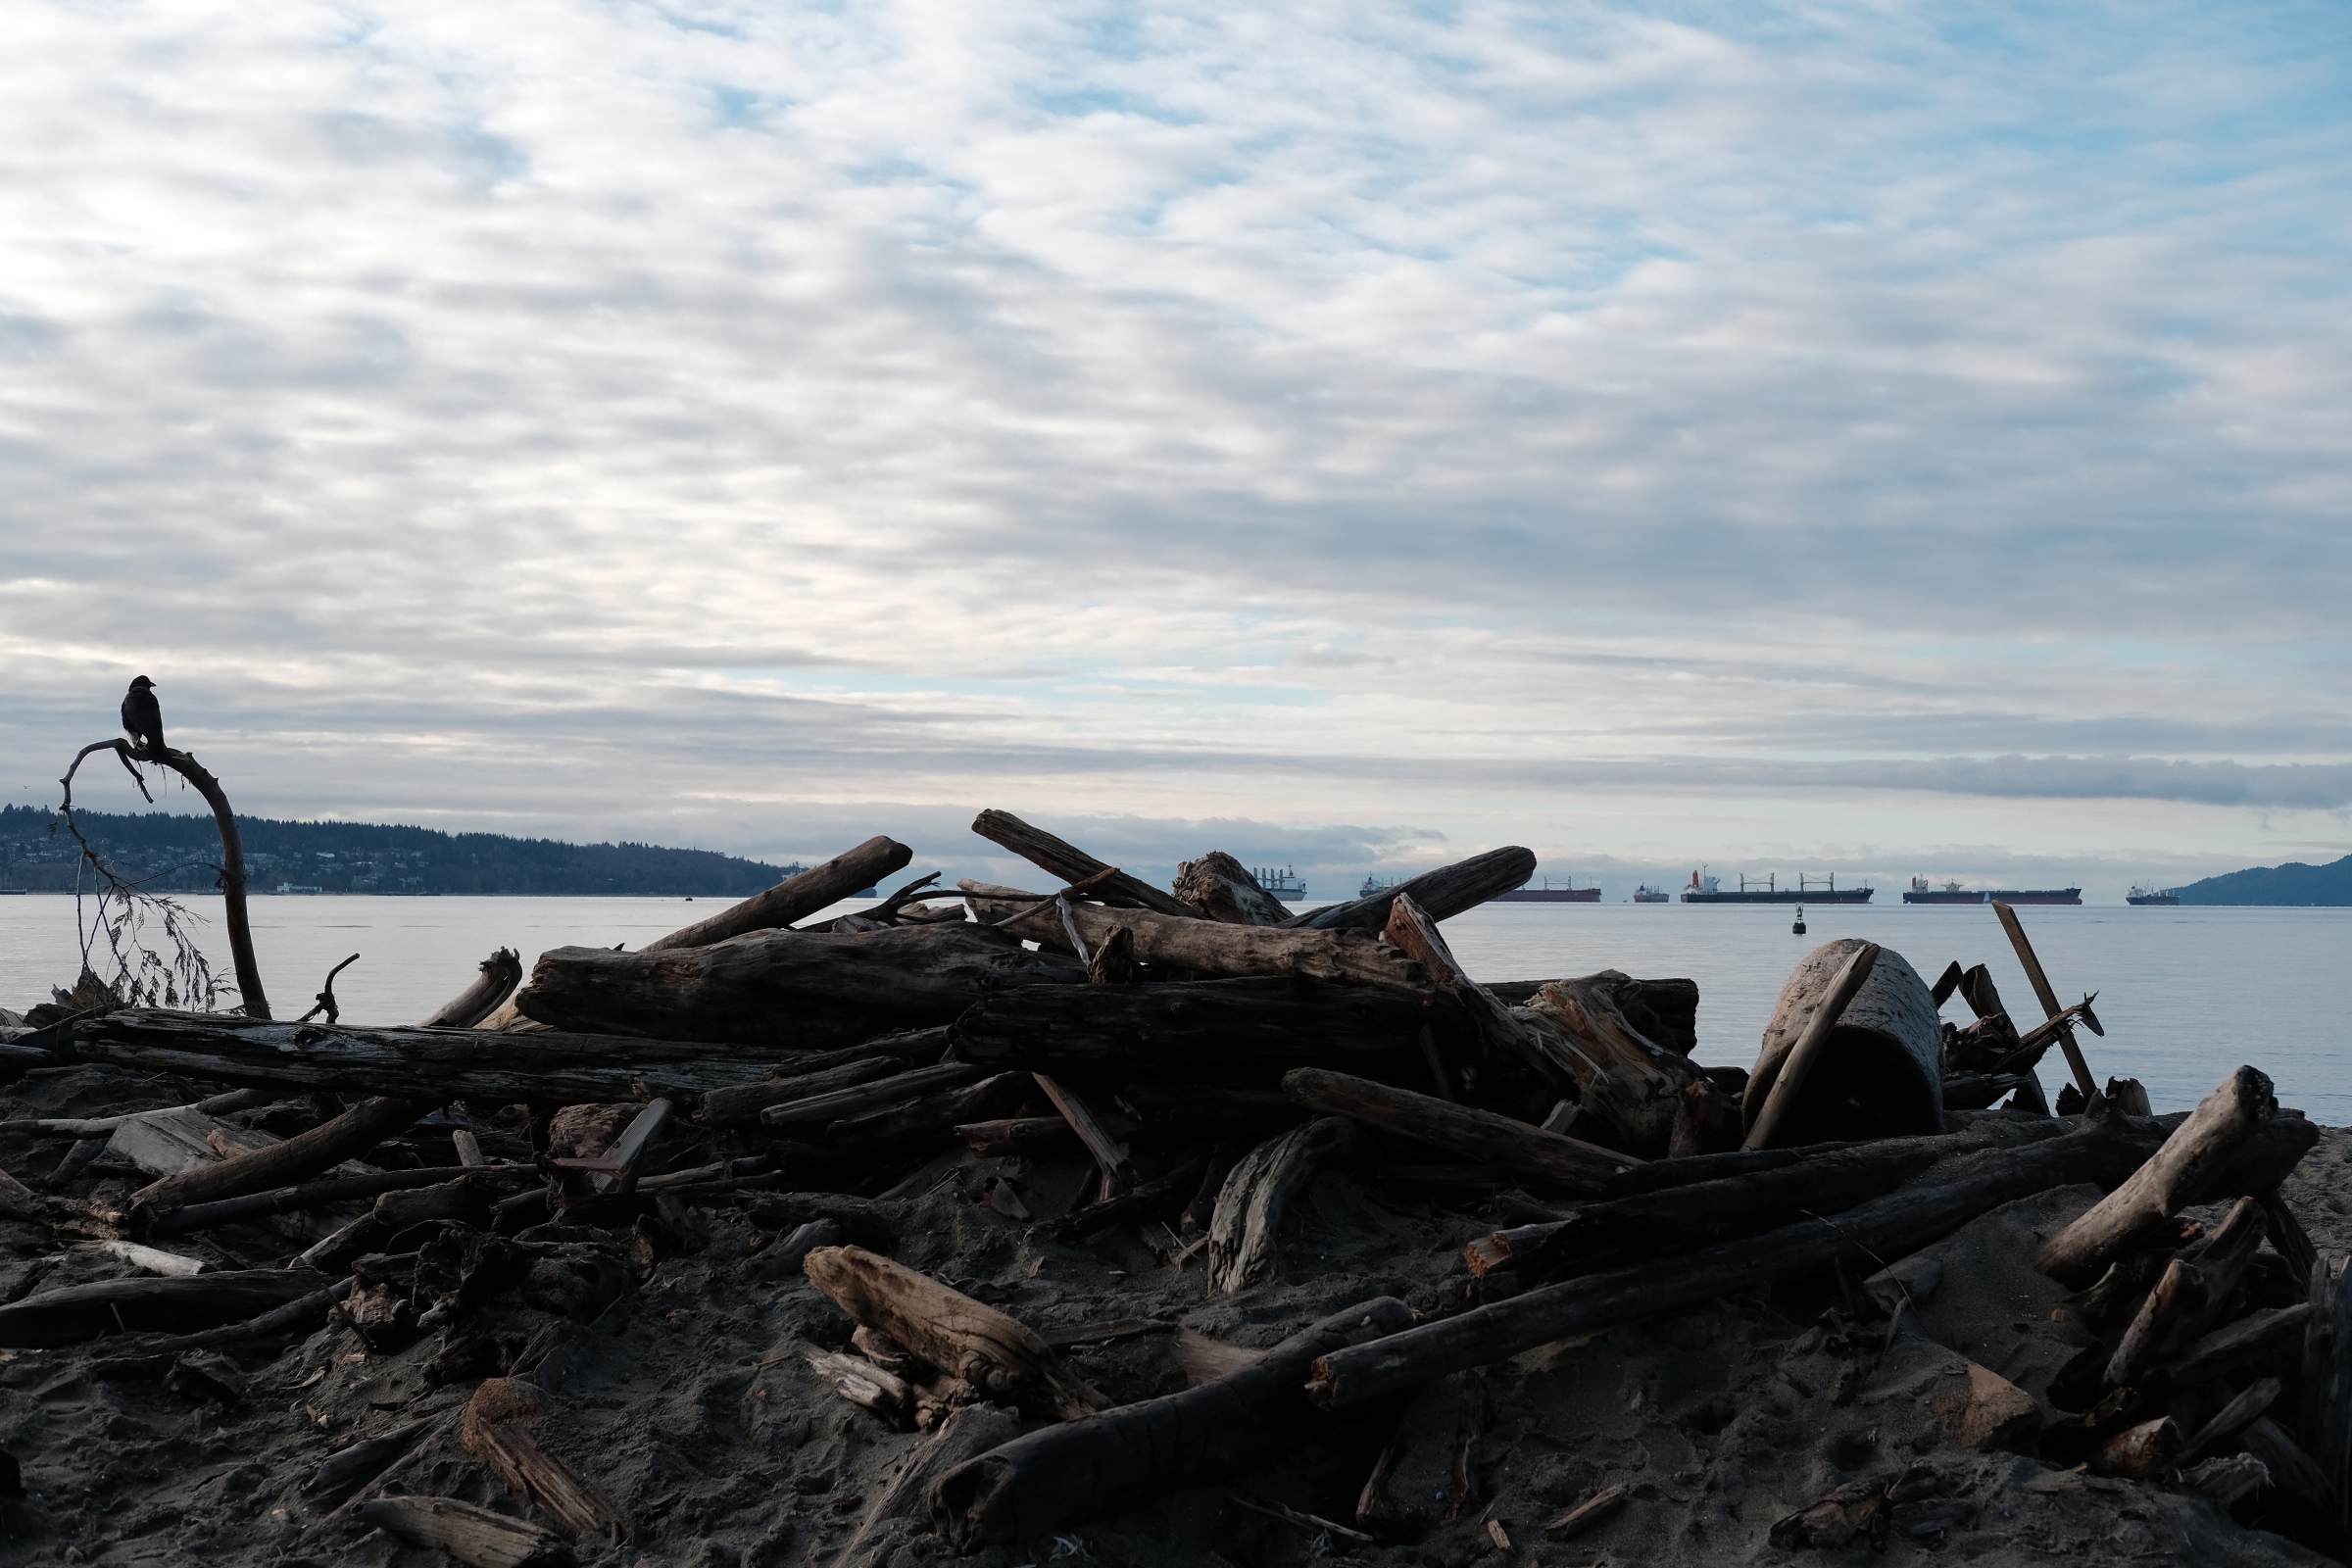
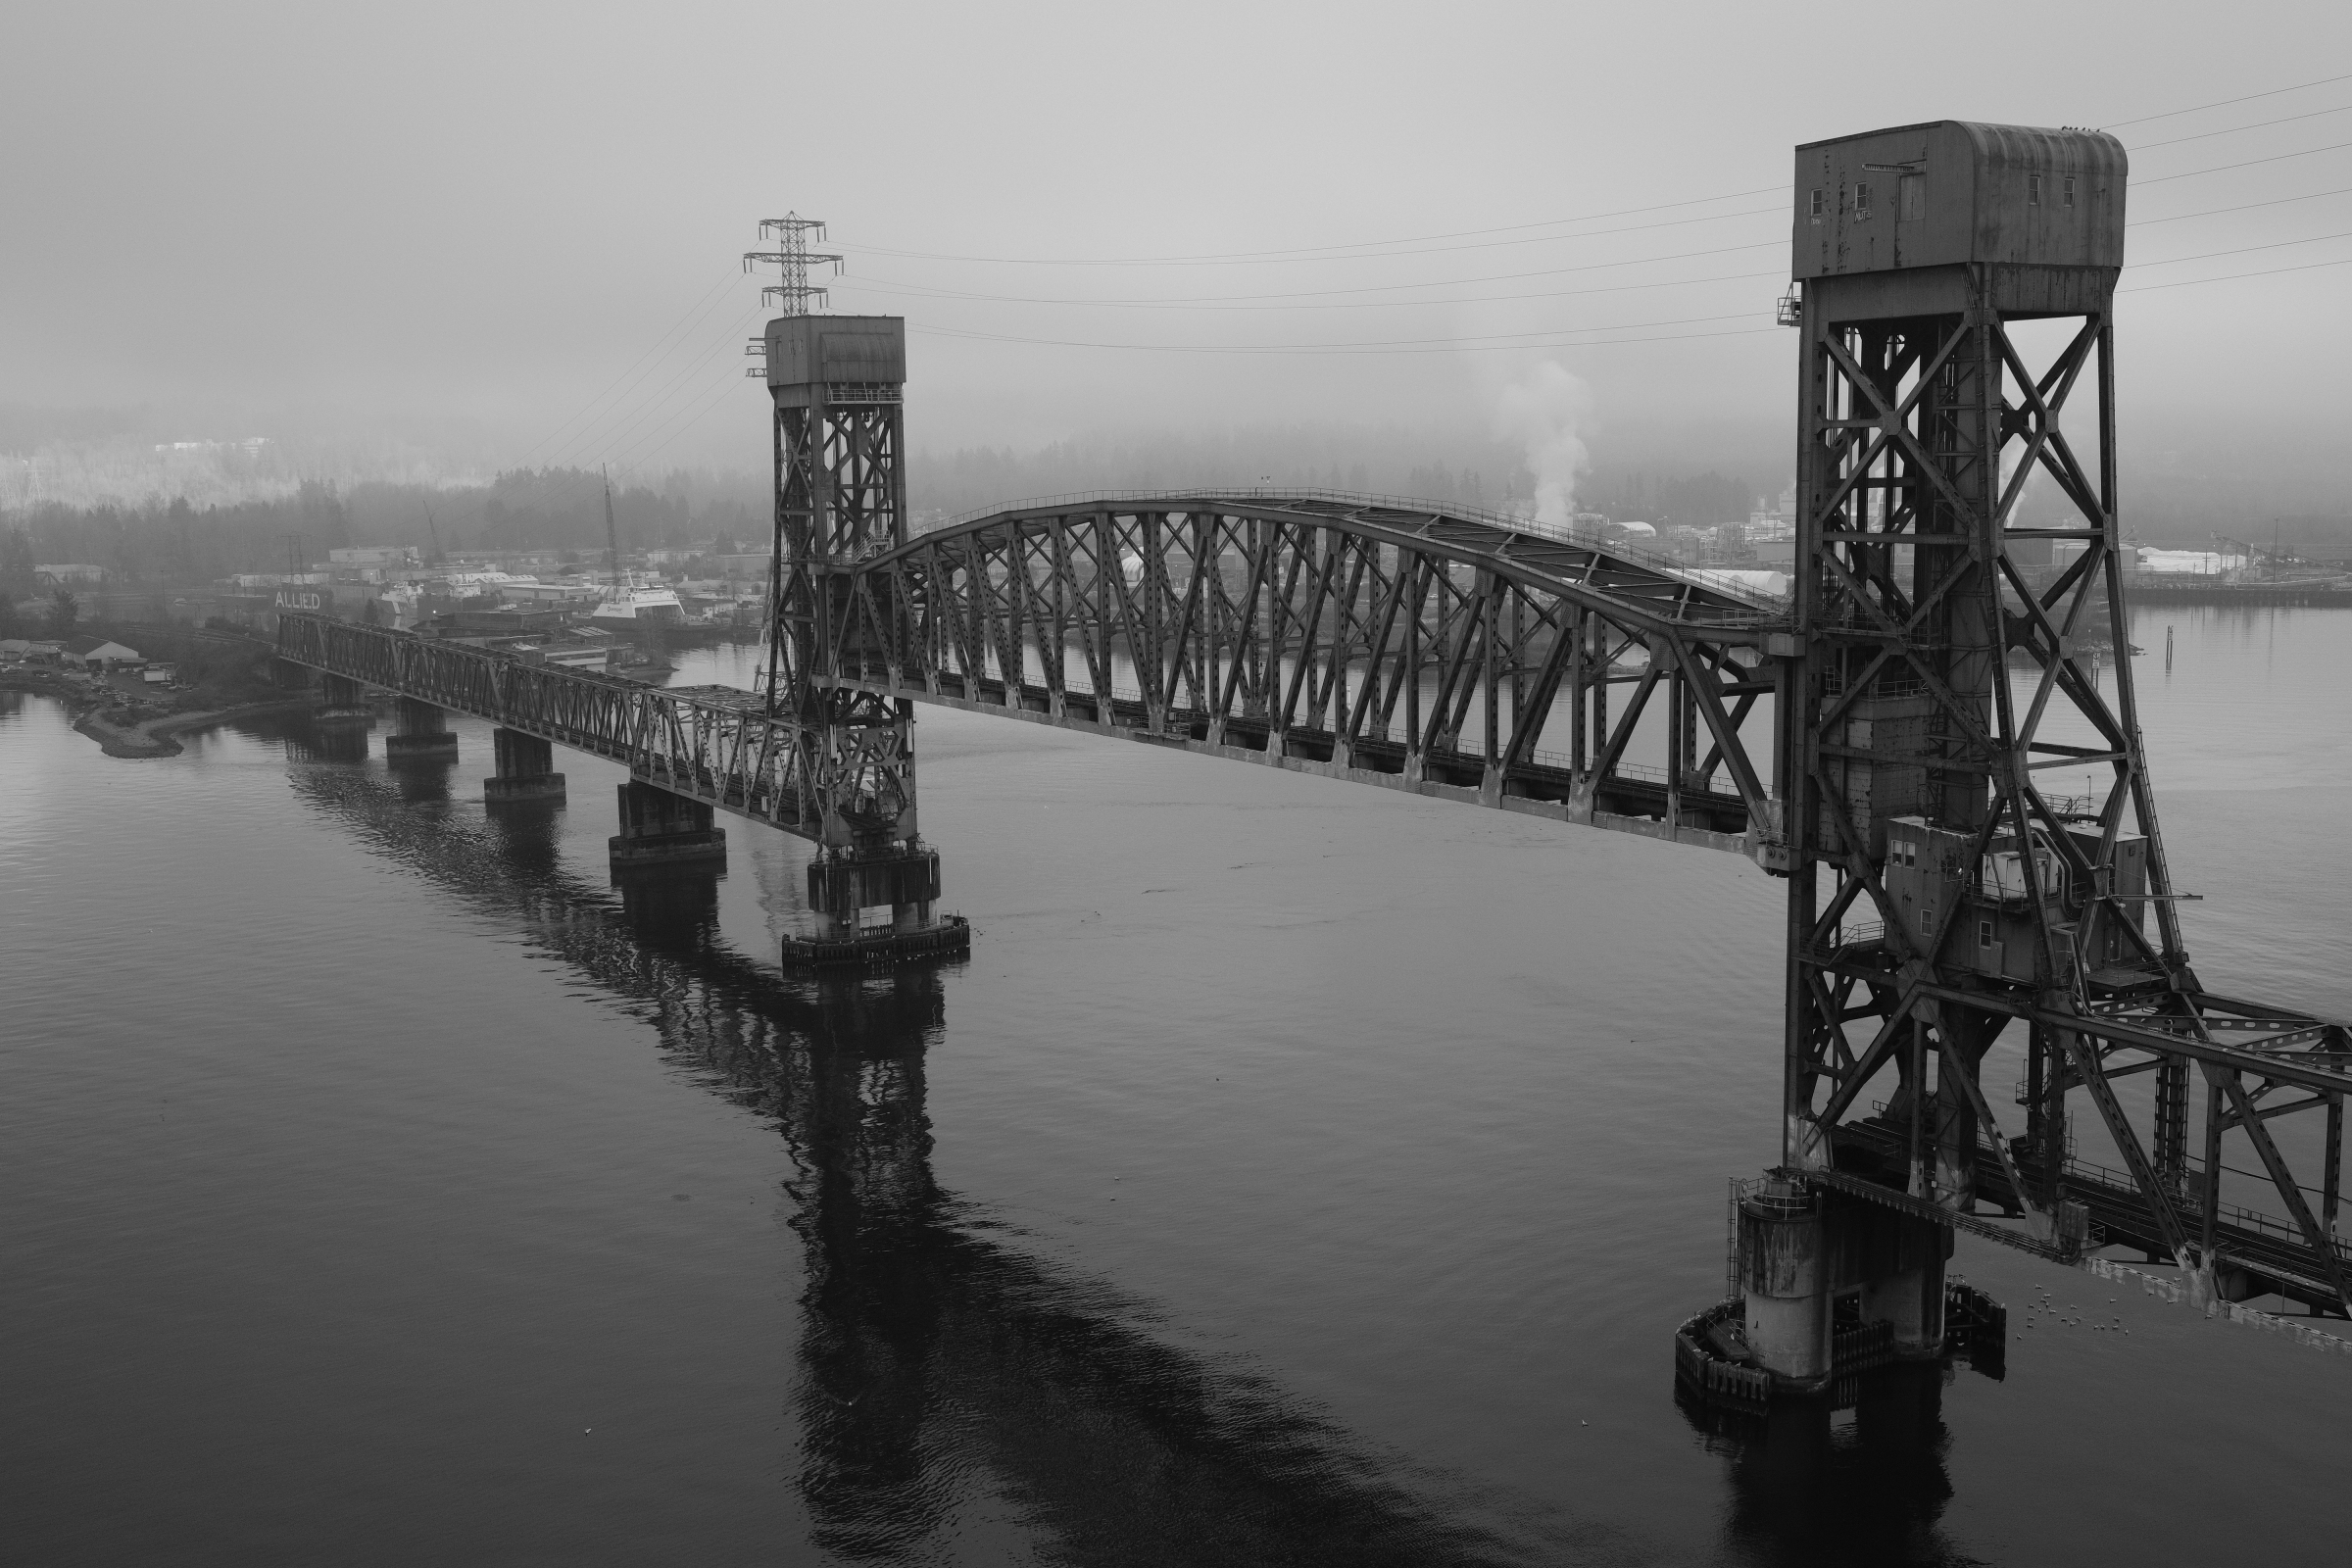
The opening image of this article was originally shot as a RAW file and then I used the in-camera conversion feature to create the JPEG (straight out of camera image). I used the Fujifilm X-Pro2 with the XF 35mm f/2. Here is the screen shot of the back LCD info for both the original RAW file and then the finished JPEG:
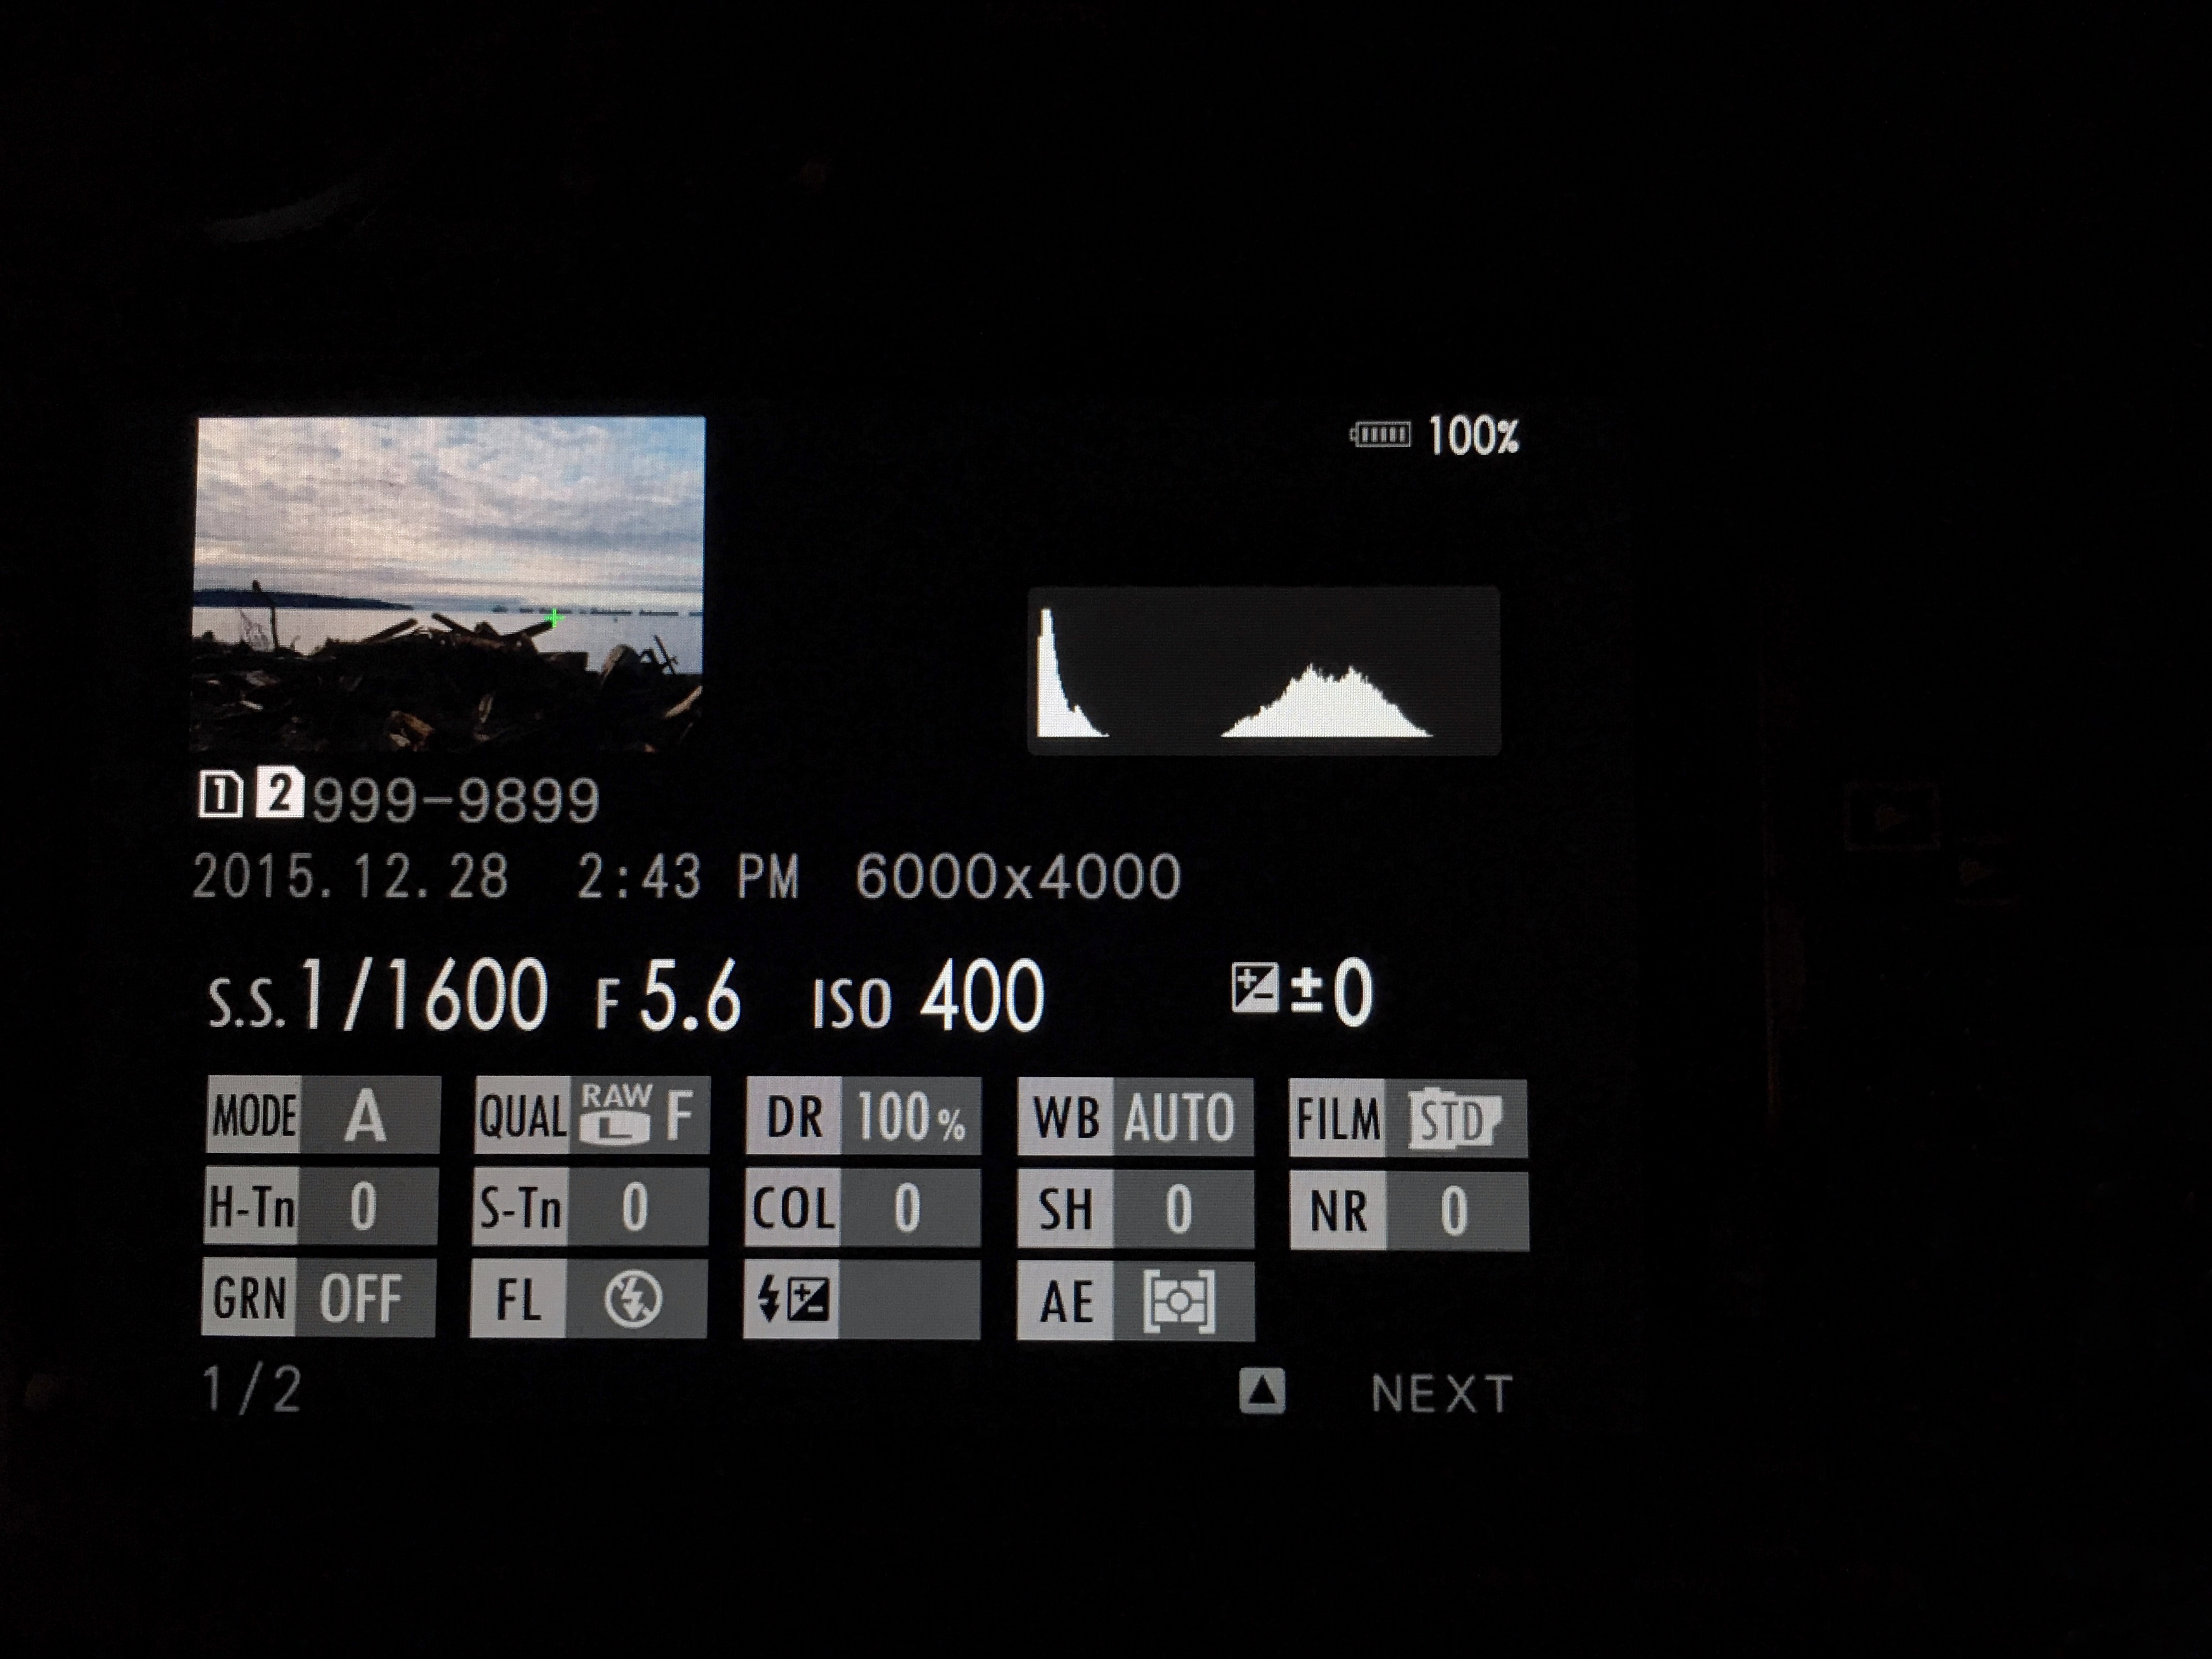
RAW file before processing
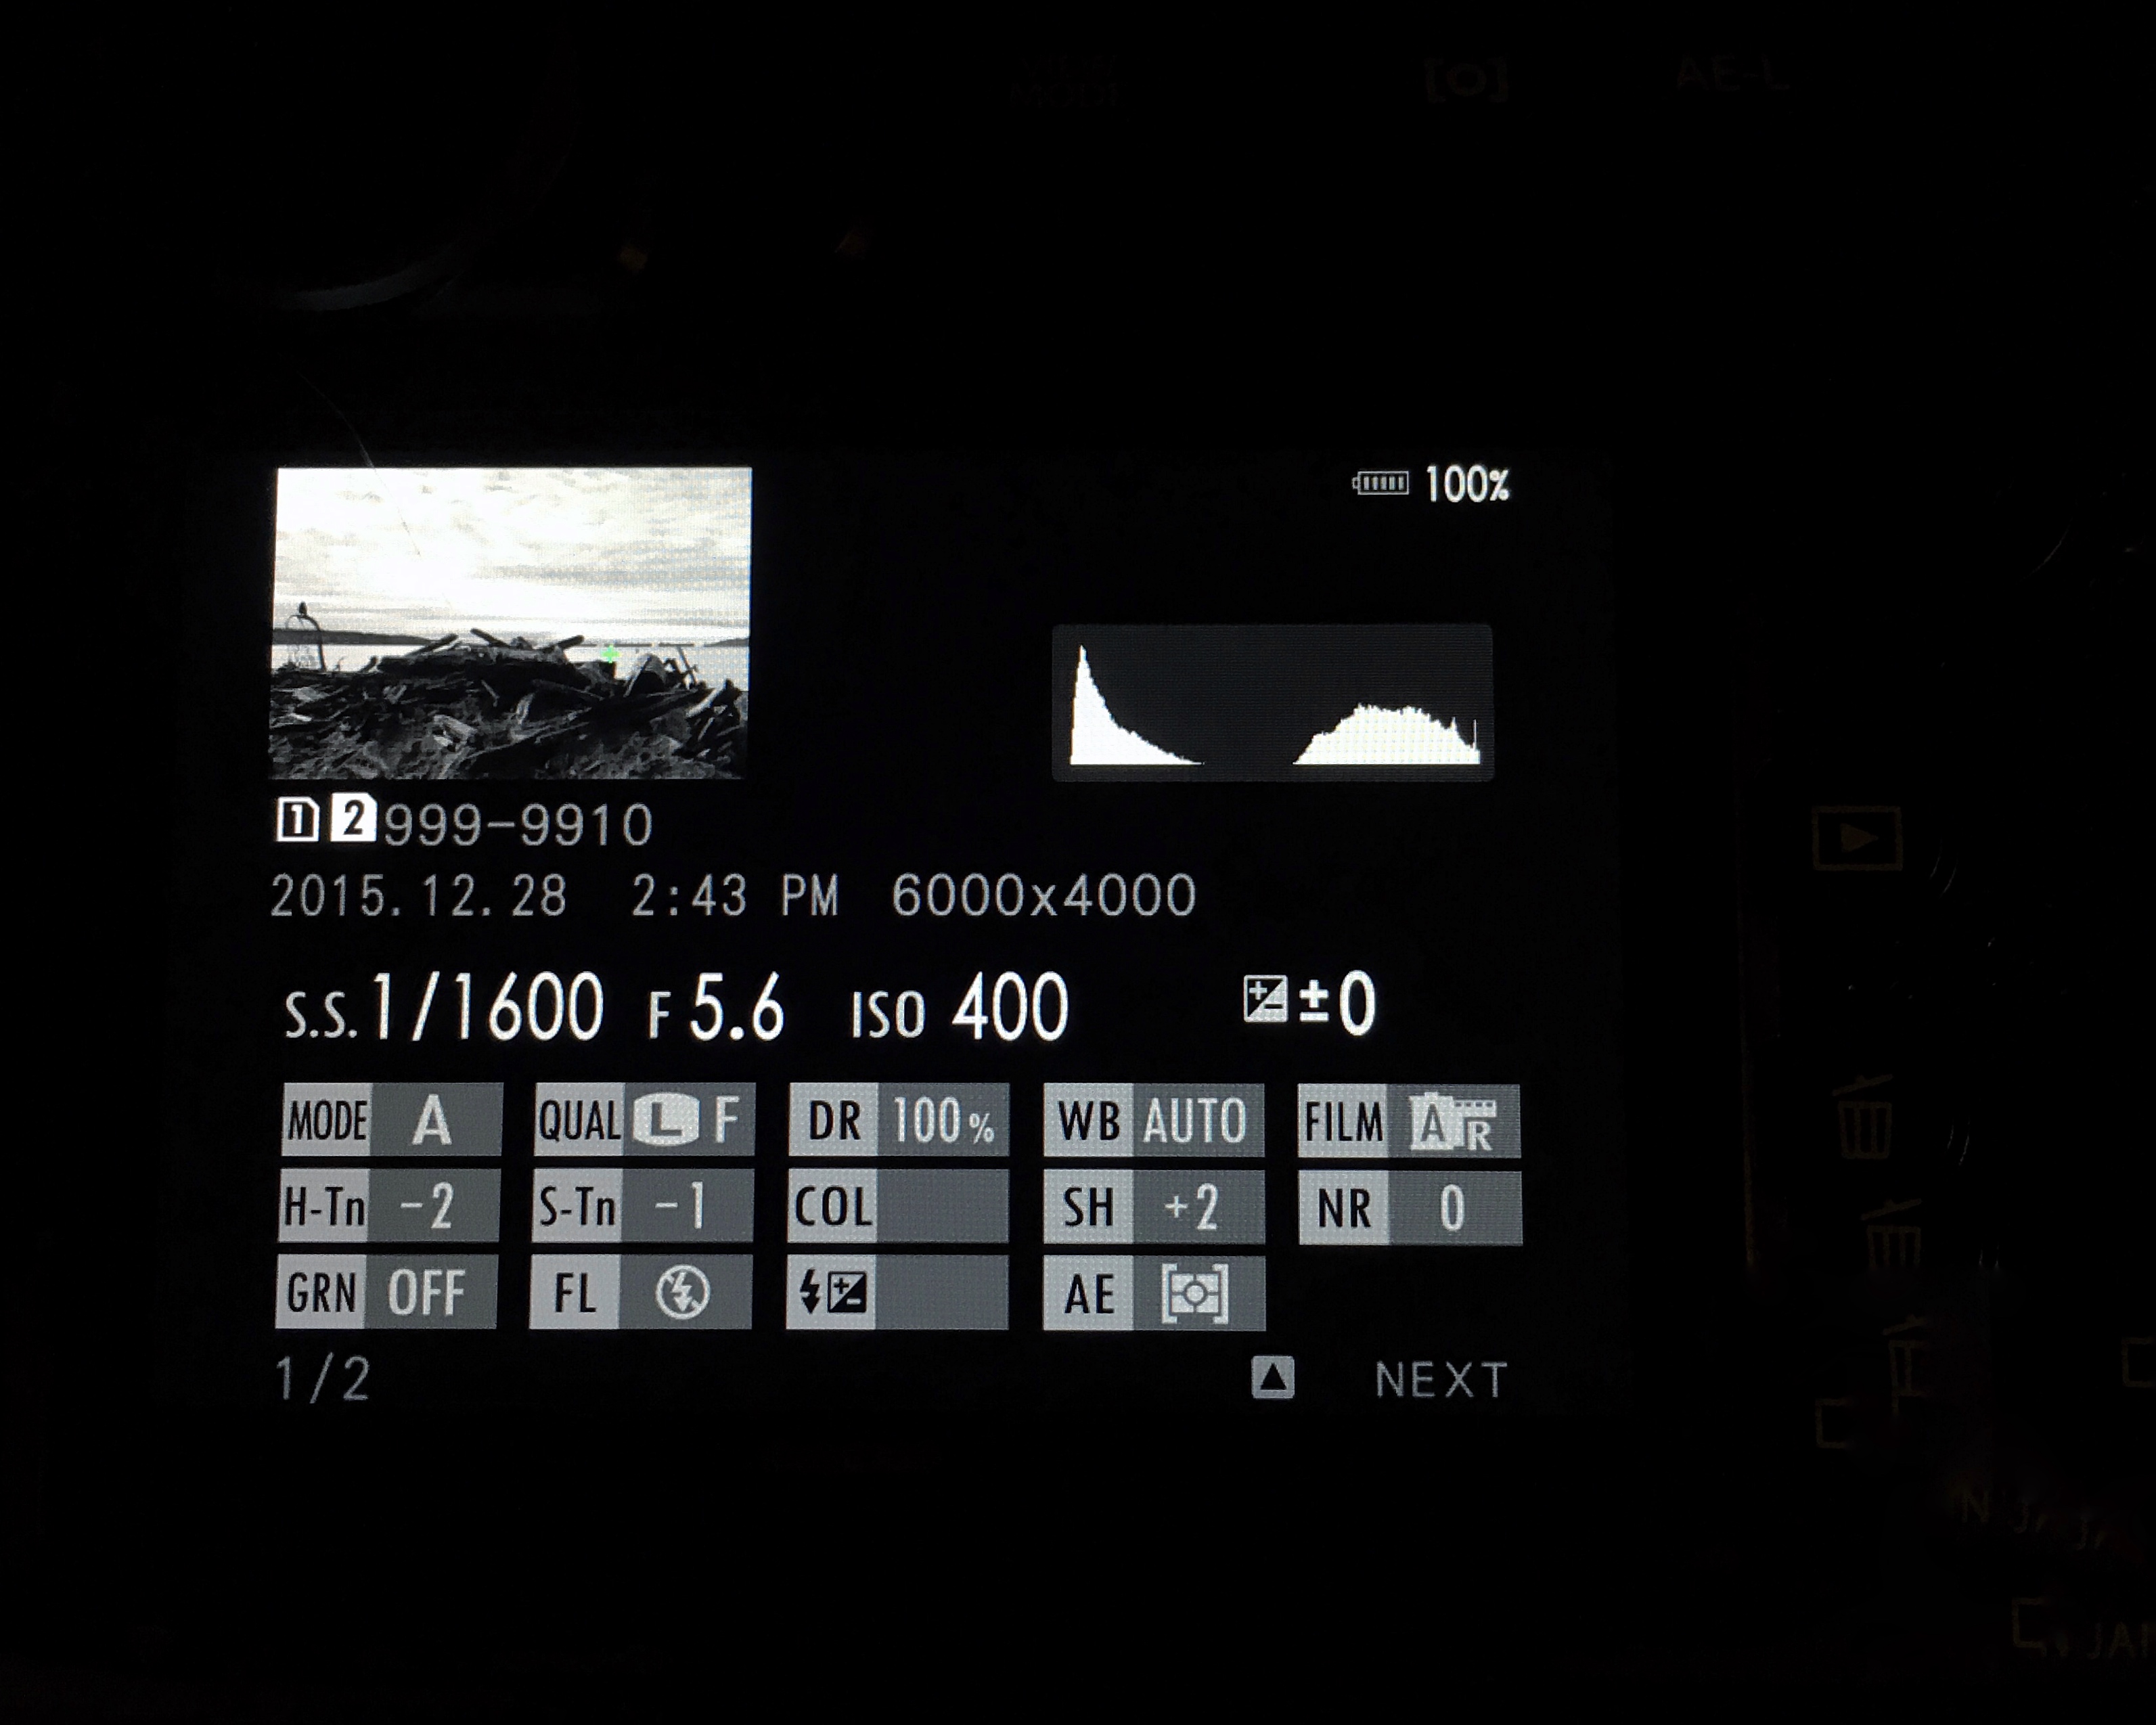
JPEG file after RAW conversion
Let me decipher the RAW conversion process:
- Push/Pull Process: +1 EV
- Film Simulation: Acros with red filter
- Highlight Tone: -2
- Shadow Tone: -1
- Sharpness: +2
- Lens Modulation Optimizer: ON
As illustrated above, the camera retains all the information for the RAW to JPEG conversion. I tried looking for the above information in the meta data on my computer after importing the images, but none of the Adobe applications (PS, LR) could find the information in the EXIF. Perhaps Fujifilm could add this information in the future. Once you create the image, the camera gives you the option to create a JPEG from it or start over again. I wish there was a way to zoom in on the image to peek without having to create the JPEG, but there isn’t. Again, hopefully Fujifilm can add this capability in the future. Here is another RAW conversion from the same RAW file to another JPEG (straight out of camera), using the same settings except using the Classic Chrome film simulation:
Classic Chrome
Below is another example of how I used a single RAW file to create multiple film simulation images (straight out of camera). I used the X-Pro 2 with the XF 23mm f/1.4 at f/8, 1/400th sec at ISO 800. Here are the basic adjustments to the RAW file other than film simulation:
- Push/Pull Process: -1/3 EV
- Sharpness: +1
Standard (Provia)

Pro Neg. Hi
Acros + R (red) Filter
Moreover, I found shooting in RAW and then deciding later which film simulation to apply was a more efficient use of my time and energy. Since the X-Pro 2 creates 24mp images, it was easier on my memory card as well. The ability to customize, experiment, and deciding to either keep or redo my film simulation JPEGs in-camera was empowering. I was no longer a slave to my setting decisions pre-shoot, wasting a lot of my thought process to decisions that I couldn’t change after I took the image. It was great not to add destructive (non-reversible) settings such as sharpness, tones, DM or grain effect to my images, only to regret it later. In the future I hope Fujifilm will allow the conversion settings to be added to the EXIF data so photographers won’t be forced to use their cameras to figure out the custom settings.
Now when I shoot with a Fujifilm X series camera, I will immediately set it to RAW mode (or if I want RAW + JPEG of my choice), shoot, edit, and then selectively choose the images that I want to experiment with at my leisure when I’m no longer focused on taking pictures. This doesn’t mean I won’t apply post processing once it is imported into my computer. This is just another tool I have at my disposal to simplify my workflow when working with Fujifilm images. This ‘new discovery’ of applying film simulations using in-camera RAW conversion has just changed my workflow for the better.


