For many, the X100 series of cameras from Fujifilm are referred to as the “desert island camera” due to it’s flexibility and great image quality for a compact camera. No doubt, it is the camera that put the X-series cameras on the map and is the gateway drug for many into the Fujifilm world. One of the things I have always struggled with when it comes to working with these cameras, though, is finding an appropriate filter system to match the camera’s tiny profile. When I stumbled across the NiSi P1 kit designed for compact cameras, I decided to order one and see if this could be the solution to my needs. After a couple of months of use, I’m ready to share my thoughts on this tiny kit.
What’s in the Box
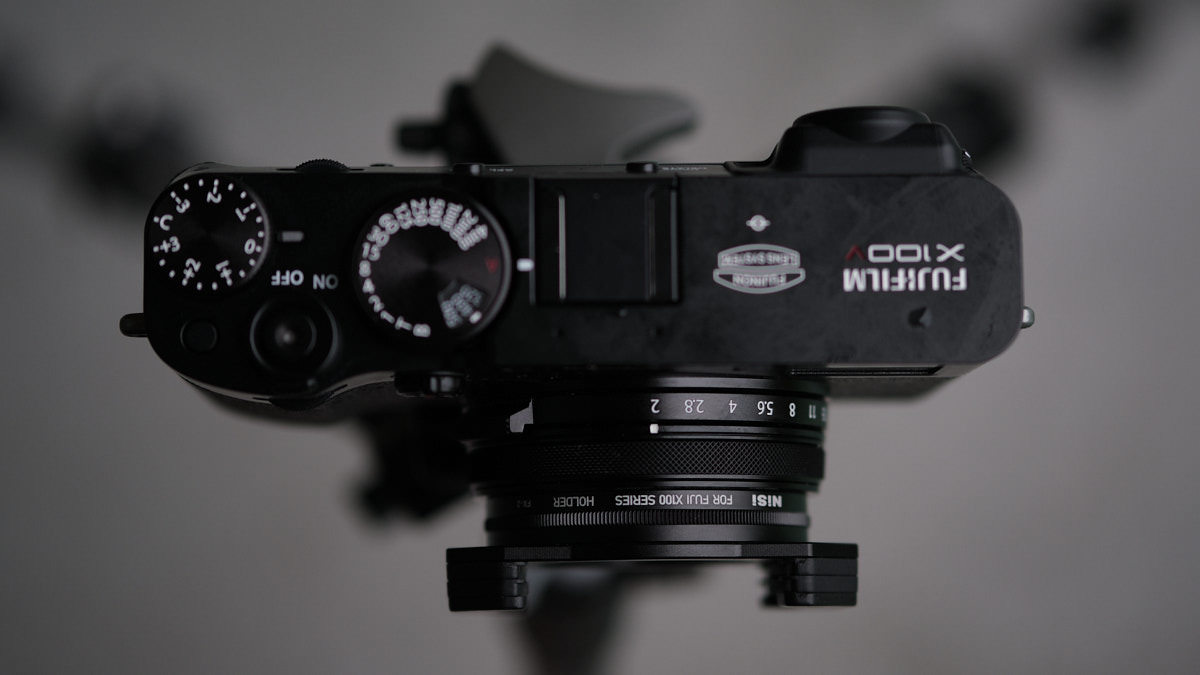
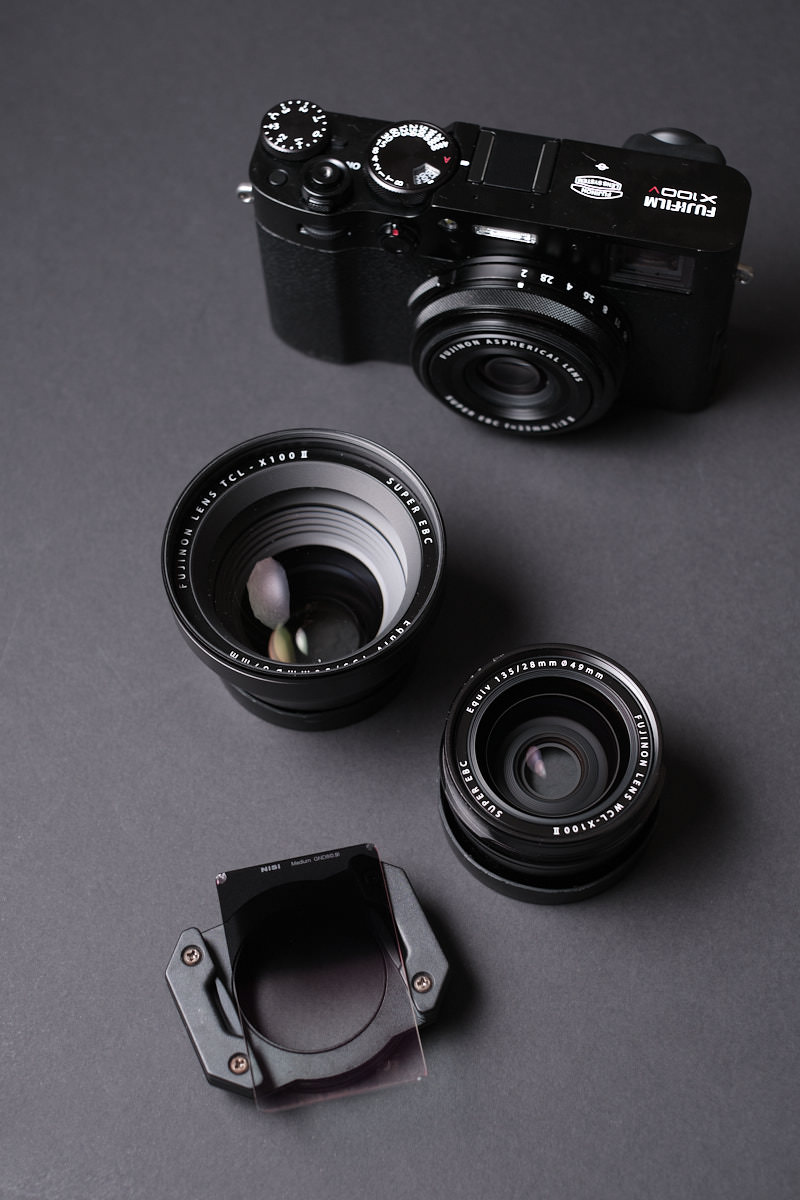
This kit comes in two variants. The “starter” kit comes with the holder, a 3-stop graduated ND filter, and a polariser. The “professional” kit adds a 3 stop ND filter and a “natural night” filter that helps to reduce the effect of man-made lights on night sky images. There is also an ND64 (6-stop) filter available for separate purchase. When the kit is initially purchased, it comes in a nice hard-case with dividers for 4 filters and the filter holder to be stored. This is a nice touch.
In Use
There are both pros and cons when using this kit in the field. Of course, since it’s such a tiny piece of gear, some corners had to be cut. It has also been designed as a filter kit for generic compact cameras (it is also available for cameras like the Ricoh GR). This means that some X100 specific features are missing. We’ll take a look at those in-depth below.
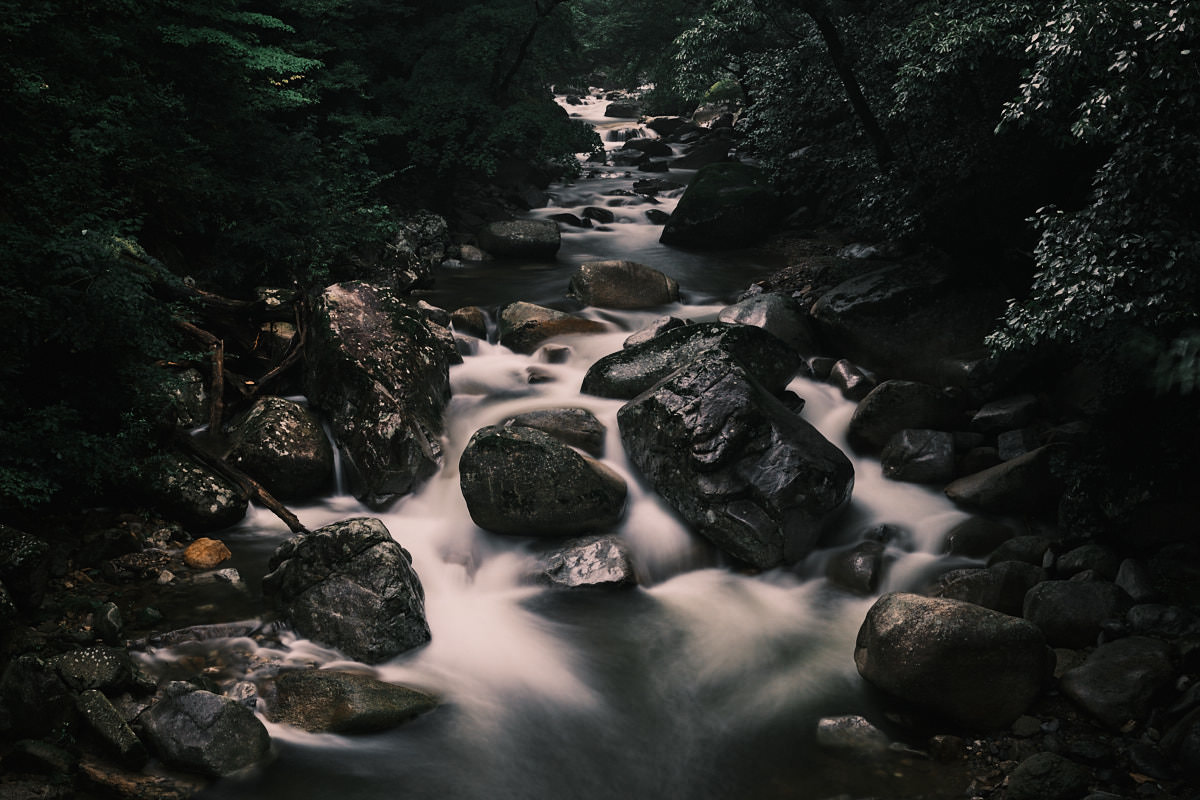
X100F, 1/30, f/8, ISO500 + NiSi P1 3-Stop Medium Edge Graduated Filter
Pros
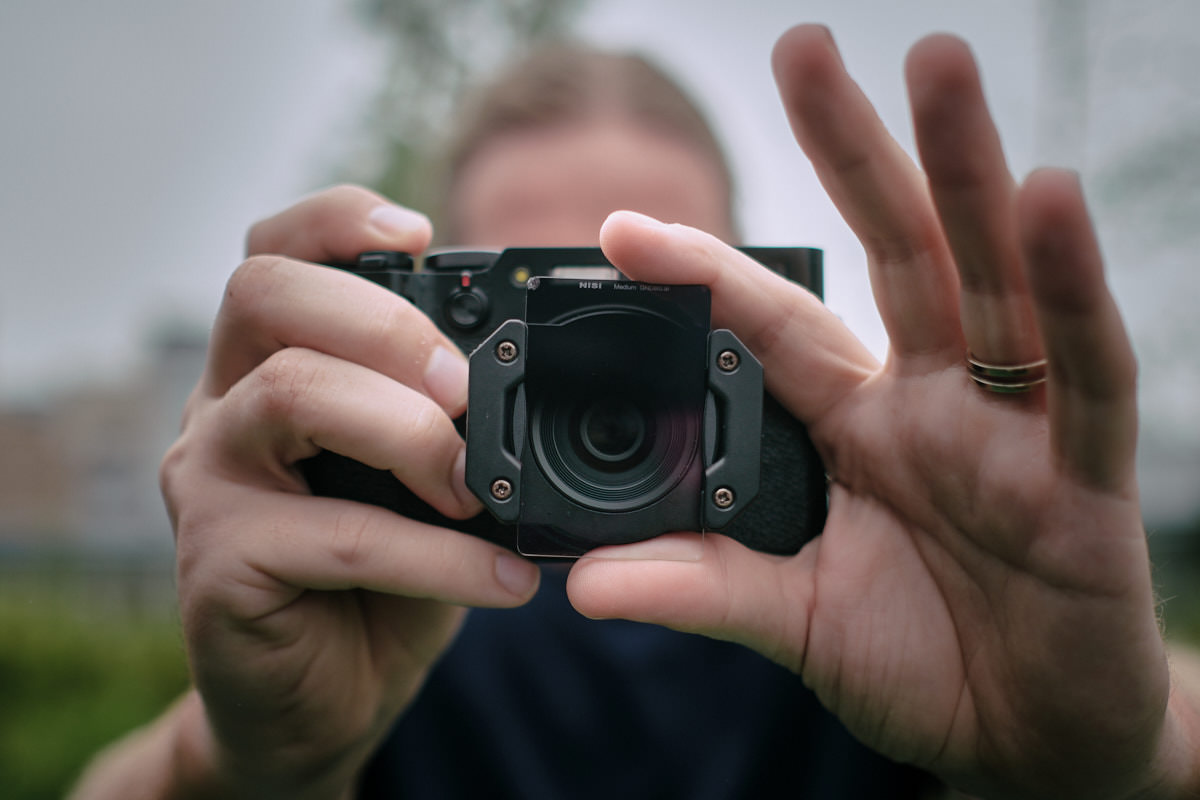
Let’s start with the good stuff. The dedicated filter ring means that the holder can be screwed directly onto your X100 series camera without the need for any adaptors. From there, the front of the unit rotates 360 degrees, allowing you to position the graduated filter or polariser in the correct position.
Here we can see that the filter holder mounts directly to the thread on the lens.
The filters themselves are the high quality we’ve come to expect from NiSi. During my day-to-day use, I haven’t noticed a loss of sharpness or any significant colour-casts. Because of the size of the holder, the filters are also tiny and require careful handling. I’ve added a small microfibre cloth to the case to ensure I can wipe them clean frequently.
Personally, I have found the filter I use most is the 3-stop graduated filter. 3-stops is a great amount for bringing down skies in most situations and the medium edge makes it useful for a variety of applications. I have found myself working with it a lot more than I ever have with my bulkier systems. Because of its size and the ease of mounting, I have it ready to go at all times. The holder’s minuscule size means it can be mounted on the lens without getting in the way. This has been the main benefit of this system, to be honest. It is just the right size for an X100 camera.
X100F, 1/125, f/11, ISO200 + NiSi P1 3-Stop Medium Edge
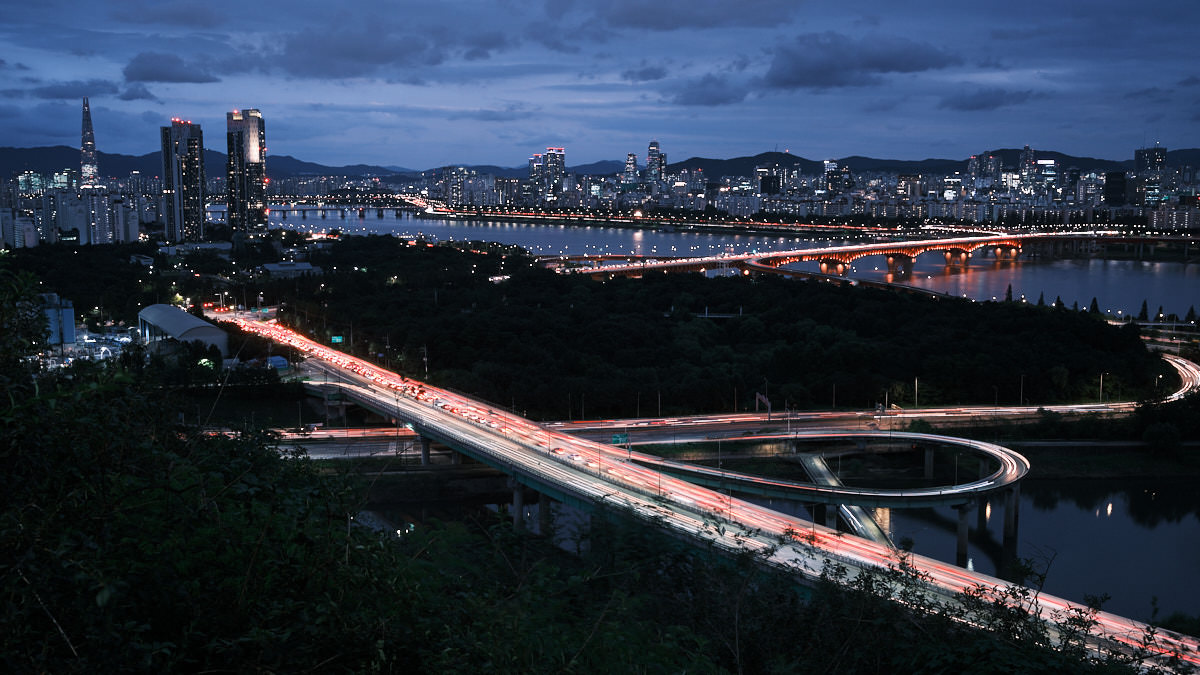
The 3-stop ND has also been useful at times. When combined with the 3 or 4 stops of in-built ND that the X100 cameras have, very long exposures are possible on overcast days and at sunrise or sunset. While the X100V can focus with this combination, it is best to pre-focus earlier models before attaching the additional filter. In the scene below, for example, I wanted to achieve a slightly longer shutter speed to give an ethereal feel to this mountain stream. The in-built ND filter did not quite give me what I was looking for, but the tiny NiSi pouch was in my pocket ready to go.
X100V, 10 seconds, f/8, ISO160 (ND filter ON) + NiSi P1 3-Stop ND
Cons
This system is really great for its intended use, but there are some flaws to be found due to its generic design and tiny size making it difficult to incorporate features for more advanced filter combinations.
The generic nature of the design means that the filters and holder had to work with several different types of cameras, including smartphones. Thus, the filter folder and filter size were not designed to be compatible with the WCL and TCL converters. When I go out for a quick walk around, I’ll take this NiSi kit to add options to my photography. However, for anything more serious, I’ll reach for the Haida M7. The M7 kit is not too much bigger than the NiSi and it is much more flexible as it can be mounted to the conversion lenses and has many more filter options.
Unfortunately, the NiSi P1 kit will not work with the X100 conversion lenses.
In terms of design, the choice of polariser really limits your options. Since the polariser is a rectangular filter, the whole unit needs to be rotated in order to polarise your scene. If this doesn’t match with the angle of your graduated filter, you can only use one or the other. A simple drop-in system, as we see on larger units, would have fixed this limitation. However, design may have been quite difficult on a holder this small.

The problem with rotating the polariser.
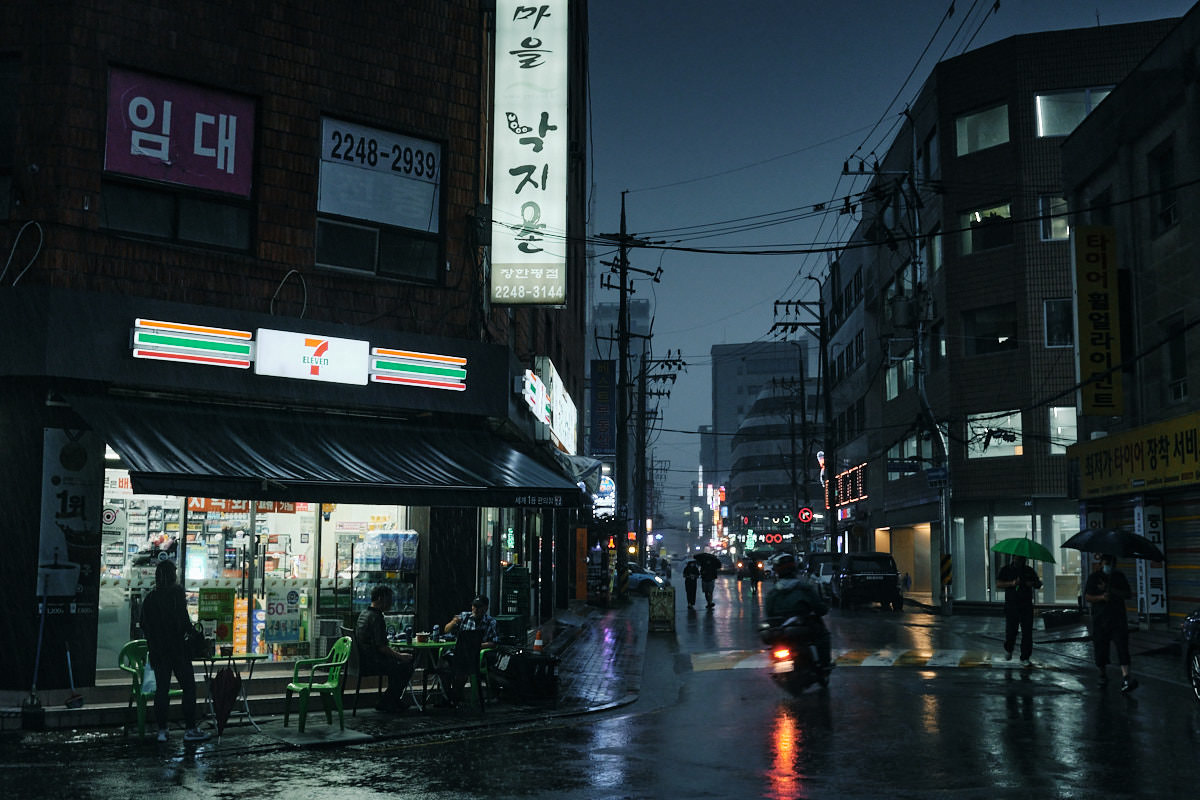
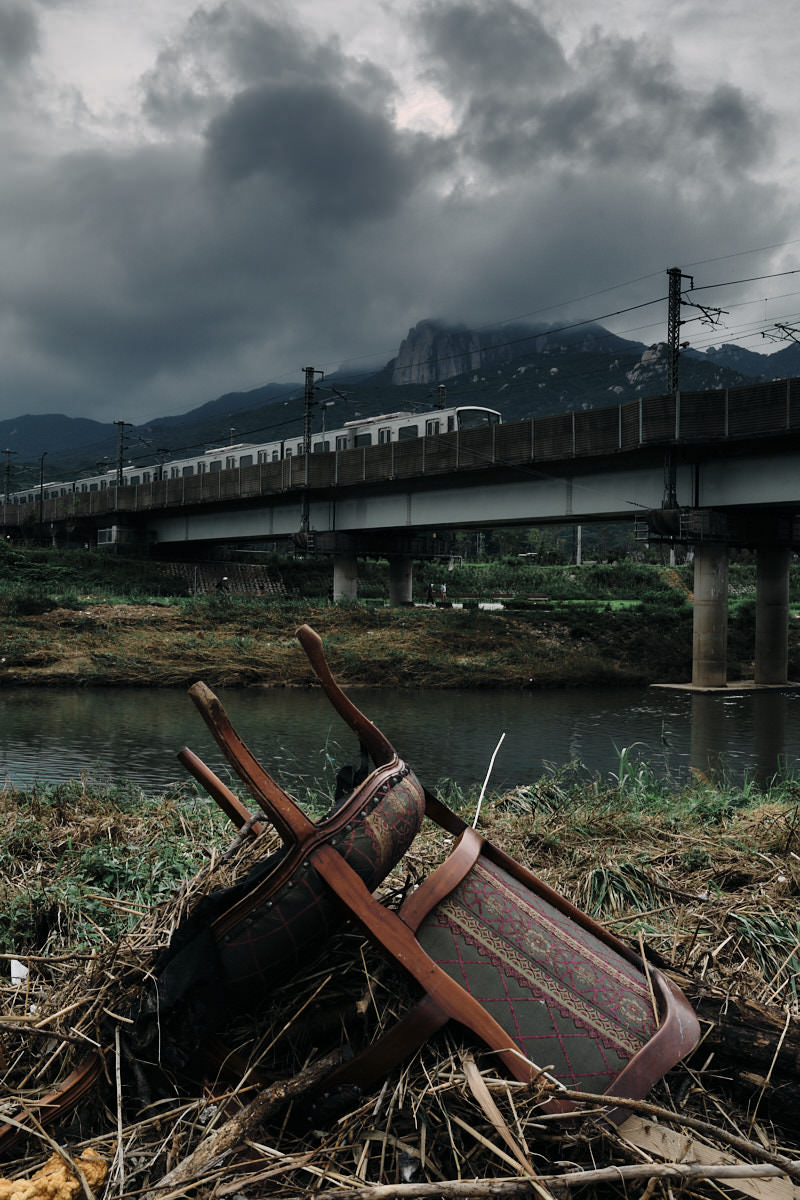
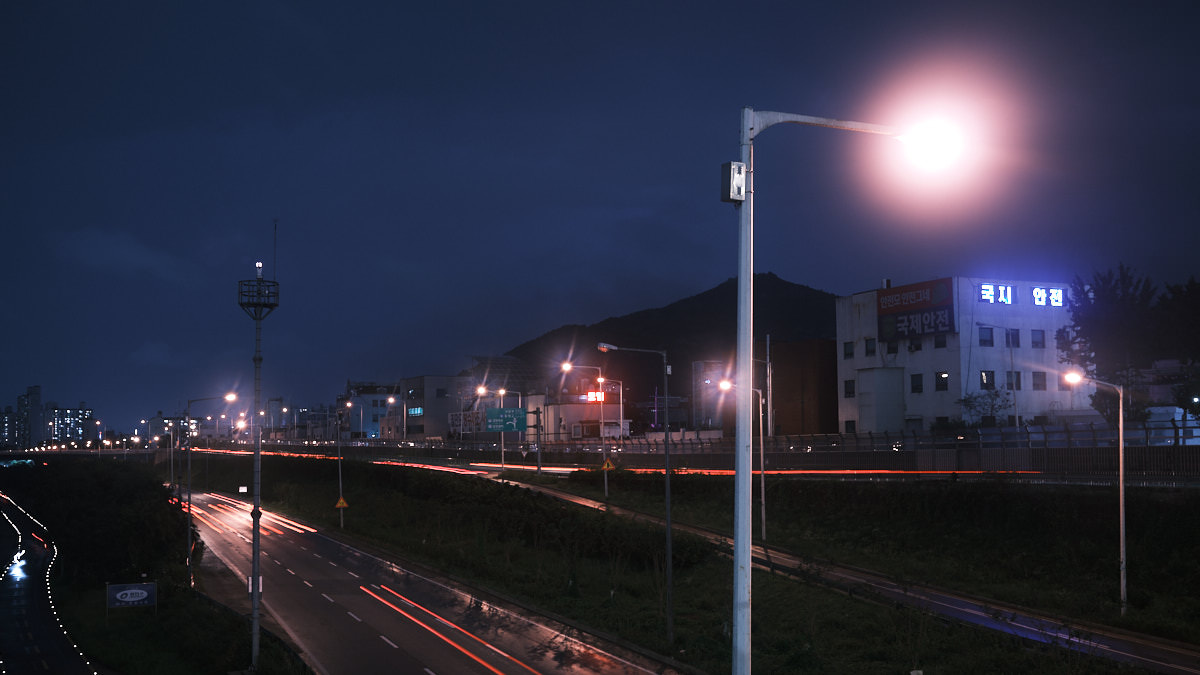
Finally, the natural light filter is somewhat gimmicky. At best, it seems to achieve what deft use of the white-balance tool in your favourite software will do and at worst degrades the image significantly. In the first example below, you’ll see that using it in tandem with sunny white balance gives a pleasing twilight blue tinge to the image. However, I achieved a very similar result by subtracting 700 Kelvin from the temperature and adding 12 points of magenta to the tint in Capture One. In fact, the orange bridge suffers a colour-shift that is difficult to correct when using the filter. For certain scenes, this filter will do more damage than good.
X100V, 3.7 seconds, f/8, ISO160 + NiSi P1 Natural Light Filter
In this second example, it is easy to see image degradation. The blooming around the lights and the extreme flare caused on the lights in the distance makes this filter unusable in my own work. Perhaps some users might find a creative use for it, however. Let us know in the comments below if this is something you’d like to make use of in your work.
X100V, 3.7 seconds, f/5, ISO160 + NiSi P1 Natural Light Filter
In Conclusion
Overall, this is a great little filter system for everyday use with an X100 series camera. However, it does have a few shortcomings that might now make it the best solution for everyone. Personally, the draw to this system for me was its minuscule size and portability. However, the drawbacks from that are the inability to use it with the conversion lenses and the polariser/grad clash I mentioned above. Also, the natural light filter isn’t quite as good as I had expected, so if you don’t need that or the additional 3-stop ND, going for the starter kit will make more sense. For a more versatile kit, I would recommend something more like the Haida M7 for a large variety of available filters and the ability to use it with the conversion lenses and other camera systems. The NiSi, however, has a place in my bag alongside the larger systems just because it’s so simple and small. What do you think? Would this be a useful addition to your kit?