If you’ve ever tried to capture an image where it’s almost impossible to balance the highlights and the low lights and capture detail in both, then you’ll have experienced working with dynamic range. Dynamic range is the range of light intensity from the darkest shadows to the brightest highlights and it is often expressed in ‘stops’ of light. However, dynamic range is an area where the human eye has a clear advantage over our camera sensor. This is due to the fact that our eye opens and closes for different brightness regions, thereby giving the sense that the human eye can cope with very dark and very bright areas of a scene.
A ‘normal’ human eye can see something like 24 ‘stops’ of light in a scene. On the other hand, the Fuji sensor, while amongst the best there is, can only see around 11 or 12 ‘stops’ of light. This is obviously a long way from the human eye’s impression of a scene. This is particularly relevant in landscape photography, where the dynamic range of a scene can often be very wide.
So how do we deal with this problem? Well, apart from developing cameras with a significantly wider dynamic range, which isn’t on the immediate horizon, there are two main solutions that I would consider in my landscape photography work.
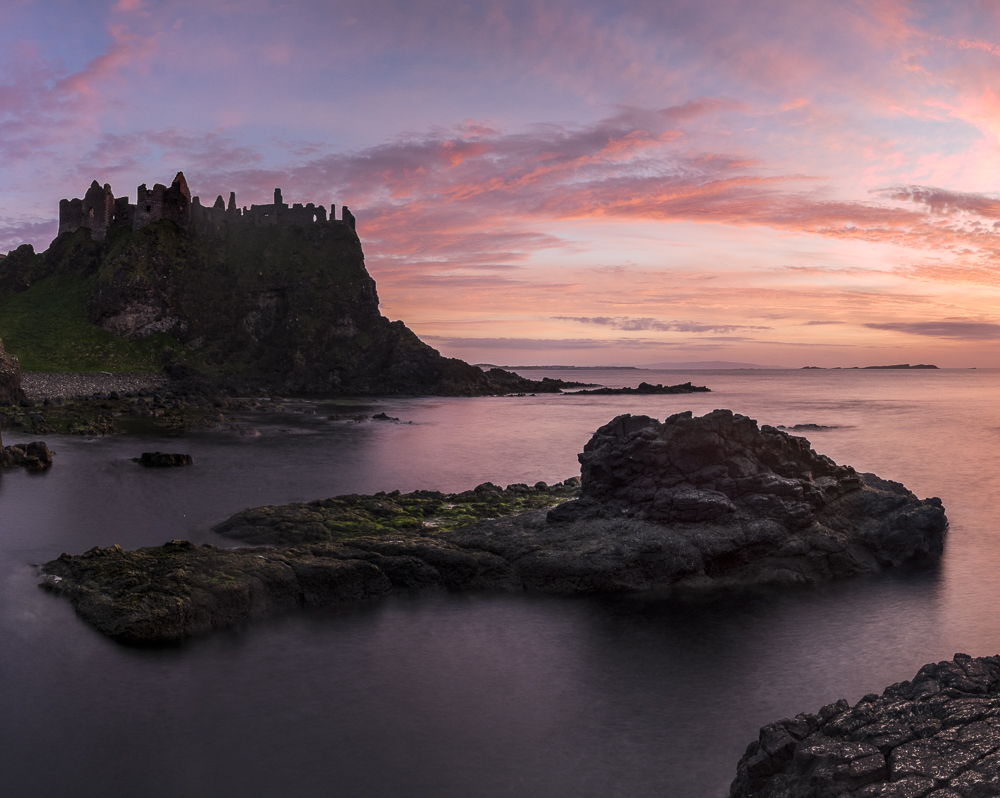
The first is to capture two images of the same scene, which if taken on a tripod, should be precisely the same. Lets assume for this example that the sky is much brighter than the land as in the image below.
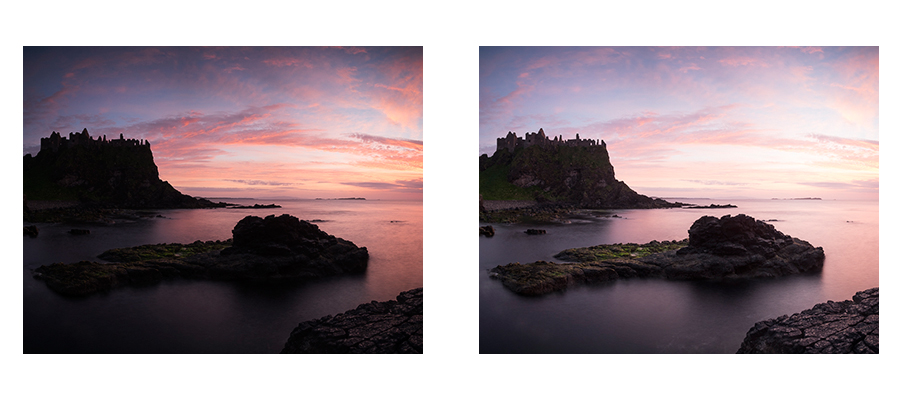
With the first image, you would expose for the sky or lighter parts of the scene and the second image would be exposed for the castle and rocks, or the darker aspects of the image. With these two exposures, you would then merge these as part of your post production workflow in something like Photoshop. This method is very useful in scenes where the darker and lighter aspects are not easily separated as two distinct halves of the image, so as the one above. I have used this method in the past, but it is time consuming. Not to mention that it’s not always easy to do and make it look like you haven’t actually done this in post production!
The second option is to use graduated neutral density filters. This is my preferred way of working wherever possible, as I would rather be out capturing photographs than sitting in front of my computer!
The image below was of the same scene as above, but taken using a ‘soft’ neutral density filter so the transition is more gradual, which works even with the castle above the horizon..
In the past, I used a number of different filters, from various manufacturers, that I had acquired over the years. Then, a few years ago, I tested these different filters and I noticed that the LEE filters were optically superior and presented less problems with colour casts. As a result, I now use the LEE system exclusively and it is this system that I’ll be talking about in the rest of this article.
One other point that I think is worth mentioning is as a result of discussions that I often have with participants on my landscape photography workshops. That is, I really believe that buying and using ‘cheap’ filters is a false economy. I have had people come up to me with a filter they bought on eBay for something like £20 and they attach it to their lens, which itself could have cost anything from a few hundreds of pounds to thousands of pounds. Why spend so much on our cameras and lenses and put a cheap filter in front of it?
While the LEE filters aren’t cheap, if you look after them properly, they will last you for many years and will actually be an investment in your photography.
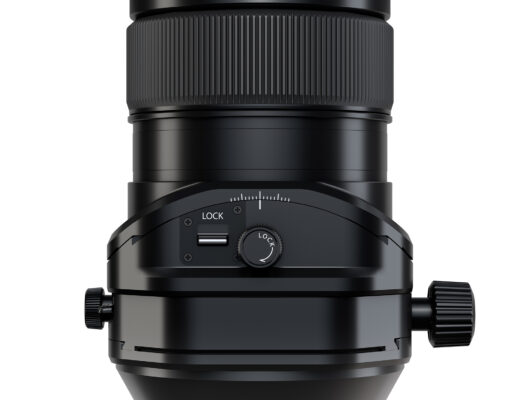
With my Fuji XT-1, a lot of my landscape work is done with the wonderful 14mm lens. As I also use my Nikon DSLR system for some of my specialised commercial work, I don’t want to have to carry two filter systems. Therefore, I normally use my LEE full size 100mm filters and use an adapter for the 58mm Fuji lens. I also carry a 62mm adapter with me for the 23mm lens as well. These adapters are relatively cheap, so they allow me to use my LEE filters for both camera systems.
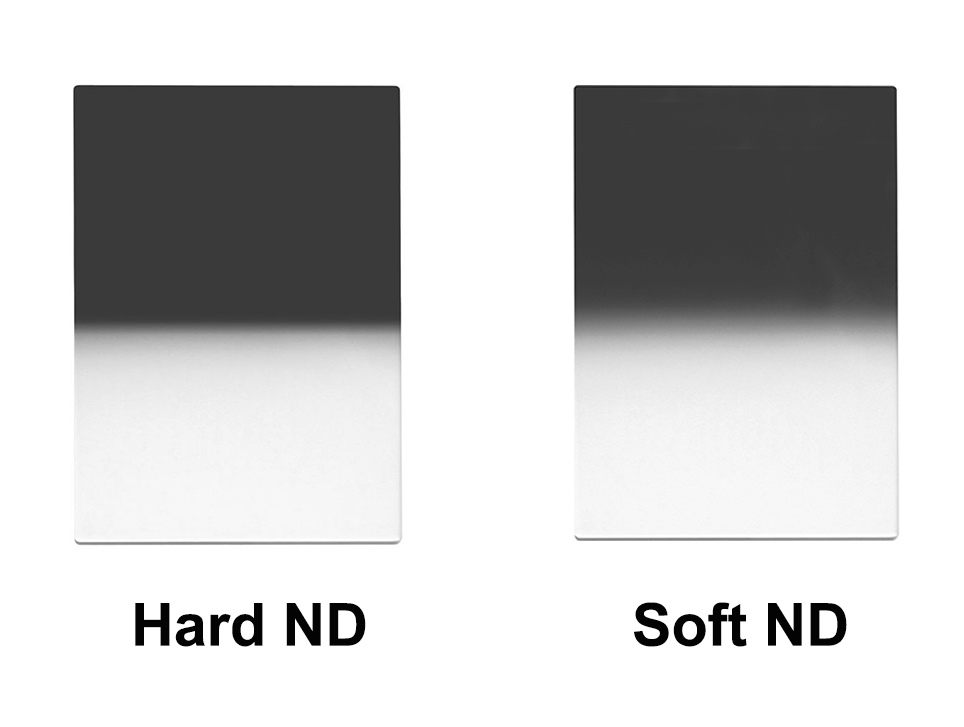
The Neutral Density (ND) graduated filters come in both ‘soft’ and ‘hard’ versions. This simply means that the graduation from the darkened part of the filter to the clear part is either sudden (hard) or gradual (soft), as used in the above image of Dunce Castle. So, when using the soft graduation, the transition is gradual and doesn’t show up on the image as a more sudden transition between the dark and light parts. You can also get a hard graduated version, which works well if there is nothing such as a rock or a tree breaking the horizon.
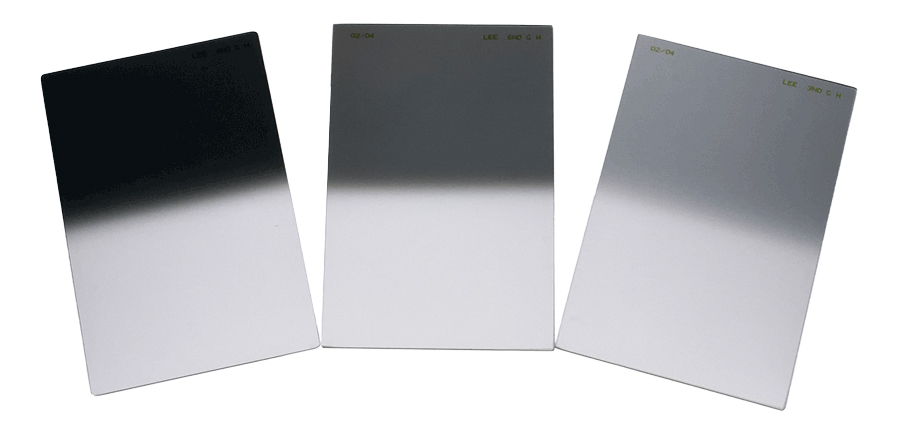
These filters usually come in one, two and three stop versions, or 0.3, 0.6 or 0.9 to use the correct terminology. That is, they get progressively darker on the top half of the filter as shown below.
For those who don’t want or need the larger 100mm LEE filters, they make a smaller set for the mirrorless market, and these work perfectly with the Fuji X series. This system is called ‘Seven5’ and it’s just perfect for carrying around. In fact, I use this smaller system when I travel by air, as my whole kit can then easily fit as carry on, even on regional carriers.
These filters open up so many creative opportunities for the landscape photographer; they are an absolutely essential part of my kit.
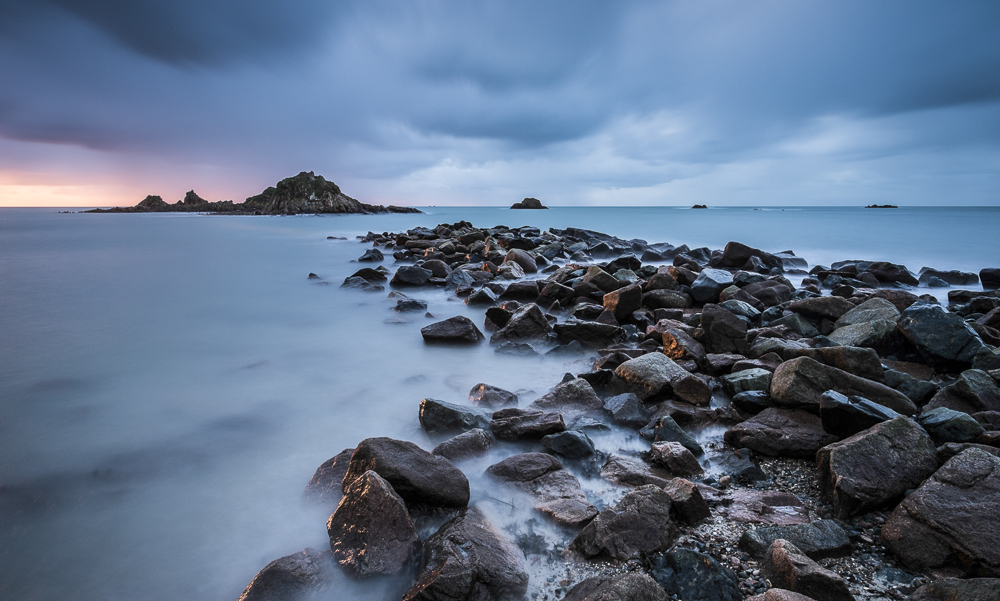
The other LEE filter that I use a lot is what is called the Big Stopper. This is in effect a very dark piece of glass which blocks 10 stops of light getting through the lens to the sensor, thereby enabling much longer exposures. In the image above, I used both an ND graduated filter and also a Big Stopper and in next month’s article, I’ll be discussing how I use these filters to create my long exposure images.